Advertisement
Quick Links
Support
For instructional videos, software downloads, or further training and support,
eGlass Academy
visit the
https://www.eglass.io/support
or by visiting
When setting up eGlass, it's best to follow the steps below in order.
For example, you'll need to see the camera image before "Calibrating Lighting", which
is why "Installing Software" is a few steps ahead of "Calibrating Lighting".
User Manual
by scanning the QR Code with your phone
The Setup Process
Step 1
Unboxing - Page 2
Step 2
Assembly - Page 3-5
Step 3
Connecting - Page 6
Step 4
Installing Software - Page 7
Step 5
Computer Set-Up - Page 7
Step 6
Turning On - Page 8
Step 7
Using Neon Pens - Page 8
Step 8
Setting Background - Page 9
Step 9
Calibrating Lighting - Page 10
Step 10
Eliminating Reflections - Page 11-12
Step 11
Using Software + Control Panel - Page 13
Step 12
Troubleshooting and FAQ's - Page 14-15
By
Advertisement

Summary of Contents for pathway eGlass
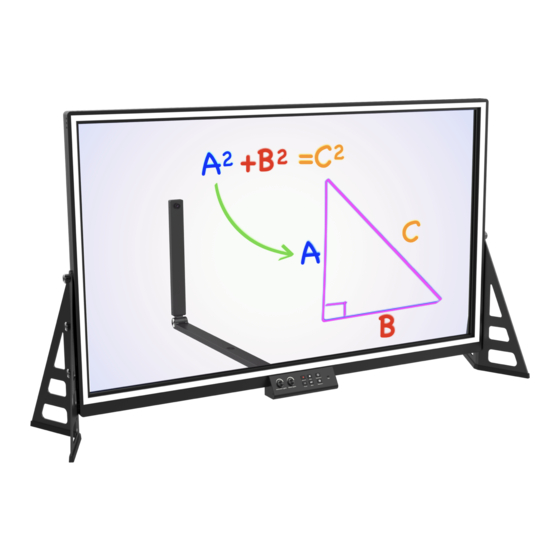
- Page 1 The Setup Process When setting up eGlass, it’s best to follow the steps below in order. For example, you’ll need to see the camera image before “Calibrating Lighting”, which is why “Installing Software” is a few steps ahead of “Calibrating Lighting”.
- Page 2 Step Unboxing What's in the Box? Main eGlass Frame Cleaning Rag 2x Support Legs 14x Support Leg (M5) Thumb Screws 2x Camera Arm (M5) Thumb Screws Camera Arm Anti-Reflection Hood USB Cable 2x Anti-Reflection Hood Brackets Power Adapter 4x Anti-Reflection Hood Rods...
- Page 3 Step Assembly polarizing filter Use the to eliminate reflection of LCD computer screens Attach filter to camera arm using the filter adapter, and rotate filter until reflection is minimized. Choose Height Setting The support legs can be mounted in three height configurations. Install thumb screws in the color-coded holes below depending on the desired height: High...
- Page 4 For added stability and security, eGlass can be mounted semi-permanently or permanently to a flat workspace. If you decide you’d like to mount eGlass to a specific place, you have two mounting options: *IMPORTANT: Adhesive bonding strength is reduced after 1x use. If your adhesive strips are no longer...
- Page 5 � Requires drilling permanent holes in the chosen work surface. � Requires additional hardware (not included) Installation: � 1. Select and verify the location you’d like to install eGlass. Adhesive Mounting Plates) 2. Place eGlass on the select location (do not use 3.
- Page 6 Power Cable into a protected AC power outlet, C. and the other end of the Power Adapter into the DC-in port on the bottom left sider of the eGlass frame. Connect Computer USB Cable Use the included to connect a PC, Mac, or Chromebook to the USB-In port on the bottom right side of the eGlass frame.
- Page 7 Download from https://www.eglass.io/support eGlass Step Computer Setup Computer Placement as close to eGlass camera as possible. For optimal results, place computer screen on the other side of glass This will simulate eye contact when looking towards the computer screen. mouse keyboard...
- Page 8 Step Turning On On/off Power Switch Flip the to provide power to the glass lighting system. Step Using Neon Dry Erase Markers Glass Lights Before writing on the glass, turn the dial (found on the Control Panel) to its maximum setting by rotating it clockwise.
- Page 9 Choosing the right background is essential, because it will appear in the wide angle camera ’s field of view. Any light sources will make it harder to read the glowing ink. Furthermore, it is best to use eGlass against a background that is free from clutter to minimize distractions.
- Page 10 Note: Before calibrating lighting, you need to have the software installed and running on you computer so that you can see the eGlass image. You also need to active a neon pen and prepare to write on the glass. Calibrating the Lighting is one of the most important steps when setting up eGlass.
- Page 11 Step Calibrating Lighting Control Panel The image settings are adjusted from the at the base of eGlass frame: Exposure + Exposure - adjust how much light is let into the camera, e ectively raising or lowering the the brightness. entire image Even if your background is white wall, you can lower the exposure to make the background appear darker, resulting in the ink glowing more vividly against the darker image.
- Page 12 Eliminating Reflections It is possible for light sources behind the camera to reflect o of the eGlass surface back into the camera. These bright spots can be distracting and even make the glowing ink hard to see. For best results: 1) Positioning: Do not position eGlass opposite of light sources that can reflect o of the glass (ceiling...
- Page 13 Step Using Software + Control Panel Support For detailed software instructions, downloads and videos, visit the eGlass Academy by scanning the QR Code with your phone or by visiting: https://www.eglass.io/support Click to view all media Go to Archive in archive...
- Page 14 Do I need to write backwards? No. The specially designed camera flips your image. Does eGlass have a built-in display, so I can see myself as I write? No, you can’t see your own image onscreen. However, by positioning your computer near the camera on the audience side of the glass, you can see yourself perfectly through the glass.
- Page 15 Do I have to use the eGlass software? No, you can use eGlass as a USB camera when using other camera softwares (like Zoom, for example), but the eGlassFusion software adds several features and functionalities that other software don’t (For example, the Snapshot and Recording buttons found on the eGlass control panel are only functional when using eGlassFusion software.)
- Page 16 Patent No.


Need help?
Do you have a question about the eGlass and is the answer not in the manual?
Questions and answers