Table of Contents
Advertisement
Quick Links
Advertisement
Table of Contents

Related Manuals for ACE COMPUTERS VISION Series


Summary of Contents for ACE COMPUTERS VISION Series
- Page 1 TECHNICAL REFERENCE GUIDE ACE VISION SERIES MODEL: VS-M660I...
-
Page 2: Table Of Contents
TABLE OF CONTENTS DISCLOSURES ..........................3 INTRODUCTION ..........................4 ENEGY STAR AND POWER MANAGEMENT ..................5 ILLUSTRATED SYSTEM DISASSEMBLY INSTRUCTIONS..............7 TROUBLESHOOTING YOUR PC ...................... 27 MAINTENANCE ..........................29 SOFTWARE UPDATES ........................30 REMOVAL OF PERSONAL DATA ..................... 31 UPGRADES, SERVICE, AND REPAIR ....................34 PRODUCT TAKE BACK, END OF LIFE PROCESSING, and E-WASTE PROGRAM ...... -
Page 3: Disclosures
Ace Computer's total liability for all claims will not exceed the price paid for the hardware product. The products sold by Ace Computers are not intended for and will not be used in life support systems, medical equipment, nuclear facilities or systems, aircraft, aircraft devices, aircraft/emergency communication devices or other critical systems whose failure to perform be reasonably expected to result in significant injury or loss of life or catastrophic property damage. -
Page 4: Introduction
If you have any questions regarding this manual or computer system, please contact our support team through Ace Computers Support page at support.acecomputers.com This manual may be periodically updated without notice. Please check the Ace Computers website for possible updates to the manual revision level. -
Page 5: Enegy Star And Power Management
ENEGY STAR AND POWER MANAGEMENT What is Energy Star? Created by the Environmental Protection Agency (EPA) and the United States Department of Energy (DOE), the Energy Star program is a strict set of specifications that residential appliances and construction elements (washers, dryers, refrigerators, freezers, dishwashers, televisions, tablets, computers, monitors, water heaters, HVAC units, dehumidifiers, air cleaners and purifiers, lighting, insulation and more) must meet through evaluation and testing to achieve certification. - Page 6 Wake Management Capable of both remote (via network) and scheduled (via real time clock) wake events from Sleep Mode. Provide clients with the ability to centrally manage (via vendor tools) any wake management settings that are configured through hardware settings if the manufacturer has control over such features.
-
Page 7: Illustrated System Disassembly Instructions
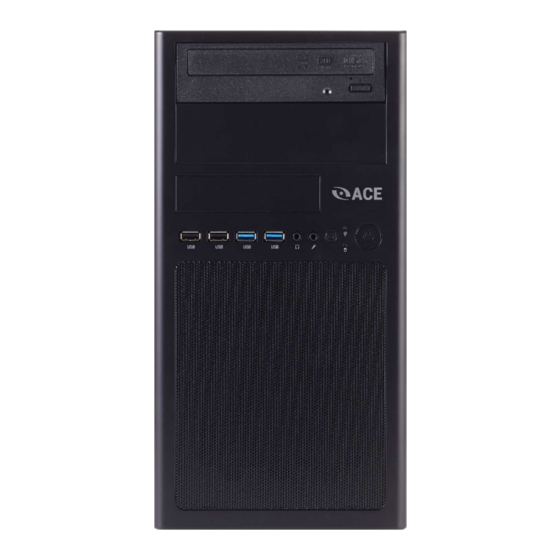
ILLUSTRATED SYSTEM DISASSEMBLY INSTRUCTIONS Introduction This section of the technical reference guide is intended to provide the following information: Information on parts requiring selective treatment per WEEE Directive Disassembly process for removal of external enclosure without tools Disassembly instructions, including required tools, as applicable ... - Page 8 Representative Desktop Component Layout Please note the illustration below is a representative sample of the VS-M660I, your PC may include additional components or variations of this family configuration. Power Supply Optical Drive Memory (2- Processor 4 DIMMS) Case Fan Heat Sink HDD Storage Device M.2 SSD...
- Page 9 Chassis Cover Removal Location: In order to access the internal components of your system, you will need to remove the left cover of the chassis. Type and number of fastenings: Two thumb screws Tools required: None, thumb screws are intended to be unfastened with your thumb and forefinger.
- Page 10 Data Storage Devices Location: The VS-M660I desktop series has the option to utilize both spinning hard drives (HDD) and M.2 SSD storage devices. The storage devices are located as indicated in Figure 1. Type and number of fastenings: HDD = (4) Phillips screws, M.2 SSD = (1) Phillips screw. Tools required: HDD = Screwdriver with PH2 bit M.2 SSD = Screwdriver with PH1 or smaller bit.
- Page 11 M.2 SSD Step 1: Ensure the desktop is off, unplugged, and any potential energy is dissipated. Step 2: Remove the side panel from the chassis as indicated in the “Chassis Cover” section of this manual. Step 3: Identify the M.2 SSD on the motherboard, refer to Figure 1 for additional help. Remove the Philips screw using the PH1 or smaller bit screwdriver, then pull straight back in a parallel position to remove the M.2 SSD from the slot on the motherboard.
- Page 12 Memory Location: The VS-M660I model can contain up to 4 DIMMS of memory. The memory modules are found on the motherboard to the right of the heat sink fan, refer to Figure 1 for additional guidance. Type and number of fastenings: Two (2) latches per memory module. Tools required: None.
- Page 13 Heatsink and Processor Location: The processor is found on the motherboard underneath the heatsink fan. Refer to Figure 1 for additional guidance. The VS-M660I motherboard only accepts a single processor. Type and number of fastenings: Heatsink: 4x Philips screws Processor: Carriage mechanism Tools required: Philips PH2 screwdriver Procedure: Heatsink with Philips screws...
- Page 14 Heatsink with push pin Step 1: Ensure the desktop is off, unplugged, and any potential energy is dissipated. Step 2: Remove the side panel from the chassis as indicated in the “Chassis Cover” section of this manual. Step 3: Remove the fan connector from the fan header.
- Page 15 Disposal: Selective Treatment/Special Handling Per Annex VII, Directive 2012/19/EU: Any plastic components within the heatsink fan must be removed separately due to the presence of brominated flame retardants and shall be disposed or recovered in compliance with Directive 2008/98/EC. Processor The removal and installation of the CPU is a very delicate process and if not done with care the CPU socket could be damaged and thus leave the motherboard unusable.
- Page 16 For specific details on reinstallation of the motherboard and any peripheral components of the motherboard refer to the motherboard user manual for ASUS Pro B660M-C D4. For re-installation of a processor specifically, ensure to utilize a thermal paste between the top of the process and the bottom of the heat sink, this allows for the best thermal heat transfer and effective cooling.
- Page 17 Expansion Cards/ Graphics Cards Location: Certain configurations of desktops may include expansion and/or graphics cards. These can be found in the lower, left-hand corner of the VS-M660I configuration. The cards are electrically connected to the motherboard via PCIe slots, and physically connected to the case. Type and number of fastenings: One or two Phillips screws.
- Page 18 Designated area for additional Expansion Cards/ Graphics Cards For specific details on reinstallation of the motherboard and any peripheral components of the motherboard refer to the motherboard user manual for ASUS Pro B660M-C D4. Disposal: Selective Treatment/Special Handling Per Annex VII, Directive 2012/19/EU: Graphics and add on expansion cards, contain a printed circuit board of greater than 10 sq.
- Page 19 Power Supply Module Location: The power supply module is located in the rear, upper portion of the chassis. Type and number of fastenings: Four (4) Phillips Screws per module. Tools required: Screwdriver Procedure: Step 1: Step 1: Ensure the computer is off, unplugged, and any potential energy is dissipated. Step 2: Remove the side panel from the chassis as indicated in the “Chassis Cover”...
- Page 20 Disposal: Selective Treatment/ Special Handling Per Annex VII, Directive 2012/19/EU: The motherboard is a printed circuit board of greater than 10 sq. cm and must be removed from the device and must be disposed of, or recovered, in compliance with the requirements of Directive 2008/98/EC.
- Page 21 Motherboard The motherboard is equipped with a lithium metal battery. The battery must be removed separately from the motherboard and shall be disposed or recovered in compliance with Directive 2008/98/EC. Refer to the “Battery” section of this manual for additional guidance. Location: The motherboard is generally centrally located within the unit.
- Page 22 Battery Handle used batteries carefully. Do not damage the battery in any way; a damaged battery may release hazardous materials into the environment. Do not discard a used battery in the garbage or a public landfill. Please comply with the regulations set up by your local hazardous waste management agency to dispose of your used battery properly.
- Page 23 Fans Location: The chassis fan in the VS-M660I model is located at the rear of the chassis below the power supply. Type and number of fastenings: Four (4) Phillips Screws. Tools required: Phillips Screwdriver. Procedure: Step 1: Ensure the computer is off, unplugged, and any potential energy is dissipated. Step 2: Remove the side panel from the chassis as indicated in the “Chassis Cover”...
- Page 24 Optical Drive (optional) Location: The optical drive is an optional add on for this model. The optical drive, if applicable, will be located in one of the front drive bay locations. Type and number of fastenings: Four (4) Phillips Screws. Tools required: Phillips Screwdriver.
- Page 25 Step 6: Remove 1 phillips screw on the the opposite side of the case. Step 7: Pull out the DVD drive. Disposal: Selective Treatment/ Special Handling Per Annex VII, Directive 2012/19/EU: The optical drive contains a printed circuit board of greater than 10 sq. cm and must be removed from the device and must be disposed of, or recovered, in compliance with the requirements of Directive 2008/98/EC.
- Page 26 External Power Cable Location: The inlet to the power cable is located on the externally facing portion of the power supply. Type and number of fastenings: None, direct pressure connection method. Tools required: None. Procedure: Disconnect the external power cable from the main desktop assembly. Disposal: Selective Treatment/Special Handling Per Annex VII, Directive 2012/19/EU: Any external electrical cables must be removed separately and shall be disposed or recovered in...
-
Page 27: Troubleshooting Your Pc
TROUBLESHOOTING YOUR PC If your computer will not power on, try the following steps: 1. Make sure the power cord is fully connected to the power supply and to the wall outlet. 2. Make sure the power supply is switched to “ON” (switch located next to the power cord on the back panel of your PC. - Page 28 If your computer freezes or crashes during boot, try the following steps: 1. If Windows seems to boot fine but hangs halfway or blue screens and restarts, it may be a software or hardware problem. Try the following steps: 2. Attempt to boot into safe mode. If the computer is stable in safe mode, try uninstalling any recently installed hardware drivers, perform a system restore, and scan for malware.
-
Page 29: Maintenance
MAINTENANCE Removing Dust Build Up Dust buildup may lead to overheating and could potentially cause serious damage to your PC components. If fans get clogged with dust, they may begin to turn at a slower RPM reducing the effectiveness of the fan and leading to overheating of the PC. The issue of dust build up is applicable to all fans within the system (e.g. -
Page 30: Software Updates
For the B660M motherboard, the drivers can be found at https://www.asus.com/Motherboards-Components/Motherboards/CSM/Pro-B660M-C-D4- CSM/HelpDesk_Download/ Contact Ace Computers Support Desk for help Ace Computers staffs a technical support desk and is always ready to help. You can contact the team at support@acecomputers.com - or-... -
Page 31: Removal Of Personal Data
REMOVAL OF PERSONAL DATA Be sure to back up all information that you desire to keep on alternative drives before deleting data as this process cannot be reversed. Digitally Erasing Information Resetting your PC may be done for various reasons, but one reason may be to remove all your personal information and return the PC to the original settings. - Page 32 Option What it Does Remove everything Reinstalls Windows 10/11 and removes your personal files. Removes apps you installed. Removes changes you made to settings. Removes any apps your PC manufacturer installed. Remove everything > Change settings gives you two options. Data erasure On removes files and cleans the drive.
- Page 33 If a screwdriver cannot be used to access the internal components of the HDD, inflicting severe damage with a blunt object, rock, hammer, etc. will destroy the HDD beyond repair. Additionally, using a drill press, or drill of sorts to drill through the HDD will also destroy the HDD beyond repair.
-
Page 34: Upgrades, Service, And Repair
UPGRADES, SERVICE, AND REPAIR The following table is a list of all included hardware features, and a few hardware features that could be added as an upgrade option. Note: all add on hardware features do not fall within the original scope of this product and void all certifications/regulatory compliance attestations. - Page 35 Ordering Parts, Requesting Repair, or Talking to Technical Support The Ace Computers technical support team is ready and available to help in providing replacement parts, helping to identify compatible upgrades, or to answer software questions. Please have your serial number available for reference when contacting Ace Computers.
-
Page 36: Product Take Back, End Of Life Processing, And E-Waste Program
Nation Wide Take Back Services If your PC has reached its end of life or is no longer useable, Ace Computers is excited to offer a Nation-Wide take back service. We will work with you to get the product back and will ensure it is proper disposed of with a certified R2 electronics recycling facility. -
Page 37: Revision History
REVISION HISTORY Release Date Changes 8.1.2022 Initial Release Addition of Optical Drive Details for 8.1.2022 disassembly...