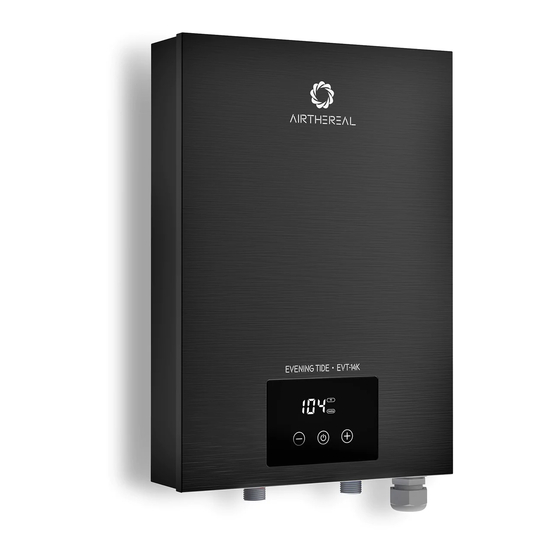
Summary of Contents for Airthereal EVENING TIDE
- Page 1 EVENING TIDE EVT-18K 18KW ELECTRIC TANKLESS WATER HEATER Evening Tide EVT-18K READ AND SAVE THESE INSTRUCTIONS...
-
Page 2: Table Of Contents
CONTENTS INTRODUCTION COMPONENTS SPECIFICATIONS IMPORTANT SAFETY INSTRUCTIONS INSTALLATION GUIDELINE CONTROLS TROUBLESHOOTING LIMITED WARRANTY... -
Page 3: Introduction
INTRODUCTION Congratulations on your purchase and welcome to Airthereal! To fully benefit from the support that Airthereal offers please register at www.airthereal.com/register COMPONENTS OUTWARD Front Cover Evening Tide EVT-18K LED Display Control Key Cable Entry Hot Water Outlet Cold Water Inlet... - Page 4 PRODUCT INNER STRUCTURE Transformer Thermostat Connection Plug To Display Heating Element Triac TEMP Sensor Water Flow Meter...
- Page 5 ELECTRICAL DIAGRAM CONNECTION LEAKAGE DISP POWER IN SCR1 SCR2 DISP: Connection plug to display FLOW: Connection plug to the flow sensor IN: Connection plug to the input temperature sensor OUT: Connection plug to the output temperature sensor...
-
Page 6: Specifications
SPECIFICATIONS Model EVT-18K Voltage 240 V Power 18 kW Min. Required Circuit Breaker Size 2 x 40 AMP Max. Amperage 75 A Recommended Wire Size 2X (8AWG/2) Min. Water Flow to Activate the Unit 0.475 GPM / 1.8L/min Safe Operating Pressure 7.25 PSI - 108.78 PSI Water Connections 3/4"... -
Page 7: Important Safety Instructions
IMPORTANT SAFETY INSTRUCTIONS WARNING: When installing or using any high voltage electrical appliance basic safety precautions should always be followed. Under no circumstance should you attempt to clean, install, inspect, repair, disassemble, or otherwise service this water heater without first shutting off all power to the unit directly at the circuit breaker box. - Page 8 Water Temperature Safety Safety and energy conservation are factors to be considered when selecting the water temperature setting of the water heater's thermostat. Water temperatures above 125°F can cause severe burns or death from scalding. Be sure to read and follow the warnings outlined on the label pictured below. The chart shown below may be used as a guide in determining the proper water temperature for your home to prevent burns.
-
Page 9: Installation Guideline
INSTALLATION GUIDELINE MOUNTING Step 1 1. Locate the installation position for the water heater. 2. Place the bracket on the wall and use a pencil to mark the screw hole locations. Make sure the outlet and inlet are pointed downward vertically. Step 2 Drill four 0.24”(6mm) diameter holes on the wall. - Page 10 Step 3 Place the bracket onto the wall and drill mounting screws directly into the plastic anchors to secure the bracket. Bracket ST 4.2*30mm Step 4 Hang the water heater onto the bracket with the outlet and inlet pointed downward. Make sure the water heater is secure before continuing.
- Page 11 PLUMBING CONNECTIONS ATTENTION 1. It is recommended that this water heater be installed by a licensed and qualified plumber in accordance with all applicable national, state, and local plumbing codes. 2. Make sure there are no impurities in the waterway. It is recommended to install a water softener to prevent the water heater from scaling, which can effectively prolong the service life.
- Page 12 Step 3 1. Open the shut-off valve to allow water to flow into the water heater. 2. Check for any leaks at plumbing connections. If there are any leaks from the nipples, firmly tighten with a wrench, but DO NOT OVERTIGHTEN. 3.
- Page 13 Step 2 Loosen the screws of the clamp and slide the matching cable through the clamp. Step 3 Note: This unit should be installed by a qualified professional in accordance with all national, state, provincial and local electrical & plumbing codes. Confirm that your breaker panel can meet the required specifications for your unit.
- Page 14 Step 4 Double-check the electrical connections to make sure they are correct and that all wire connections are tight and secure. Step 5 1. Tighten the screws of the clamp. 2. Secure the panel with screws. OPERATING INSTRUCTIONS CAUTION: Wait until the water is fully flowing through the heater before turning on the breaker. 1.
- Page 15 Cleaning steps 1. Open the water inlet and take out the filter with tweezers. 2. Take out the circlip. 3. Take out the water flow rotor. 4. Clean the water flow rotor and filter. Installation steps Runded Bump 1. Install the water flow rotor into the copper head of the water inlet.
-
Page 16: Controls
CONTROLS Power On/Off Leakage of electricity Decrease/Down Temperature exceed 149°F/65°C Increase/Up Water inlet temperature sensor failure Not currently working Water outlet temperature sensor failure Working state No over-zero signal Excessive water flow Communication failure... -
Page 17: Troubleshooting
TROUBLESHOOTING Issue Possible Reason Solution Make sure the breakers at main Water heater is not heating electrical panel are ON. You may have No power or incorrect at all (water is flowing but a faulty breaker or unit may be wired wiring. - Page 18 A. Check that the voltage meets the E5 (with 5 beeps user's home voltage is low installation requirements. sounds) or the grid input voltage B. There is interference from high-power abnormal. equipment nearby. Communication failure Contact Airthereal support for assistance.
-
Page 19: Limited Warranty
LIMITED WARRANTY LIMITED WARRANTY Airthereal warrants all Electric Tankless Water Heaters for 1 year for the main unit and warrants the Mainboard, relay, Led display, heating element and other major parts for 3 years from the date of purchase. For more information please visit www.airthereal.com/warranty. - Page 20 Always here to help you www.airthereal.com Produced for: West Ryder Technology LLC 2330 Paseo Del Prado STE C304 Las Vegas, NV 89102 V 20220526...


Need help?
Do you have a question about the EVENING TIDE and is the answer not in the manual?
Questions and answers