Advertisement
Advertisement
Table of Contents

Subscribe to Our Youtube Channel
Related Manuals for BCP SKY5186


Summary of Contents for BCP SKY5186
- Page 1 INSTRUCTION MANUAL Wall Mounted Pull-Up Bar SKY5186 Ver. 3...
- Page 2 NOTICE Please retain these instructions for future reference. • For added stability, attach pull-up bar to wood beams within the wall. • Please do not exceed the weight limitations of this item. • Firmly secure all bolts, screws and knobs before use. •...
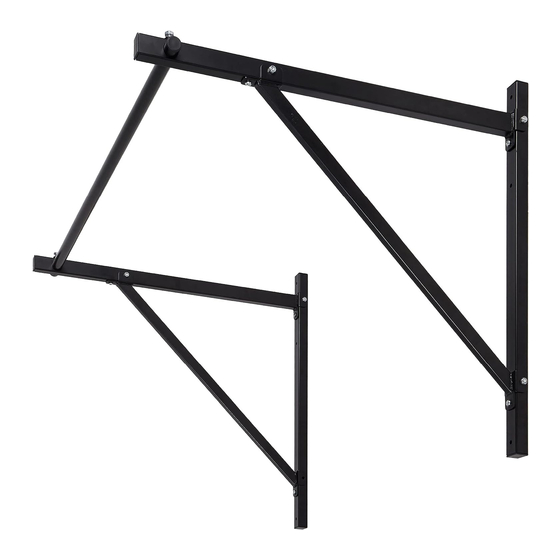
- Page 3 PARTS WALL FRAME BAR FRAME ANGLED FRAME 2 PCS 2 PCS 2 PCS 1 PC...
- Page 4 PRODUCT ASSEMBLY Line up two part A wall frames; make sure the frames are level and arranged parallel to each other. Use the pencil and ruler to mark the desired mounting location. Use an electric drill to drill six screw holes. Use a hammer to insert six part 1-1 wall anchors into the holes.
- Page 5 PRODUCT ASSEMBLY Attach the wall frames by screwing six part 1-2 screws into the wall anchors. Attach two part B bar frames with two part 5 screws, two part 2 bolts, and two part 6 nuts.
- Page 6 PRODUCT ASSEMBLY Attach two part C angled frames with four part 5 screws. Secure the angled frames with two part 2 bolts, two part 4 bolts, and four part 6 nuts.
- Page 7 PRODUCT ASSEMBLY Slide the part D bar through the bar frames and secure with two part 3 screws.
- Page 8 HELP CENTER Question about your product? We're here to help. Visit us at: help.bestchoiceproducts.com CHAT Chat Support Product Inquiry Orders FAQ Product Assembly Returns & Refunds PRODUCT WARRANTY INFORMATION All items can be returned for any reason within 60 days of the receipt and will receive a full refund as long as the item is returned in its original product packaging and all accessories from its original shipment are included.
Need help?
Do you have a question about the SKY5186 and is the answer not in the manual?
Questions and answers