Table of Contents
Advertisement
Quick Links
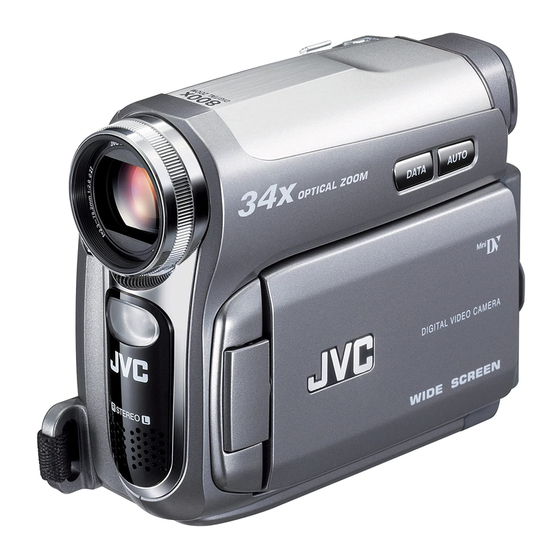
DIGITAL VIDEO CAMERA
GR-D770AA
INSTRUCTIONS
LYT1646-001A
Dear Customer,
Thank you for purchasing this digital
video camera. Before use, please
read the safety information and
precautions contained in the pages,
3 – 6 to ensure safe use of this
product.
GETTING STARTED
RECORDING & PLAYBACK
DIGITAL STILL CAMERA
(D.S.C.) RECORDING &
PLAYBACK
ADVANCED FEATURES
REFERENCES
TERMS
To deactivate the demonstration,
set "DEMO MODE" to "OFF".
(
pg. 33, 36)
ENGLISH
8
19
27
33
47
Back cover
EN
Advertisement
Table of Contents

Subscribe to Our Youtube Channel
Related Manuals for JVC GR-D770AA


Summary of Contents for JVC GR-D770AA
- Page 1 Before use, please read the safety information and precautions contained in the pages, DIGITAL VIDEO CAMERA 3 – 6 to ensure safe use of this product. ENGLISH GR-D770AA GETTING STARTED RECORDING & PLAYBACK DIGITAL STILL CAMERA (D.S.C.) RECORDING & PLAYBACK ADVANCED FEATURES...
- Page 2 Major Features of this Camcorder Wipe/Fader Effects Backlight Compensation You can use the Wipe/Fader Effects to make Simply pressing the button brightens the image darkened by backlight. ( pg. 40) pro-style scene transitions. ( pg. 41) Fade in Data Battery You can check the battery status by simply Fade out pressing the DATA button.
- Page 3 ● SDHC Memory Card cannot be used with this camcorder. ● Remember that this camcorder is not compatible with other digital video formats. ● It is recommended that you use JVC brand cassette tapes. Your camcorder is compatible with all brands of commercially available cassette tapes complying...
- Page 4 Do not use this equipment in a bathroom or proprietary technology and will operate only places with water. with JVC Data Battery. Use the JVC Also do not place any containers filled with water BN-VF808U/BN-VF815U/BN-VF823U battery or liquids (such as cosmetics or medicines, flower packs and, to recharge them or to supply vases, potted plants, cups etc.) on top of this unit.
- Page 5 Do not point the lens or the viewfinder directly into the sun. This can cause eye injuries, as well as lead to the malfunctioning of internal circuitry. There is also a risk of fire or electric shock. CAUTION! The following notes concern possible physical damage to the camcorder and to the user.
- Page 6 ● When using a cleaner or chemically treated cloth refer to the cautions of each product. ● To clean the viewfinder, please consult your nearest JVC dealer. USE CLEANING CASSETTE Appears if dirt is detected on the heads during recording. Use an optional cleaning cassette.
-
Page 7: Table Of Contents
CONTENTS GETTING STARTED ADVANCED FEATURES Index ..............8 MENUS FOR DETAILED ADJUSTMENT....33 Regarding This Manual........12 Changing The Menu Settings ......33 Provided Accessories ........12 Recording Menus..........34 Power.............. 14 Playback Menus ..........37 Language Settings.......... 16 FEATURES FOR RECORDING....... 38 Date/Time Settings ......... -
Page 8: Getting Started
GETTING STARTED Index 30 31 BATT. NOTES: How to open the LCD monitor Pull on the end a of the LCD monitor. ● The image will not appear simultaneously on the LCD monitor and the viewfinder. When the viewfinder is pulled out while the LCD monitor is opened, you can select which one to “PRIORITY”... - Page 9 GETTING STARTED Controls Indicators :Up / Play / Pause [4/9] ( pg. 22)/ POWER/CHARGE Lamp ( pg. 14) Manual Focus [FOCUS] ( pg. 39) Other Parts :Down / Stop [8] ( pg. 22) Backlight Compensation pg. 40) LCD Monitor ( pg.
- Page 10 GETTING STARTED LCD Monitor/Viewfinder Indications During Both Video And D.S.C Recording During Video Recording 10 x PHOTO 16:9 – – –min 23:15 AM 6 . 2 07 SOUND 12 B I T 15:55 Battery Remaining Power Indicator Operation Mode ( pg.
- Page 11 GETTING STARTED During Video Playback During D.S.C. Playback 100-0013 B I T BLANK SEARCH 23:15 AM PUSH "STOP" BUTTON 12. 6. 2007 TO CANCEL Battery Remaining Power Indicator Folder/File Number 2 0 : Operation Mode Indicator Date/Time Battery Remaining Power Indicator Sound L/R Indicator ( pg.
-
Page 12: Regarding This Manual
GETTING STARTED Regarding This Manual Provided Accessories Control Lever LCD Monitor Power Cord AC Adapter AP-V14E Audio/Video Cable (Ø3.5 mini-plug to RCA plug) Control lever USB Cable There are two kinds of operation using the Battery Pack control lever: moving the lever towards up/down/ BN-VF808U left/right, or pressing down the lever. - Page 13 GETTING STARTED How To Attach The Lens Cap How To Attach The Core Filter To protect the lens, attach Attach the core filters to the cables. The core the provided lens cap to the filter reduces interference. When connecting a camcorder as shown in the cable, attach the end with the core filter to the illustration.
-
Page 14: Power
GETTING STARTED To detach the battery pack Power Slide the battery pack upward while pressing BATT. to detach it. Charging The Battery Pack Battery pack Charging time POWER/ BN-VF808U* Approx. 1 hr. 30 min. Battery pack mount CHARGE lamp BN-VF815U Approx. - Page 15 DATA several times, there may BN-VF823U 5 hrs. 30 min. 6 hrs. 45 min. be a problem on the battery. In such a case, consult your nearest JVC dealer. * Provided NOTES: Using AC Power ● Recording time is reduced significantly under the Perform steps 4 –...
-
Page 16: Language Settings
GETTING STARTED Language Settings Viewfinder Adjustment The language on the display can be changed. Set the Power Switch to “REC” while pressing pg. 36) down the Lock Button located on the switch. LANGUAGE Select Make sure the LCD monitor is closed and ENGLISH locked. -
Page 17: Tripod Mounting
GETTING STARTED Tripod Mounting NOTES: ● If you wait a few seconds and the cassette holder does not open, close the cassette holder cover To attach the camcorder and try again. If the cassette holder still does to a tripod, align the open, turn the camcorder off then on again. -
Page 18: Loading/Unloading A Memory Card
GETTING STARTED Loading/Unloading A Memory 16:9 Wide Mode Card You can record videos at 4:3 size and 16:9 size. By default, the camera is set to record videos at Card Cover ( the 16:9 size. Memory card (optional) Clipped edge Make sure the camcorder’s power is off. -
Page 19: Recording & Playback
VIDEO RECORDING ● When a blank portion is left between recorded Basic Recording scenes on the tape, the time code is interrupted and errors may occur when editing the tape. To NOTE: avoid this, refer to “Recording From The Middle Of A Tape”... -
Page 20: Zooming
VIDEO RECORDING Zooming Journalistic Shooting While recording In some situations, different shooting Zoom out Zoom in angles may provide more dramatic results. Hold the camcorder in the desired position and W: Wide angle T: Telephoto tilt the LCD monitor in ●... -
Page 21: Time Code
VIDEO RECORDING Time Code Dual Rec. During recording, a time code is recorded on the You can capture still images without disturbing tape. This code is to confirm the location of the the recording in progress. Press SNAPSHOT. recorded scene on the tape during playback. A sub screen will be displayed for approx. -
Page 22: Video Playback
VIDEO PLAYBACK NOTES: Normal Playback ● The playback picture can be viewed in the LCD monitor, viewfinder or on a connected TV. Lock Button pg. 23) ● If Stop mode continues for 5 minutes when power VOL. +/– VIDEO/MEMORY is supplied from a battery, the camcorder shuts off automatically. -
Page 23: Blank Search
* Not required for watching still images only. NOTE: The S-Video cable is optional. Be sure to use the YTU94146A S-Video cable. Consult the JVC Service Centre described on the sheet included in the package for details on its availability. Make sure to connect the end with a core filter to the camera. -
Page 24: Playback Using The Remote Control
VIDEO PLAYBACK Make sure all units are turned off. Playback Using The Remote Connect the camcorder to a TV or VCR as Control shown in the illustration. If using a VCR, go to step 3. A battery is included inside the remote control at If not, go to step 4. - Page 25 VIDEO PLAYBACK Buttons And Functions S.SHOT Button Functions the same as SNAPSHOT on the camcorder. (Also available with the Power Switch set to “PLAY” ). Zoom (T/W) PAUSE or (Up) SLOW (YI) SLOW (IU) PLAY (Right) (Left) STOP or SHIFT (Down) Infrared beam transmitting window The following buttons are available only when the...
- Page 26 VIDEO PLAYBACK Frame-By-Frame Playback Playback Special Effects Allows you to add creative effects to the video During normal or still playback, press SLOW playback image. (IU) repeatedly for forward or SLOW (YI) repeatedly for reverse. Each time SLOW SEPIA: ( pg.
-
Page 27: D.s.c. Recording
D.S.C. RECORDING Basic Shooting (D.S.C. Snapshot) CHECK CARD’S WRITE PROTECTION SWITCH You can use your camcorder as a Digital Still Appears when you attempt to shoot digital still Camera for taking snapshots. Still images are images when the write protection tab on the SD stored in the memory card. -
Page 28: Playback
D.S.C. PLAYBACK Normal Playback Of Images Auto Playback Of Images Images shot with the camcorder are You can run through all the images stored in memory card automatically. automatically numbered, then stored in numerical order in the memory card. You can Perform steps 1 –... -
Page 29: Additional Features For D.s.c
ADDITIONAL FEATURES FOR D.S.C. Select “EXECUTE”, Resetting The File Name PROTECT press SET. ● To cancel protection, PROTECT? By resetting the file name, a new folder will be select “RETURN”. made. The new files you are going to make will EXECUTE ●... -
Page 30: Deleting Files
ADDITIONAL FEATURES FOR D.S.C. Deleting Files Setting Print Information (DPOF Setting)* Previously stored files can be deleted either one at a time or all at once. This camcorder is compatible with the DPOF Perform steps 1 – 3 in (Digital Print Order Format) standard in order to Select support future systems such as automatic “Normal Playback Of Images”... - Page 31 ADDITIONAL FEATURES FOR D.S.C. To Print By Selecting Still Images And To Reset The Number Of Prints Number Of Prints Perform steps 1 – 3 in “To Print All Still Images (One Print For Each)”. pg. 30) Perform steps 1 – 3 in “To Print All Still Select “RESET”, press SET or .
-
Page 32: Initialising A Memory Card
ADDITIONAL FEATURES FOR D.S.C. Initialising A Memory Card You can initialise a memory card any time. After initialising, all files and data stored in the memory card, including those which have been protected, are cleared. Perform steps 1 – 3 in “Normal Playback Of Images”. -
Page 33: Advanced Features
MENUS FOR DETAILED ADJUSTMENT Select the desired function, press SET or Changing The Menu Settings The selected function menu appears. Example: FUNCTION menu. This camcorder is equipped with an easy-to-use, Current Setting on-screen menu system that simplifies many of the more detailed camcorder settings. FUNCTION pg. -
Page 34: Recording Menus
MENUS FOR DETAILED ADJUSTMENT In the following pages, [ ] refers to Factory TELE MACRO preset settings. [OFF]: Disables the function. Recording Menus ON: When the distance to the subject is less than 1 m, set “TELE MACRO” to “ON”. You can shoot a subject as large as possible at a FUNCTION distance of approx. - Page 35 MENUS FOR DETAILED ADJUSTMENT IMAGE SIZE* SNAP/SLOW [640 x 480 F] / 640 x 480 S [SNAP ] : Snapshot mode The Image Size mode can be selected to best SLOW : Live Slow mode match your needs. Two Picture Quality modes For details on the procedure, refer to “Live Slow”...
- Page 36 MENUS FOR DETAILED ADJUSTMENT DISPLAY MELODY OFF: Even though not heard while shooting, The DISPLAY settings (except “CLOCK ADJ.”, shutter sound is recorded on the tape. “16:9 OUTPUT” and “BRIGHT”) are effective only for shooting. [ON]: A melody sounds when any operation is performed.
-
Page 37: Playback Menus
MENUS FOR DETAILED ADJUSTMENT SOUND L/R Playback Menus [STEREO ]: Sound is output on both “L” and “R” channels in stereo. SOUND L : Sound from the “L” channel is The settings below are effective only for video output. playback except “SNAP/SLOW” and “REC SOUND R : Sound from the “R”... -
Page 38: Features For Recording
FEATURES FOR RECORDING NOTES: LED Light ● This feature is effective when the recording mode selection is set to both “A” or “M”. LED Light can be used to brighten ● Live Slow cannot be used when the 16:9 Wide the subject in the dark place mode is selected. -
Page 39: Manual Focus
FEATURES FOR RECORDING Manual Focus Exposure Control The camcorder’s Full Range AF system offers Manual exposure control is recommended in the continuous shooting ability from close-up (as following situations: close as approx. 5 cm to the subject) to infinity. ● When shooting using reverse lighting or when the However, correct focus may not be obtained background is too bright. -
Page 40: Iris Lock
FEATURES FOR RECORDING Iris Lock Spot Exposure Control Like the pupil of the human eye, the iris Selection of a spot metering area enables more contracts in well-lit environments to keep too precise exposure compensation. much light from entering, and dilates in dim Set the Power Switch to “REC”. -
Page 41: Manual White Balance Adjustment
FEATURES FOR RECORDING FINE: Outdoors on a sunny day. Wipe Or Fader Effects CLOUD: Outdoors on a cloudy day. HALOGEN: A video light or similar type of These effects let you make pro-style scene lighting is used. transitions. Use them to spice up the transition [ ]Factory-preset from one scene to the next. -
Page 42: Dubbing Still Images Recorded On A Tape To A Memory Card
FEATURES FOR RECORDING PROGRAM AE SHUTTER OFF: Disables the function. (Factory-preset) OFF: Disables the function. (Factory-preset) SPORTS SHUTTER 1/50: The shutter speed is fixed (Variable Shutter Speed: 1/250 – 1/4000): at 1/50th of a second. Black bands that usually This setting allows fast-moving images to be appear when shooting a TV screen become captured one frame at a time, for vivid, stable narrower. -
Page 43: Editing
EDITING Dubbing To A VCR Dubbing To Or From A Video Unit Equipped With A DV Connector To use this camcorder as a player (Digital Dubbing) Following the illustration, ( pg. 23) “Connections To A TV Or VCR”, connect the It is also possible to copy recorded scenes from camcorder and the VCR’s input connectors. -
Page 44: Connection To A Personal Computer
DV IN/OUT connector. ● When using a DV cable, be sure to use the To USB To DV IN / OUT optional JVC VC-VDV204U or VC-VDV206U DV cable. To use this camcorder as a recorder Core filter Core filter Make sure all units are turned off. -
Page 45: Audio Dubbing
To end Audio Dubbing, press PAUSE (9), ● When using a DV cable, be sure to use the then STOP (8). optional JVC VC-VDV206U or VC-VDV204U DV cable depending on the type of DV connector To hear the dubbed sound during playback (4 or 6 pins) on the PC. -
Page 46: Insert Editing
EDITING Insert Editing You can record a new scene into a previously recorded tape, replacing a section of the original recording with minimal picture distortion at the in and outpoints. The original audio remains unchanged. ● Use the provided remote control. NOTES: ●... -
Page 47: References
LCD monitor become dark. This is not a malfunction. HConsult your nearest JVC dealer. The LCD monitor or viewfinder indications blink. Picture does not appear on the LCD monitor. ● Effects functions that cannot be used together are ●... - Page 48 ● The built-in clock battery has run out and the TAPE END previously set date/time has been erased. Appears when the tape ends during recording or HConsult your nearest JVC dealer for playback. replacement. LENS CAP UNIT IN SAFEGUARD MODE...
-
Page 49: Cautions
CAUTIONS ● During use Battery Packs ... make sure the cassette bears the Mini DV mark. The supplied battery pack is a Terminals ... be aware that recording onto prerecorded tapes lithium-ion battery. Before using automatically erases the previously recorded the supplied battery pack or an video and audio signals. - Page 50 ... disassemble or modify the unit. If, after using the cleaning cassette, the ... short-circuit the terminals of the battery pack. problems still exist, consult your nearest JVC Keep it away from metallic objects when not in dealer. use.
-
Page 51: Specifications
SPECIFICATIONS Camcorder Maximum recording time (using 80 min. cassette) SP: 80 min., LP: 120 min. For General For Digital Still Camera Power supply DC 11 V (Using AC Adapter) Storage media DC 7.2 V (Using battery pack) SD Memory Card/MultiMediaCard Power consumption Compression system Approx. -
Page 52: Terms
TERMS AC Adapter ....15 Image Size ....35 Rec Mode ....35, 37 Audio Dubbing ....45 Index Playback ....28 Recording Capacity Auto/Manual Mode ..21 Initialising Memory Card ..27 A Memory Card ..32 Tape .......19 Insert Editing ....46 Recording Backlight Interface Shooting ..20 Media Selection ..35 Compensation ..40 Iris Lock ......40...
Need help?
Do you have a question about the GR-D770AA and is the answer not in the manual?
Questions and answers