Table of Contents
Advertisement
Quick Links
Manual Rev: 6.00
Date: April 99
Model
Protocol
Number
DC-390
SCSI-2
DC-390U
SCSI-3
DC-390F
SCSI-3
DC-390U2B
Wide Ultra2
DC-390U2W
Wide Ultra2
U: Ultra SCSI (Narrow); F: Ultra SCSI (Wide); U2: Wide Ultra2 SCSI
The designation DC-390 is used throughout this manual in reference to the common features
of all the above models. Any discrepancies or special features not supported by the entire
DC-390 Series are described using specific model numbers.
* All other product names are trademarks or copyrights of their respective owners.
DC-390 Series
PCI SCSI Host Adapters
User's Manual
Mode
SE
SE
SE
SE or LVD
SE and LVD
DC-390 Series User's Manual
SCSI
Max Xfer
Width
Rate (MB/S)
8-bit
10
8-bit
20
16-bit
40
16-bit
80
16-bit
80
Max
Devices
7
7
15
15
15
1 1
Advertisement
Table of Contents

Related Manuals for Tekram Technology DC-390U


Summary of Contents for Tekram Technology DC-390U
- Page 1 Manual Rev: 6.00 Date: April 99 Model Protocol Mode SCSI Max Xfer Number Width Rate (MB/S) Devices DC-390 SCSI-2 8-bit DC-390U SCSI-3 8-bit DC-390F SCSI-3 16-bit DC-390U2B Wide Ultra2 SE or LVD 16-bit DC-390U2W Wide Ultra2 SE and LVD 16-bit U: Ultra SCSI (Narrow);...
- Page 2 FCC Compliance Statement This equipment has been tested and found to comply with limits for a Class B digital device, pursuant to Part 15 of the FCC rules. These limits are designed to provide reasonable protection against harmful interference in residential installations. This equipment generates, uses, and can radiate radio frequency energy, and if not installed and used in accordance with the instructions, may cause harmful interface to radio communications.
- Page 3 Award BIOS with built-in NCR SCSI BIOS & DC-390 Controllers – Possible Compatibility Problem: Why and when the problem occurs The built-in SCSI BIOS feature incorporated into some mainboards with Award BIOS is meant to control NCR/Symbios Logic-based SCSI adapters that have no BIOS of their own. Since the DC-390 controllers use Symbios SCSI chips, some mainboards with built-in NCR or Symbios Logic SCSI BIOS may detect these cards and load their own BIOS to control them.
-
Page 4: Table Of Contents
TABLE OF CONTENTS INTRODUCTION.................7 HARDWARE SETUP ................8 Board Layout....................9 Setting the Jumpers..................12 Setting the SCSI IDs..................12 Checking the Terminators on the SCSI Bus ............. 13 Cable Connection ................... 14 Coexisting with Symbios 53C810/53C860-based Card ........15 CONFIGURING YOUR SCSI CARD..........16 Setting the System BIOS................. - Page 5 Driver Options....................43 Server-based Backup/Restore Support............. 44 Removable Media Support................44 Duplexing ...................... 45 OS/2 DRIVERS................. 46 New OS/2 Installation..................46 Adding the Driver to an Existing OS/2 System ..........47 Un-installing the Driver .................. 48 Command-Line Switches for TMSCSIM.ADD..........49 WINDOWS NT DRIVERS..............
- Page 6 10.3 Adding the Driver to an Existing SCO UNIX System ........63 APPENDIX ....................64 Specifications ....................64 Product Support Form..................65 General Troubleshooting Tips................. 66 Flash BIOS Programming Utility ..............71 DC-390 Series User’s Manual...
-
Page 7: Introduction
1. INTRODUCTION The DC-390 series is a SCSI (Small Computer System Interface) bus to PCI bus host adapter, which complies to the PCI 2.1 specification with Plug-&-Play (PnP) readiness. By using the Disconnect/Reconnect technique, performance degradation during multitasking operations is prevented. -
Page 8: Hardware Setup
SCSI ID number (0-6 for DC-390/390U; 0-15 for DC-390F/390U2B/390U2W) of each SCSI device is set properly for the host adapter (Section 2.3). The maximum devices that can be installed on each model are show below: Model # Max. Devices Number DC-390 DC-390U DC-390F 15 * DC-390U2B DC-390U2W 15 * •... -
Page 9: Board Layout
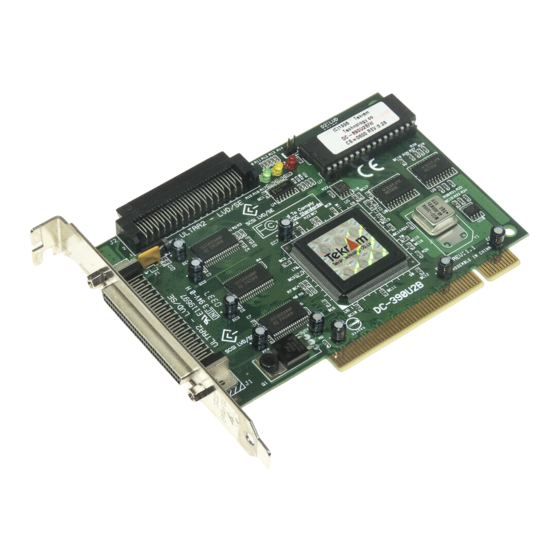
2. HARDWARE SETUP 2.1 Board Layout The following figures illustrate the jumper and connector locations for the DC-390 Series PCI SCSI Host Adapters: DC-390 Fast SCSI-2 adapter DC-390U Ultra SCSI-3 adapter DC-390 Series User’s Manual... - Page 10 2. HARDWARE SETUP DC-390F Ultra Wide SCSI-3 adapter DC-390U2B Wide Ultra2 SCSI adapter DC-390 Series User’s Manual...
- Page 11 2. HARDWARE SETUP DC-390U2W Wide Ultra2 SCSI adapter For DC-390U2B/W: When any SE device is connected on the Ultra2 connector(s) (J1 and/or J2), all the LVD devices on the connector(s) will be down-graded to SE performance. Therefore, it is recommended that non-Ultra2 devices are not to be used on DC-390U2B. For DC-390U2W, non-Ultra2 devices should be kept on connectors CN1 and CN2.
-
Page 12: Setting The Jumpers
2. HARDWARE SETUP 2.2 Setting the Jumpers DC-390: JP1 (LED); JP2 (ROM) DC-390U/390F/390U2B/390U2W: JP1 (LED) SCSI Device Activity LED Indicator (JP1) JP1 is used to indicate activity of the SCSI devices controlled by the DC-390 series adapter, and should be connected to the cable leading to the Hard Drive LED on the front panel of your computer case. -
Page 13: Checking The Terminators On The Scsi Bus
2. HARDWARE SETUP 2.4 Checking the Terminators on the SCSI Bus In order to stabilize the SCSI bus, only two sets of terminators can be installed - one at each end of the SCSI bus. The DC-390 series is equipped with Active Terminators that automatically switch from Enabled to Disabled or vice versa by scanning the devices connected on the SCSI bus. -
Page 14: Cable Connection
2.5 Cable Connection Model # External Internal DC-390 CN1: 50-pin; 8-bit (Female) CN2: 50-pin; 8-bit (Male) DC-390U CN1: 50-pin; 8-bit (Female) CN2: 50-pin; 8-bit (Male) DC-390F* CN1: 68-pin; 16-bit CN2: 68-pin; 16-bit (wide, Female) (wide, Female) CN3: 50-pin; 8-bit (Male) DC-390U2B J1: 68-pin;... -
Page 15: Coexisting With Symbios 53C810/53C860-Based Card
2.6 Coexisting with Symbios 53C810/53C860-based Card [1] When you use DC-310/U or other Symbios 53C810 cards having EEPROM built on board with DC-390U/F/U2B/U2W, please only use tekram driver. [2] If you use DC-310/U only or with other none-Symbios chip card , you have to use Symbios driver, not Tekram driver. -
Page 16: Configuring Your Scsi Card
3. CONFIGURING YOUR SCSI CARD 3.1 Setting the System BIOS After the DC-390 is inserted in an available PCI-BUS slot and the jumpers and cables are properly set, first turn on the power to your external SCSI devices and then power on the system. - Page 17 3. CONFIGURING YOUR SCSI CARD After powering up the system, the DC-390U/F/U2B/U2W BIOS will show a message with two screen indicating its BIOS version with a date code and information about the IOPORT address, IRQ number and address that the ROM BIOS is mapped at TEKRAM DC-310 PCI-SCSI Controller BIOS v3.04...
-
Page 18: Running The Pcu (Pci Configuration Utility)
3. CONFIGURING YOUR SCSI CARD 3.2 Running the PCU (PCI Configuration Utility) Since the DC-390 series is PCI compliant with Plug-&-Play (PnP) readiness, the system should allocate the proper Interrupt Level, Adapter BIOS Address and other settings automatically. Still, entering the PCU allows you to view more information and set additional options for both the DC-390 series adapter and the SCSI Devices. -
Page 19: Show Adapter Information
3. CONFIGURING YOUR SCSI CARD 3.2.1 Show Adapter Information This screen displays detailed information about the SCSI chip, ROM BIOS address, I/O port address, IRQ, PCI interrupt line, etc. The information about the SCSI Chip, IRQ Trigger Type and Data Xfer Type is provided by the DC-390 series adapter itself. The rest of the information in this table is provided by the mainboard's BIOS, which should support the PCI PnP specification. - Page 20 SCSI bus, avoid setting the adapter SCSI ID to the number 8 or larger otherwise you may run into difficulties. Boot Device ID: SCSI ID 0 (default) – 7 (DC-390/DC-390U) or 15 (DC-390F/390U2B/ 390U2W). This option allows you to boot from any bootable devices connected. To ensure proper operation, see the following notes: •...
- Page 21 3. CONFIGURING YOUR SCSI CARD INT13 Extension: Enabled (default)/Disabled. When enabled, the DC-390 will support more than 1024 cylinders for use with operating systems supporting the INT13 Extension. The conventional INT 13H disk interface supports a maximum of only 1024 cylinders. For operating systems such as Win95 OSR2 or later, supporting INT13 Extension, the DC-390 will support >1024 cylinders by using the Command Packet Mechanism instead of the cylinder/head/sector mechanism and thus work with SCSI disks greater than 8GB.
- Page 22 3. CONFIGURING YOUR SCSI CARD to No, that device must be controlled through device drivers. The two options for More Than 2 Drive Support are as follows: • Enabled (default) Under DOS 5.0 or above, the ability to control up to eight devices, controlled by BIOS INT 13H is provided.
- Page 23 3. CONFIGURING YOUR SCSI CARD Disabled If this option is disabled, the removable media devices will not be used as BIOS devices. Boot drive This setting allows only the removable media installed as Drive C: to only (default) work as a BIOS device, thereby allowing it to boot. As stated above, this device would function as a hard drive, not a removable.
-
Page 24: Set Devices Options
3. CONFIGURING YOUR SCSI CARD F2 or F6 Function During Bootup: Disabled/Enabled (default). This setting determines whether or not the user can access the DC-390’s BIOS via the F2 or F6 keys during system boot. When disabled, the option to enter the PCU will not be displayed, in which case the only way to configure the DC-390’s settings will be to run the UTIL.EXE program in the \DOS directory on the driver diskette. - Page 25 For DC-390F/390U2B/390U2W: Press <Tab> to see the next screen for SCSI ID 8-15, if available. For DC-390U: "Wide Negotiation" is always set to “No” and cannot be changed. Parity Checking: Yes/No. This option defaults to enabled, i.e., Yes. If set to No, the DC-390 won’t perform parity checking.
- Page 26 OS/2, Windows NT and Unix. Wide Negotiation: Yes/No. This option is ignored when the DC-390U, a non-Wide SCSI adapter, is installed. It is suggested that you enable this option, i.e., Yes, for 16-bit Wide SCSI devices in order to gain the best performance and that you disable it for 8-bit devices for less compatibility problems.
-
Page 27: Show Scsi Devices
3. CONFIGURING YOUR SCSI CARD 3.2.4 Show SCSI Devices This sub-menu provides general information for all devices on the SCSI bus: Select A Device For Display Device Information SCSI Device Information Vender ID ………………………….….…. ST32171N Product Revision level ……………………………… Fixed disk SCSI Version ………………….. -
Page 28: Low Level Format Utility
3. CONFIGURING YOUR SCSI CARD 3.2.5 Since most SCSI drives are already pre-formatted when shipped from their manufacturers, you can skip this section except in the following situations: A disk drive is damaged The disk drive has not been formatted with the 512B/block parameter proceed. -
Page 29: Dos Aspi Drivers & Utilities
4. DOS ASPI DRIVERS & UTILITIES This chapter describes in detail the various ASPI Drivers and Utility programs that are provided with the DC-390 Host Adapter Kit for use under the DOS operating system. To get up and running quickly under DOS, see Section 4.1 - Easy DOS Driver Installation Software for easy installation instructions. -
Page 30: Easy Dos Driver Installation Software (Install.exe)
4. DOS ASPI DRIVERS & UTILITIES Easy DOS Driver Installation Software (INSTALL.EXE) easy driver installation for your SCSI devices. Under DOS, the driver installation will be necessary if either: More than two Hard Drives are installed and " " is disabled (sec. - Page 31 Do You Want to install CD-ROM can have any name you choose. The default path would be C:\DC390 (for DC-390) or C:\DC390W (for DC-390U/390F/390U2B/390U2W). For this example we'll use This Installation Program will copy some Device Drivers and Utility to the following directory...
- Page 32 4. DOS ASPI DRIVERS & UTILITIES Please Key in the PathName where MSCDEX.EXE Resides ENTER ---- Accept the Pathname ---- Abort Install MSCDEX.EXE You would then assign the first drive letter to be reserved for the CD-ROM drive(s). In After confirmation, the installation program will modify both the CONFIG.SYS and AUTOEXEC.BAT files.
-
Page 33: Installing The Aspi Driver
4. DOS ASPI DRIVERS & UTILITIES 4.2 Installing the ASPI Driver With the ASPI driver ASPI.SYS installed, you are able to run or install the following utilities and drivers: • TFDISK.EXE: Disk partitioning utility on the DC-390 series driver diskette •... - Page 34 4. DOS ASPI DRIVERS & UTILITIES Using the /d option, you have the ability to reserve up to 9 logical drives for each SCSI device. However, you must keep the total number of partitions (logical drives) reserved by the driver to within 16. This option is important for removable media devices. If you do not reserve enough logical drives for your removable media, some of the logical drives may go unrecognized.
-
Page 35: Disk Partition Utility
4. DOS ASPI DRIVERS & UTILITIES Note: With the More Than 2 Drives Support option enabled in the PCU, you will be able to install up to eight drives without installing device drivers. Of course, your DOS version must be 5.0 or higher. LOCK/UNLOCK functions are crucial for data integrity of removable devices and need to be supported by drivers. -
Page 36: Installing The Cd-Rom Driver
4. DOS ASPI DRIVERS & UTILITIES Cylinders= XXX – Depends on drive’s capacity. • Using 255 heads, 63 sectors parameters: Heads = 255 Sectors = 63 Cylinders = XXX – Depends on drive’s capacity. After partitioning the disk, you must also choose "Create Logical Drive" to assign a DOS drive letter to the partition. -
Page 37: Installing Tape Streamer (Dat)
4. DOS ASPI DRIVERS & UTILITIES 4.6 Installing Tape Streamer (DAT) After installing the ASPI.SYS driver, the DC-390 can support the following tape backup subsystems under DOS. • SYTOS PLUS Tape backup program from SYTRON CORP. • SYTOS V3.xTape backup program from SYTRON CORP. •... -
Page 38: Netware Drivers
5.1.1 NetWare 5.0 This subsection covers the installation of the driver module (DC390R1.HAM, DC390R1.DDI for DC-390) and (DC-390XR1.HAM, DC390XR1.DDI for DC-390U/F/U2B/U2W) for NetWare Versions 5.0: Begin the file server installation according to the instructions in the file server installation chapter in the Novell NetWare installation manual. -
Page 39: Netware 4.Xx
2. After seeing a message block showing “Choose the server Drivers-Disk Driver” during the installation, insert the DC-390U/F/U2B/U2W device driver diskette into drive A: or B: . Then use the “Ins” key to select an unlisted driver. A dialog box will appear. If the driver diskette is in drive A:, press “Enter”... - Page 40 Write down the slot number for use *below and press <Enter> to proceed. In case where two DC-390U/F/U2B/U2W series adapters are present in the system, the driver must be loaded once for each card. Further along, the console screen will display the message: "Edit File As Necessary: STARTUP.NCF".
-
Page 41: Netware 3.12/Sft-Iii
5. NETWARE DRIVERS 5.1.3 NetWare 3.12/SFT-III This subsection covers the installation of the driver module DC390XR1.HAM and DC390XR1.DDI for NetWare Versions 3.12/SFT-III. 1. Download those two files:NWPA_UP.EXE and 312PTD.EXE from Novell website at http://developer.novell.com/devres/sas/certinfo.htm at Download Upgrade Package for NetWare v3.12. 2. - Page 42 12. Write down the slot number for use *below and press <Enter> to proceed. In case where two DC-390U/W/F/U2B/U2W series adapters are present in the system, the driver must be loaded once for each card. Further along, the console screen will display the message: "Edit File As Necessary: STARTUP.NCF".
-
Page 43: Driver Options
5. NETWARE DRIVERS 5.2 Driver Options The following options are supported by EEPROM Setting. Set these \n options by using DOS 'UTIL.EXE' or during POST by pressing F2/F6 to enter set up utility.\n Supported options are :\n Parity check\n Synchronous negotiation\n Synchronous transfer rate\n Disconnection\n Wide negotiation\n... -
Page 44: Server-Based Backup/Restore Support
5. NETWARE DRIVERS 5.3 Server-based Backup/Restore Support The server-based backup/restore utility, Sbackup, comes with the NetWare OS. The DC- 390's ASPI drivers provide an interface between this utility and the tape subsystem. To run Sbackup, at the NetWare prompt type: :load tsa410 <Return>... -
Page 45: Duplexing
5. NETWARE DRIVERS Note: If the status is mounted already, then dismount and mount it again by pressing 4 consecutive <Return> to make sure the operating system gets the correct disk geometry. Exit monitor The message shown on the console informing you of the new media geometry looks like this: HA@E800h, ID-LUN@4-0) Removable media: cyls=120 hds=64 sec=32 (This indicates that your DC-390 is installed with I/O port E800H, and your device has a capacity of 120MB with SCSI ID 4. -
Page 46: Os/2 Drivers
TMSCSIM.ADD is the DC-390's OS/2 Adapter Device Driver that is fully compatible with OS/2 v2.x and Warp 3.0 • TMSCSIM.DDP contains installation instructions used by TMSCSIM.EXE • TMSCSIM.EXE is the program that searches for the DC-390 and determines its configuration DC-390 <-> DC-390U/F TMSCSIM.ADD <-> TMSCSIW.ADD TMSCSIM.DDP <-> TMSCSIW.DDP TMSCSIM.EXE <->... -
Page 47: Adding The Driver To An Existing Os/2 System
6. OS/2 DRIVERS Then, add one more line at the end of the CONFIG.SYS: SET COPYFROMFLOPPY=1 Remove DISK 1A and insert the OS/2 Installation diskette. Boot from this disk to begin the OS/2 installation. A blue screen will prompt for the OS/2 DISK 1. Insert DISK 1A instead and proceed with the installation. -
Page 48: Un-Installing The Driver
6. OS/2 DRIVERS If there is a problem, check the CONFIG.SYS on the hard drive for the line: BASEDEV=QL510.ADD If this line exists, change it as follows: BASEDEV=QL510.ADD REM BASEDEV=QL510.ADD You may also install the driver manually: Copy the file TMSCSIM.ADD from the directory \OS2DRV on the Tekram driver disk to the directory C:\OS2. -
Page 49: Command-Line Switches For Tmscsim.add
6. OS/2 DRIVERS 6.4 Command-Line Switches for TMSCSIM.ADD BASEDEV=TMSCSIM.ADD [/Universal switch] [/Adapter ID [/Unit switch]] [Universal switch] An option that applies to all adapters: MO - Do not change MO device type to DASD type when reporting to Device Manager. TMSCSIM.ADD default: Change MO device type to DASD. -
Page 50: Windows Nt Drivers
& 4.x 3.1 & 3.5 Oemsetup.inf: Device information file Oemsetup.inf: Device information file (*) trm390w.sys for DC-390U/F/U2B/U2W And two others are under the root directory: • TXTSETUP.OEM (Text Setup File) • DCSCI (Text Setup Tag File) 7.1 New Windows NT Installation You can boot Microsoft Windows NT from Setup Diskette(NT 3.1-3.5/3.51-4.X) or CD-... - Page 51 7. WINDOWS NT DRIVERS Press "S" to skip mass storage device detection. The next screen will show: “Setup has recognized the following SCSI Adapters in your computer: (none).” Choose to configure an additional SCSI adapter by pressing "S", and continue with the following steps: On the next screen, NT will show various drivers.
-
Page 52: Adding The Driver To An Existing Nt System
7. WINDOWS NT DRIVERS Press "ENTER" to continue and copy the driver files. At this point, simply follow the Microsoft Windows NT installation procedure. 7.2 Adding the Driver to an Existing NT System 7.2.1 For NT Versions 3.x and 3.5x From the Main Program group, double click the Windows NT Setup icon. -
Page 53: Removing The Scsi Host Adapter From The System
7. WINDOWS NT DRIVERS Windows NT will show: "Tekram DC-390 PCI SCSI Adapter Ver. XXX". Select "OK" At this point, if the specified driver has already been installed, NT will display the following message: “The drivers for this adapter are already on the system" Select "Current"... -
Page 54: Windows 3.X Drivers
8. WINDOWS 3.X DRIVERS This chapter provides installation and un-install procedures for the DC-390 Windows 3.x driver. Note: This driver is for use with all versions of Windows 3.0 or higher, as well as Windows for WorkGroups 3.11 or higher. The primary purpose of this driver is to enable the option of 32-Bit Disk Access under the above mentioned environments. -
Page 55: Windows 95/98 Drivers
This chapter provides installation procedures for the DC-390 series Windows 95/98 drivers. Windows 95/98 must first be installed before beginning this procedure. There are two driver files under the \WIN95_98 directory on the driver diskette: • TRM390.MPD: Windows 95/98 driver file (TRM390W.MPD for DC-390U/F/U2B/ U2W) • SCSI.INF: Information file 9.1 Installing the Windows 95 Driver... -
Page 56: Installing The Windows 95 Osr2 Driver
9. WINDOWS 95/98 DRIVERS A "Select Device" dialog box shows "Tekram DC-390 (DC-390U/F/U2B/U2W)PCI SCSI Adapter". Click "OK". A "PCI SCSI Bus Controller Properties" dialog box shows driver Files directory :\Windows\SYSTEM\IOSBUSYS\TRM390.MPD or TRM390W.MPD". Click "OK". A "System Settings Change" dialog box appears. Remove the driver disk from the drive and click on “Yes”... -
Page 57: Installing The Windows 98 Driver
9. WINDOWS 95/98 DRIVERS 9.3 Installing the Windows 98 Driver For DC-390/U2B/U2W: Windows 98 will detect the DC-390 series PCI SCSI Adapter as an AMD or Symbios PCI SCSI Controller (DC-390U2B/U2W) and install its built-in driver during Windows 98 Setup. To replace the driver with the Tekram driver, follow these steps: Open the Control Panel and double-click the System Icon. - Page 58 HCT test. Our 98PATCH.EXE modifies the PCI.VXD program and fix this problem. • 98Patch.exe is only for DC-390U/F under Windows 98. For windows 95 and windows 95 OSR2, you don't need to run 98patch.exe to fix PCI.VXD. DC-390 Series User’s Manual...
-
Page 59: Adding The Driver To An Existing 95/98 System
9. WINDOWS 95/98 DRIVERS 9.4 Adding the Driver to an Existing 95/98 System 9.4.1 For an Existing Windows 95 System Open the Control Panel and double-click on the System icon. Click on the "Device Manager" tab and double-click on the "SCSI controllers" entry. Select the "Tekram DC-395U/UW or DC-315/U PCI SCSI Host Adapter"... -
Page 60: For An Existing Windows 98 System
9. WINDOWS 95/98 DRIVERS A "Copying Files screen" dialog box appears, Specify path as A:\Win95_98 and click "OK". 10. A "System Settings Change" dialog box appears. Remove the driver disk from the drive and click on “Yes” to restart the computer. 9.4.3 For an Existing Windows 98 System Open the Control Panel and double-click the System Icon. -
Page 61: Sco Unix Drivers
The example used throughout this chapter is for DC-390 under SCO Unix 3.2v4.x. The following is the table for mapping different driver names used for DC-390 series under either SCO Unix 3.2v4.x or SCO OpenServer 5.0: DC-390 DC-390U/F/U2B/U2W SCO Unix 3.2v4.x slha SCO OpenServer 5.0 10.1 Preparing a Driver Diskette... -
Page 62: New Sco Unix Installation
10. SCO UNIX DRIVERS The SCO Unix/OpenServer driver diskette is now made. Proceed to the following instruction for installation procedures. 10.2 New SCO UNIX Installation with DC-390 as the primary SCSI adapter Insert the system diskette N1 and boot up. When the boot prompt is shown: Boot Type the following command to proceed:... -
Page 63: Adding The Driver To An Existing Sco Unix System
10. SCO UNIX DRIVERS device address vector dma comment —————————————————————————————————— %DC390 Tekram PCI SCSI adapter driver(V2.0) %+adapter 0x9000-0x9100 ha=0/id=7 at bus=0/dev=5/func=0 %++device id=0/lun=0/disk/206MB/”IBM ...” %++device id=2/lun=0/tape/”WANGTEK ...” 10.3 Adding the Driver to an Existing SCO UNIX System with non-SCSI boot drive Boot SCO UNIX into administration (single user) mode. -
Page 64: Appendix
Max. sync. Model No. data Xfer rate SCSI-I SCSI-II SCSI-3 Ultra2 Devices DC-390 DC-390U DC-390F DC-390U2B DC-390U2W • Boot ROM support • On-chip state machine to control the SCSI sequences in hardware • Patented programmable GLITCH EATER™ Circuitry on REQ# and ACK# inputs (DC- 390 only) •... -
Page 65: Product Support Form
B. Product Support Form The following information may be required by your supplier in order to obtain technical support assistance: Have you tried the General Troubleshooting Tips in Appendix C without success? Yes? ____ No? ____ DC-390 Information - Serial # : ________________________ - Purchase Date : ________________________... -
Page 66: General Troubleshooting Tips
C. General Troubleshooting Tips Most controller errors are traceable to external factors, such as conflicts with other installed cards, bad or incorrectly configured drives, loose cables, improper SCSI termination, or other installation errors. To troubleshoot SCSI problems, try simplifying your hardware configuration by removing some devices from the system and then adding them back one at a time. - Page 67 Setting this option to Yes will enable the DC-390’s BIOS to re-scan this device during the next bootup. 11. DC-390 with RICOH CD-R RO-1420C: (DC-390U/F are O.K.) The RO-1420C may wrongly generate a SCSI parity error during its reselection phase. SCSI adapters based on the NCR 53CF94 SCSI core can hang up if this condition occurs, since the 53CF94 DOES check SCSI parity during the reselection phase.
- Page 68 • AHA-2940: Adaptec PCI SCSI controller • DC-390U/F: PCI Ultra/Wide SCSI controller by TEKRAM based on 53C875 12. Linux/FreeBSD/Unix-based drivers: They are available under “Driver&AP” section of each model under “Storage” section on FTP site (ftp://ftp.tekram.com.tw). 13. Overclocking policy: The difference between SCSI chip and CPU is that CPU will pack 100MHz if it can run 100MHz and 66MHz if can run 66MHz during production.
- Page 69 C. General Troubleshooting Tips WinASPI solution. Windows 95/98 default supports WINASPI (WNASPI32.DLL-32 bit User Mode, WinASPI.DLL-16 bit User Mode, APIX.VXD-kernel Mode). We do not need to provide those drivers. Windows NT does not support WINASPI. Customer install WINASPI to the NT, when the Application needs this interface.
- Page 70 C. General Troubleshooting Tips 1). If mainboard BIOS is O.K. to let you manually assign the IRQ, take Award BIOS for example and now want to manually assign the DC-390x, which is seated in PCI slot 2, to IRQ10. The mainboard BIOS may have "Slot n Use IRQ NO : "...
-
Page 71: Flash Bios Programming Utility
Updating the DC-390U/F/U2B/U2W BIOS Code is made easy with the TRMFLASH.EXE Utility, which can be found in the <BIOS> directory of the driver disk. Since the DC-390U/F (board versions 1.1/2.2 and later) and DC-390U2B/U2W feature FLASH BIOS, it is not necessary to change the actual BIOS chip in order to upgrade the SCSI BIOS.
Need help?
Do you have a question about the DC-390U and is the answer not in the manual?
Questions and answers