Harman Kardon DVD 50 Owner's Manual
5-disc dvd changer
Hide thumbs
Also See for DVD 50:
- Service manual (76 pages) ,
- Owner's manual (40 pages) ,
- Brochure (3 pages)
Table of Contents
Advertisement
Quick Links
Advertisement
Table of Contents

Related Manuals for Harman Kardon DVD 50


Summary of Contents for Harman Kardon DVD 50
- Page 1 DVD 50 5-Disc DVD Changer OWNER’S MANUAL ® Power for the Digital Revolution. ™...
-
Page 2: Table Of Contents
DVD 50 5-Disc DVD Changer 3 Introduction 4 Safety Information 5 DVD Compatibility & Terminology 6 Front Panel Controls 7 Front Panel Information Display 9 Rear Panel Connections 10 Remote Control Functions 13 Installation and Connections 18 Setup Menu Remote Control Operation... -
Page 3: Introduction
On the video side, the DVD 50 is one of the first 5-disc changers to offer progressive scan video outputs for use with digital “HDTV-Ready” dis- play monitors. -
Page 4: Safety Information
DVD 50 that may not be covered by the war- ranty, be certain that all discs are removed from the unit before it is moved. Once the DVD 50 is installed, discs may be left in the unit when it... -
Page 5: Dvd Compatibility & Terminology
DVD Compatibility & Terminology The DVD 50 is more than a DVD player; it will play the following disc formats: Both 5-inch (12cm) and 3-inch (8cm) discs DVD movie discs CD, CD-R and CD-RW audio discs DTS audio discs CD audio discs with HDCD encoding... -
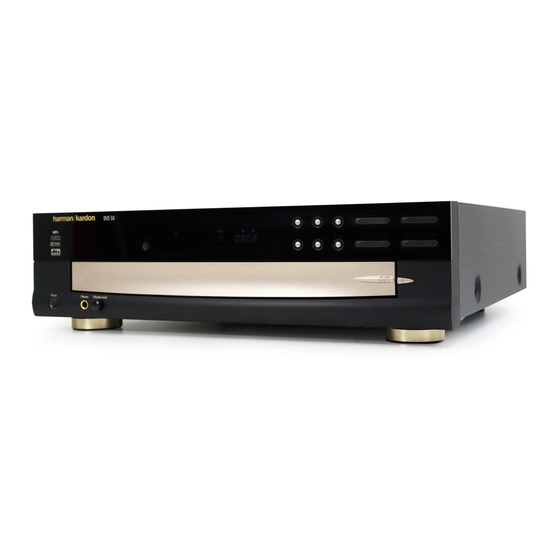
Page 6: Front Panel Controls
Headphone Level Control Search Forward/Reverse Power Switch: Press the button once to turn the DVD 50 on; press it again to put the unit in the Standby mode. Status Indicator: When the DVD 50 is in the On mode, this indicator will glow green. -
Page 7: Front Panel Information Display
Disc Number Indicators: When the DVD 50 has sensed that a disc is loaded in one or more of the tray positions, the number inside the corresponding disc icon will light. The disc position that is currently playing will flash. - Page 8 Front Panel Information Display Parental Lock Indicator: This indicator lights when the parental lock system is engaged in order to prevent anyone from changing the rating level without a code. Resume Indicator: This indicator lights when the Stop button has been pressed once to put the unit in the Resume mode.
-
Page 9: Rear Panel Connections
(IR) input jack of another compatible Harman Kardon remote-controlled product to have the built-in Remote Sensor on the DVD 50 provide IR signals to other compatible products. £ Analog Audio Outputs: Connect these jacks to an audio input on an A/V receiver or surround processor for analog audio playback. -
Page 10: Remote Control Functions
Remote Control Functions Title Button Power-On Button Status Button Return Button Navigation Buttons Previous Button Play Button Reverse Search Button Open/Close Button Stop Button Slow Play Buttons Random Button Disc Skip Button Numeric Buttons Repeat Button Repeat A-B Button Light Button Check Button Program Button Clear Button... - Page 11 DVD disc, press this button to return to the previous menu screen. Navigation Buttons: Press these buttons to change or select an item from the DVD 50’s Status Banner or in the on-screen menu displayed by a DVD disc.
- Page 12 The DVD 50 will display a camera icon on the screen to indicate when this feature is available.
-
Page 13: Installation And Connections
In addition to the safety considerations outlined on page 4, it is also recommended that the DVD 50 not be placed in a location that is sub- ject to direct sunlight or extreme heat or cold, as these conditions may damage the discs used in the player, or the player itself. - Page 14 Step 1: Connect the AC Power Cord ª to an AC outlet as shown in Connection , but do NOT turn the DVD 50 on at this point. Step 2: Connect the left and right Analog Audio Outputs £ to the left and right audio...
-
Page 15: Audio Inputs
Connection . For coaxial connections, run the cable from the Coaxial Digital Output ¶ on the DVD 50 to a coaxial input on the A/V receiver, as shown in Connection Either type of connection may be used and only DVD 50... - Page 16 AUDIO OUT CONTROL COMPONENT VIDEO IN on the DVD 50 to a coaxial input on the A/V receiver as shown in Connection . Either type of connection may be used and only one is required. Remember to change the settings in...
- Page 17 Y/Pr/Pb Component Outputs ¢ on the DVD 50 directly to the matching inputs on your video display. If the video display has an S-Video input and component video is not available, connect the S-Video Output §...
-
Page 18: Setup Menu
DVD 50. Make certain that those devices are set to the correct audio and video inputs for use with the DVD 50. If you have not already done so, plug the AC Power Cord ª into a wall output or surge protector/power strip. -
Page 19: Audio Language Selection
When all four digits have been entered and the OK box is highlighted, press the Enter Button to store the selection in the DVD 50’s memory. Although the word “OTHER” will appear in the settings list, your desired choice will be entered. -
Page 20: Menu Language Selection
Ratings Selection and Password Control The DVD 50 enables you to control the discs that are viewed by setting a ratings level. When a disc has a rating level greater than the default, it will not play. To further protect... -
Page 21: Aspect Ratio
When all four numbers have been repeated, press the Enter Button set the password in the DVD 50’s memory. If the two passwords do not agree, an “Incorrect Password” (Figure 9) message will appear to ask you to try entering the number again. -
Page 22: Video Output
The DVD 50 will play either type of disc, and you may select a default that tells which way to present the image when there is a choice. -
Page 23: Dvd Auto Play
Turn the unit off and pause for a few seconds. When you turn the DVD 50 on again, the video output will be restored to the standard setting, and a picture will once again be visible on a conventional analog display. -
Page 24: Dynamic Range Setting
Although the DVD 50 will play all of these disc types, this setting creates a default that tells which way to present the soundtracks when there is a choice. - Page 25 96kHz signals, select the 96kHz option. When this choice is made, the DVD 50 will pass each type of signal through without any further processing. When a 96kHz signal is present, it will be noted by the...
-
Page 26: Playback Basics For All Formats
Playback Basics for All Formats Loading Discs To load discs in the DVD 50, first make certain that the unit is turned on by pressing the Power Switch so that the Status Indicator turns green. Next, press the Open/Close Button until the Disc Tray opens. - Page 27 Playback Basics for All Formats Auto Power Shut-Off As an optional feature, you may set the DVD 50 so that it automatically turns off after ten min- utes when the unit is idle and no disc is play- ing. The normal factory default for this feature is “OFF”, meaning that the unit will remain on...
- Page 28 Playback Basics for All Formats Basic playback with the DVD 50 involves func- tions similar to those you may be familiar with for conventional CD players or changers: Turn the unit on by pressing in the Power Switch If there are discs already loaded in the unit, the last disc to be played will automatically begin playing.
-
Page 29: Dvd Playback
This feature is out of the control of the DVD 50, as it is set by the disc’s internal programming. IMPORTANT NOTES ON DVD PLAYBACK The DVD 50 is capable of all the features and options covered by the DVD standards. -
Page 30: Using The On-Screen Menu Bar For Dvd Playback
DVD Playback Using the On-Screen Menu Bar for DVD Playback The DVD 50 is equipped with a powerful on- screen display system that serves the dual pur- pose of showing you the current status of the DVD 50 while enabling quick and easy changes to settings and functions. -
Page 31: Changing Camera Angles
DVD, and is not set by the DVD 50. The number of angles avail- able will vary from one disc to another. 31 DVD PLAYBACK... -
Page 32: Cd Playback
CD Playback Using the On-Screen Menu Bar for CD Playback The DVD 50 allows you to take advantage of the on-screen Menu Bar even when playing CDs. The use of this graphical display makes it easy to select CD functions. -
Page 33: Mp3 Playback
MP3 Disc Playback The DVD 50 is rare among DVD players in that it is able to playback discs recorded with MP3 files. This means that you may enjoy the latest music using discs created in your computer through the high quality audio components in your home the- ater system. -
Page 34: Vcd Playback
VCD disc operate very closely to those for CD. To play a VCD disc, place it in the DVD 50 as you would any other CD or DVD disc. After the unit takes a few seconds to read the disc’s contents the VCD segment of the... -
Page 35: Programmed Play
Programmed Play The DVD 50 is equipped with a wide range of programmed play functions that enable you to have the unit select or repeat tracks for you, or you may program a specific order for discs and tracks to play. -
Page 36: Programmed Play
3. The second box will now be highlighted in blue to indicate that a selection for track or title is to be made. As the DVD 50 already knows the disc type for the position selected, the heading over the box will indicate “Track” for VCD or CD discs and “Title”... -
Page 37: Bookmarks
Programmed Play Bookmarks Bookmarks are a feature of the DVD 50 that allows you to mark up to nine different points on a disc and to quickly return to those points later. The Bookmarks feature works on DVD, VCD and CD discs. -
Page 38: Dvd Language Codes
DVD Language Codes The availability of specific languages for the main audio track or subtitles is dependent on the choices made by a disc’s producer. You should always consult the disc’s jacket for information on languages for any disc. In the case of some languages, you may be required to enter a code from the list below to access that language. -
Page 39: Troubleshooting Guide
Troubleshooting Guide TROUBLESHOOTING GUIDE SYMPTOM POSSIBLE CAUSE Unit does not turn on • Main Power Switch turned Off • No AC power Disc does not play • Disc loaded improperly • Incorrect disc type • Invalid Region Code • Rating is above parental preset No picture •... -
Page 40: Technical Specifications
All specifications subject to change without notice. Harman Kardon is a registered trademark, and Power for the Digital Revolution is a trademark, of Harman Kardon, Inc. *Manufactured under license from Dolby Laboratories. “Dolby,” “Pro Logic,” “AC-3” and the Double-D symbol are trademarks of Dolby Laboratories. Confidential Unpublished Works. © 1992–2000 Dolby Laboratories, Inc.
Need help?
Do you have a question about the DVD 50 and is the answer not in the manual?
Questions and answers