
Related Manuals for Samsung AM030RXMDEH/EU


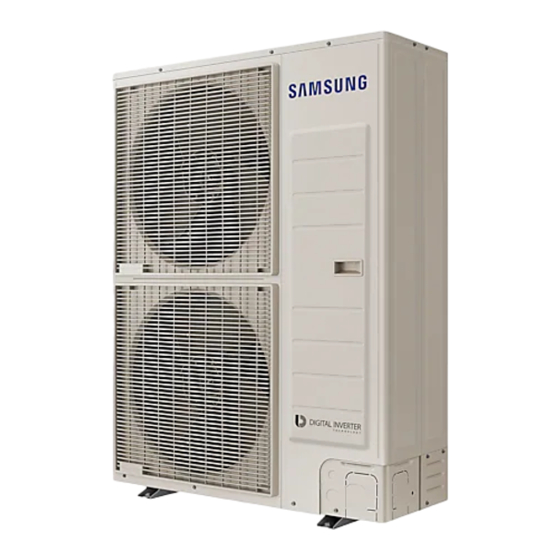
Summary of Contents for Samsung AM030RXMDEH/EU
-
Page 1: Table Of Contents
SYSTEM AIR CONDITIONER OUTDOOR UNIT AM040KXMDEH/EU AM050KXMDEH/EU AM040KXMDEH/TK AM050KXMDEH/TK AM040KXMDCH/AZ AM050KXMDCH/AZ AM030RXMDEH/EU AIR CONDITIONER CONTENTS 1. Precautions 2. Product Specifications 3. Disassembly and Reassembly 4. Troubleshooting 5. PCB Diagram 6. Wiring Diagram 7. KEY OPTION 8. Auto Commissioning & Management System &... -
Page 2: Precautions
High efficient G-Fin & epoxy acrylic coating has increased heat transfer and hydrophilicity on heat exchanger. Company A Diameter Ø8 Ø7 Heat transfer surface area Pressure Evaporation 14.1% loss in heat Condensation exchanger 10.3% Internal heat transfer performance 30.8% Pressure resistance Same Company A Samsung Electronics... - Page 3 Saturated liquid refrigerant Temperature Low temperature gas refrigerant 온도 Low temperature liquid refrigerant Cross section of the Cross section of the Sub-cooled Turbo inter-cooler conventional inter-cooler liquid refrigerant *Increased heat transfer area with Shell & Tube type Turbo Inter-cooler Samsung Electronics...
- Page 4 Corrosion is evident after 1,000 hours of test Company A * Tested by Samsung L ong piping/High level difference technology Longest piping length is allowed up to 175m (equivalent length) and Maximum 50m of level difference is allowed for more flexible installation.
- Page 5 • Silent mode can be adjusted in 3 levels depending on the level of noise. Highest temperature 6 hours 12 hours of silent mode Operation time 7 : 00 13 : 30 19 : 00 7 : 00 Samsung Electronics...
- Page 6 If you need to move/replace the outdoor unit or when there are problems on indoor units or on the pipes, outdoor unit will recover refrigerant remaining on the pipes. Indoor unit malfunction Outdoor 6 hour s 12 hour s Fan RP M Night Night Refrigerant recoveringsss Samsung Electronics...
- Page 7 You may connect up to 9 indoor units on a single outdoor unit. It will allow more powerful and flexible air conditioning system and you can select refrigerant pipe length, or number of indoor units depending on the needs for office, commercial and residential places. Maximum 9 indoor unit connection Samsung Electronics...
- Page 8 C onvenient product installation Service valve is not exposed to keep the neat appearance and pipe can be connected in 4 different directions which provide flexible installation and maintenance services. Conventional * For models with 9kW or larger (Flare type connection) Samsung Electronics...
-
Page 9: Product Specifications
- Heating Capacity: Figures obtained under the conditions of indoor 20°C DB, outdoor 7°C DB, pipe length 7.5m, level difference 0m 2. The regular heating capacity is based on the outdoor temperature of 7°C. When the outdoor temperature drops below 0°C, the heating capacity may drop as well due to the temperature. Samsung Electronics... - Page 10 - Heating Capacity: Figures obtained under the conditions of indoor 20°C DB, outdoor 7°C DB, pipe length 7.5m, level difference 0m 2. The regular heating capacity is based on the outdoor temperature of 7°C. When the outdoor temperature drops below 0°C, the heating capacity may drop as well due to the temperature. Samsung Electronics...
-
Page 11: Disassembly And Reassembly
Monkey Spanner –Screw Driver Nipper Electric Motion Driver L-Wrench ■ Disassembly and reassembly of DVM MINI : Refer to the product of the same structure. This chapter, only the product which is not duplicated in the other products listed. Samsung Electronics... - Page 12 Cabi Top 1) Remove the 9 screws on each side of the Cabinet-Top and separate it. (Use +Screw Driver) Cabi-Install front part 1) Remove the 1 screw in the Cabinet-Install Front part and separate it. (Use +Screw Driver) Samsung Electronics...
- Page 13 2) Remove the 4 screws in the Outdoor Unit Guard and separate it. (Use + Screw Driver) Cabi Back RH 1) Remove the 4 screws on each side of the Cabinet Back RH and separate it. (Use + Screw Driver) Samsung Electronics...
- Page 14 Parts Procedure Remark Cabi-Install Back 1) Remove the 1 screw in the Cabinet-Install Back and separate it. (Use +Screw Driver) Cabi Front LF 1) Remove the 10 screws in the Cabinet-Front LF and separate it. (Use +Screw Driver) Samsung Electronics...
- Page 15 Disassembly and Reassembly Parts Procedure Remark 1) Turn 2 mounting nuts as shown in the picture and remove it. (Use L Wrench or Monkey Spanner or Socket Wrench) Samsung Electronics...
- Page 16 (Use +Screw Driver) 3) Disconnect the Motor wire from Assy Control Out. Motor connection part : Can be different according to model. Bracket Motor 1) Remove the 2 mounting screws in Bracket Motor and separate it. (Use + Screw Driver) Samsung Electronics...
- Page 17 Out. Number of connectors, that can be disconnected, may different depending on the model. (From 4~8) 2) Remove the 1 mounting screw in Control Out and separate it. (Use + Screw Driver.) 3) Separate the Assy Control Out. Samsung Electronics...
- Page 18 ASS'Y TUBE 1) Priority refrigerant remove. VALVE 2) Using welding machine with picture 5 places a pipe disjoint. When remove Compressor, Heat Exchanger, a pipe, remove perfectly refrigerant of Compressor inside first, and disjoint a pipe by welding machine. Samsung Electronics...
- Page 19 1) Fixed 1 screw of cover end part remove. (Use Hexagonal Wrench or Monkey Spanner or Hexagonal Socket.) 2) Remove the Compressor felt. 3) Like picture, remove the 3 screws fixed on bottom and separate it. (Use Hexagonal Wrench or Monkey Spanner or Hexagonal Socket.) Samsung Electronics...
- Page 20 Disassembly and Reassembly Parts Procedure Remark Assy Cond Out 1) Remove the 3 screws that is fixing each side of Assy Cond Out and separate it. (Use +Screw Driver.) Samsung Electronics...
-
Page 21: Troubleshooting
Troubleshooting 4. Troubleshooting 4-1. Error Display ERROR DISPLAY AM040/050KXMDEHS, AM040/050KXMDCHS, AM030RXMDEHS Samsung Electronics... - Page 22 DC LINK voltage sensor error E470 EEPROM read/write error E471 EEPROM unmatching error E474 Heat sink temperature error E475 Outdoor fan 2 error E484 PFC overload E485 Input current sensor error E500 Heat sink overheat E554 Gas leak error Samsung Electronics...
- Page 23 Check the outdoor unit PCB communication each unit and replace the indoor unit PCB line and connector then replace the PCB. after checking out lines. Samsung Electronics...
- Page 24 PCB then find an indoor unit that hampers communication by making a connection to each unit and replace indoor unit PCB after checking out lines. Good Defective 0.7V 0.7V Samsung Electronics...
- Page 25 PBA → Outdoor unit inverter PBA is normal MAIN PBA connector (CN39) [7-segment on [Model which uses 3 phase [Model which uses Main PBA (Common)] 1 phase power Inverter PBA power Inverter PBA LED LED confirmation part] confirmation part] Samsung Electronics...
- Page 26 Check if everything is normal and end service on temperature sensor similar to the values on the table on the right side? Change the outdoor unit PBA → Turn on the power → Check if everything is normal and end service Samsung Electronics...
- Page 27 PCB, is the value of voltage 5V, Replace PCB. between pins 3 and 4? Is the value of voltage 5V, between pins 2 and 4? The ▼ mark is the 1st pin on the PCB. Replace high/middle/low-pressure sensor Samsung Electronics...
- Page 28 Check the relevant indoor fan Is the indoor EEV working properly? Check the relevant EEV Is the sensor on indoor heat exchanger shows the temperature correctly? Refer to temperature sensor error section to check for error Check for indoor air inlet blockage Samsung Electronics...
- Page 29 Do the values of S-net and Replace high pressure sensor Manifold gauge correspond? Does indoor/outdoor EEV Check the relevant EEV operate well? Is there any clogged place Check the piping in the piping (ex. filter)? Check the amount of refrigerant Samsung Electronics...
- Page 30 (ex. filter)? Is there any leakage in liquid pipe valve or discharge check valve of the stop-side outdoor unit when Replace the relevant components several outdoor units are in operation? Check the amount of refrigerant Samsung Electronics...
- Page 31 Connect S-net and Manifold gauge (Mandatory) Are service valves open? Open the service valve Does indoor/outdoor EEV Check the relevant EEV operate well? Is there any clogged place in the piping. Check the piping (ex. filter)? Check the amount of refrigerant. Samsung Electronics...
- Page 32 3) If 3-phase power is normal check the phase of the power line using 3-phase tester. If it shows reverse phase, please change the current 3-phase tester power line connection. 4) After completing above, press reset key (K3) then check the power again. Samsung Electronics...
- Page 33 Check the leakage on sub-cooler Normal Replace the sub-cooler Failure Check the leakage on indoor unit EEV Normal Replace the indoor unit EEV Check the piping connection Connect liquid-gas pipe) Re-install the pipe Check the amount of refrigerant Samsung Electronics...
- Page 34 On the high-pressure sensor Replace the PCB of the PCB, is the value of voltage 5V, between pins 3 and 4? The ▼ mark is the 1st pin on the PCB. Replace the high/low-pressure sensor Samsung Electronics...
- Page 35 Is high pressure sensor correctly connected to PCB? Check and reconnect the connector Is there leakage of refrigerant in the system or charging inferior? (Check with manifold gauge) Refill or recharge the refrigerant Replace the high pressure sensor Samsung Electronics...
- Page 36 * Do not change the outdoor unit PBA with fan motor problem → If the 7-segment on the outdoor unit main PBA shows error, there is no problem with outdoor unit main PBA → Control related problems can be solved by S/W update Samsung Electronics...
- Page 37 Do the values of S-net and Manifold gauge Replace a high pressure sensor correspond? Does indoor/outdoor EEV Check the relevant EEV operate well? Is there any clogged place in Check the piping the piping (ex. filter)? Check the amount of refrigerant Samsung Electronics...
- Page 38 3. Is there any noise when the 3. Change the compressor: When loud compressor rotates? abnormal noise generates (such as metal grinding), or severe vibration Is the resistance between Replace the compressor compressor body and chassis MegaΩ? Cont. Samsung Electronics...
- Page 39 → It is Compressor, inverter PBA related error, therefore it is not related to above PBA * Make sure to check if service valve is open → If the service valve is close, damage could occur due to pressure difference during operation Samsung Electronics...
- Page 40 2. Remove obstacles on air outlet and secure enough space Is the service valve completely open? Open the valve Is the compressor operating normally? Replace the compressor Change the outdoor unit inverter PBA and check for normal operation → End service Samsung Electronics...
- Page 41 1. Remove obstacles on air inlet and secure enough space Is the indoor unit installed correctly?? 2. Remove obstacles on air outlet and secure enough space Is piping/wiring between Re-install them correctly the indoor and outdoor unit done correctly? Cont. Samsung Electronics...
- Page 42 Is the resistance between Replace the compressor. compressor body and chassis MegaΩ? Is the location and Turn off the power and change the location measured value of the of the temperature sensor or replace it temperature sensor normal? Cont. Samsung Electronics...
- Page 43 1 phase * Do not change the EMI/outdoor unit main/ Indoor unit main PBA when E464 error occurs power power → It is Compressor, inverter PBA related error, therefore it is not related to above PBA Samsung Electronics...
- Page 44 2. Change the reactor → Check for normal operation → (such as scratch/pressed/ End service broken terminal/ [Check list for model which uses 3 phase power] loose terminal) [Check list for model which uses 1 phase power] Cont. Samsung Electronics...
- Page 45 End service 2. Connect the terminal and the power cable in the power terminal cabinet → Check for normal operation → End service Change the outdoor unit inverter PBA and check for normal operation → End service Samsung Electronics...
- Page 46 3. Is there any noise when 3. Change the compressor: When loud abnormal the compressor rotates? noise generates (such as metal grinding), or severe vibration Is the outdoor and indoor unit Install them correctly pipes/cables correctly installed? Cont. Samsung Electronics...
- Page 47 Gas leak error (Error Code : E554) (cont.) Cont. Open the valve Is the service valve completely open? Re-connect the sensor connector Is the EVA sensor correctly connected? Charge the refrigerant Is the refrigerant charged? Replace the INVERTER PCB. Samsung Electronics...
- Page 48 When error occurs, turn on/off the power for number of time and if same error occurs while the power is off, change the inverter PBA 7. EEPROM read/write error: E470 Error occurs when there is no EEPROM data in the set. Check the model name and insert EEPROM for corresponding model or load the EEPROM data. Samsung Electronics...
-
Page 49: Pcb Diagram
PCB Diagram 5. PCB Diagram 5-1. Outdoor Unit PCB ▒ MAIN PCB : AM040/050KXMDEHS, AM040/050KXMDCHS, AM030RXMDEHS 14 15 22 23... - Page 50 PCB Diagram ▒ MAIN PCB : AM040/050KXMDEHS, AM040/050KXMDCHS, AM030RXMDEHS (cont.) ① CN101-AC INPUT ② CN701-HOT GAS ③ CN702-4WAY VALVE 1 ④ CN703-BASE HEATER #1~#3 : 220~240Vac #1~#3 : 220~240Vac #1~#3 : 220~240Vac #1~#3 : 220~240Vac ⑤ ⑥ ⑦ ⑧ CN704-4WAY VALVE 2 CN403- TEMP SENSOR CN306-MICOM DOWNLOAD CN802-EEV 1...
- Page 51 PCB Diagram ∎ Inverter PCB : 1 Phase ① ② ③ ④ Reactor-A1/B1 Reactor-A2/B2 CN31(2PIN/RED)-Communication CN22-Down loader #Reactor-A2 : WHT #Reactor-A2 : BLK #1 : RXD, #2 : TXD #1 : RXD_ATARO, #2 : TXD_ATARO #Reactor-B2 : WHT #Reactor-B2 : BLK #3 : GND, #4 : DC 5V #3, #8 : N.C, #4~#7 :DATA signal #5 : DC 12V, #6 : INV.
- Page 52 PCB Diagram ∎ Inverter PCB : 1 Phase II ① ② ③ ④ Reactor-A1/B1 Reactor-A2/B2 CN31-MAIN Communication CN22-Down loader #Reactor-A2 : WHT #Reactor-A2 : BLK #1 : RXD#2 : TXD #1 : RXD_ATARO, #2 : TXD_ATARO #Reactor-B2 : WHT #Reactor-B2 : BLK #3 : GND, #4 : DC 5V #3, #8 : N.C, #4~#7 : DATA signal #5 : DC 12V, #6 : INV.
- Page 53 PCB Diagram ∎ EMI PCB : 1 Phase ① ② ③ L1-AC POWER L phase N1-AC POWER N phase CN01-AC POWER L1 : BRN N1 : SKY-BLU #1-#3 : AC 220~240V...
-
Page 54: Wiring Diagram
Wiring Diagram 6. Wiring Diagram 6-1. 1Phase [AM040/050KXMDEHS, AM040/050KXMDCHS, AM030RXMDEHS] This Document can not be used without Samsung’s authorization. -
Page 55: Key Option
KEY OPTION 7. KEY OPTION 7-1. Setting the Outdoor Unit Option Switch AM040/050KXMDEHS, AM040/050KXMDCHS, AM030RXMDEHS Switch for setting the number of indoor unit connections PBA shape DIP S/W 7-SEGMENT (K5~K16) (DISPLAY) Terminal Block for Interface Module Please connect a wire here. ▪... - Page 56 KEY OPTION ■ AMSSSSSMSSS series Tact S/W # of Times Item SEG1 SEG2 SEG3 SEG4 Note One time of Auto Commissioning & Management System long press 1time Charge heating refrigerant 2times Test heating operation 3times Heating pump out 4times Vacuum 5times Finish 1time...
- Page 57 KEY OPTION Entry After Pressing Display Details Display Value Applicable Model K4 for 5 Seconds Main MICOM 0time Version (ex. 0912) Version RDSSSMSSSS series Inverter 1time Version (ex. 0912) MICOM Version 2times EEP ROM Version Version (ex. 0912) Auto-Designating SEG1 SEG2 SEG3,4 AMSSSSSMSSS...
- Page 58 10 ~ 12 ℃ 7 ~ 9 ℃ (공장 출하 세팅) [common to all models] 5 ~ 7 ℃ ※ Please raise the setting values by improving performance while referring to the performance data of long-pipe cooling from the Technical Data Book. Function (Snowdrift Protection Control) 9 ~ 11 ℃...
-
Page 59: Auto Commissioning & Management System & Amount Of Refrigerant Check Function
Auto Commissioning & Management System & Amount of Refrigerant Check Function 8. Auto Commissioning & Management System & Amount of Refrigerant Check Function [Applicable Only to AM*****M*** Series] 8-1. Overview of Auto Commissioning & Management System 8-1-1. Overview of Auto Commissioning & Management System 1) What is the Auto Commissioning &... - Page 60 Auto Commissioning & Management System & Amount of Refrigerant Check Function 4) Items to Check for Auto Commissioning & Management System operation The check items of DVM S ECO in the Auto Commissioning & Management System operation are as in the following. - Indoor unit temperature sensor (indoor temperature of each indoor unit, EVA In/Out temperature sensor) - Outdoor unit temperature sensor (outdoor temperature of each outdoor unit, Cond_Out, high pressure sensor, low pressure sensor, intermediate pressure sensor, suction, liquid line temperature sensor)
- Page 61 Auto Commissioning & Management System & Amount of Refrigerant Check Function 8-1-2. Auto Commissioning & Management System 1) Flow Chart of Pre-Inspection and Auto Commissioning & Management System operation (1) Pre-Inspection - Check the installation status of indoor and outdoor units such as piping, communication, power, and refrigerant level. (2) Auto Commissioning &...
- Page 62 Auto Commissioning & Management System & Amount of Refrigerant Check Function 8-1-3. Resolving the Problem of "Check Required" 1) Temperature Sensor of Outdoor Unit ■ Things to Check: Outdoor temperature of each outdoor unit, Cond_Out, suction, and liquid line temperature sensor ■...
- Page 63 Auto Commissioning & Management System & Amount of Refrigerant Check Function 2) Pressure Sensor ■ Things to Check: High/low pressure sensors of stand-alone outdoor unit ■ Error Code: None (showing "Check Required" on the result report) ■ Determine the pressure sensor status of stand-alone outdoor unit before running the compressor. ■...
- Page 64 Auto Commissioning & Management System & Amount of Refrigerant Check Function 3) Operational Problem of Compressor ■ Things to Check: Operational current of outdoor unit compressor ■ Error Code: None (showing "Check Required" on the result report) ■ Determine the operational current of outdoor unit compressor. ■...
- Page 65 Auto Commissioning & Management System & Amount of Refrigerant Check Function 4) Cycle Status ■ Things to Check: Cycle status of outdoor unit ■ Error Code: None (showing "Check Required" on the result report) ■ Determine the cycle status of each outdoor unit. ■...
- Page 66 Auto Commissioning & Management System & Amount of Refrigerant Check Function 5) Main EEV ■ Things to Check: Main EEV of outdoor unit. (only when the operating mode of automated test operation is set to "heating") ■ Error Code: None (showing "Check Required" on the result report). ■...
- Page 67 Auto Commissioning & Management System & Amount of Refrigerant Check Function 8-2. Automatic Check of Refrigerant Level This function determines the refrigerant level of system through the refrigerant level checking operation. Start Press the tact switch "K2" 4 times. Enter the S-NET pro signal. Meeting the temperature conditions Check the refrigerant level Determine the refrigerant level...
-
Page 68: Index For Model Name
Index for Model Name 9. Index for Model Name 9-1. Outdoor Unit ① ② ③ ④ ⑤ ⑥ ⑦ ⑧ ⑨ ① Classification ⑥ Feature ⑧ Mode STANDARD+GENERAL Temp.+MODULE COOLING ONLY STANDARD+LOW Temp.+MODULE HEAT PUMP STANDARD+TROPICAL+MODULE HEAT RECOVERY STANDARD+GENERAL Temp.+ ②... - Page 69 China china.samsungportal.com © Samsung Electronics Co., Ltd. Novermber. 2018. This Service Manual is a property of Samsung Electronics Co., Ltd. Printed in Korea. Any unauthorized use of Manual can be punished under applicable International and/or domestic law. Code No. AC-00170E_2...
Need help?
Do you have a question about the AM030RXMDEH/EU and is the answer not in the manual?
Questions and answers