
Subscribe to Our Youtube Channel
Related Manuals for RVS systems RVS-218632


Summary of Contents for RVS systems RVS-218632
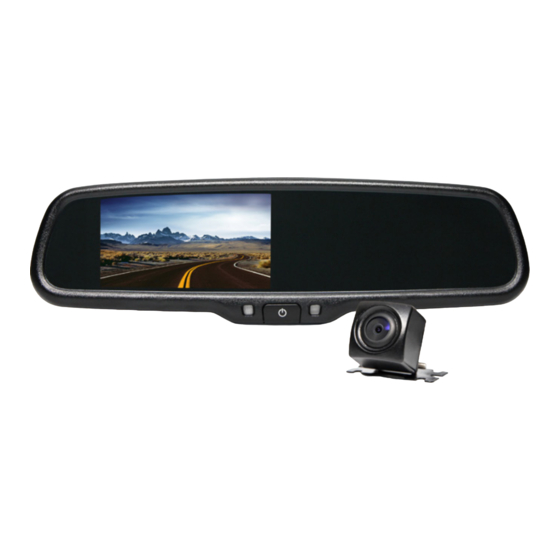
- Page 1 Instruction Manual G-SERIES Backup Camera System with Built-In Dash Camera RVS-218632 RVS Systems, Inc. © 2017 Reverse With Confidence ™...
- Page 2 Troubleshooting......33 Warranty & Disclaimer......34-35 RVS Systems...
- Page 3 NOTE! Please read all of the installation instructions carefully before installing the product. Improper installation will void manufacturer’s warranty. Congratulations on purchasing a Rear View Backup Camera System! With this manual you will be able to properly install and operate the unit. The Backup Camera System is intended to be installed as a supplement aid to your standard rear view mirror that already exists in your vehicle.
- Page 4 Rear View Camera System. If you back up while looking only at the monitor, you may cause RVS Systems...
- Page 5 INSTALLATION: • Electric shock or product or disconnected wire may cause a malfunction may occur if this fire. product is installed incorrectly. • While installing the Rear View System be careful with the wire • Use this product within positioning in order to avoid wire the voltage range specified.
- Page 6 If you have questions about this product, contact: RVS Systems 1797 Atlantic Avenue Brooklyn, NY 11233 Tel: 1.800.764.1028 IN NO EVENT SHALL SELLER OR MANUFACTURER BE LIABLE FOR ANY DIRECT OR CONSEQUENTIAL DAMAGES OF ANY NATURE, OR LOSSES OR EXPENSES RESULTING FROM ANY DEFECTIVE PRODUCT OR THE USE OF ANY PRODUCT.
- Page 7 Before drilling please check that no cable or wiring is on the other side of the wall. Please clamp all wires securely to reduce the possibility of them being damaged while vehicle is in use. Keep all cables away from hot or moving parts and electrical noisy components. We recommend doing a benchmark test before installation to insure that all components are working properly.
- Page 8 Do not run the cable over sharp edges, do not kink the cable and keep away from HOT and rotating parts. Fasten all cables and secure all excess cable. Connect camera to the camera extension cable which runs inside the vehicle. Figure 1.2 RVS Systems...
- Page 9 Wiring After connecting the camera to the “camera cable” connect the camera cable to the input on the wiring harness using the RCA adapter. Connect the RED 12V power wire to an ignition power source and the BLACK 12V ground wire to a chassis ground. The GREEN wire is the REVERSE trigger wire.
- Page 10 There are many methods to remove the original rear view mirror, however, please don’t force the mirror off the bracket. The manufacturer will not be responsible for any damage caused to your car by an incorrect installation of the mirror. RVS Systems...
- Page 11 FIGURE 1.2 When a camera is to be installed at the rear of vehicle, a good position is usually at the top of the license plate where there is an under ledge. Reverse With Confidence ™...
- Page 12 FIGURE 2.2 RVS Systems...
- Page 13 Reverse With Confidence ™...
- Page 14 0.2M space from the car. Accuracy The accuracy of the grid-lines can vary based on how you angle your cam- era. Therefore to compensate for inaccuracies, you can adjust the grid-lines to your camera angle. RVS Systems...
- Page 15 Long press settings button (middle button) to enter into “grid-line ad- justment” mode.The settings on top are for the left grid-line and the bottom are for the right. Press the “Settings” button (middle button) to toggle between the the two. The up, down, left and right buttons are to adjust the location of grid-lines.
- Page 16 Screen Size: 4.3” Display Screen: TFT-LCD Display Resolution: 400(H)x234(V) Aspect Ratio: 16:9 Color Depth: 16.7M dithering Pixel Pitch (mm) 0.219x0.219 Power Consumption: Working Voltage: DC12V VIDEO-IN to GPS/DVD Video Input: (Default) Camera to backup camera Signal System: PAL/Auto/NTSC RVS Systems...
- Page 17 Glass and bracket The thickness of our mirror’s glass is 4mm. It is strong enough to bear impact and reach every country’s safety standards on rear view mirrors. OEM bracket for special rear view mirror monitor with 21mm- thickness pipe. FIGURE 2.1 RED- Power (+) YELLOW- Video...
- Page 18 Stop recording and press “MENU” button twice to en- ter system setting menu. Find “System time” and set the exact date and time with UP/DOWN buttons. Press “REC” to switch to next setting. RVS Systems...
- Page 19 Video size The full HD DVR mirror can record four kinds of video quality. They are HDR 1920*1080 30FPS - 1920*1080 30FPS - 1280*720 60FPS and 1280*720 30FPS. To adjust this, first stop recording. Press “MENU” button to enter system setting menu.
- Page 20 Stop recording and press “MENU” to enter video setting menu. Enter into menu of “Car on auto rec” by pressing UP/DOWN buttons. Press “MENU” to choose “Car on continuate rec”. The mirror will auto start to record once mirror is turned on. RVS Systems...
- Page 21 G sensor and event recording With the G-sensor function, the mirror will automatically save the video as an “event file” when the system detects a strong acceleration, deceleration or excessive shaking. The event file is locked and cannot be overwritten in record cycle mode.
- Page 22 As memory of the SD card is limited, you may want to only record the most import- ant video. The motion detect setting helps with this. Recording will begin when it detects any moving object. Choose from a variety of sensitivity levels. RVS Systems...
- Page 23 Diagram of Sensitivity Level Parking Mode Safety Concerns of Parking Mode WARNING: Due to the system being on and drawing power even when the vehicle is off, parking mode will drain the battery on your vehicle. Please be sure NOT to use this function if you do not have a power regulator or backup power.
- Page 24 “NO”. You can choose “YES” by pressing UP/DOWN buttons. After this, you can find the third warning message: “Safe-guard recording mode is activated. DVR mir- ror will continue to record front views after you leave the car.” Parking mode is now on. RVS Systems...
- Page 25 Video Watermark - Turn On/Turn Off/ Set Drive ID Stop recording and press “MENU” to enter video setting menu. Find and choose “Driver ID Setting” with the UP/DOWN buttons. Use UP/Down buttons to choose the right number and press “REC” button to change the number. After setting the Driver ID number, press DOWN button to find “Driver ID stamp OSD”...
- Page 26 This amount of time can be changed or turned off with the auto power off function. Stop recording and press “MENU” to enter the video setting menu. Scroll to “Auto power off” using UP/DOWN. Press the “REC” button to choose between 1 min/3 mins/5 mins/Off. RVS Systems...
- Page 27 Auto Screen Off Why do you need auto screen off function? A bright screen can be distracting when driving at night. The mirror continues to record even if the screen is off. It also uses less power. Set Auto Screen Off The screen can be set to automatically turn off after a set period of inactivity.
- Page 28 Under the stopping record mode, press “mode” can enter photograph mode, press “rec” to When not recording, press “MODE” to enter photography mode. Press “REC” to take a photograph, and press “menu” can set the photos resolution and quality. photo, and press “MENU” to change photo resolution or image quality. RVS Systems...
- Page 29 File browsing When not recording, press “MODE” twice to enter the file browsing interface. Scroll UP/DOWN to choose between G-Sensor files, normal files, and photos. Press “REC” to enter a file list. Scroll UP/DOWN to switch between videos, press “REC” to select a video, and press “REC” again to play/pause the file.
- Page 30 4.3” 16:9 TFT Display Memory: SD card (MAX32GB) Focus: 12cm-infinite Photo Format: JPEG Video Format: Audio: Built in microphone and speaker Temperature: -30c° 70c° Power Supply: DC 9V-32V Certifications: The DVR mirror has passed E-MARK/FCC/C-TICK and is compliant with ROHS. RVS Systems...
- Page 31 About Camera SPECIFICATIONS: Reverse With Confidence ™...
- Page 32 Camera Installation Mounting Position view angle installation position º RVS Systems...
- Page 33 Problems Diagnoses Solutions Recording frequently stops 1. Motion detection is on 1. Turn off motion detection 2. The SD card is too small to read and store information 2. Use a larger higher class SD card Camera input is working but no 1.
- Page 34 OTHERS OR THE UNAUTHORIZED USE OF NONCONFORMING PARTS; THE DAMAGE IS DUE TO NORMAL WEAR AND TEAR, THIS DAMAGE IS DUE TO ABUSE, IMPROPER MAINTENANCE, NEGLECT OR ACCIDENT; OR THE DAMAGE IS DUE TO USE OF THE RVS SYSTEMS, INC. SYSTEM AFTER PARTIAL FAILURE OR USE WITH IMPROPER ACCESSORIES.
- Page 35 INJURY, LOSS OR DAMAGE, INCIDENTAL OR CONSEQUENTIAL, ARISING OUT OF THE USE OR INTENDED USE OF THE PRODUCT. IN NO EVENT SHALL RVS SYSTEMS AND/OR ITS AFFILIATES HAVE ANY LIABILITY FOR ANY LOSSES (WHETHER DIRECT OR INDIRECT, IN CONTRACT, TORT...
- Page 36 If you have any questions about this product, contact: RVS Systems, Inc. 1797 Atlantic Avenue Brooklyn, NY 11233 800.764.1028 Better Cameras. Better Service. IT’S OUR GUARANTEE. RVS Systems...
Need help?
Do you have a question about the RVS-218632 and is the answer not in the manual?
Questions and answers