
Related Manuals for Liberator RMH-1

Summary of Contents for Liberator RMH-1
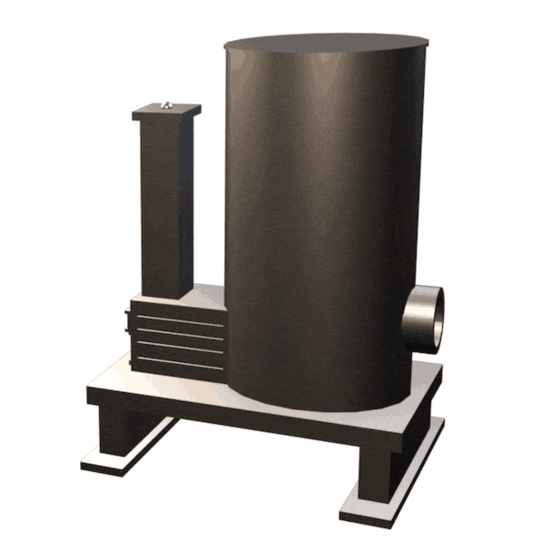
- Page 1 OWNERS MANUAL LIBERATOR ROCKET HEATER Model: RMH-1 SAVE THIS MANUAL FOR FUTURE REFERENCE LIBERATOR LLC BOURBON, MO. (573)-468-4043...
- Page 2 Table of Contents 1. Cover, Page 1 2. Table of Contents, Page 2 3. Warnings, Pages 3 – 4 4. Installation, Pages 5-11 5. Operation and Maintenance of Heater, Parts Diagram, Pages 12-13 Page 2...
- Page 3 Thank you for your purchase of the Liberator Rocket Heater. This owners manual will assist you in the proper use, maintenance, and safety precautions to undertake in the wood stoves operation and installation. WARNING! READ ALL INSTRUCTIONS CAREFULLY BEFORE USING OR INSTALLING! SAFETY PRECAUTIONS! -Do not touch the appliance while it is hot, in operation or thereafter.
- Page 4 -Do not connect a wood burning heater to a Type B gas vent. Doing so is not safe and is prohibited by the National Fire Protection Association Code. -Liberator LLC grants no warranties, implied or stated, for the installation or maintenance of your appliance, and assumes no responsibility of any consequential damage. Safety, damage to property, injury, etcetera, is the sole responsibility of the owner(s) of this appliance.
- Page 5 SAFETY NOTICE: IF THIS HEATER IS NOT PROPERLY INSTALLED, A HOUSE FIRE MAY RESULT. FOR YOUR SAFETY, FOLLOW THE INSTALLATION DIRECTIONS. CONTACT LOCAL BUILDING OR FIRE OFFICIALS ABOUT RESTRICTIONS AND INSTALLATION INSPECTION REQUIREMENTS IN YOUR AREA. Installation Place the heater on solid masonry or solid concrete. When the heater is used on a combustible floor, use an Underwriters Laboratory Listed or equivalent Type 2 floor protector.
- Page 6 Chimney Connection Masonry Chimney The masonry chimney must comply with UL or equivalent NRTL and NFPA 211 standards and codes. Before using an existing masonry chimney, clean the chimney and inspect the flue liner to be absolutely sure it is safe to use. Rules For Connecting To A Masonry Chimney 1.
- Page 7 Flue Connection Through a Non-Combustible Wall Page 7...
- Page 8 Page 8...
- Page 9 Page 9...
- Page 10 UL Listed Chimney Carefully follow the chimney manufacturers instructions. Use only listed type HT per UL 103, 6" inch diameter black or blued chimney connector with a minimum thickness of no less than 24 gauge. If your chimney starts at the ceiling you will need enough 6" inch pipe to reach the ceiling. The top of the chimney must be at least 3' feet above the roof and be at least 2' feet higher than any point of the roof within 10' feet.
- Page 11 Page 11...
- Page 12 Final Draft Inspection (Do NOT do this while the appliance is in operation) To check if your chimney is drafting correctly, open the lighting/cleanout door and put a lit match or cigarette lighter in front of the burn chamber. Then do the same (with the door closed) on top of the fuel feeding area.
- Page 13 NEVER load fuel from the front door (the one that slides up and down). This door is only for lighting/startup and cleaning. Only load fuel from the top of the vertical tube and do not put the top lid on top of the vertical fuel tube while the stove is in operation, unless you have an outside air intake adapter (sold separately) properly installed, which in that case you should always have the top lid over the fuel tube.
Need help?
Do you have a question about the RMH-1 and is the answer not in the manual?
Questions and answers