
Related Manuals for Skyvue NexGen Series


Summary of Contents for Skyvue NexGen Series
- Page 1 NXG-5570-DS | C-NXG-5570-DS MODEL: Owner’s Manual Weatherproof Televisions IMPORTANT: Please read this owners manual before starting or operating the equipment.
-
Page 3: W Elcome
Congratulations on purchasing your new outdoor weather-proof television. We welcome you to our SkyVue family. To gain the full potential of your new SkyVue Outdoor Television, please read carefully the instructions within this document. There is a wealth of relevant information to get started and fully utilize all of the unique capabilities of your new SkyVue Outdoor Television. -
Page 5: Important Information
WARNING: FCC Regulations state that any unauthorized changes or modifications to this equipment not expressly approved by the manufacturer could void the user's authority to operate this equipment. Owner’s Manual - Model NXG-5570-DS | C-NXG-5570-DS mportant nformatIon 2012 SKYVUE 2012 SKYVUE... -
Page 6: S Afety I Nformation
Skyvue Television 2218 Dawson Drive, Chester, SC 29706 TEL: 1-877-475-9883 Visit us online at www.skyvue.com INFORMATION: This equipment has been tested and found to comply with the limits for a Class B digital device, pursuant to Part 15 of the FCC Rules. - Page 7 Electricity is used to perform many useful functions, but it can also cause personal injuries and property damage if improperly handled. This product has been engineered and manufactured with the highest priority on safety. However, improper use can result in electric shock and/or fire. In order to prevent potential danger, please observe the following instructions when installing, operating and cleaning the product.
- Page 8 Also, do not allow the cabinet to remain in contact with rubber or vinyl products for a long period of time. Plasticizers inside the plastic may cause the cabinet to deform and cause the paint to peel off. ® All Rights Reserved. SkyVue 2012 SKYVUE 2012 SKYVUE LC-60LE632U̲70LE732U̲E̲01.indd 4...
- Page 9 More than 2,200 companies enjoy the benefi ts of CEA membership, including legislative advocacy, market research, technical training and education, industry promotion and the fostering of business and strategic relationships Owner’s Manual - Model NXG-5570-DS | C-NXG-5570-DS mportant nformatIon 2012 SKYVUE 2012 SKYVUE...
- Page 10 Do not submerge SkyVue Outdoor TV’s in water: The SkyVue Outdoor TV’s will resist water exposure from normal rain, sprinklers, garden hoses, etc.; however, it is not designed to withstand pressure washers, high-pressure water jets, hurricane-type weather or be submerged in water.
-
Page 11: Table Of Contents
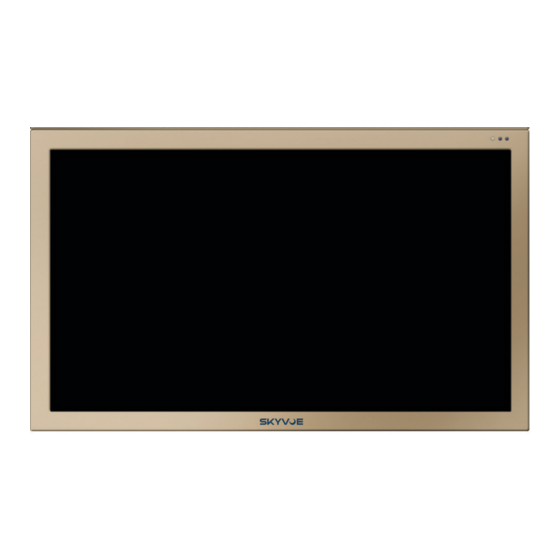
Table of Contents ..........................1 elcOme ......................3 mpOrtant nfOrmatIOn ....................... 4 afety nfOrmatIOn tV I ......................... 10 nStallatIOn ..................11 anel omPonent ouRCe ....................12 anel onneCtionS ....................15 etaChable PeakeRbaR ....................24 anual OntrOlS ..................24 rOnt anel IghtS and enSOrS ...................... - Page 12 If items are damaged or missing, contact your dealer immediately. Model NXG-5570-DS Front View Model NXG-5570-DS Back View NXG-5570-DS | C-NXG-5570-DS MODEL: Owner’s Manual Weatherproof Televisions IMPORTANT: Please read this owners manual before starting or operating the equipment. Owner’s Manual Remote Control ® All Rights Reserved. SkyVue...
-
Page 13: Tv I Nstallation
1. The Internal Component Source is inside the Component Cover located on the back of the unit. 2. Loosen the 6 thumbscrews located on the back cover of your SkyVue TV , and pull off the cover to reveal the Component Source. -
Page 14: Rear Panel Connections
PC Audio IN - This connection port is for people who want to provide audio to the TV when using a PC or a DVI video device. Use a 3.5mm mini-jack audio cable (headphone jack) to provide audio for a HDCP enabled DVI video device or PCs with VGA or DVI connection. (Continued on next page) ® All Rights Reserved. SkyVue... - Page 15 Component Video Jacks - This 3-cable connection allows the chrominance (color) and luminance (brightness) portions of a video signal to be processed separately. Component video improves color accuracy further by splitting the chrominance signal into two portions. 10. Composite Video In – The composite video input uses a single standard RCA-style jack to pass video signals. This type of connection combines chrominance and luminance information, sending it along a single cable.
- Page 16 Switching Inputs: Cable Name Cable End Images Your SkyVue TV offers several options when connecting your devices to the TV. The chart below will help you understand which input you select for each of the connections. HDMI or HDMI-DVI Coaxial RF...
-
Page 17: D Etachable S Peakerbar
TV Installation - Detachable Speaker Bar Detachable Speakerbar Installation - Top Mounting WARNING: Use at least two people when transporting the TV. Note: If you mount the TV to a ceiling or wall mount, it is best to install the Detachable Speaker Bar before the TV has been installed. - Page 18 Installation/Mounting Notes Figure 1 Figure 2 Remove for Speakerbar Do Not Remove Figure 3 Figure 4 Figure 5 ® All Rights Reserved. SkyVue...
- Page 19 Connecting to an Antenna Wall Antenna Connecting to Digital/Standard Cable without Cable Box or with Antenna 1. Make sure the power to the TV is turned off. 2. Connect the Coaxial RF cable from your antenna or digital cable to the ATSC/NTSC input off the back of the TV. 3.
- Page 20 Refer to the DVD/Blu-ray player’s manual to make sure the DVD/Blu-ray player is configured to output correctly to the TV. This TV will turn off automatically if there’s no signal present for more than 15 minutes. ® All Rights Reserved. SkyVue...
- Page 21 Connecting with Composite 1. Make sure the power of the TV and your DVD/Blu-ray DVD/Blu-ray player is turned off. 2. Obtain a Yellow Video Cable. Connect the Yellow Video connector to both your DVD/ Blu-ray player and Composite’s Yellow Video connector port off the back of your TV.
- Page 22 Yellow Video connector port off the back of your TV. 3. Connect the white color connector to both your DVD/Blu-ray player and Composite’s white connector port off the back of your TV. (Continued on next page) Located on Back of TV ® All Rights Reserved. SkyVue...
- Page 23 4. Connect the red color connector to both your DVD/Blu-ray player and Composite’s red connector port off the back of your TV. 5. Turn on the TV and your DVD/Blu-ray player. 6. Use the remote control’s input button or the input button on the right side of the TV to switch to AV (CVBS).
- Page 24 Connecting with RCA Audio Analog (For use when Skyvue Speakerbar is not in use) 1. Make sure the power of the TV and your receiver is turned off. 2. Obtain a 3.5mm stereo/audio cable (if your amplifier audio connection re- quires RCA audio out jacks you will need to obtain an 1/8”...
- Page 25 Connecting with VGA Analog 1. Make sure the power of the TV and your PC is turned off. 2. Obtain a 15-pin D-Sub VGA cable, connect to the VGA output of your PC and the other end to the VGA port off the back of your TV. 3.
-
Page 26: M Anual C Ontrols O N Tv
120V, 60HZ power source at all times. Manual Controls Panel The Side or Bottom Control Panel can be found by reaching your hand on the underside of the SkyVue logo . Location of Manual Controls Panel This button switches between the different sources of the TV. When the On-Screen Display (OSD) is active, this INPUT button acts as the enter button and confirms the menu selection. -
Page 27: Remote Control Guide
CH +/ - Push to go up or down in channel numbers Numbers - Push these to enter channel numbers and passwords Sleep - Push to activate the sleep timer ./- Push to enter channels The SkyVue Remote Control is weatherproof For use with Streaming Stick Devices: = Home... -
Page 28: On-Screen Display (Osd) Functions
Vol+ and Vol- to select a choice. Vol(-) - This button decreases the volume and functions as right direction in the OSD. If the OSD is active, use Vol+/Vol- to select a choice. ® All Rights Reserved. SkyVue... -
Page 29: On-Screen Display Menu
On-Screen Display Menu Your TV has been factory-set to plug-in and enjoy your programming. In the event you turn on the TV and get the message, “Please run Channel Auto Scan,” press your remote’s Menu button, press the Channel function and press Auto Scan. -
Page 30: Time Menu
Closed Caption Ambient Light Sensor Restore Default Ambient Sensor Value Setup Wizard Auto Backlight Floor Software Update Backlight Sensor Floor Lock Menu This menu manages Lock functions including: System Lock Change Password (Hotel Mode) Input Block ® All Rights Reserved. SkyVue... -
Page 31: Adjusting On-Screen Displays - Channel Menu
Adjusting On-Screen Displays – Channel Menu 1. Press the buttons on the remote or CH+/CH- on the TV to move the cursor to the item to be selected. 2. Press the buttons on the remote or VOL+/VOL- on the TV to make the desired adjustments. 3. - Page 32 Channel No. item of the menu. The longer the horizontal bar appears, the better the signal strength. If the signal strength is extremely poor, no meter will appear and the menu will simply say Bad. ® All Rights Reserved. SkyVue...
-
Page 33: Adjusting On-Screen Displays - Picture Menu
Adjusting On-Screen Displays – Picture Menu 1. Press buttons on the remote or CH+/CH- (on the TV) to move the cursor to the item to be selected. 2. Press buttons on the remote or VOL+/VOL- (on the TV) to make the desired adjustments. 3. -
Page 34: Adjusting On-Screen Displays - Audio Menu
VOL+/VOL- on the TV to make the desired adjustments. 3. When adjustments are complete, press MENU or EXIT on remote or MENU on the TV to exit the main menu. ® All Rights Reserved. SkyVue... - Page 35 Equalizer Press the buttons to highlight Equalizer, then to select Standard, Music, Movie, Sports or Personal sound mode. 120 Hz Press the buttons to highlight 120 Hz, then to adjust the 120 Hz (bass) audio band. This adjustment is available only when Personal sound mode is selected.
-
Page 36: Adjusting On-Screen Displays - Time Menu
VOL+/VOL- on the TV to make the desired adjustments. 3. When adjustments are complete, press MENU or EXIT on remote or MENU on the TV to exit the main menu. ® All Rights Reserved. SkyVue... - Page 37 Sleep Timer Press the buttons to highlight Sleep Timer, then use to select Off or 5, 10, 15, 30, 60, 90, 120, 180 or 240 minutes. The TV will turn off automatically after the selected time has elapsed. Time Zone Press the buttons to highlight the Time Zone adjustment, then use...
-
Page 38: Adjusting On-Screen Displays - Setup Menu
CC Mode submenu shown at left. Pressing will now select among the three closed caption modes: Off, On and CC on Mute. The last option shows captions only when mute is activated. ® All Rights Reserved. SkyVue... - Page 39 Adjusting On-Screen Displays – Setup Menu (cont.) Advanced Selection Services When the CC Mode submenu is on-screen, press buttons to highlight Advanced Selection Services. Use to select Advanced Selec- tion Services Off or 1-6. Availability of these services depends on the TV program. Options When the CC Mode submenu is on-screen, press buttons to highlight Options.
-
Page 40: Adjusting On-Screen Displays - Lock Menu
Software Update (USB) This function is used to update the software on your TV. Consult SkyVue Outdoor TV for more information. Blue Screen Press the buttons to highlight the Blue Screen adjustment, then use to activate or deactivate the blue screen that appears when no signal is available at the selected input. - Page 41 (0000 unless you previously changed it), then enter the new password twice. If you enter a new password but forget it later, contact SkyVue Outdoor TV for assistance. Owner’s Manual - Model...
- Page 42 If an input is blocked, using it will require entering the system password. Canada RRT Setting Reset RRT These functions are not adjustable and are for service use only. ® All Rights Reserved. SkyVue...
-
Page 43: Sing The Usb I Nput
Using the USB Input Using the USB input on the rear panel of the TV, you can access material stored on a USB stick. The material can be MP3 or WAV music files, or JPEG or BMP pictures. The TV also has the ability to display the first few sentences of plain text (.TXT) documents, but because it shows only a few lines, this function is of very limited use. - Page 44 Listening to Music from the USB Stick to highlight the song you want to listen to, then press to play the song. The song will begin playing and a text screen that shows data about the file will appear. ® All Rights Reserved. SkyVue...
-
Page 45: T Roubleshooting
Trouble Solutions Check the following: Power cord is connected correctly. Power is turned on. The video cable is connected correctly. You have selected the proper input signal source. No picture If you have done the above, without resolve, unplug TV for at least 1 hour to perform Hard Reset. - Page 46 This is common to all LED screens used in display and television color products, and is not specific to SkyVue Outdoor TV’s. For more information, see SkyVue Outdoor TV’s’s Pixel Quality Policy in this manual. Switching a channel Different channels and inputs sometimes have this effect because the channel signal’s...
-
Page 47: Care Of Skyvue Outdoor Tv
(do not spray the solution directly on the panel) and gently clean the panel. A “special outdoor formula” LED Cleaning Kit is now available and can be ordered from SkyVue Outdoor When the TV is not in use, keep it covered with a Deluxe SkyVue Outdoor TV Cover: When the unit is not being used, the SkyVue team strongly recommends using the all weather protective cover. -
Page 48: Specifications
• All NXG-DS Series are equipped with an external air flow system allowing filtered air to assist in keeping vital components cool. • 2 Year Parts and Labor Warranty applies to all SkyVue NXG-DS Series Outdoor Televisions. 1) Satin Black, 2) White, 3) Dark Brown, 4) Slate Gray, 5) Sandstone, 6) Mint Green, 7) Hunter Green, 8) Terra Copper, 9) Patriot Blue *All dimensions shown are for planning purposes only. - Page 49 • 2 Year Parts and Labor Warranty applies to all SkyVue C-NXG-DS Series Outdoor Televisions. 1) Satin Black, 2) White, 3) Dark Brown, 4) Slate Gray, 5) Sandstone, 6) Mint Green, 7) Hunter Green, 8) Terra Copper, 9) Patriot Blue *All dimensions shown are for planning purposes only.
-
Page 50: Tv Care & Policy Information
TV Care & Policy Information Extreme Climate Warning If temperatures below -24º F are expected, we recommend that you bring your SkyVue Outdoor TV inside to prevent damage to the LED screen. SkyVue Outdoor TV Pixel Quality Policy (Applicable to LED TVs sold within USA and Canada only.) SkyVue Outdoor TV LED screens are manufactured with rigorous standards to maintain optimal viewing. -
Page 51: Rs232 Control Codes
RS232 Control Codes Baud rate 38400 Baud Rate: 38400/ Bits: 8/ Parity: None/Stop Bit: 1 Command Code Sequence: A0 F0 55 FF <IR Code> <Check Sum> The time of the command sequence must be < 500 ms. The interval time of two continuous command sequences must be > 500 ms. Mute: A0 F0 55 FF 14 EB AV Input...
Need help?
Do you have a question about the NexGen Series and is the answer not in the manual?
Questions and answers