Jungheinrich WMT 210 Service Manual
Hide thumbs
Also See for WMT 210:
- Operating instructions manual (28 pages) ,
- Service manual (38 pages)

Subscribe to Our Youtube Channel
Related Manuals for Jungheinrich WMT 210

Summary of Contents for Jungheinrich WMT 210
- Page 1 Public Jungheinrich WMT 210/215 Service manual Seite 1 v1.0 30.05.2022 LS-Support-Interfaces@jungheinich.de...
-
Page 2: Table Of Contents
Behandlung und Entsorgung von Lithium-Batterien ..Error! Bookmark not defined. Leistungsdaten Netzteil ..........Error! Bookmark not defined. Type plate ........................7 WMT 210 ........................7 WMT 215 ........................7 Lieferumfang ......Error! Bookmark not defined. Mounting and Handling ............9 VESA75 Montage ...................... - Page 3 Ein-/Ausschalttaste ...................... 26 COM-Port Datenweiterleitung ........Error! Bookmark not defined. Adaptive Helligkeitsanpassung ........Error! Bookmark not defined. Jungheinrich Image: Windows Standard 10 IoT Enterprise 2019 LTSC ................. 29 Windows Updates (unter Windows 10) ............... 29 Vorinstallierte Drittanbieter-Software......Error! Bookmark not defined.
-
Page 4: Comments
Comments General Comments This manual is about administration and usage of the Jungheinrich truck terminals WMT 210 and 215, referred to in the following as device You can find further information for mounting, cabling and safety- relevant aspects in the separate available operation instructions. - Page 5 Public General Description Intended Use The device was specifically developed for use on forklift trucks in logistics and industrial environments. A further application area is in the production environment where the device is used for stationary vis- ualisation, control and operating/machine data collection. The device must be operated and stored under the following conditions: Temperature during operation -30°C to +50°C Temperature during storage...
- Page 6 Regarding conformity, please observe the information in the operating instructions enclosed with the device. The complete text of the EU declaration of conformity is available at the following Internet address: www.jungheinrich.com/declaration-of-conformity Warranty / repairs During the device warranty period, any repairs must only be performed by the manufacturer or by ser- vice personnel that has been authorised by the manufacturer.
-
Page 7: Type Plate
Public Type plate WMT 210 Description Feature number Production year and calendar week Serial number (also as barcode above) WLAN MAC address (also as barcode above) Input voltage and maximum power consumption Manufacturer WMT 215 Description Feature number Production year and calendar week... - Page 8 Public Scope of delivery Check that the contents of the packaging are intact: If you find any damage, the device must not be put into operation. Please contact the manufacturer immediately. Check the contents of the packaging for completeness with regard to your order: •...
-
Page 9: Mounting And Handling
Public Mounting and Handling WMT 210 WMT 215 VESA75 Interface VESA75 hole pattern according to illustration, position 4. Horizontal and vertical distance between the screw holes: 75 mm Thread: M6, torque: 8 Nm (recommended) Screw-in depth in the threaded bushings: max. 6 mm... -
Page 10: Wmt 210
Public Interface Overview WMT 210 Description Switch for autostart (OFF:ON) – standard: off Power supply (PE – 0 VDC – Ignition - +12 to +48 VDC) Grounding (PE) – 1,5mm² flat plug contact COM2 (RS232) COM1 (RS232) with optional 5V power supply on pin 9... -
Page 11: Wmt 215
Public WMT 215 Beschreibung Power supply (PE – 0 VDC – Ignition - +12 to +48 VDC) Switch for autostart (OFF:ON) – standard: off Connection for UPS (uninterruptible power supply) Optional: Connection socket (SMA female) for external GPS antenna Connection socket (RP-SMA male) for external WLAN antenna (activated via configuration center) Grounding (PE) –... -
Page 12: Zündung/Ignition
The two antennas for 2.4 and 5 GHz WLAN and Bluetooth are protected behind the two plastic covers on the back of the device. Avoid covering the antennas with metal parts during installation. WMT 210 WMT 215 The option "external antenna" deactivates the internal antenna at the rear right (2) and offers it exter- nally in the service slot via an R-SMA connector. -
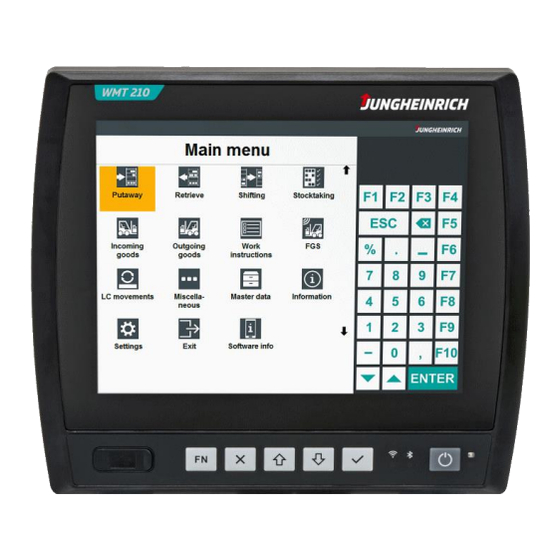
Page 13: Frontseitige Bedientasten
Public Start-up After the device has been connected to the voltage source and the service slot has been closed again, the device can be put into operation. When the device is switched on for the first time, it automatically starts the start-up wizard of the ope- rating system. -
Page 14: Windows Setup Wizard
Accept the Windows 10 licence agreement After completing the wizard, 2 reboots are performed and the final configuration scripts are run. Wizard Reset With the script "reset_image_for_customer" in the path C:\Program Files\Jungheinrich\ResetImage, the Windows Setup Wizard can be reset and restarted. Partitioning The devices are always equipped with a 64GB eMMC mass storage and optionally with an additional 128GB SSD. -
Page 15: Touch Kalibrierung
Public In the basic version, the 64 GB eMMC is partitioned as follows: 1. 37 GB - WINDOWS (C:) 2. 10 GB – DATA (D:) 3. 12 GB – Recovery partition 4. 0,25 GB – EFI system partition In the version with an additional 128GB SSD, the following partitioning is carried out: 1. -
Page 16: Configuration Center
Public Configuration Center The Configuration Center is used to configure the device-specific settings. It can be started via the Configuration Center desktop icon. Administrator rights are required to edit the settings. The following chapters describe the individual menu items of the Configuration Centre. All settings must always be saved via the diskette symbol at the top right before they become active. -
Page 17: Systeminformationen
Public System Information Displays detailed system-specific information, among other things: - System overview - BIOS version - Serial number - Model number - Image version - Network information - Hardware information Seite 17 v1.0 30.05.2022 LS-Support-Interfaces@jungheinich.de... -
Page 18: Ignition-Funktion
Public Ignition Key The device has the option of being started or locked by means of an additional signal input. The function serves to secure the system against unauthorised access and at the same time saves energy when used in battery-operated vehicles or mobile locations. Applying a voltage to the enable contact when the vehicle is switched off causes the device to switch on automatically. - Page 19 Public Wireless Connections Configuration of the WLAN and Bluetooth radio modules. Seite 19 v1.0 30.05.2022 LS-Support-Interfaces@jungheinich.de...
- Page 20 Public Backup and Restore Tools for backing up and restoring the operating system. A restore point is always stored on the recovery partition during both the backup process and the rein- stallation with the help of a boot USB stick. This can be installed at any time using the button "Start restore...".
- Page 21 Public On-Screen Keyboard Tool for configuring the soft keyboard. In addition to the on-screen keyboard integrated in Windows (osk.exe), another configurable on-screen keyboard is available. Standard layout of the on-screen keyboard: The following settings, among others, can be made for the on-screen keyboard via the Con- figuration Center: Input language / keyboard layout (alphanumeric / numeric) Display (colours / transparency)
-
Page 22: Interner Watchdog
Public Internal Watchdog Konfiguration des internen Watchdogs With the help of the watchdog, a "freeze" of the operating system can be detected and the system can react automatically with a restart or shutdown. Seite 22 v1.0 30.05.2022 LS-Support-Interfaces@jungheinich.de... -
Page 23: Fronttasten
Public Front buttons Configuration of the front buttons. Seite 23 v1.0 30.05.2022 LS-Support-Interfaces@jungheinich.de... -
Page 24: Usb-Port Sperre
Public USB port blocking NOTE Only the data connection is blocked. Charging of USB devices is still possible. Complete deactiva- tion of the front USB port is possible via the BIOS. To deactivate a USB port, mark the corresponding USB port and press the "Lock" button. Seite 24 v1.0 30.05.2022... -
Page 25: Unified Write Filter
Public Unified Write Filter UWF (Windows 10 IoT) is a Microsoft driver which, when activated (enabled), redirects all I/O operations on the hard disk and stores them in an intermediate cache in the working memory. If the device is restarted, all changes made in this cache are discarded. -
Page 26: Ein-/Ausschalttaste
Public 6.10 Ein-/Ausschalttaste Controls the behaviour when the power button is pressed. NOTE If the power button is pressed for longer than 5 seconds, the device is switched off hard, regardless of the configuration. These settings are permanently stored in the system controller of the device. Changing the power settings in the operating system for the power button has no effect on the behaviour. - Page 27 Public 6.11 Serial Port Wedge The Serial Port Wedge Tool interprets all incoming data as keyboard entries via the selected COM port. Optionally, a pre- or postcode can be configured, which should be transmitted before or after the input. Application example: Barcode scanner with serial port. NOTE Note that only one process can access a COM port at a time.
- Page 28 Public 6.12 Adaptive brightness and adjustment Default values according to illustration. Seite 28 v1.0 30.05.2022 LS-Support-Interfaces@jungheinich.de...
-
Page 29: Jungheinrich Image: Windows Standard 10 Iot Enterprise 2019 Ltsc
Public Jungheinrich Image: Windows Standard 10 IoT Enterprise 2019 LTSC The following settings differ from the standard Windows configuration: • Windows Remote Desktop (RDP) connections are activated for "Admin" and "User" users. • Automatic Windows updates are deactivated, please deactivate the write protection (UWF) in any case before activating the updates. -
Page 30: Bios
To start the BIOS setup menu, please press the DEL key (external keyboard) directly after switching on the device. The One-Time-Boot menu can be opened via the ESC key (external keyboard) or via the "X" front key when the Jungheinrich boot logo is displayed: "Enter Setup" starts the BIOS setup menu. Navigation in BIOS NOTE The assignment of the front keys in the BIOS differs from that in the operating system. - Page 31 Public Activating/deactivating interfaces The setup menu allows you to configure performance, hardware and interface properties. The settings are adjusted to the device ex works and should only be changed by experienced users. The following menu paths can be used to activate / deactivate selected interfaces: Interface Menu Default...
-
Page 32: Bootable Usb Wizard
- Administrative permissions - PC with Microsoft Windows 10 (or higher) - Bootable USB Wizard to create the installation USB stick: Download the current version of the "Bootable USB Assistant" from the Jungheinrich RDT support homepage: https://support-rdt.jungheinrich.com/support/ Run the wizard from the local PC and not from a network drive Creating the Boot USB Stick 1. - Page 33 Public 2. Confirm the welcome page with "Next". 3. Connect the USB stick to the computer and select the USB stick to be used from the drop-down menu. Then select the image file to be installed on the device. 4. Continue with "Next" and check the settings before completing the process with "Finish". The USB stick is then formatted and prepared for installation.
- Page 34 Public Booting from the installation USB stick Before switching on the device, connect the installation USB stick to one of the USB ports. Switch on the device and start the One-Time-Boot menu using the "ESC" key (alternatively front key "X") and select the USB stick.
-
Page 35: Change History
Public Change history Date Description Version 30.05.2022 First Version Seite 35 v1.0 30.05.2022 LS-Support-Interfaces@jungheinich.de...
Need help?
Do you have a question about the WMT 210 and is the answer not in the manual?
Questions and answers