Subscribe to Our Youtube Channel
Summary of Contents for Raymarine LifeTag System
- Page 1 87064_1.book Page 1 Thursday, April 6, 2006 2:38 PM LifeTag System Installation & Commissioning Guide Document reference: 87064-1 Date: April 2006...
- Page 2 Important Information WARNING:LifeTag System The Raymarine LifeTag system is only an aid to crew safety, and must not be relied upon as the vessel's main crew safety system. It is the responsibility of the Captain and all crew members to ensure that all safety instructions and procedures are in place and obeyed in accordance with local requirements.
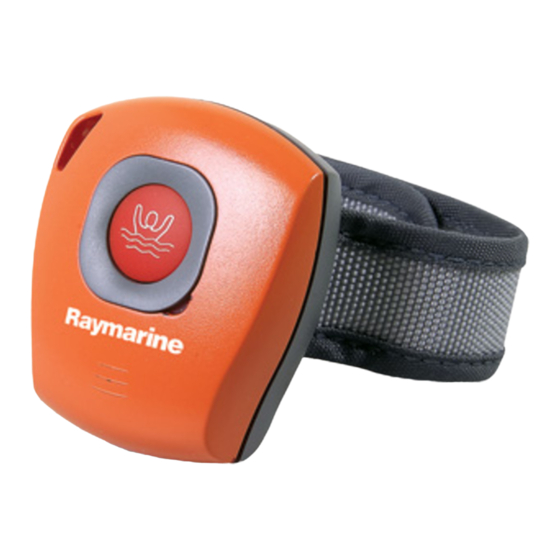
- Page 3 87064_1.book Page 1 Thursday, April 6, 2006 2:38 PM LifeTag Installation & Commissioning Guide Getting Started Base Station Straps x2 Buzzer, bracket and fixing screws x2 CR2 3V lithium Tags x2 batteries x2 SeaTalk cable Self-tapping screws x2 Cable ties Strap extensions x2 3ft (1 meter) Figure 1 - Parts supplied...
-
Page 4: Emc Installation Guidelines
Always use the ferrites supplied by Raymarine. D3548-6 Connections to Other Equipment If your Raymarine equipment is to be connected to other equipment using a cable not supplied by Raymarine, a suppression ferrite MUST always be attached to the cable near the Raymarine unit. EMC Conformance Always check the installation before going to sea to make sure that it is not affected by radio transmissions, engine starting etc. - Page 5 LifeTag Installation & Commissioning Guide Connecting Base Station The LifeTag system Base Station has to be connected to a 12 V dc power source and to the Alarm Buzzer: • Temporary connections are required to enable an initial site survey to be carried out.
- Page 6 87064_1.book Page 4 Thursday, April 6, 2006 2:38 PM LifeTag Installation & Commissioning Guide Connecting Base Station to SeaTalk Important: Ensure that the 12 V supply on the SeaTalk bus is protected by a 5 A fuse. SeaTalk bus D8976-1 Figure 5 - Base Station connection to SeaTalk Compatibility with other Seatalk Products If the LifeTag Base Station is connected to a Seatalk system which includes a SeaTalk chartplotter and...
- Page 7 87064_1.book Page 5 Thursday, April 6, 2006 2:38 PM LifeTag Installation & Commissioning Guide Connect Alarm buzzer Base Station Fit cable tie Alarm buzzer D9007-1 Figure 7 - Alarm buzzer connections Connect switched 12 V output (optional) The switched 12 V output can be used to automatically trigger appropriate emergency systems, when a MOB event occurs.
-
Page 8: Site Survey
, below. No alarm If no alarms are initiated during the site survey, the LifeTag system is operating satisfactorily with the Base Station at its current location. Switch off the power, then permanently install the Base Station at Fitting procedures that location, as detailed under , below. - Page 9 Figure 9 - Using two Base Stations 4. With both Base Stations powered up, carry out a site survey as described above. If on-board alarms still occur, please contact Customer Support at www.Raymarine.com for advice and assistance. If no alarms are initiated, switch off the power, then permanently install each Base Station at the...
-
Page 10: Base Station
87064_1.book Page 8 Thursday, April 6, 2006 2:38 PM LifeTag Installation & Commissioning Guide Fitting procedures When you are satisfied that your LifeTag system will give satisfactory coverage aboard your boat: Figure 10 Figure 11 Fig- • Fit and connect the Base Station and Alarm buzzer, as described in... - Page 11 87064_1.book Page 9 Thursday, April 6, 2006 2:38 PM LifeTag Installation & Commissioning Guide Locating Securing Mark holes for fixing screws. Drill two inch (3.5 mm) pilot holes. Countersink the pilot holes to prevent Secure the safety alarm with the damage to the mounting surface.
- Page 12 Do NOT use any Tag that has not been registered. Procedure A standard LifeTag system is supplied with two Tags. These are pre-registered with the Base Station, so if you are using only these two Tags, you can proceed with the commissioning procedure as follows: 1.
- Page 13 87064_1.book Page 11 Thursday, April 6, 2006 2:38 PM LifeTag Installation & Commissioning Guide 2. Check each Tag to ensure the LED indicator briefly flashes GREEN once every 10 seconds, Flash GREEN to indicates that the Tag is ACTIVE. If a Tag is not active, press and release the push button to activate the Tag.
- Page 14 Tag registration & de-registration Registering a Tag Tags supplied with a Base Station as part of a LifeTag system, are factory-registered with the Base Station so you do not have to carry out a registration procedure with these. However, if you have obtained a Tag separate from your Base Station (e.g. if you have bought an extra Tag), IT WILL NOT WORK WITH YOUR BASE STATION until you have registered the Tag with the Base Station.
- Page 15 87064_1.book Page 13 Thursday, April 6, 2006 2:38 PM LifeTag Installation & Commissioning Guide REGISTRATION COMPLETE 5. Wait for registration to complete. This is indicated by GREEN indicator flashing briefly once every 10 seconds. The Tag is now active (i.e. in normal oper- GREEN Flashes ating mode) and will initiate an alarm condition in the (Tag active)
-
Page 16: Specification
FCC rules and void the user's authority to operate the equipment. Declaration of Conformity Raymarine UK Ltd. hereby declares that the LifeTag and LifeTag Base Stationare in compliance with the essential requirements and other relevant provisions of the R&TTE Directive 1999/5/EC.


Need help?
Do you have a question about the LifeTag System and is the answer not in the manual?
Questions and answers