Advertisement
Quick Links
Advertisement

Related Manuals for Elation PROTEUS RAYZOR BLADE L


Summary of Contents for Elation PROTEUS RAYZOR BLADE L
- Page 1 P R O T E U S ™ RAYZOR BLADE L user manual...
- Page 2 Elation Professional B.V. | Junostraat 2 | 6468 EW Kerkrade, The Netherlands +31 45 546 85 66 | +31 45 546 85 96 fax | www.elationlighting.eu | info@elationlighting.eu Elation Professional Mexico | AV Santa Ana 30 | Parque Industrial Lerma, Lerma, Mexico 52000 +52 (728) 282-7070...
- Page 3 C O N T E N T S General Information Limited Warranty (USA Only) Safety Guidelines Overview Torque Settings for Screws Installation Guidelines System Menu Dimmer Curve Graphs Patching and FX Programming Guide DMX Traits: Main Fixture DMX Traits: RGB Pixels DMX Traits: Strobeline DMX Traits: Sparkled DMX Traits: Color Temperature...
- Page 4 IP65 Rated RJ45 DATA Cable (Fixture to Fixture Interconnect Use Only!) IP65 Rated Power Cable CUSTOMER SUPPORT Contact ELATION Service for any product related service and support needs. Also visit forums.elationlighting.com with questions, comments or suggestions. ELATION SERVICE USA-Monday-Friday 8:00am to 4:30pm PST 323-582-3322 | Fax 323-832-9142 | support@elationlighting.com...
- Page 5 ELATION. It is the Customer’s responsibility to provide product proof of purchase and serial number by acceptable evidence such as an invoice copy or an approved ELATION Ex- tended Warranty Certificate (“EWC”) and any relevant maintenance records at the time war- ranty service is sought.
- Page 6 This fixture is a sophisticated piece of electronic equipment. To guarantee a smooth operation, it is important to follow all instructions and guidelines in this manual. Elation Professional is not responsible for injury and/or damages resulting from the misuse of this fixture due to the disregard of the information printed in this manual.
- Page 7 S A F E T Y G U I D E L I N E S • DO NOT TOUCH the fixture housing during operation. Turn OFF the power and allow approximately 15 minutes for the fixture to cool down before serving. •...
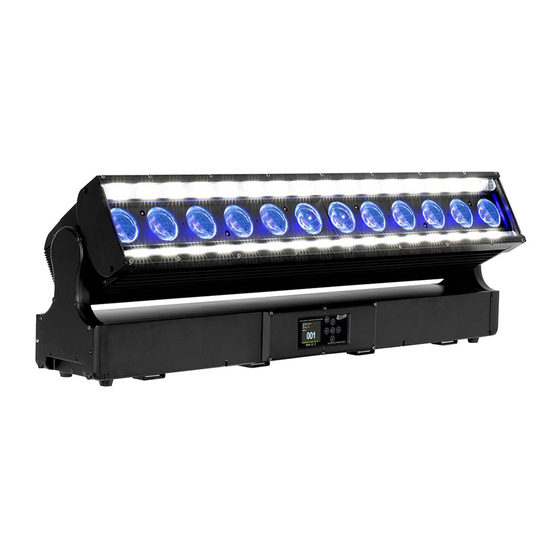
- Page 8 O V E R V I E W Lens Tilt Lock Carrying Handles LCD Display & System Menu Controls POWER IN 5-Pin DMX Out 5-Pin DMX IN RJ45 IN RJ45 OUT Gore Valve Safety Cable Anchor Point Omega Bracket...
- Page 9 Rear Head Cover Fan 14±1.4 CAUTION! DO NOT OVER TORQUE SCREWS AS THIS CAN CAUSE LEAKAGE ISSUES! TO CONFIRM THE IP65 INTEGRITY, TEST FIXTURE USING THE ELATION IP TESTER. CONTACT ELATION SERVICE FOR MORE DETAILS. Steady Minimum Maximum Time Tester...
- Page 10 INSTALLATION GUIDELINES FLAMMABLE MATERIAL WARNING Keep fixture minimum 5.0 feet (1.5m) away from flammable materials and/or pyrotechnics. ELECTRICAL CONNECTIONS A qualified electrician should be used for all electrical connections and/or installations. MINIMUM DISTANCE TO OBJECTS/SURFACES MUST BE 3.2 FOOT (1.0 METERS) MINIMUM DISTANCE OF INFLAMMABLE MATERIALS FROM THE SURFACE 3.2 FEET (1.0 METER) MAXIMUM AMBIENT TEMPERATURE 194°...
- Page 11 INSTALLATION GUIDELINES TILT-LOCK To lock, press the Tilt-Lock Button until it clicks. To Unlock, press the Limiting-Plate to the right until the Tilt-Lock button pops up. FROST-FILTER 1. Loosen the screws on both sides of the Frost-Filter Baffle and lift it away as shown below. 2.
- Page 12 I N S TA L L AT I O N G U I D E L I N E S OMEGA BRACKETS WITH CLAMP INSTALLATION Insert the Omega Brackets into the matching holes on the bottom of the fixture. Secure the Omega Brackets to the fixture by turning each quick-lock fastener ¼...
- Page 13 I N S TA L L AT I O N G U I D E L I N E S RIGGING Overhead rigging requires extensive experience, including among others, calculating working load limits, installation material being used, and periodic safety inspection of all installation material and the fixture.
- Page 14 INSTALLATION GUIDELINES ART-NET | sACN CONNECTION When connecting fixture to a network switch to control multiple devices, a Gigabit Ethernet Switch that supports IGMP (Internet Group Management Protocol) is required. Using a Gigabit Ethernet Switch that does not support IGMP can cause erratic behavior of all connected devices to the switch.
- Page 15 I N S TA L L AT I O N G U I D E L I N E S POWER AND DATA CABLES ENSURE ALL CONNECTIONS AND ENDCAPS ARE PROPERLY SEALED WITH DIELECTRIC GREASE (AVAILABLE AT MOST ELECTRICAL SUPPLIERS) TO PREVENT WATER CORROSION AND/OR ELECTRICAL SHORT CIRCUIT.
- Page 16 LEDs. This issue is not specific only to ELATION lighting fixtures, it is a common issue with lighting fixtures from all manufacturers. Although there is no true way to fully prevent this issue from happening, the guidelines below can prevent any potential damage from occurring if followed.
- Page 17 S U N P R O T E C T I O N M O D E The fixture incorporates an automatic protection from harmful sunlight, which can damage a fixture’s internal components from extended exposure. Fixtures use an internal sensor to determine their physical orientation, then reorient the fixture towards the ground to prevent sunlight from entering the lens.
- Page 18 S YS T E M M E N U The fixture includes an easy to navigate system menu. The control panel (see image below) located on the front of the fixture, provides access to the main system menu and is where all necessary system adjustments are made to the fixture.
- Page 19 S YS T E M M E N U ELATION PROTEUS RAYZOR BLADE L MAIN MENU OPTIONS / VALUES (Default Settings in BOLD) DESCRIPTION Set Dmx Address A001~AXXX DMX Address Setting Dmx Value ALL…… DMX Value Display Function Secondary Mode...
- Page 20 S YS T E M M E N U ELATION PROTEUS RAYZOR BLADE L MAIN MENU OPTIONS / VALUES (Default Settings in BOLD) DESCRIPTION Celsius Temperature C/F Temp C/F Fahrenheit TILT=XXX Initial Status Initial effect position ..DMX Only Select Signal...
- Page 21 S YS T E M M E N U FUNCTION-Auto Program Define fixture mode (Primary or Alone) for running Auto Programs. Select desired internal programs under “Select Program”, set the number of steps under “Edit program”, and edit individual scenes under “Edit Scenes”. PERSONALITY-Status Settings-Address Via DMX When ON, define the desired DMX address via an external controller.
- Page 22 S YS T E M M E N U ONLY QUALIFIED TECHNICIANS SHOULD PERFORM THIS FUNCTION! NOTE: SAVED WHITE BALANCE IS ERASED AFTER A RESET IS PERFORMED! This function restores all fixture settings to the factory default settings. The password is 011 and must be entered each time a reset is performed.
- Page 23 S YS T E M M E N U EDIT PROGRAM-Record Controller-Working With Built-In Programs A Primary unit can send up to 3 different data groups to the Secondary units, i.e. a Primary unit can start 3 different Secondary units, which run 3 different programs. The Primary unit sends the 3 program parts in a continuous loop.
- Page 24 S YS T E M M E N U EDIT PROGRAM-Record Controller-Working With Built-In Program [continued] Example: Program 2 includes scenes: 10, 11, 12, & 13 Program 4 includes scenes: 8, 9, & 10 Program 6 includes scenes: 12, 13, 14, & 15 Auto Pro Part 1 is Program 2 Auto Pro Part 2 is Program 3 Auto Pro Part 3 is Program 6...
- Page 25 D I M M E R C U R V E G R A P H S...
- Page 26 PAT C H I N G A N D F X P R O G R A M M I N G G U I D E The Proteus Rayzor Blade L is a versatile fixture that combines three unique fixtures into one chassis.
- Page 27 PAT C H I N G A N D F X P R O G R A M M I N G G U I D E FX Concept Selection and control of integrated FX on the Rayzor Blade are found in the Main, SparkLED and StrobeLine Parts.
- Page 28 PAT C H I N G A N D F X P R O G R A M M I N G G U I D E A full FX cycle is 360-degrees and the fixture allows offsets in 10 degree increments. Offsetting a fixture by 180 would mean it is exactly halfway ahead through the FX cycle.
- Page 29 D M X T R A I T S : M A I N F I X T U R E Features subject to change without notice MODE/CHANNEL FADE FIXTURE PIXEL VALUE FUNCTION DEFAULT STANDARD PIXEL EXTENDED STATUS CONTROL PLUS 28CH 76CH 188CH...
- Page 30 D M X T R A I T S : M A I N F I X T U R E Features subject to change without notice MODE/CHANNEL FADE FIXTURE PIXEL VALUE FUNCTION DEFAULT STANDARD PIXEL EXTENDED STATUS CONTROL PLUS 28CH 76CH 188CH...
- Page 31 D M X T R A I T S : M A I N F I X T U R E Features subject to change without notice MODE/CHANNEL FADE FIXTURE PIXEL VALUE FUNCTION DEFAULT STANDARD PIXEL EXTENDED STATUS CONTROL PLUS 28CH 76CH 188CH...
- Page 32 D M X T R A I T S : M A I N F I X T U R E Features subject to change without notice MODE/CHANNEL FADE FIXTURE PIXEL VALUE FUNCTION DEFAULT STANDARD PIXEL EXTENDED STATUS CONTROL PLUS 28CH 76CH 188CH...
- Page 33 D M X T R A I T S : M A I N F I X T U R E Features subject to change without notice MODE/CHANNEL FADE FIXTURE PIXEL VALUE FUNCTION DEFAULT STANDARD PIXEL EXTENDED STATUS CONTROL PLUS 28CH 76CH 188CH...
- Page 34 D M X T R A I T S : R G B P I X E L S Features subject to change without notice MODE/CHANNEL FADE FIXTURE PIXEL VALUE FUNCTION DEFAULT STANDARD PIXEL EXTENDED STATUS CONTROL PLUS 28CH 76CH 188CH PART/NAM CH140...
- Page 35 D M X T R A I T S : R G B P I X E L S Features subject to change without notice MODE/CHANNEL FADE FIXTURE PIXEL VALUE FUNCTION DEFAULT STANDARD PIXEL EXTENDED STATUS CONTROL PLUS 28CH 76CH 188CH PART/NAM CH140...
- Page 36 D M X T R A I T S : S T R O B E L I N E Features subject to change without notice MODE/CHANNEL FADE FIXTURE PIXEL VALUE FUNCTION DEFAULT STANDARD PIXEL EXTENDED STATUS CONTROL PLUS 28CH 76CH 188CH PART/NAM...
- Page 37 D M X T R A I T S : S PA R K L E D Features subject to change without notice MODE/CHANNEL FADE FIXTURE PIXEL VALUE FUNCTION DEFAULT STANDARD PIXEL EXTENDED STATUS CONTROL PLUS 28CH 76CH 188CH PART/NAM CH140 Strobe 0-31...
- Page 38 D M X T R A I T S : C O L O R T E M P E R AT U R E Color Color Color Temperature Temperature Temperature 2000 4700 7400 2050 4750 7450 2100 4800 7500 2150 4850 7550...
- Page 39 P I X E L L AYO U T S SparkLEDs StrobeLine Row 1: 1-12 Row 1: 1-32 Row 2: 13-36 Row 2: 33-64 Row 3: 37-48 SparkLEDs LEDs LEDs LEDs LEDs LEDs LEDs LEDs LEDs LEDs LEDs LEDs LEDs 1+37 5 2+38 8 3+39 11 4+40 14 5+41 17 6+42 20 7+43 23 8+44 26 9+45 29 10+46 32 11+47 35 12+48 13+14+ 15+16+...
- Page 40 R G B W P I X E L F X TA B L E Step Wave Sawtooth Ramp Up Ramp Down Sine Wave (Square) Wave Wave Wave Features subject to change without notice TYPE SLOT NAME FX ADJUSTMENT NOTES/STEPS Sinewave-Cross In and Out fade start at the same time (default)
- Page 41 R G B W P I X E L F X TA B L E Features subject to change without notice TYPE SLOT NAME FX ADJUSTMENT NOTES/STEPS...
- Page 42 R G B W P I X E L F X TA B L E Features subject to change without notice TYPE SLOT NAME FX ADJUSTMENT NOTES/STEPS Reverse, Stop, Forward Every Pixel Randomly picks a Red, Green, Blue 101 RGBW Cells or White on every step Reverse, Stop, Forward Every Pixel Randomly picks a Red, Green, Blue, 102 RGBWCMY Cells...
- Page 43 R G B W P I X E L F X TA B L E Features subject to change without notice TYPE SLOT NAME FX ADJUSTMENT NOTES/STEPS...
- Page 44 R G B W P I X E L F X TA B L E Features subject to change without notice TYPE SLOT NAME FX ADJUSTMENT NOTES/STEPS...
- Page 45 R G B W P I X E L F X TA B L E Features subject to change without notice TYPE SLOT NAME FX ADJUSTMENT NOTES/STEPS...
- Page 46 S PA R K L E D F X TA B L E Step Wave Sawtooth Ramp Up Ramp Down Sine Wave (Square) Wave Wave Wave Features subject to change without notice TYPE SLOT NAME FX ADJUSTMENT NOTES/STEPS Sinewave-Cross In and Out fade start at the same time (default) Sinewave-Full In fade completes, then out fade completes...
- Page 47 S PA R K L E D F X TA B L E Features subject to change without notice TYPE SLOT NAME FX ADJUSTMENT NOTES/STEPS...
- Page 48 S PA R K L E D F X TA B L E Features subject to change without notice TYPE SLOT NAME FX ADJUSTMENT NOTES/STEPS 101 Single Reverse, Stop, Forward 1,2,3,4,5,6,7,8,9,10,11,12 102 Single Bounce Reverse, Stop, Forward 1,2,3,4,5,6,7,8,9,10,11,12,11,10,9,8,7,6,5,4,3,2 1, 1+2, 1+2+3, 1+2+3+4, …, 103 Fill Row Reverse, Stop, Forward 1+2+3+4+5+6+7+8+9+10+11+12,...
- Page 49 S PA R K L E D F X TA B L E Features subject to change without notice TYPE SLOT NAME FX ADJUSTMENT NOTES/STEPS 151 Out disabled 1+2+11+12 152 Mid disabled 3+4+9+10 153 Center disabled 5+6+7+8 154 Set 1 disabled 155 Set 2 disabled...
- Page 50 S PA R K L E D F X TA B L E Features subject to change without notice TYPE SLOT NAME FX ADJUSTMENT NOTES/STEPS Row 1 disabled Row 2 disabled Row 3 disabled Column 1 disabled Column 2 disabled Column 3 disabled Column 4...
- Page 51 S T R O B E L I N E F X TA B L E Step Wave Sawtooth Ramp Up Ramp Down Sine Wave (Square) Wave Wave Wave Features subject to change without notice TYPE SLOT NAME FX ADJUSTMENT NOTES/STEPS Sinewave-Cross In and Out fade start at the same time...
- Page 52 S T R O B E L I N E F X TA B L E Features subject to change without notice TYPE SLOT NAME FX ADJUSTMENT NOTES/STEPS...
- Page 53 S T R O B E L I N E F X TA B L E Features subject to change without notice TYPE SLOT NAME FX ADJUSTMENT NOTES/STEPS 101 Single Reverse, Stop, Forward 102 Single Top / Bottom Reverse, Stop, Forward Top Row chases first, then bottom row 103 1/4 Reverse, Stop, Forward 104 1/4 Top / Bottom Reverse, Stop, Forward...
- Page 54 S T R O B E L I N E F X TA B L E Features subject to change without notice TYPE SLOT NAME FX ADJUSTMENT NOTES/STEPS...
- Page 55 S T R O B E L I N E F X TA B L E Features subject to change without notice TYPE SLOT NAME FX ADJUSTMENT NOTES/STEPS 191 Row 1 disabled 192 Row 2 disabled 193 Quarter 1 disabled 194 Quarter 2 disabled 195 Quarter 3...
- Page 56 S T R O B E L I N E F X TA B L E Features subject to change without notice TYPE SLOT NAME FX ADJUSTMENT NOTES/STEPS 237 Lens 1 disabled Strobe LEDs above and below the lens 238 Lens 2 disabled Strobe LEDs above and below the lens 239 Lens 3...
- Page 57 R E M O T E D E V I C E M A N A G E M E N T ( R D M ) NOTE: In order for RDM to work properly, RDM enabled equipment must be used throughout the entire system, including DMX data splitters and wireless systems.
- Page 58 E R R O R C O D E S When power is applied, the unit will automatically enter a “Reset/Test” mode. This mode brings all the internal motors to a home position. If there is an internal problem with one or more of the motors an error code will flash in the display in the form of “XXer”...
- Page 59 Regular inspections are recommended to insure proper function and extended life. There are no user serviceable parts inside this fixture, please refer all other service issues to an authorized Elation service technician. Should you need any spare parts, please order genuine parts from an authorized Elation dealer.
- Page 60 S P E C I F I C AT I O N S SOURCE (12) 60W Osram RGBW LEDs (48) 2W White SparkLED™ (256) 1W Strobe LED 50,000 Hour Average LED Life* *Test lab conditions. May vary depending on several factors including but not limited to: Environmental Conditions, Power/Voltage, Usage Patterns (On-Off Cycling), Control, and Dimming.
- Page 61 D I M E N S I O N S - F I X T U R E *Drawings not to scale. Specifications and improvements in the design of this unit and this manual are subject to change without notice.
- Page 62 D I M E N S I O N S - F I L *Drawings not to scale. Specifications and improvements in the design of this unit and this manual are subject to change without notice.
- Page 63 O P T I O N A L A C C E S S O R I E S ORDER CODE ITEM TRIGGER CLAMP Heavy Duty Wrap Around Hook Style Clamp SIP126 5 ft. (1.5m) IP65 Power Link Cable AC5PDMX5PRO 5 ft.
Need help?
Do you have a question about the PROTEUS RAYZOR BLADE L and is the answer not in the manual?
Questions and answers