
Related Manuals for Xirlink XVP-525

Summary of Contents for Xirlink XVP-525
- Page 1 C-it Digital Video PC Camera Model XVP-525 For Windows User's Guide Release 2.0 June, 1998 Xirlink, Inc.
- Page 2 Xirlink, Inc. The C-it logo is a registered trademark of Xirlink, Inc. Information is subject to change without notice and does not represent a commitment on the part of Xirlink, Inc. The software described is furnished under a licensing agreement. The software may be used or copied only in accordance with the terms of such an agreement.
-
Page 3: Table Of Contents
Introduction ..........................5 Welcome to the C-it Digital Video PC Camera for video media ..........5 What's In the Box ........................5 What You Need......................... 5 A Quick Look at C-it Digital Video Camera ................7 Hints for Taking Good Pictures ....................7 A Quick Look at C-it applications ..................... - Page 4 Using a Chat box........................43 Sending and Receiving Files While Conferencing ............... 44 To send a file to the other person: ..................44 Right Mouse Menu Shortcuts....................45 Right Mouse Menu on the Video Conference Center............45 Right Mouse Menu on the Local and Remote Windows ........... 45 C-it Video Album........................
-
Page 5: Introduction
Introduction Welcome to the C-it Digital Video PC Camera for video media The C-it with its high-quality digital Video Camera and software now makes video mail and videoconferencing easy. Whether you're sending video mail or videoconferencing over the Internet with someone in another part of the world, or on your business' network to a colleague in a building across town, the C-it delivers clear video and audio to your computer. - Page 6 Microsoft Internet Explorer (version 3.0 or later) and Microsoft NetMeeting (version 2.1 or later). Both Microsoft Internet Explorer and Microsoft NetMeeting are part of Windows OS. If your computer includes a complete installation of Windows OS, Internet Explorer and NetMeeting are already installed.
-
Page 7: A Quick Look At C-It Digital Video Camera
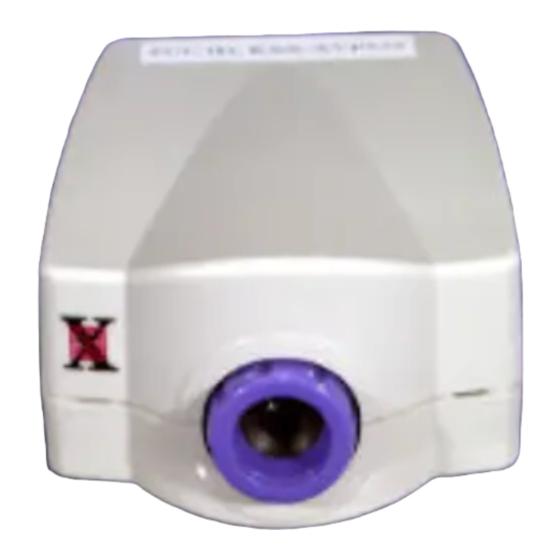
A Quick Look at C-it Digital Video Camera Power On Light Swivel Base USB cable Focusing Ring Rotate to focus the image Focus the Camera You focus the camera with the focus ring. Adjust the Monitor For best results you may need to adjust the computer monitor settings. With Windows running, double-click on the My Computer icon. -
Page 8: A Quick Look At C-It Applications
A Quick Look at C-it applications OpArt Video Mail With this application, you can capture a series of video clip as well as audio and then send it out to your recipient as a revolutionary new video mail. After OpArt_VM compression, a one minute video mail will only takes about 1MB of memory space. -
Page 9: C-It Video Album
C-it Video Album Take snapshots -- grab a frame of the video and save it as a cap*.bmp file in the photo album. Take captures – record motions and save it as a cap*.avi file in the photo album. Take video mail – record video and audio message and save it as a cap*.exe file in the photo album. -
Page 10: Installation
Installation Installing the C-it on your computer takes two steps: Install the software – make sure you install the software first before plugging in the C-it Digital Video PC Camera. Connect the C-it Digital Video Camera to a USB port Before You Begin Before you can send video email with OpArt Video Mail or videoconferencing with the C-it Video Conference Center, your computer must have all the necessary hardware and software to access the... -
Page 11: To Install The C-It Software
To install the C-it Software 1 Turn on your PC and start Windows95 or Windows98. 2 Insert the C-it CD into your CD drive. The Autorun starts and displays the initial screen. Click Install. 3 The installation procedure starts and you'll see the Welcome dialog box. Click Next. - Page 12 t NOTE: If the Autorun does not start, choose Run from the Windows Start menu. Assuming your CD drive is the D drive, type d:CitAutorun in the Run dialog box and click OK. If the CD is in some other drive type its letter instead, such as e:CitAutorun. 4 This dialog box show the Software Licensing Agreement.
- Page 13 6 The next dialog box shows where the C-it files will be installed. The C-it application files will be installed in the Destination Folder shown on the dialog box -- typically it will be C:\Program Files\C-it. Click Next if you want to save in the default folder. To install the C-it files in a different directory, click the Browse button to see the Choose Directory dialog box.
- Page 14 8 Click Next. 9 At this point, installation begins, and progress boxes show how the installation is proceeding. 10 After all the files are installed the following dialog box appears. Click Finish and that's it. You're now ready to connect the camera.
-
Page 15: To Connect The C-It Digital Video Camera
Between 9:00 a.m. and 6:00 p.m. Pacific Standard Time. While logged on to the Internet, you can 1. Connect directly to our home page at http://www.xirlink.com 2. Connect directly to our product site at http://www.citnow.com 3. Contact our technical support at techsupport@xirlink.com... -
Page 16: Opart Video Mail
OpArt Video Mail This Chapter explains how to compose video mail and send it out over the Internet Service Provider. Using OpArt Video Mail Double click on the OpArt Video Mail icon to open this application When start OpArt Video Mail, if you don’t have sound card previously installed, you will get the following message: Click OK if you want to continue without audio device, or Cancel if you want to go back to install the device first before using the application. - Page 17 Preview This button will become active once you have recorded a message. Click on this button to view and listen to your newly recorded message. Send This button will become active once you have recorded a message. Click on this button to send the mail out if you are satisfied with what you saw in Preview.
- Page 18 Capture Frame Rate – You can select different frame rates per second for the video capturing. The more the frames per second, the more lifelike video you will get. But this will also increase the mail size that takes the recipient longer time to download. Video Compression Quality –...
-
Page 19: Sample Of Using The Opart Video Mail Application
Sample of using the OpArt Video Mail Application Sending site 1. Capturing the mail Click here to capture your mail. Make sure you speak nice and clear into the microphone. Click here to stop the capture when you finish. 2. After clicking Stop, notice now the OpArt is doing the compress for your video and audio. - Page 20 3. Previewing the video mail you just capture After compression, all the buttons are now enabled. Click here to view the mail you have just recorded. The playback will show, you can check the quality of the video and audio. This is the exact the same quality with receiving side’s playback.
- Page 21 4. Sending the video mail if you are satisfied Your default E-mail composer will open and allow you to type in the recipient’s E-mail address and subject. Click here to Send. This will open up your default E-mail carrier. Here is just a sample of Microsoft Outlook E-mail system: Click here to send Type in the E-mail address of the one(s)
- Page 22 5. Saving the video mail if you want keep it Click here to save your recorded mail to Album. Notice that after you click this button, it will gray out which indicates this recording has been saved. Receiving site 1) Open the mail from your E-mail carrier Double click on the mail...
- Page 23 2) Open the OpArt_VM.exe from the incoming mail 3) Choose the opening method Click to cancel Click to proceed Save mail to disk Open mail without saving...
- Page 24 4) The OpArt_VM.exe will play back by Microsoft Time control bar Microsoft movie playback control Click to stop playback or rewind Click to play or pause the playback 5) Close the OpArt_VM playback window Click here to close Click here to link this window to our home page...
-
Page 25: C-It Video Camera
C-it Video Camera The C-it Video Camera application provides a complete set of options for using the camera to take quality snapshots and videos. To open the Video Camera window: Double-click the icon, C-it Video Camera. The Video Camera window opens and shows the image that your camera sees. From Left to Right: 1. -
Page 26: To Capture Video Clips
To capture video clips: 1 Point the camera at the action. 2 Click the Capture button on the Video Camera window. The video begins recording and is captured on your computer's hard drive. Notice the Capture button changes to Stop in Figure 2. To stop recording, click the Stop button. -
Page 27: To Open The Video Album
t TIP: Limit the length of the video sequences to a few seconds. Long video sequences can take a lot of space on the hard drive. For example, thirty seconds of video captured in Camera application needs about 10 megabytes of hard disk space. To open the Video Album: Click on the Album button on the Camera window. -
Page 28: Adjusting The Video
Adjusting the Video The C-it Digital PC Video Camera software has video settings to provide the best quality of the video media application. These settings are available from the C-it Video Camera window. To display the video settings: 1 Click the C-it Video Camera icon to open the Video Camera window. 2 Click the Options button on the window. -
Page 29: General Settings
General Settings The General tab will be selected when the Options dialog box opens. Zoom -- These options determine how the image window will resize when you click the Maximize button on the Video Camera window. • Maximize to full screen -- The video image will fill the computer's screen, just like a television set. -
Page 30: Image Format
Image Format The Image Format settings control the image size, number of bits used to process the image, and the format of processing (such as YV12). Use scroll bar to see all the supported formats and select the one you want Check this box if your system hangs frequently while running the C-it applications Check this box if your graphic card does not... -
Page 31: Video Quality
Video Quality With the video quality settings you can adjust the image to get the best possible video on your computer screen. Video Compression -- As video captured by camera, you want to send it as a displayable file, not as raw data. - Page 32 the camera "stays open" for so long that moving objects will be blurred. You'll probably have to experiment with this setting to find the best one for different lighting conditions. If the image is: white or washed out -- drag the slider to the left to decrease the light. dark or almost black -- drag the slider to the right to let in more light.
-
Page 33: C-It Video Conference Center
C-it Video Conference Center This chapter explains how to videoconference over the Internet or an Intranet with the C-it software. Getting Started Before starting, inform everyone participating in the videoconference when it will begin. Each participant must be logged on to the Internet (or company Intranet), and have a camera and videoconferencing software up and running. -
Page 34: Calling Options
To give the conference a name, such as Design Meeting 9/30, enter it into the Conference Name text box. This is optional. 4 Click the Call button. The C-it Video Conference Center software now dials the number and makes the call. You don't have to worry about any connections. -
Page 35: Window Control Buttons And Features
IP Address -- An IP address is the numerical address of a server registered on the Internet. An IP address format is 123.456.789.00. Machine Name -- This option is normally for use with local area networks or an Intranet within a company. -
Page 36: Adjusting Settings While Conferencing
Adjusting Settings While Conferencing Adjusting the Audio The two Audio sliders on the Video Conference Center control the microphone sensitivity and speaker volume. Drag the sliders to the left and right to adjust the audio. To mute the microphone or speakers, click the round buttons. -
Page 37: Adjusting Window Size
3 Select options for the video. Send Image Size -- The smaller the image size, the less data that has to be transmitted and therefore the smoother the video motion. Click Small if the video motion is jerky. Then, on the Local window itself, click the reduce button to set the window to be is as small as possible. -
Page 38: Working While Conferencing
2 To start sending or receiving video again, click the Preview button on the Local or Remote window. You can also pause the video using the right mouse menu on the Conference Center. Working While Conferencing Seeing each other while you talk may be all the videoconferencing that you want to do. But the C-it software offers many more features to help you get the most out of videoconferencing. - Page 39 A list of the applications and windows already open on your computer appears on the pop-up menu. 3 Select the application that you want to share. In the example, Microsoft PowerPoint is selected. t TIP: Make sure the application is not minimized when you select it from the list. If it's minimized, the other conference participants will only see the application's minimized icon.
-
Page 40: Collaborating On Work
Collaborating on Work Collaborating means that other people in the videoconference can actually edit or make changes to the application and file running on your computer. it's like having that person sitting at your computer and working at your keyboard. The others participants do not need to have the application installed or open on their computers. -
Page 41: Take A Snapshot
As soon as You're finished working collaboratively, save the file so you Don't lose the changes. Take a Snapshot A snapshot takes a picture of the video image. You can take the snapshot from the Local camera, or from the Remote camera. To take a snapshot: 1 Click the Snapshot button on the Remote Window to take a picture from the other person's camera. -
Page 42: Working On The Whiteboard
Working on the Whiteboard The Whiteboard during a videoconference is like a white board in a conference room except it appears on everyone's computer screen. Typically you use it to display graphics already saved on your computer. To use the Whiteboard: 1 Click the Whiteboard button. -
Page 43: Using A Chat Box
Using a Chat box In addition to communicating with audio, you can communicate with one or more people on line using a chat box. To use a chat box during a videoconference: 1 Click the Chat button on the Video Conference Center. The Chat box appears. -
Page 44: Sending And Receiving Files While Conferencing
Sending and Receiving Files While Conferencing You can send and receive files at the same time You're videoconferencing. To send a file to the other person: 1 Select the Person's name in the Video Conference Center. 2 Click the SF button on the Video Conference Center. A dialog box appears so you can select the file to send. -
Page 45: Right Mouse Menu Shortcuts
Right Mouse Menu Shortcuts Clicking the right mouse menu on the various windows displays shortcuts for several features. Right Mouse Menu on the Video Conference Center 1 Put the pointer on one of the names of the participants in the conference and click and hold down the right mouse button. - Page 46 Copy -- equivalent to clicking the Snapshot button on the window. Pause -- equivalent to clicking the Stop button on the window. Always on Top -- keeps the window on top of all other windows on your screen. Window Size -- shows a popup menu with window enlargement options. The one with the dot next to it is the current window enlargement factor.
-
Page 47: C-It Video Album
C-it Video Album This section describes the C-it video album and its controls. The C-it Video Album folder is a storage place for your video clips, video mails, and snapshots. The album holds three types of files: video mails – self-executable files which are series of motion pictures with audio; their names end with .exe (which could be run with no other additional software required). -
Page 48: Playing Back An Exe File From Album
Playing Back an exe file from Album 1 Click the captured exe file icon on the album to select it. 2 Choose Open from the View menu. You can also just double click on the icon itself. Then the OpArt Player will play the video mail. Here is an example of the playback window: Time control bar Microsoft movie playback control... -
Page 49: Seeing A Snapshot
Seeing a Snapshot 1 Click the snapshot's icon on the album to select it. 2 Choose Open from the View menu. You can also just double-click on the snapshot's icon. Microsoft Paint opens so you can see the snapshot and edit it. t NOTE: If you have set up your computer to display .bmp files with another application, it will open instead. -
Page 50: Setting Video Album Options
Setting Video Album Options 1 Open the Video Album. 2 Choose Options from the View menu. The Album's Options dialog box appears. 3 Select the options you want for the album and click OK. Folder for Pictures -- The folder where you want to save snapshots and videos captured with the camera. -
Page 51: View Menu
Help Menu About -- Displays information about your C-it software. The About dialog box also displays the button, Connect to Xirlink, so you can quickly access the Xirlink Web Site. The Video Album Tool Bar The icons on the tool bar are shortcuts for the menu commands and other features. -
Page 52: Frequently Asked Questions
Frequently Asked Questions This section answers some of the most frequently asked questions about the C-it Video Camera, the OpArt Video Mail, and video conferencing in general. What does the USB stand for on my C-it Digital Video PC Camera? Universal Serial Bus. - Page 53 PC to operate. I already have an earlier version of the Xirlink software. How do I upgrade? Please visit the C-it Web page at www.Citnow.com and look for available upgrades.
- Page 54 How much memory does C-it require? Your computer will need at least 16 Mbytes of RAM in order to run C-it software. However, to guarantee stable work with other open applications, the computer should have 32 or more Mbytes of memory. Does C-it supports Windows NT? The current version NT 4.0 doesn’t support USB.
- Page 55 What is a ULS? ULS is short for User Location Service. Before ULS, people wanting to call someone over the Internet had to type in the other person's IP address which are long numbers like this: 207.215.121.99. The ULS was developed so you don't have to deal IP addresses any more. Instead, you can type in the person's name or e-mail address, and the ULS will find and enter the proper IP address for you.
- Page 56 What the file size will be if I capture 1 minute video mail? The video mail file size is depends on the time you capture and the motion of the video. The bigger the motion, the bigger the file’s size. If you capture 1 minute with talking only, the file size will be around .
- Page 57 using to place the call. If you still can't connect, check that the other person's hardware and software are compatible with the H.324/H.323 standards. If there are incompatibilities, you will not be able to communicate. Can I talk to more than one person at a time? Yes.
-
Page 58: Troubleshooting
Troubleshooting When installing the software you receive the message, "This product requires a Windows Problem: 95 version 4.00.950 B. C-it Digital Video PC Camera cannot be installed on your system since you have a different version of MS Windows." The C-it Digital Video PC Camera is available for several versions of Windows 95, Solution: Windows 98, and Windows NT. - Page 59 Unplug the camera and reboot the computer. When the system is up, plug in the camera again. The system should auto detect the camera and reload the drivers. The video window has flashing vertical or horizontal colored lines. Problem: The computer may be having problems processing the large amounts of data sent Solution: through it during a typical video capture sequence.
- Page 60 The light will come on when you run any of the C-it applications. Solution: There is no update files available on your home web page. Problem: Our upgrade drivers are located at ftp://xirlink.com and all the posting files will be Solution: updated without further notice.
- Page 61 Technical Specifications Digital Video Camera Specifications USB telephony peripheral compliant; up to 12 Mbps, Bi-directional, isochronous. No video capture card or power supply necessary C-it ViCEª (Video Compression Engine) built-in Built-in microphone for audio input; 8kHz, 16-bit audio Supports standard 352x288 (CIF), 352x240 (SIF), 320x240, 176x144 (QCIF), 160x120 and 128x96 (sub-QCIF) video formats.
Need help?
Do you have a question about the XVP-525 and is the answer not in the manual?
Questions and answers