
Related Manuals for LARTET DC-20 Series


Summary of Contents for LARTET DC-20 Series
- Page 1 USER MANUAL DC-20 and DC-21 Thermometer and hygrometer 1600K07M TETRALEC E.I. S.L.
-
Page 2: Table Of Contents
Content INTRODUCTION AND GENERAL CHARACTERISTICS ................. 1-1 1.1. Characteristics of the DC-20 and DC-21 displays ................1-2 1.2. Temperature and humidity sensor characteristics................1-2 1.3. Weight of the displays........................1-3 1.4. Dimensions of the DC-20 and DC-21....................1-3 1.4.1. - Page 3 4.1.1. Displays DC-20/X. Read values from the display ..............4-2 4.1.2. Displays DC-21/X. Send values to the display ................. 4-2 4.2. PROTOCOL MODBUS RTU - ASCII for RS-485 ................4-4 4.3. PROTOCOL MODBUS RTU - Word for RS-485 ................4-6 4.4.
-
Page 4: Introduction And General Characteristics
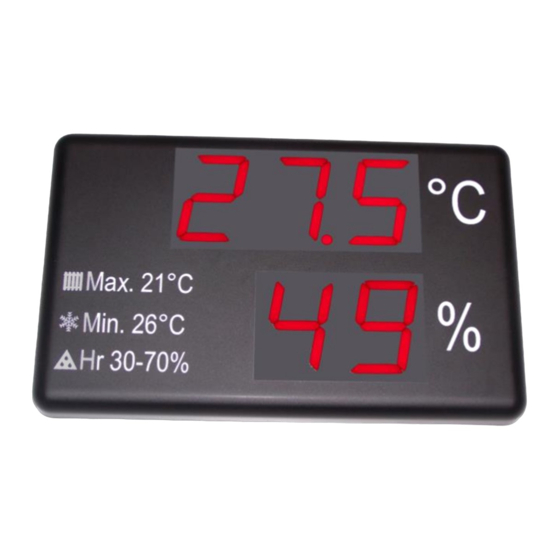
CHAPTER 1 INTRODUCTION AND GENERAL CHARACTERISTICS 1. INTRODUCTION AND GENERAL CHARACTERISTICS Numerical displays DC-20 and DC.21 are displays for the accomplishment of the Real Decreto 1826/2009, in the section relative to the temperature and humidity displaying in the public access locals with air-conditioning. DC-20 displays admit form 1 to 5 sensors, calculating the °C mean value of all them. -
Page 5: Characteristics Of The Dc-20 And Dc-21 Displays
CHAPTER 1 INTRODUCTION AND GENERAL CHARACTERISTICS 1.1. Characteristics of the DC-20 and DC-21 displays Supply Voltage........... 88 to 264 VAC 47 to 63Hz. Consumption DC-20S and DC-21S ..12VA. Consumption DC-20S and DC-21S ..24VA. Display ............7 segments, 100mm high + decimal point.............. -
Page 6: Weight Of The Displays
CHAPTER 1 INTRODUCTION AND GENERAL CHARACTERISTICS 1.3. Weight of the displays. The weight of the DC-20S and DC-21S is 5kg. The weight of the DC-20D and DC-21D is 7kg. 1.4. Dimensions of the DC-20 and DC-21. 1.4.1. Dimensions of the DC-20S and DC-21S. °C Max. -
Page 7: Display Mounting
CHAPTER 1 INTRODUCTION AND GENERAL CHARACTERISTICS 1.5. Display mounting 1.5.1. Mounting of the DC-20S and DC-21S. The DC-20S and DC-21S displays can be fixed to the wall in two ways: 1– Hanged. Place 2 of the supplied plug at 410mm from one to the other. Insert the screws leaving their head outside for 4mm. -
Page 8: Mounting Of The Dc-20D And Dc-21D
CHAPTER 1 INTRODUCTION AND GENERAL CHARACTERISTICS Screwed: PARED 1.5.2. Mounting of the DC-20D and DC-21D. The DC-20D and DC-21D displays must be hanged using the rings the display has. Cables or chains can be used The power cables and the sensor can be fixed to the mounting elements without tightening them. -
Page 9: Installation
CHAPTER 2 INSTALLATION 2. INSTALLATION The installation of the DC-20 and DC-21 is not particularly delicate but some important considerations must be taken into account. The display must not be anchored to places subject to vibrations, nor should it be installed in places which generally surpass the limits specified in the display characteristics, both in terms of temperature and humidity. -
Page 10: Serial Line Connection
CHAPTER 2 INSTALLATION 2.3. Serial line connection. The displays of the series DC-20X and DC-21X admit connection through the RS-485 line. The connection must be done using a DB9 connector placed in the interior of the display The connection schematic is the one that follows Plug RS-485 2.4. - Page 11 CHAPTER 2 INSTALLATION In the sensor placing must be avoided: 1. The air streams due to doors 2. Placing it in climate control systems outputs 3. Proximity to fridges 4. Walls with direct sunlight In case the sensor cable must be extended, the colours of the cables must be respected. The colour identification is = White MAR = Brown...
-
Page 12: Operation
CHAPTER 3 OPERATION 3. OPERATION. 3.1. Initial reset. Before connecting the display to the network, we must ensure that all of the connections have been carried out correctly and that the display is firmly in place. Each time we connect the display to the power supply network, an initial reset occurs which tests all of the segments comprising the display. -
Page 13: Modify Parameters Rs-485, Ethernet Or Wifi
CHAPTER 3 OPERATION 3.2.1. Modify parameters RS-485, Ethernet or Wifi. To modify the parameters the user must access the three programming keys placed on the top inside the display. See paragraph 3.1 to see how to access inside the display. The programmation keys are placed in the top of the displays. -
Page 14: Rs-485 Parameters
CHAPTER 3 OPERATION 3.3. RS-485 parameters. 3.3.1. Parameter 1 for RS-485: Address of the display. It allows to configurate the address of the display in the RS-485 network. Value between 0 and 99. 3.3.2. Parameter 2 for RS-485: Serial line configuration. The parameters of the serial line are codified in the following table: Code Baud Rate... -
Page 15: Parameter 3 For Rs-485: Sensor Control And Communication Protocol
CHAPTER 3 OPERATION 3.3.3. Parameter 3 for RS-485: Sensor control and communication protocol This parameter performs two functions Left digit: Sensor control 0-> Disable sensor information 1 -> Enable sensor information Right digit: Communication protocol, The user can select between the following protocols: 0: ASCII: Really simple protocol that uses ASCII characters 1: ModBus RTU-ASCII: This uses the ModBus protocol, but the temperature and humidity data are coded in ASCII in the same block. -
Page 16: Parameters Ethernet And Wifi
CHAPTER 3 OPERATION 3.4. Parameters Ethernet and Wifi. 3.4.1. Parameter 1 for Ethernet and Wifi: MAC address of the display. To know the MAC address, access parameter 1 and, using the “*” key, access the 3 last values of the MAC address. The first 3 numbers are always 00 -20 - 4A, so the first value displayed in the parameter is the 4 value of the MAC. -
Page 17: Communication Protocols
CHAPTER 4 COMMUNICATION PROTOCOLS 4. COMMUNICATION PROTOCOLS In this paragraph, the different protocols will be explained, as well as the programmation of the displays through them. The formats of values of the numbers and characters are written in this manual are: •... -
Page 18: Displays Dc-20/X. Read Values From The Display
CHAPTER 4 COMMUNICATION PROTOCOLS 4.1.1. Displays DC-20/X. Read values from the display To read the current values of the temperature and humidity, the following message must be sent: Header Address Code End of block Characters High Carry return Decimal 80d 84d Hexadecimal 50h 54h The address of the display is formed by 2 digits between 0 and 99... - Page 19 CHAPTER 4 COMMUNICATION PROTOCOLS Example: Data sent to the address 04. Temperature 18.6°C and relative humidity 47%. Header Address Code Temp Space End of block Characters 18,6 Carry return Decimal 49d 53d 86d 84d 49d 56d 44d 54d 52d 55d Hexadecimal 31h 35h 56h 54h...
-
Page 20: Protocol Modbus Rtu - Ascii For Rs-485
CHAPTER 4 COMMUNICATION PROTOCOLS 4.2. PROTOCOL MODBUS RTU - ASCII for RS-485 This protocol allows the user to communicate with devices that dispose of ModBus RTU protocol It uses the function 10h and the data block is in ASCII mode. The values can be read or sent. If the user wants to send the values to the display, the sensor must be disabled (see paragraph 3.3.3) To read the values from the display, the following command must be sent... - Page 21 CHAPTER 4 COMMUNICATION PROTOCOLS To write values in the display, the following message must be sent: Addr. Func. Register Register Words Words Num. High High bytes High CRC Data 25,3 56h 54h 32h 35h 2Ch 33h 34h 37h The first byte is the address of the display inside the network. The three following bytes must be 10h, 01h and 01h.
-
Page 22: Protocol Modbus Rtu - Word For Rs-485
CHAPTER 4 COMMUNICATION PROTOCOLS 4.3. PROTOCOL MODBUS RTU - Word for RS-485 This protocol allows the user to communicate with devices using the protocol Modbus RTU This protocol uses the function 06h to write and the function 03h to read data from the display. The data block is a Word. - Page 23 CHAPTER 4 COMMUNICATION PROTOCOLS Response block example. Temperature: 23,8ºC Addr. Func. Num. bytes Data Low CRC High CRC 00h EEh To read the humidity value, the data request must be sent to register 0003h (40004). In the following example, the data block structure is detailed for a humidity request. Start Start Num.
-
Page 24: Tcp/Ip, Udp/Ip Protocol
CHAPTER 4 COMMUNICATION PROTOCOLS 4.4. TCP/IP, UDP/IP PROTOCOL The display only accepts frames ending with a block ending it can see. (End of clock = Carry return = 0Dh) Local Port = 10001. 4.4.1. UDP protocol To use the UDP protocol, the communication port must be programmed with the default configuration To use UDP/IP, the Local Port must be 10001 UDP Datagram Mode... -
Page 25: Send Values To The Display. Displays Without Sensor
CHAPTER 4 COMMUNICATION PROTOCOLS 4.4.3. Send values to the display. Displays without sensor. To send the temperature and humidity values to a display without sensor, the following block must be sent Code Temperature Space Humidity End of Block Characters TT.T Carry return Decimal 86d 84d... -
Page 26: Modbus/Tcp Protocol
CHAPTER 4 COMMUNICATION PROTOCOLS 4-10 4.5. ModBus/TCP PROTOCOL The frame must accomplish the ModBus/TC specifications for being accepted by the display. 4.5.1. Modbus/TCP protocol End of block is not necessary. Local Port = 502. 4.5.2. Read data from the display To read the current temperature and humidity, the functions 03h or 10h must be used. -
Page 27: Send Temperature And Humidity
CHAPTER 4 COMMUNICATION PROTOCOLS 4-11 Function 10h Temperature and humidity can be read using the function 10h. In the frame, the following codes must be codified. Unit = 01h Function = 10h Start address = 00h 00h Start Num. Num. Identifier Protocol Unit... - Page 28 CHAPTER 4 COMMUNICATION PROTOCOLS 4-12 Function 10h mode ASCII Sending temperature and humidity using the function 10h. In the frame, the following codes must be codified. Unit = 01h Function = 10h Start address = 00h 00h Identifier Protocol Num. bytes Unit Function Start address...
-
Page 29: Ip Address. Ethernet Option
CHAPTER 4 COMMUNICATION PROTOCOLS 4-13 4.1. IP Address. Ethernet option Before being able to communicate with the display an IP address must be assigned. To assign an IP address the DeviceInstaller program from Lantronix must be used, which can be downloaded free from their website: www.lantronix.com Seleccione: Support &... -
Page 30: Udp/Ip Configuration
CHAPTER 4 COMMUNICATION PROTOCOLS 4-14 Enter your computer User Name and Password. To access the setup the Local Port, select Channel1->Connection. You will see a screen similar to the one above. In Local Port insert the new value and click OK on the bottom of the page. 4.2.1. -
Page 31: Ip Address. Wifi
CHAPTER 4 COMMUNICATION PROTOCOLS 4-15 4.3. IP address. Wifi. The easiest way to set up the IP address is by using the Hyperterminal program and the serial line of computer. The cable’s wiring diagram is the classic crossover. DB9 o SAP12 Hembra Hembra Ordenador... - Page 32 CHAPTER 4 COMMUNICATION PROTOCOLS 4-16 The attached Hyperterminal set up have been verified and work correctly, but any other set up may work also correctly. DC-20 and DC-21 operation manual...
-
Page 33: Accessing Wifi Module Configuration
CHAPTER 4 COMMUNICATION PROTOCOLS 4-17 To set up the Wifi module using the Hyperterminal or any other program, you must follow a time sequence. A time error on steps 5 and 6 forces to return to step 3. 4.3.1. Accessing Wifi module configuration In order to access to Wifi module configuration the next steps must be followed: 1–... - Page 34 CHAPTER 4 COMMUNICATION PROTOCOLS 4-18 6– At this time you have 3 seconds to push the Intro key on your keyboard. 7– The following screen is shown. DC-20 and DC-21 operation manual...
- Page 35 CHAPTER 4 COMMUNICATION PROTOCOLS 4-19 8– You must set up: 0 Server + Intro 4 WLAN + Intro Example of Server Set up Ask your network administrator the IP and Gateway address. Example of WLAN Set up Ask your network administrator the correct values To exit select 8 (Exit without save) or 9 (Save and exit).
-
Page 36: Set Up Ip Address Using The Deviceinstaller
CHAPTER 4 COMMUNICATION PROTOCOLS 4-20 4.4. Set up IP Address using the DeviceInstaller. Before being able to communicate with the display an IP address must be assigned. To assign an IP address the DeviceInstaller program from Lantronix must be used, which can be downloaded free from their website: www.lantronix.com Select: Support →... - Page 37 Severo Ochoa, 80 Polígono Industrial Font del Radium 08403Granollers As the builder of the equipment of the LARTET brand: Model: DC-20 in all versions. Model: DC-21 in all versions We declare under our sole responsibility that the aforementioned product complies with the following European directives: Directive: LVD 2006/95/CEE Low Voltage Directive.
Need help?
Do you have a question about the DC-20 Series and is the answer not in the manual?
Questions and answers