Table of Contents
Advertisement
RAD-010603
version:
Table of Contents
Introduction . . . . . . . . . . . . . . . . . . . . . . . . . . . . . . . . . . . . . . . . . . . . .2
What's in the Box . . . . . . . . . . . . . . . . . . . . . . . . . . . . . . . . . . . . . . . . .2
Radium Features . . . . . . . . . . . . . . . . . . . . . . . . . . . . . . . . . . . . . . . . . .2
An Overview . . . . . . . . . . . . . . . . . . . . . . . . . . . . . . . . . . . . . . . . . . . .3
A Guide to Getting Started . . . . . . . . . . . . . . . . . . . . . . . . . . . . . . . . .4
Hardware Installation . . . . . . . . . . . . . . . . . . . . . . . . . . . . . . . . . . . . . .4
Software Installation . . . . . . . . . . . . . . . . . . . . . . . . . . . . . . . . . . . . . . .4
USB Driver Installation for Windows . . . . . . . . . . . . . . . . . . . . . . .4
Windows 98 . . . . . . . . . . . . . . . . . . . . . . . . . . . . . . . . . . . . . . . . .5
Windows Me . . . . . . . . . . . . . . . . . . . . . . . . . . . . . . . . . . . . . . . . .5
Windows 2000 . . . . . . . . . . . . . . . . . . . . . . . . . . . . . . . . . . . . . . .6
Windows XP . . . . . . . . . . . . . . . . . . . . . . . . . . . . . . . . . . . . . . . . .6
Mac OS X . . . . . . . . . . . . . . . . . . . . . . . . . . . . . . . . . . . . . . . . . . .8
Setting Up Your MIDI Studio . . . . . . . . . . . . . . . . . . . . . . . . . . . . . . . . .9
MIDI Functions . . . . . . . . . . . . . . . . . . . . . . . . . . . . . . . . . . . . . .10
Standalone Mode . . . . . . . . . . . . . . . . . . . . . . . . . . . . . . . . . . . . .11
Default Settings . . . . . . . . . . . . . . . . . . . . . . . . . . . . . . . . . . . . . .11
Operation Panel Features . . . . . . . . . . . . . . . . . . . . . . . . . . . . . . . . . .12
The Data Entry Slider . . . . . . . . . . . . . . . . . . . . . . . . . . . . . .13
Assignable Sliders and Knobs . . . . . . . . . . . . . . . . . . . . . . . .14
Other Buttons and Keys . . . . . . . . . . . . . . . . . . . . . . . . . . . .15
Rear Panel Features . . . . . . . . . . . . . . . . . . . . . . . . . . . . . . . . . . . . . .17
Specifications . . . . . . . . . . . . . . . . . . . . . . . . . . . . . . . . . . . . . . . . . . .18
MIDI Implementation Chart . . . . . . . . . . . . . . . . . . . . . . . . . . . . . . . .19
Radium Warranty . . . . . . . . . . . . . . . . . . . . . . . . . . . . . . . . . . . . . . . .20
Appendix A - MIDI Controller Chart . . . . . . . . . . . . . . . . . . . . . . . . .21
Appendix B - Preset Banks . . . . . . . . . . . . . . . . . . . . . . . . . . . . . . . . .22
Radium Manual
. . . . . . . . . . . . . . . . . . . . . . . . . . . . . . . . . . . . . . . . . . .6
. . . . . . . . . . . . . . .10
. . . . . . . . . . . . . . . .13
Advertisement
Table of Contents

Related Manuals for M-Audio Radium


Summary of Contents for M-Audio Radium
-
Page 1: Table Of Contents
Radium Warranty ........ -
Page 2: Introduction
Introduction Congratulations on your purchase of the Radium, part of the USB Keystation series of MIDI controllers brought to you by M-Audio.You may use your Radium in conjunction with a USB equipped PC or Macintosh computer and appropriate music software to enter a full range of MIDI note and controller information. -
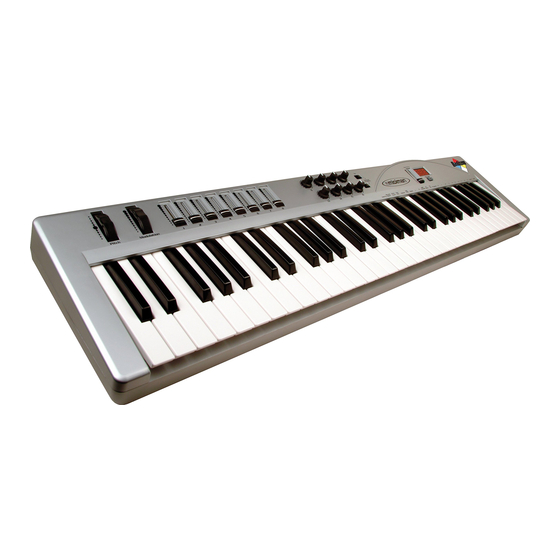
Page 3: An Overview
An Overview The Radium is a fully functional MIDI controller. Its touch-sensitive keys can be set to play any octave or transposed pitch, while the Radium’s pitch wheel, mod wheel and data slider with the addition of sixteen programmable rotary knobs and sliders make it the most versatile MIDI controller of its class. -
Page 4: A Guide To Getting Started
A Guide to Getting Started An outline of the steps needed to begin using your Radium on either a Mac or PC: 1. Attach the Radium to your computer (see “Hardware Installation”). 2. Install the Driver (see “Software Installation”). 3. Hook your sound module to the Radium (see “Setting Up Your MIDI Studio”). -
Page 5: Windows 98
Windows 98 1. Connect the Radium to your computer's USB port and power the Radium keyboard up to the USB power position. The computer will update its database as it looks for drivers. After doing so, your computer will identify the Keystation as a USB device. -
Page 6: Windows 2000
1. Insert the Keystation Drivers CD into your PC’s CD ROM drive. Connect the Radium to your PC's USB port and power the Radium keyboard up to the USB power position.The computer will update its database as it looks for drivers. - Page 7 Radium (either Modem or Printer). DO NOT choose a port (since we’re using USB), just click “Search.” OMS begins Searching. IMPORTANT: If the USB cable is not correctly hooked up to the Radium, or the Radium is not switched on, setup will fail.
-
Page 8: Mac Os X
2. Click on the lock icon and enter the administrator password you chose when you installed OSX. 3. Follow the prompts to install the software. Your Radium is ready for use. Refer to the sections “Setting Up Your MIDI Studio” and “Using the KEYSTATION in your Application Software” for more information. -
Page 9: Setting Up Your Midi Studio
3. The MIDI Output of the Radium is connected to the MIDI In of a sound module. The audio output of the sound module can be plugged directly into a sound system, or into a mixer, which is then connected to a sound system. -
Page 10: Using The Radium With Your Application Software
Using the Radium with Your Application Software Once the Radium driver has been installed, you will need to configure your MIDI application software to utilize the Radium. The manner in which this is done varies between applications, so we can just cover the basics here. -
Page 11: Standalone Mode
MIDI cable and use it to connect the MIDI OUT jack of your Radium labeled “Keyboard” to the MIDI IN jack of the other instrument. 1. Power up the Radium using a 9VDC adapter. Set the power switch to the the 9vDC setting. -
Page 12: Operation Panel Features
Operation Panel Features 1. Pitch Bend Wheel: The Pitch Bend wheel is used for raising or lowering the pitch of a voice during performance, starting from and always returning to a center “detent” point. The range of pitch values depends on the sound generator (sound card or module) being used. -
Page 13: Utilizing The Programming Assignment Keys
MIDI parameter commands. 8. Programming Assignments Keys: After pressing the MIDI/SELECT button, these keys on the Radium act as function keys which allow you to assign certain MIDI parameters and Program Change/MIDI Channel selections by the numbered key group. -
Page 14: Assignable Sliders And Knobs
MIDI devices.The default assignments for the sliders and knobs which load when the Radium is powered on have been selected in order to work well with General MIDI instruments. They are listed in the following table. -
Page 15: Other Buttons And Keys
MIDI CHANNEL Key: MIDI CHANNEL key, you select your keyboard’s transmitting MIDI channel.The default channel will be 1 when the Radium’s power is first turned on.To change this setting (for example, to set MIDI channel to Channel 2), do the following:... - Page 16 3. Press the “2” key, then the Enter key. Lastly, press the MIDI/SELECT button one more time (this will change the MIDI transmit channel from 1 to 2.) The Radium allows you to use the numeric keys instead of the Number Keys: DATA ENTRY slider to specify the Control Change parameter data.This is done...
-
Page 17: Rear Panel Features
Radium MIDI Out, and is used to send MIDI messages to another MIDI instrument (such as sound module). 4. USB Port - This USB connector jack is used to connect the Radium to the computer’s USB port using a standard USB cable (included). -
Page 18: Specifications
Specifications Model: Radium49 and Radium61 Keyboards Keyboard Type 49 or 61 dynamic keys Simultaneous Output 10 note (reverse priority) Control Switches Controller Knobs (8) Controller Sliders (8) MIDI Channel Reset Octave (-3, -2, -1, center , +1, +2, or +3) Program Change CC-00/CC-32 (GS Bank Selection) CC-No. -
Page 19: Midi Implementation Chart
MIDI Implementation Chart Model: Radium49 and Radium61 keyboards Function Transmitted Recognized Remarks Basic Channel Default Changed 1-16 Mode Default Mode 3 Messages Altered ************* Note Number 12-108 With Octave Change True Voice ************* Velocity Note ON Note OFF After Touch Key’s Ch’s Pitch Bender... -
Page 20: Radium Warranty
In the event that repair is required, a Return Authorization number must be obtained from M-Audio.After this number is obtained, the unit should be shipped back to M-Audio in a protective package with a description of the problem and the Return Authorization clearly written on the package. -
Page 21: Appendix A - Midi Controller Chart
Appendix A - MIDI Controller Chart Number Definition Parameter Bank Select 0-127 Modulation Wheel 0-127 Breath Control 0-127 Undefined 0-127 Foot Controller 0-127 Portamento Time 0-127 Data Entry 0-127 Channel Volume 0-127 Balance 0-127 Undefined 0-127 0-127 Expression Controller 0-127 Effect Control 1 0-127 Effect Control 2... -
Page 22: Appendix B - Preset Banks
MIDI Manufacturer’s Association standard referenced in this table.* *All synthesizers and modules are trademarks of their respective owners and these owners are in no way associated or affiliated with M-Audio. Other manufacturer’s trademarks are used here for the sole purpose of describing useful applications of...
Need help?
Do you have a question about the Radium and is the answer not in the manual?
Questions and answers