Table of Contents
Advertisement
Available languages
Available languages
Quick Links
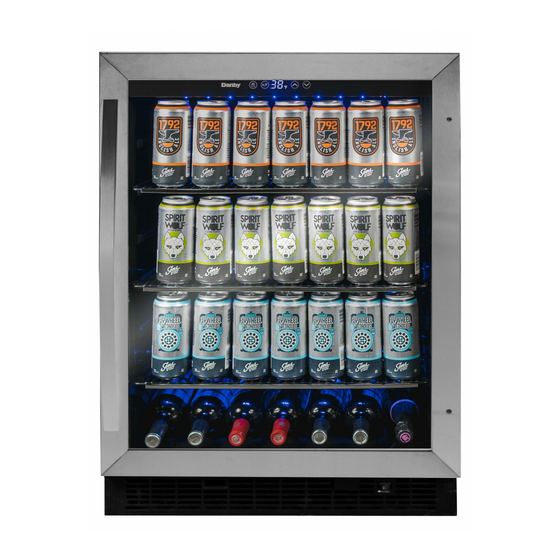
WINE COOLER
Owner's Manual.............................1 - 10
REFROIDISSEUR DE VIN
Manuel du propriétaire.................11 - 20
ENFRIADOR DE VINO
Manual del propietario.................21 - 30
www.Danby.com
*
*
DANBY PRODUCTS LIMITED, ONTARIO, CANADA N1H 6Z9
DANBY PRODUCTS INC., FINDLAY, OHIO, USA 45840
OWNER'S MANUAL
MANUEL DU PROPRIÉTAIRE
MANUAL DEL PROPIETARIO
MODEL • MODÈLE • MODELO
DBC057A1BSS
2022.01.20
Advertisement
Table of Contents

Related Manuals for Danby DBC057A1BSS


Summary of Contents for Danby DBC057A1BSS
- Page 1 Owner’s Manual......1 - 10 MODEL • MODÈLE • MODELO REFROIDISSEUR DE VIN Manuel du propriétaire....11 - 20 DBC057A1BSS ENFRIADOR DE VINO Manual del propietario....21 - 30 DANBY PRODUCTS LIMITED, ONTARIO, CANADA N1H 6Z9 www.Danby.com DANBY PRODUCTS INC., FINDLAY, OHIO, USA 45840 2022.01.20...
- Page 2 2. Visit www.Danby.com to access self-service tools, FAQs and much more by searching your model number in the search bar. 3. For the Quickest Customer Service, please fi ll out the web form at www.danby.com/ support. Your submission will go directly to an expert on your particular appliance.
-
Page 3: Read And Follow All Safety Instructions
Important Safety Information READ AND FOLLOW ALL SAFETY INSTRUCTIONS DANGER: Risk of fi re or explosion. Flammable This appliance is not intended for use by persons refrigerant used. Do not puncture refrigerant tubing. (including children) whose physical, sensory or mental capabilities may be different or reduced, •... -
Page 4: Leveling Instructions
INSTALLATION INSTRUCTIONS LOCATION LEVELING INSTRUCTIONS • Two people should be used when moving the There is an adjustable leg on the bottom of the appliance. appliance that can be turned up or down to ensure • Remove interior and exterior packaging prior to that the appliance is level. -
Page 5: Installation Instructions
INSTALLATION INSTRUCTIONS PREPARING THE ENCLOSURE Gloves and safety goggles should be worn during installation. It is not recommended to install the appliance into a corner or directly beside a wall. The door will need to be opened more than 90° to allow full extension of the shelves. If it is necessary to place next to a wall or in a corner, leave at least 2-4 inches (5-10 cm) of space between the wall and the appliance to allow for the door opening. -
Page 6: Control Panel
OPERATING INSTRUCTIONS FEATURES 1. Low-E Glass Door: Low-E glass used to refl ect and absorb heat. 2. Electronic Display and Controls: For viewing and regulating the temperature. 3. Magnetic Door Gaskets: Tight fi tting seals retain all the cooling power and humidity levels. 4. -
Page 7: Function Instruction
OPERATING INSTRUCTIONS FUNCTION INSTRUCTION DEFROST The default temperature setting is 54°F (12°C). This appliance is equipped with an automatic defrost function and does not require manual The default temperature scale is °C. defrosting. Defrost water from the appliance is channeled into a drip tray located above the Press the °C/°F button to change the temperature... -
Page 8: Door Reversal Instructions
OPERATING INSTRUCTIONS DOOR REVERSAL INSTRUCTIONS If the appliance is placed on its back or side for any length of time it must be allowed to remain upright for 6 hours before plugging in to avoid damage to internal components. 1. Remove the two screws that secure the right hinge axis to the lower right hinge. - Page 9 CARE & MAINTENANCE CLEANING MOVING Ensure the appliance is unplugged before cleaning. • Make sure the appliance is empty. • To clean the inside of the appliance, use a soft • Secure the shelves with tape. cloth and a solution of a tablespoon of baking soda to one quart of water or a mild soap •...
-
Page 10: Troubleshooting
TROUBLESHOOTING PROBLEM POSSIBLE CAUSE No power • A fuse may be blown or the circuit breaker tripped • Plug not fully inserted into the wall outlet Internal temperature not cold enough • Door is not shut properly or opened excessively Appliance runs continuously •... - Page 11 Nothing within this warranty shall imply that Danby will be responsible or liable for any spoilage or damage to food or other c...
- Page 12 1. Lisez votre manuel du propriétaire pour obtenir de l’aide à l’installation, au dépannage et à la maintenance. 2. Visitez www.Danby.com pour accéder aux outils en libre-service, aux FAQ et bien plus encore en recherchant votre numéro de modèle dans la barre de recherche.
-
Page 13: Instructions De Mise À La Terre
Consignes de sécurité importantes LIRE ET SUIVRE TOUTES LES INSTRUCTIONS DE SÉCURITÉ DANGER : Risque d’incendie ou d’explosion. Cet appareil n’est pas destiné à être utilisé par des personnes (y compris des enfants) dont les capacités Liquide frigorigène infl ammable utilisé. Ne pas physiques, sensorielles ou mentales peuvent être percer les tubes de réfrigérant. -
Page 14: Instructions D'installation
INSTRUCTIONS D’INSTALLATION EMPLACEMENT INSTRUCTIONS DE NIVEAU Il y a une patte réglable au bas de l’appareil • Deux personnes doivent être utilisées pour qui peut être montée ou bas pour s’assurer que déplacer l’appareil. l’appareil est au niveau. Il est important que •... -
Page 15: Outils Requis
INSTRUCTIONS D’INSTALLATION PRÉPARER L’ENCEINTE En faire les installations décrites dans cette section, des gants, les lunette de sécurité devraient être portés. Il n’est pas recommandé d’installer l’appareil dans un coin ou directement à côté d’un mur. La porte devra être ouverte plus de 90° pour permettre une extension complète des étagères. S’il est nécessaire de placer l’unité... -
Page 16: Panneau De Contrôle
CONSIGNES D’UTILISATION CARACTÉRISTIQUES 1. Porte en verre Low-E: verre Low-E utilisé pour réfl échir et absorber la chaleur. 2. Affi chage et commandes électroniques: Pour visualiser et régler la température. 3. Joints de porte magnétiques: Les joints bien ajustés retiennent toute la puissance de refroidissement et le niveau d’humidité. -
Page 17: Instruction De Fonction
CONSIGNES D’UTILISATION INSTRUCTION DE FONCTION DÉGIVRER Le réglage de température par défaut est de 54 °F Cet appareil est équipé d’une fonction de dégivrage (12 °C). automatique et ne nécessite pas de dégivrage manuel. Le dégivrage de l’eau de l’appareil L’échelle de température par défaut est °C. - Page 18 CONSIGNES D’UTILISATION INSTRUCTIONS D’INVERSION DE PORTE Si l’appareil est placé sur le dos ou sur le côté pendant un certain temps, il doit être autorisé à rester debout pendant 6 heures avant de le brancher afi n d’éviter d’endommager les composants internes.
-
Page 19: Soins Et Entretien
SOINS ET ENTRETIEN NETTOYAGE DÉMÉNAGER Assurez-vous que l’appareil est débranché avant de • Assurez-vous que l’appareil est vide. nettoyer une partie de l’appareil. • Fixez les étagères avec du ruban adhésif. • Pour nettoyer l’intérieur de l’appareil, utilisez un chiffon doux et une solution d’une cuillère •... -
Page 20: Dépannage
DÉPANNAGE PROBLÈME CAUSE POSSIBLE L’appareil n’est pas alimenté • Un fusible de votre panneau de distribution peut être grillé ou le disjoncteur déclenché • La fi che n’est pas complètement insérée dans prise murale La température interne n’est pas • Le porte n’est pas fermées correctement ou ouverte trop assez froide souvent L’appareil fonctionne en continu... - Page 21 Aucune partie de la garantie ne prévoit implicitement que le fabricant sera tenu responsable des dommages subis par les aliments ou Nothing within this warranty shall imply that Danby will be responsible or liable for any spoilage or damage to food or other c ontents of this appliance, whether due d’autres types de contenu, qu’ils soient causés par la défectuosité...
- Page 22 3. Para obtener el servicio al cliente más rápido, complete el formulario web en www. danby.com/support. Su envío irá directamente a un experto en su dispositivo en particular. Nuestros tiempos de respuesta promedio son entre 20 minutos y 2 horas, durante el horario comercial EST.
-
Page 23: Instrucciones De Conexion A Tierra
Importantes Instrucciones de Seguridad LEA Y SIGA TODAS LAS INSTRUCCIONES DE SEGURIDAD PELIGRO: Riesgo de incendio o explosión. Este aparato no está diseñado para ser usado por personas (incluyendo niños) cuyas capacidades Refrigerante infl amable usado. No perforar la físicas, sensoriales o mentales pueden ser diferentes tubería del refrigerante. - Page 24 INSTRUCCIONES DE INSTALACIÓN UBICACIÓN INSTRUCCIONES DE NIVELACIÓN Hay dos patas ajustables en la parte inferior • Se deben utilizar dos personas para mover el del aparato que se pueden subir o bajar para aparato. asegurarse de que el aparato esté nivelado. Es •...
-
Page 25: Instrucciones De Instalación
INSTRUCCIONES DE INSTALACIÓN PREPARAR EL RECINTO Se deben usar guantes y gafas de seguridad durante la instalación. No se recomienda instalar el aparato en una esquina o directamente al lado de una pared. La puerta tendrá que abrirse más de 90° para permitir la extensión completa de los estantes. Si es necesario colocar la unidad cerca de una pared o en una esquina, deje al menos 2-4 pulgadas (5-10 cm) de espacio entre la pared y el aparato para permitir la apertura de la puerta. -
Page 26: Instrucciones De Operación
INSTRUCCIONES DE OPERACIÓN CARACTERISTICAS 1. Puerta de vidrio Low-E: vidrio Low-E utilizado para refl ejar y absorber el calor. 2. Pantalla y controles electrónicos: Para ver y confi gurar la temperatura. 3. Juntas de puerta magnéticas: los sellos ajustados retienen todos los niveles de potencia de enfriamiento y humedad. -
Page 27: Fallo De Alimentación
INSTRUCCIONES DE OPERACIÓN INSTRUCCIÓN DE LA FUNCIÓN DESCONGELAR El ajuste de temperatura predeterminado es 54 °F Esta unidad está equipada con una función (12 °C). de descongelación automática y no requiere descongelación manual. El agua de descongelación La escala de temperatura predeterminada es °C. del aparato se canaliza en una bandeja de goteo situada por encima del compresor. - Page 28 INSTRUCCIONES DE OPERACIÓN INSTRUCCIONES DE REVERSIÓN DE PUERTA Si el electrodoméstico se coloca sobre su parte posterior o lateral por un período de tiempo prolongado, debe dejarse en posición vertical durante 6 horas antes de enchufarlo para evitar daños a los componentes internos. 1.
-
Page 29: Cuidado Y Mantenimiento
CUIDADO Y MANTENIMIENTO LIMPIEZA MUDARSE Asegúrese de que la unidad esté desenchufada • Asegúrese de que el electrodoméstico esté vacío. antes de limpiar cualquier parte del aparato. • Asegure los estantes con cinta. • Para limpiar el interior del aparato, utilice un paño suave y una solución de una cucharada •... - Page 30 SOLUCIÓN SUGERIDA PROBLEMA POSSIBLE CAUSA No funciona • Un fusible en su casa puede soplarse o el interruptor de circuito disparado • El enchufe no está completamente insertado en la toma de corriente La temperatura interna no • La puerta no se cierra correctamente o se abre demasiado es lo sufi...
- Page 31 Los cargos por transporte desde y hacia el lugar en que se efectúe el servicio técnico no están cubiertos por esta garantía y son de responsabilidad del comprador. Nothing within this warranty shall imply that Danby will be responsible or liable for any spoilage or damage to food or other c ontents of this appliance, whether due Nada dentro de esta garantía implica que Danby será...
- Page 32 *Trademarks of Danby Products Limited and/or its subsidiaries Printed in China * Marques de commerce de Danby Products Limited et / ou de ses filiales Imprimé en Chine * Marcas comerciales de Danby Products Limited y / o sus subsidiarias...
Need help?
Do you have a question about the DBC057A1BSS and is the answer not in the manual?
Questions and answers