
Related Manuals for Samsung CW-21Z453NL EC Series


Summary of Contents for Samsung CW-21Z453NL EC Series
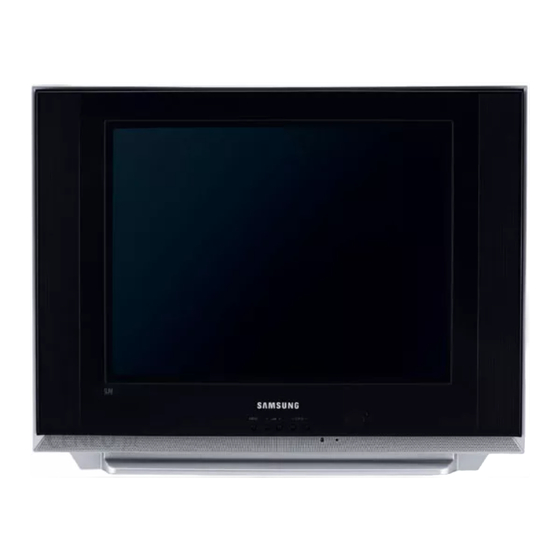
- Page 1 Ultra Slim Fit CRT ■ ■ ■Multi Wide System LNA Plus(Low Noise Amplifier) ■ ■ ■Turbo Plus Low Stand-By Power Wattage ■ ■ SOUND Equalizer ■ ■ CW-21Z453N...
- Page 2 © Samsung Electronics Co., Ltd. Oct. 2006 This Service Manual is a property of Samsung Electronics Co.,Ltd. Printed in Korea Any unauthorized use of Manual can be punished under applicable AA82-04216A International and/or domestic law.
-
Page 3: Table Of Contents
Table of Contents Chapter 1 Precaution ■ 1-1 Safety Precautions ............1-1 ■... - Page 4 Chapter 8 Wiring Diagram ■ 8-1 Overall Wiring ............. . . 8-1 ■...
-
Page 5: Chapter 2 Product Specification
- TDA7297SA : 5W ~ 15W Sound Output BTL AMP - 24C16 : 16K EEPROM - LA7845 : Vertical Deflection AMP - C5936 : H-OUT S/W TR - TDQ-6L : F/S PAL Tuner(LNA Option) - TDA6107JF : R/G/B Drive AMP IC - Flyback Trans : BSC29-0156G(11P,27KV) Samsung Electronics... -
Page 6: Key Features
- NICAM / STEREO / Line-STEREO - Auto STEREO, Sound Equalizer, Auto Mute, Auto Volume Limit, PSEUDO STEREO, TURBO PLUS - Composite (RCA A/V,DVD) - Rear : 42P Scart Input/Output (Scart1 R/G/B Input) - Front or Side A/V Input (Side A/V Preferability), Headphone Samsung Electronics... -
Page 7: Specifications Analysis
A2 or Nicam A2 or Nicam Auto Stereo Equalizer Front/Side AV Jack PC Input(VGA) Scart Jack 2Scart 2Scart Back A/V Monitor Out Jack S-VHS Jack(Front only) Head/Earphone Jack Common Interface Service Port Normal Remocon(TM76) Accessory Battery Matching Trans Rod ANT Samsung Electronics... -
Page 8: Accessories
Product Specification 2-4 Accessories Accessories Item Item code Remark Remote Control AA59-00399A Batteries 4301-000121 Owner's Instructions AA68-03801A Samsung Service center Warranty Card BN68-00514D Safety Guide Manual AA68-03242E Registration Card AA68-03575A RF Cable HDMI/DVI Cable HDMI Cable Video Cable Internet shopping mall... -
Page 9: Chapter 3 Alignment & Adjustment
4. When replacing the Side AV Ass'y : No adjustments required 5. When replacing the PIP Module : No adjustments required 6. When replacing the Control Ass'y : No adjustments required 7. When replacing the PFC Ass'y : No adjustments required Samsung Electronics... -
Page 10: How To Access Service Mode
4. W/B Setting Item Data Required Adjustment White x:286 3 y:290 3 Y:40 ± ± ± White Balance (Standard Data) Balance x:286 3 y:290 3 Y:2.0 ± ± ± Toshiba Pattern Screen Voltage Same as S16A Basic Model G2 Adjust Samsung Electronics... -
Page 11: Factory Data
9.AFT STEP CheckSum: 5827 CS21Z45 CS21Z45 Middle East Asia 21"/SLIM-CRT Remark Non-PIP/Non-LNA 1.X-Ray Protect 2.High Deviation 3.V-Guard 4.Sound Carrier Mute 5.Speaker By MODEL 6.PIP Device SDA9488 <Option1 Initial Lang> 7.Lang. Opion Iran *Iran:(Eng,Frn,Turkey,Persia) *Arab:(Eng,Frn,Arab,Urdu) 8.Picture Size CheckSum: CFB1 CS21Z45 Samsung Electronics... - Page 12 16:9 H Trapezium Adjust 14:9 V Amp Adjust 14:9 V Shift Adjust 14:9 H Parabola Adjust 14:9 H Trapezium Adjust VM Mode VM Gain VM Delay Preset Gain R Preset Gain G Preset Gain B Blue Screen HS Offset Samsung Electronics...
- Page 13 Alignment & Adjustment Samsung Electronics...
- Page 14 YUV Sub Tint RF YUV Sub Tint AV YUV Sub Tint RGB Blue Stretch Soft Clipping Level Peak White Limit SECAM B-Y Offset Peaking CF0 & Delay Mode Sub Sharpness Video Dependent Coring RF Video Dependent Coring AV Samsung Electronics...
- Page 15 IF AGC Speed IF Demodulator Fast Filter IF PLL Wide Blanking Front Wide Only Wide Blanking Rear Wide Only PIP AGC Mode PIP Only RF FOA/FOB ALL MODEL RF PA/NT Ident Sensitivit ALL MODEL AV PA/NT Ident Sensitivit ALL MODEL Samsung Electronics...
- Page 16 EHT Tracking Mode Component R cutoff Component B cutoff BlueScreen Contrast AV FOA/FOB 6. YC Delay Item Adjust South East Asia Middle East Asia Remark PAL Delay SECAM Delay NTSC Delay PAL AV Delay SECAM AV Delay NTSC AV Delay Samsung Electronics...
- Page 17 Dynamic Skin Gamma & White Stretch DNIE JR Comb Filter Diode Clamp DC Transfer Ratio NTSC Matrix South East Asia Middle East Asia Remark WHITE BALANCE 286/290 40FL 265/265 45FL 290/300 45FL 286/290 2.0FL 265/265 2.5FL 290/300 2.5FL Samsung Electronics...
-
Page 18: Service Adjustment
② Press "Power Off →Info → Menu → Mute → Power On" using the remote control and enter Factory Mode. ③ Enter Deflection Mode. ④ Adjust the V-AMP, V-SHIFT, H-AMP and H-SHIFT items so that the width becomes 5 and the height becomes 4. 3-10 Samsung Electronics... - Page 19 ⑦ When the adjustments are complete, display the Lion pattern and check that the picture size has not been changed. If there is no change, finish the adjustments. Samsung Electronics 3-11...
-
Page 20: Software Upgrade
1. To enter Service Mode, press the keys on the remote control according to the following sequence. (in Stand-by status) Info → Menu → Mute → Power On 2. When entering Service mode, the software information is displayed at the top of the service mode menu OSD. ex) T-HITPEU-1000 2005/0X/XX 3-12 Samsung Electronics... - Page 21 - Check the “Flash selection” item is appoint “Manual” - You can adjust program delay time for program speed but we use the normal “5[ms]” - Check the green lamp if this is sometime red lamp you can not programming Samsung Electronics 3-13...
- Page 22 - Click the “Erase Flash” button for before program erase - You can select flash selection item but we use normal “All” mode - Change the “Select flash ROM to erase. When ready press Send.” - Click the “Send” button 3-14 Samsung Electronics...
- Page 23 - Click the “Browse” button and find the new program folder in your computer - Click the “Send” button 6. Verify new program - Click the “Verify Flash” button - Change the “Select flash to verify correct programming. When ready press Send.” - Click the “Send” button Samsung Electronics 3-15...
-
Page 24: Replacements & Calibration
4. Slowly turn the Static Focus VR counter clockwise so that the center vertical line is the most clearly displayed. [adjusted point : Center(2/1)] SINGLE FOCUS VR 5. Check the entire screen focus and repeat steps 3 to 4, if necessary. 3-16 Samsung Electronics... - Page 25 2. Initialize all settings to the values appropriate to the corresponding model. 3. Display the Toshiba pattern. 4. First check IBRM in "G2 Adjust" of Factory and adjust Screen VR until the color of IBRM item turns green. SCREEN Samsung Electronics 3-17...
- Page 26 4. When the adjustment is finished, check the following checklist. - If there is a spot on the screen when turning the TV set off/on, adjust the Screen Voltage again. - If there is a ghost line on the screen, adjust the Screen Voltage again. 3-18 Samsung Electronics...
-
Page 27: Chapter 7 Block Diagram
Block Diagram 7. Block Diagram 7-1 Overall Block Diagram EEPROM EEPROM 24C16 24C16 B/ B B/ B c i t c i t Samsung Electronics... -
Page 28: Partial Block Diagram
Block Diagram 7-2 Partial Block Diagram 7-2-1 Functional blocks UOCIII Samsung Electronics... - Page 29 Schematic Diagram 10. Schematic Diagram 10-1 Power This Document can not be used without Samsung’s authorization. TP01 Power Signal TP03 TP02 TP02 TP01 TP03 TP08 TP05 TP05 TP08 Samsung Electronics 10-1...
- Page 30 Schematic Diagram 10-2 Main This Document can not be used without Samsung’s authorization. TP12 Power TP04 Signal TP13 TP06 TP12 TP07 TP13 TP11 TP09 TP06 TP04 TP07 TP09 TP10 TP10 TP11 10-2 Samsung Electronics...
- Page 31 Schematic Diagram 10-3 CRT This Document can not be used without Samsung’s authorization. Power Signal Samsung Electronics 10-3...
- Page 32 Schematic Diagram 10-4 Sound This Document can not be used without Samsung’s authorization. Power Signal 10-4 Samsung Electronics...
- Page 33 * CN501 : A 9 pin port connected to the CRT ASSY, which outputs the R/G/B signal to the CRT ASS'Y for display and Power signals to the CRT DRIVE. * CN701 : A 8 pin port connected to the AV ASSY, which receives AV2 external input. Samsung Electronics...
- Page 34 * GT502 & GT503 : The TBC-WIRE connection port. This port plays the role of the CRT GROUND. * CN502 : The R/G/B output signal from the UOC Module & the power, which is required to drive the CRT and the AMP, from the DEFLECTION BLOCK is connected to this port. Samsung Electronics...
- Page 35 Wiring Diagram 8. Wiring Diagram 8-1 Overall Wiring SI GN A L MAIN P OW E R AV Signal Audio Out CRT Power Supply & Main Input SPEAKER Samsung Electronics...
- Page 36 SENSE R-OUT G-OUT B-OUT CN701 L-IN TU01S R-IN L-OUT R-OUT V-IN V-OUT 2 SCART 8-2-2 CRT Board Connector Pin CN502 Connects the R/G/B signal from the UOC Module. PIN No. Pin NAME B+200V HEATER SENSE R-OUT G-OUT B-OUT Samsung Electronics...
- Page 37 ASSY PCB MISC-A/V CT-21Z45,KOREA,NARNIA T0003 T0099 AA94-15999A ASSY PCB MISC-CRT CT-21Z45,KOREA,NARNIA T0175 AA96-03164A ASSY SPEAKER P 8ohm,6*13cm,Z31,10W,SPK+W T0091 T0299 AA64-04411A WINDOW-RMC LED 21Z45,PC,CLEAR S.N.A T0607 AA61-40113A STOPPER-PCB 501H,HIPS,-,-,HB,NTR,- S.N.A M0112 T0175 T0022 T0299 M0014 T0607 T0057 CIS7 T0023 Samsung Electronics...
-
Page 38: Chapter 1 Precaution
When Check the AC power cord for possible damages. Keep voltage exceeds the specified limits, check each special the part or the lead away from any heat-emitting part. materials. Samsung Electronics... - Page 39 Critical safety parts should be bracketed with ( Use only regular parts for replacements (in particular, flame resistance and dielectric strength specifications). Irregular parts or materials may cause electric shock or fire. Samsung Electronics...
-
Page 40: Servicing Precautions
5. Check for insulation between the blade of the AC plug 10. The sharp edges of the metal material may cause and that of any conductive materials (i.e. the metal physical damage, so ensure wearing protective gloves panel, input terminal, earphone jack, etc). during the repair. Samsung Electronics... -
Page 41: Static Electricity Precautions
These servicing instructions are for use by qualified service personnel only. To reduce the risk of electric shock do not perform any servicing other than that contained in the operating instructions unless you are qualified to do so. Samsung Electronics... -
Page 42: Installation Precautions
5. Make sure to turn the power off and unplug the power cord from the outlet before repositioning the product. Also check the antenna cable or the external connectors if they are fully unplugged. Damage to the cord may cause fire or electric shock. Samsung Electronics... - Page 43 MEMO Samsung Electronics...
- Page 44 The mirror returns to a blank state so that no stains or after-images are left. The SAMSUNG SKY500N model has both an ANYNET port and a SERVICE jack port. Because the shape of the ANYNET port on the DLP TV is the same as that of the SERVICE jack port of the SKY500N, it fails to turn the TV off after a connection has been reported.
- Page 45 Ex: For LCD 15:9 devices, "Wide" is displayed on the OSD instead of "16:9". 4. The picture size can be changed even in the blue screen. However, the picture size should be controlled by the product specifications if the change is impossible due to hardware restrictions. 14-2 Samsung Electronics...
- Page 46 You can use this AV interface for users by controlling connected AV devices function to study English by watching AFKN or CC marked through the Anynet menu when AV devices of Samsung video tapes. Electronics are connected.
- Page 47 MEMO 14-4 Samsung Electronics...
- Page 48 11-1-1 Front Front (or Side) Panel On-screen menu display Volume adjustment Channel selection Remote control sensor Indicator Power on/off 11-1-2 Side Rear Panel cable television network 11-1-3 Rear Front (or Side) Panel Audio input Video input Headphone jack Samsung Electronics 11-1...
- Page 49 Used to switch the TV Used to select a channel on and off. numbered ten or over. Press this button, then Numeric buttons “ ” symbol is Used to select channels displayed. Enter the directly. two-digit channel number. 11-2 Samsung Electronics...
-
Page 50: Cw21Z453Nlxxec
100uF,20%,16V,GP,TP,6.3x7,5 CA04 2401-002009 C-AL 100uF,20%,16V,GP,TP,6.3x7,5 CA05 2202-000183 C-CERAMIC,MLC-AXIAL 2.2NF,20%,16V,Y5R,TP CA06 2202-000183 C-CERAMIC,MLC-AXIAL 2.2NF,20%,16V,Y5R,TP JA330 3722-001061 JACK-PHONE 1P,3.6PI,AG,BLK,N JA333 3722-001164 JACK-PIN 3P,SN,WH:YE:RE,STRAIGHT LA01 2701-000114 INDUCTOR-AXIAL 10UH,10%,2534 LA02 2701-000114 INDUCTOR-AXIAL 10UH,10%,2534 AA41-01178A PCB SUB CS21Z30,FR-1,1,A,1.6,245*245*1.6 S.N.A RA01 2001-000028 R-CARBON(S) 100OHM,5%,1/2W,AA,TP,2.4X6.4 Samsung Electronics... - Page 51 C-AL 470uF,20%,25V,GP,TP,10x16,5 C410 2401-002288 C-AL 470uF,20%,25V,WT,TP,10x20,5 C411 2201-000556 C-CERAMIC,DISC 0.47NF,10%,500V,Y5P,TP,5. C412 2401-001527 C-AL 47uF,20%,250V,HR,TP,13x25mm,5m C413 2201-000556 C-CERAMIC,DISC 0.47NF,10%,500V,Y5P,TP,5. C414 2301-001083 C-FILM,LEAD-PPF 27nF,5%,400V,TP,20x7.5x1 C415 2301-001067 C-FILM,LEAD-PPF 82nF,5%,400V,TP,19x15.5x C417 2202-000796 C-CERAMIC,MLC-AXIAL 1NF,10%,50V,Y5P,TP,3 C424 2201-000132 C-CERAMIC,DISC 0.1NF,10%,500V,Y5P,TP,6.5 C499 2305-000237 C-FILM,LEAD-PEF 1uF,5%,63V,TP,7.5x15.5mm Samsung Electronics...
- Page 52 C-AL 470uF,20%,16V,GP,TP,8x11.5,5 C906 2401-000480 C-AL 10uF,20%,50V,GP,TP,5x11,5 C907 2202-002037 C-CERAMIC,MLC-AXIAL 100nF,80-20%,50V,Y5V C909 2202-002037 C-CERAMIC,MLC-AXIAL 100nF,80-20%,50V,Y5V C911 2202-002037 C-CERAMIC,MLC-AXIAL 100nF,80-20%,50V,Y5V C912 2401-000480 C-AL 10uF,20%,50V,GP,TP,5x11,5 C913 2202-002037 C-CERAMIC,MLC-AXIAL 100nF,80-20%,50V,Y5V C914 2202-002037 C-CERAMIC,MLC-AXIAL 100nF,80-20%,50V,Y5V C915 2401-003036 C-AL 100uF,20%,16V,GP,TP,5X11mm,5mm C916 2202-002037 C-CERAMIC,MLC-AXIAL 100nF,80-20%,50V,Y5V Samsung Electronics...
- Page 53 DIODE-RECTIFIER MUR420,200V,4A,DO-201AD, D809A 0402-001374 DIODE-RECTIFIER FFPF06U20S,200V,6A,TO-22 D811 0402-001603 DIODE-RECTIFIER MUR480E,800V,4A,DO-201AD D813 0402-000493 DIODE-RECTIFIER 1R5GU41,400V,1.5A,DO-15L DZ242 0403-001373 DIODE-ZENER MTZJ5.1A,4.85-5.03V,500mW,DO DZ301 0403-001329 DIODE-ZENER MTZJ24B,22.75-23.73V,500mW,D DZ302 0403-001329 DIODE-ZENER MTZJ24B,22.75-23.73V,500mW,D DZ303 0403-001221 DIODE-ZENER UZ39BSB,35.36-37.19V,500mW,D DZ305 0403-001329 DIODE-ZENER MTZJ24B,22.75-23.73V,500mW,D DZ306 0403-000700 DIODE-ZENER TZP33A,5%,1000mW,DO-41,TP Samsung Electronics...
- Page 54 EYELET ID1.5,OD2,L2.8,NI+SN,BSP3-1/2H EY859 6042-000002 EYELET ID1.5,OD2,L2.8,NI+SN,BSP3-1/2H EY863 6042-000002 EYELET ID1.5,OD2,L2.8,NI+SN,BSP3-1/2H EY864 6042-000002 EYELET ID1.5,OD2,L2.8,NI+SN,BSP3-1/2H EY865 6042-000002 EYELET ID1.5,OD2,L2.8,NI+SN,BSP3-1/2H EY866 6042-000002 EYELET ID1.5,OD2,L2.8,NI+SN,BSP3-1/2H EY867 6042-000002 EYELET ID1.5,OD2,L2.8,NI+SN,BSP3-1/2H EY868 6042-000002 EYELET ID1.5,OD2,L2.8,NI+SN,BSP3-1/2H EY869 6042-000002 EYELET ID1.5,OD2,L2.8,NI+SN,BSP3-1/2H EY870 6042-000002 EYELET ID1.5,OD2,L2.8,NI+SN,BSP3-1/2H Samsung Electronics...
- Page 55 JACK-SCART 42P,SN,BLK L101 2701-000114 INDUCTOR-AXIAL 10UH,10%,2534 L102 2701-000114 INDUCTOR-AXIAL 10UH,10%,2534 L103 2701-000202 INDUCTOR-AXIAL 0.56UH,10%,2534 L107 2701-000159 INDUCTOR-AXIAL 22UH,10%,4298 L110 2001-000281 R-CARBON 100OHM,5%,1/8W,AA,TP,1.8X3.2MM L199 2001-000281 R-CARBON 100OHM,5%,1/8W,AA,TP,1.8X3.2MM L201 2701-000114 INDUCTOR-AXIAL 10UH,10%,2534 L202 2001-000793 R-CARBON 47OHM,5%,1/8W,AA,TP,1.8X3.2MM L204 2701-000114 INDUCTOR-AXIAL 10UH,10%,2534 Samsung Electronics...
- Page 56 KSA539,PNP,400mW,TO-92,T Q905 0501-000389 TR-SMALL SIGNAL KSC815,NPN,400mW,TO-92,T R101 2001-000281 R-CARBON 100OHM,5%,1/8W,AA,TP,1.8X3.2MM R102 2001-000290 R-CARBON 10KOHM,5%,1/8W,AA,TP,1.8X3.2MM R106 2001-000947 R-CARBON 7.5KOHM,5%,1/8W,AA,TP,1.8X3.2MM R108 2001-000331 R-CARBON 12KOHM,5%,1/8W,AA,TP,1.8X3.2MM R109 2001-000786 R-CARBON 47KOHM,5%,1/8W,AA,TP,1.8X3.2MM R111 2001-000780 R-CARBON 470OHM,5%,1/8W,AA,TP,1.8X3.2MM R123 2001-000281 R-CARBON 100OHM,5%,1/8W,AA,TP,1.8X3.2MM R124 2001-000515 R-CARBON 220OHM,5%,1/8W,AA,TP,1.8X3.2MM Samsung Electronics...
- Page 57 R-CARBON 36KOHM,5%,1/8W,AA,TP,1.8X3.2MM R522 2001-000734 R-CARBON 4.7KOHM,5%,1/8W,AA,TP,1.8X3.2MM R523 2001-000734 R-CARBON 4.7KOHM,5%,1/8W,AA,TP,1.8X3.2MM R606 2001-000837 R-CARBON 51KOHM,5%,1/8W,AA,TP,1.8X3.2MM R607 2001-000290 R-CARBON 10KOHM,5%,1/8W,AA,TP,1.8X3.2MM R608 2001-000290 R-CARBON 10KOHM,5%,1/8W,AA,TP,1.8X3.2MM R609 2001-000281 R-CARBON 100OHM,5%,1/8W,AA,TP,1.8X3.2MM R620 2001-000290 R-CARBON 10KOHM,5%,1/8W,AA,TP,1.8X3.2MM R621 2001-000429 R-CARBON 1KOHM,5%,1/8W,AA,TP,1.8X3.2MM R622 2001-000429 R-CARBON 1KOHM,5%,1/8W,AA,TP,1.8X3.2MM Samsung Electronics...
- Page 58 R-CARBON 3KOHM,5%,1/8W,AA,TP,1.8X3.2MM R916 2001-000812 R-CARBON 5.6KOHM,5%,1/8W,AA,TP,1.8X3.2MM R917 2001-000347 R-CARBON 13KOHM,5%,1/8W,AA,TP,1.8X3.2MM R920 2001-000281 R-CARBON 100OHM,5%,1/8W,AA,TP,1.8X3.2MM R921 2001-000734 R-CARBON 4.7KOHM,5%,1/8W,AA,TP,1.8X3.2MM R923 2001-000786 R-CARBON 47KOHM,5%,1/8W,AA,TP,1.8X3.2MM R924 2001-000591 R-CARBON 3.3KOHM,5%,1/8W,AA,TP,1.8X3.2MM R925 2001-000440 R-CARBON 1OHM,5%,1/8W,AA,TP,1.8X3.2MM R926 2001-000591 R-CARBON 3.3KOHM,5%,1/8W,AA,TP,1.8X3.2MM R927 2001-000302 R-CARBON 10OHM,5%,1/8W,AA,TP,1.8X3.2MM Samsung Electronics...
-
Page 59: Cw21Z453Nlxxec
1.01 S.N.A ASSY P/MATERIAL M0113 AA92-11815A ASSY P/MATERIAL 21Z45 S.N.A T0376 6902-000001 BAG AIR LDPE,T0.2,L1800,W1000,TRP,,,LDPE 0.008 S.N.A T0524 6902-000005 BAG PE HDPE/NITRON/HDPE,T0.015/T0.5/T0.0 S.N.A T0376 6902-000061 BAG AIR LDPE,T0.2,L1000,W500,TRP,,, 0.03 S.N.A T0214 AA60-40006A PIN-STAPLE AUTO,33X17.8X2.4,H18,33X17.8X S.N.A ASSY LABEL 5-10 Samsung Electronics... - Page 60 COMM,SAMSUNG,Slovenian,E S.N.A M0156 AA68-03843W MANUAL USERS-01 COMM,SAMSUNG,Serbian,Eur S.N.A T0056 AA68-03860A MANUAL FLYER-S/D COMM,SAMSUNG,ENG,Italia S.N.A T0238 BN68-00514D MANUAL FLYER-WARRANTY CARD comm,Samsung, S.N.A T0059 BN68-00907A MANUAL FLYER-CARD COMM,SAMSUNG,18 LANG,E S.N.A ASSY COVER FRONT M0001 AA90-05604D ASSY COVER FRONT CW21Z453NLXXEC S.N.A M0081 6003-001026...
- Page 61 T0527 AA65-30018A CLAMPER CORE-WIRE DONG-A,NYLON-66,-,-,-, S.N.A T0527 AA65-30110A CLAMPER CORE-WIRE ALL MODEL,NYLON 66,V2, S.N.A T0066 AA96-20109B ASSY POWER CORD -,CP2/NO(4.0),H/C250,KKP T0061 3811-001609 WIRE-PVC CU BCWA,300V,ROLL,-,#22,BLK 0.15 S.N.A T0268 AA39-10006X CBF-POWER CORD -,-,KKP419C,3P,-,-,BLK,-, T0010 AA61-20284A HOLDER P-CORD,PP,-,-,-,BLK,VO,KE-002 S.N.A 5-12 Samsung Electronics...
- Page 62 ③ Tap the upper part of the Back Cover 2 or 3 times and pull the Back Cover to separate it from the unit. Notice: Disassemble the product after disconnecting the power cord and discharge the unit to prevent an electric shock and damage to the product due to static electricity. Samsung Electronics 12-1...
- Page 63 Press the clip down completely and pull the con- nector. ① Separate theAV and Main Board from the Front Cabinet and AV Wire, GT-Pin Wire. ② To separate the Wire, Fixing clip and pressing the Wire. 12-2 Samsung Electronics...
- Page 64 ① Separate the cables connecting the FBT and the CRT. Notice: Since there may be a remaining high-voltage current within the CRT, take care not to touch the CRT hole with metal or a part of yourself when separating the cables. Samsung Electronics 12-3...
- Page 65 In addition, separate the wires on a flat and clean surface so as to prevent scratching of the material and the PCB. Pull the wires while pressing on the fixing clip. 12-4 Samsung Electronics...
- Page 66 2 t r 2 t r n i a n i a t r o l e n n i a l e n u l o u l o Samsung Electronics 13-1...
- Page 67 13-2 Samsung Electronics...
- Page 68 Circuit Description 13-1-5 Power IC (STR-W6750F) a t l Samsung Electronics 13-3...
- Page 69 Circuit Description 13-1-6 TDA6109JF 13-4 Samsung Electronics...
- Page 70 Circuit Description 13-1-7 CRT Drive 13-1-8 Spot Killer Samsung Electronics 13-5...
- Page 71 Circuit Description 13-1-9 Picture In Picture 13-6 Samsung Electronics...
- Page 72 13-1-10 X-Ray Protection t o r t c e n o i t s e t n i t o r t c e n o i E “ ” O r e t a t l Samsung Electronics 13-7...
- Page 73 MEMO 13-8 Samsung Electronics...
-
Page 74: Chapter 6 Troubleshooting
2) Check that the Master Switch has been pressed. 3) Check that the transmitter is turned on. 4) Check that transmitter device selection is set to TV. 5) Check that the signal cable is properly connected. 6) Check that channel setting has been set. Samsung Electronics... - Page 75 ” S D “ ” S r i a c i p & i l + D “ ( ” 1 t r a D “ ” 1 Q “ ” 1 Q “ ” 1 r i a Samsung Electronics...
- Page 76 Cannot select an A/V channel. out, you cannot select an A/V channel. Check if the connector is properly connected. Cannot select a menu. Check if the menu is grayed out. If a menu is grayed out, it cannot be selected. Samsung Electronics...
- Page 77 ■ Set the auto volume control to ON. There is a lot of noise. Keep the antenna away from the power cord or connectors if possible. The selected language does not Press the Multiplex button to select the TV. appear. Samsung Electronics...
- Page 78 This noise may occur when the plastic material inside the TV expands or contracts according The TV makes a noise as if to the seasonal temperature or humidity. This is like the noise from a furniture/cabinet/sink something is dropping inside. unit, and there is no need for concern. Samsung Electronics...
- Page 79 Therefore, you can determine whether the software has been properly downloaded, if you know the correct checksum for that version of the software. You can check the checksum according in the following order. Factory Mode → Checksum → Right Button → Calculate Checksum → Output Checksum (e.g. 3036) ■ Checksum Examples T-HITPEU-1000:checksum=5B67 T-HITPEA-1000:checksum=51A7 Samsung Electronics...
- Page 80 Ultra Slim Fit CRT ■ ■ ■Multi Wide System LNA Plus(Low Noise Amplifier) ■ ■ ■Turbo Plus Low Stand-By Power Wattage ■ ■ SOUND Equalizer ■ ■ CW-21Z453N...
- Page 81 © Samsung Electronics Co., Ltd. Oct. 2006 This Service Manual is a property of Samsung Electronics Co.,Ltd. Printed in Korea Any unauthorized use of Manual can be punished under applicable AA82-04216A International and/or domestic law.
- Page 82 Table of Contents Chapter 1 Precaution ■ 1-1 Safety Precautions ............1-1 ■...
- Page 83 Chapter 8 Wiring Diagram ■ 8-1 Overall Wiring ............. . . 8-1 ■...
Need help?
Do you have a question about the CW-21Z453NL EC Series and is the answer not in the manual?
Questions and answers