Table of Contents
Advertisement
Quick Links
Installation Instructions
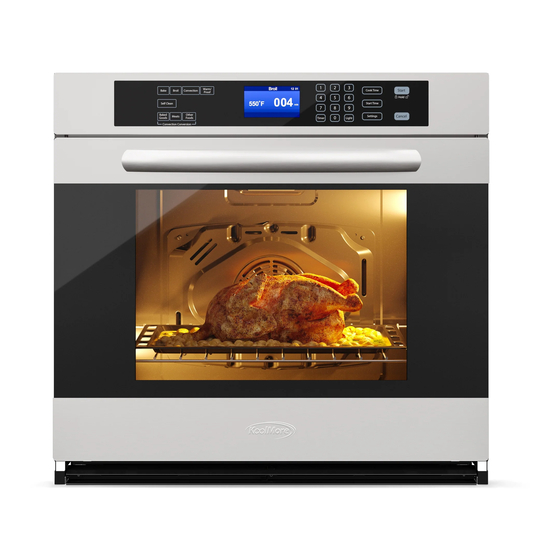
30" Built In Wall Oven
Model : KM-WO30S-SS
For any service-related Issues, please contact us:
Phone Number: 718-576-6342
Email address: support@koolmore.com
IMPORTANT SAFETY INSTRUCTIONS:
CAREFULLY READ THE IMPORTANT INFORMATION
REGARDING INSTALLATION, SAFETY AND
MAINTENANCE. KEEP THESE INSTRUCTIONS FOR
FUTURE REFERENCE.
Advertisement
Table of Contents

Related Manuals for KoolMore KM-WO30S-SS


Summary of Contents for KoolMore KM-WO30S-SS
- Page 1 Installation Instructions 30" Built In Wall Oven Model : KM-WO30S-SS For any service-related Issues, please contact us: Phone Number: 718-576-6342 Email address: support@koolmore.com IMPORTANT SAFETY INSTRUCTIONS: CAREFULLY READ THE IMPORTANT INFORMATION REGARDING INSTALLATION, SAFETY AND MAINTENANCE. KEEP THESE INSTRUCTIONS FOR...
- Page 2 At its sole discretion. Koolmore Supply Inc may determine to replace the product. In the event of product replacement, your appliance will be warranted for the remaining term of the original unit's warranty period.
-
Page 3: Table Of Contents
TABLE OF CONTENTS OVEN SAFETY ....................2 INSTALLATION REQUIREMENTS ................. 2 Tools and Parts ....................... 2 Location Requirements ....................3 Opening Dimensions ..................... 5 Electrical Requirements ....................6 INSTALLATION INSTRUCTIONS ................8 Step 1 - Unpack the Oven ..................... 8 Step 2 - Remove the Oven Door ................... -
Page 4: Oven Safety
OVEN SAFETY Your safety and the safety of others are very important. We have provided many important safety messages in this manual and on your appliance. Always read and obey all safety messages. This is the safety alert symbol. This symbol alerts you to potential hazards that can kill or hurt you and others. -
Page 5: Location Requirements
ALL INSTALLATIONS Tools Needed: • • Measuring Tape Hand or Sabre Saw • • Straightedge 1" Hole Saw • • Pencil Cordless Drill and Drill Bit • • Phillips Screwdriver Safety Gloves and Goggles • • Level Volt Meter (0-250VAC) •... - Page 6 PRODUCT DIMENSIONS Single Oven Letter Single Oven Dimensions 287/16" (72.2 cm) Height (overall) 281/2" (72.4 cm) Width (recessed) 273/16" (69 cm) Height (recessed) 231/2" (59.7 cm) Depth (recessed) 297/8" (75.9 cm) Width (overall)
-
Page 7: Opening Dimensions
OPENING DIMENSIONS Single Oven - Installed in Cabinet and Installed Undercounter Electrical Junction Box Location 4" NOTE: Junction box may be located in adjacent cabinet 4" Single Oven Single Oven in Undercounter Cabinet w/o Cooktop Width (cutout) 285/8" (72.7 cm) 285/8" (72.7 cm) Height (cutout) 271/2"... -
Page 8: Electrical Requirements
ELECTRICAL REQUIREMENTS If codes permit and a separate ground wire is used, it is recommended that a qualified electrical installer determine that the ground path is adequate and wire gauge is in accordance with local codes. Do not use an extension cord. In U.S.A. - Page 9 WARNING Electrical Shock Hazard The electrical power to the oven branch circuit must be shut off while line connections are being made. Do not use an extension cord with this appliance. Electrical ground is required on this appliance. The free end of the green wire (the ground wire) must be connected to a suitable ground.
-
Page 10: Installation Instructions
If local codes permit grounding through the electrical supply neutral, connect both the white neutral wire and the green ground wire from the oven to the white neutral electrical supply wire. • grounded. • Single Oven - When a 4-wire, single phase 120/240 volt, 60 Hz., AC only electrical supply is available, a 25-amp maximum circuit protection is required 120/208 volt 60 Hz., AC only electrical supply is available, a 20-amp maximum circuit protection is required). -
Page 11: Step 2 - Remove The Oven Door
STEP 2 - REMOVE THE OVEN DOOR IMPORTANT: The oven door is heavy and fragile, and the door front is glass. To avoid oven door glass breakage, use both hands, and grasp only the sides of the oven door to remove. 1. -
Page 12: Step 3 - Install Oven
STEP 3 - INSTALL OVEN WARNING Excessive Weight Hazard Use two or more people to move and install oven. Failure to do so can result in back or other injury. 1. Using two or more people, grasp the ceiling of the oven cavity and lift the oven onto a table or platform even with the cutout opening. -
Page 13: Step 4 - Make Electrical Connection
STEP 4 - MAKE ELECTRICAL CONNECTION To properly install your oven, you must determine the type of electrical connection you will be using and follow the instructions provided for it here. DIRECT WIRE WARNING Electrical Shock Hazard Disconnect power before servicing. Improper connection of aluminum house wiring and copper appliance leads can result in an electrical hazard or re. - Page 14 4. Route the flexible electrical supply conduit from the oven to the junction box through a UL listed or CSA approved conduit connector. 5. Tighten screws on conduit connector. 3-WIRE CONNECTION (GROUNDED NEUTRAL) - U.S.A. ONLY WARNING Electrical Shock Hazard Grounding through the neutral conductor is prohibited for new branch-circuit installations (1996 NEC);...
- Page 15 2. Connect the two black wires together using a UL listed wire connector. 3. Connect the two neutral (white) wires and the ground (green or bare) wire (of the oven cable) using a UL listed wire connector. 4. Connect the two red wires together using a UL listed wire connector.
-
Page 16: Step 5 - Mount The Oven
STEP 5 - MOUNT THE OVEN 1. Slide the oven completely into the cabinet until the back surface of the front frame touches the front wall of the cabinet. Center the oven within the cabinet cutout. NOTE: Push against seal area of the oven front frame when pushing the oven into the cabinet. -
Page 17: Step 7 - Complete Installation
STEP 7 - COMPLETE INSTALLATION 1. Check that all parts are now installed. If there is an extra part, go back through the steps to see which step was skipped. 2. Dispose of/recycle all packaging materials. 3. Check Operation of Oven. •...
Need help?
Do you have a question about the KM-WO30S-SS and is the answer not in the manual?
Questions and answers