Advertisement
Available languages
Available languages
Quick Links
KEEP INSTRUCTIONS
FOR FUTURE USE
ASSEMBLY ASSISTANCE
IMPORTANT: Retain for future reference and
read carefully.
Child Craft strives for the highest quality in our
products but occasionally a missing part or problem
can occur during assembly.
If any parts are missing or broken or you need
assistance with assembly, DO NOT return the
product to your dealer. Go to our website at
www.forever-eclectic.com or call Child Craft
for assistance at 1-330-723-0599. Please have the
model number and manufacture date available
when you call or write us at:
Child Craft, 5216 Portside Dr., Medina, OH 44256
ASSEMBLY INSTRUCTIONS
• Adult assembly required.
• Read all instructions BEFORE assembly and USE
of product.
• Unpack carton, remove packing materials,
including polybag. Identify and check all parts.
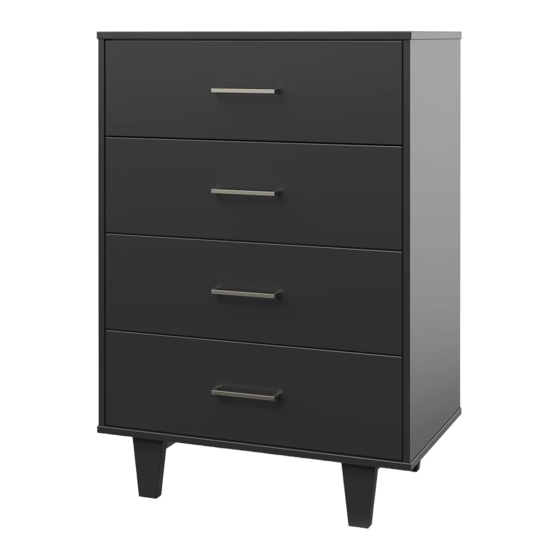
AB20456_G1
Assembled Chest
.
FOR CUSTOMER SERVICE CALL
1-330-723-0599. DO NOT CALL
RETAILER OR RESELLER FOR SERVICE
AS THEY ARE NOT AUTHORIZED TO
RESOLVE ANY SERVICE ISSUES.
FOR WARRANTY AND FEDERAL SAFETY STANDARD
COMPLIANCE CERTIFICATES, PLEASE VISIT
OUR WEBSITE AT
www.forever-eclectic.com
Record the information for your product here:
Model number:
Manufacture date:
PO number:
1
Tremont Chest
Model Covered: F04502
Child Craft
5216 Portside Dr.,
Medina, OH 44256 USA
PH: 1 330.723.0599
FAX: 1 330.722.5037
www.forever-eclectic.com
Advertisement

Subscribe to Our Youtube Channel
Related Manuals for FOREVER Eclectic Tremont F04502


Summary of Contents for FOREVER Eclectic Tremont F04502
- Page 1 Tremont Chest Model Covered: F04502 Child Craft 5216 Portside Dr., Medina, OH 44256 USA PH: 1 330.723.0599 FAX: 1 330.722.5037 www.forever-eclectic.com AB20456_G1 Assembled Chest KEEP INSTRUCTIONS FOR CUSTOMER SERVICE CALL 1-330-723-0599. DO NOT CALL FOR FUTURE USE RETAILER OR RESELLER FOR SERVICE AS THEY ARE NOT AUTHORIZED TO ASSEMBLY ASSISTANCE RESOLVE ANY SERVICE ISSUES.
- Page 2 FURNITURE PARTS LIST FURNITURE PARTS Part Description Part Number Qty. A. Bottom 23102420 B. Top 23102412 C. Center Rail 23102424 D. Drawer Front 23102425 E. Top Drawer Side Left 23102432 F. Top Drawer Side Right 23102433 G. Lower Drawer Side Left 23102434 H.
-
Page 3: Hardware Package
HARDWARE PACKAGE AB20456_G3 HARDWARE PARTS LIST PREPARATION Carefully remove and lay out all hardware and parts. Part Description Part Number Qty. Check quantities and match the parts list. Construct furniture on an even flat floor. AA. Dowel 11201360 Note: during the assembly process whenever using BB. - Page 4 STEP 1 A x 1 N x 2 BB x 6 BB x 6 N x 2 AB20456_G4 STEP 2 H x 1 J x 1 AA x 2 BB x 2 BB x 2 AA x 2 AB20456_G5...
- Page 5 STEP 3 H x 1 AA x 2 BB x 2 BB x 2 AA x 2 AB20456_G6 STEP 4 C x 1 AA x 1 BB x 1 AB20456_G7...
- Page 6 STEP 5 AA x 5 AA x 5 AB20456_G8 STEP 6 K x 1 AB20456_G9...
- Page 7 STEP 7 BB x 5 BB x 5 AB20456_G10 STEP 8 AA x 4 AA x 4 AB20456_G11...
- Page 8 STEP 9 AB20456_G12 STEP 10 BB x 8 BB x 4 BB x 4 AB20456_G13...
- Page 9 STEP 11 AA x 4 AA x 4 AB20456_G15 STEP 12 B x 1 BB x 8 BB x 4 BB x 4 AB20456_G16...
- Page 10 STEP 13 D x 1 E x 1 F x 1 CC x 4 CC x 2 CC x 2 AB20456_G17 STEP 14 X 3 D x 1 G x 1 I x 1 CC x 4 CC x 2 CC x 2 AB20456_G18...
- Page 11 STEP 15 X 4 L x 1 M x 1 O x 2 CC x 2 CC x 6 CC x 2 CC x 2 O x 2 AB20456_G19 STEP 16 X 4 CC x 2 CC x 2 AB20456_G20...
- Page 12 STEP 17 X 4 DD x 1 EE x 2 EE x 2 AB20456_G21 DRAWER INSTALL These slide sections mounted on chest side must be fully extended for install. This side section mounted to drawer. Drawers may need to be pushed in and out to properly set slides.
-
Page 13: Drawer Removal
DRAWER REMOVAL AB20456_G23 ANTI TIP KIT ALIGNMENT Top of Anti Tip Bracket is about 1 in. from top edge of the chest. Please refer to Anti Tip Kit instructions for install AB20456_G24... -
Page 14: Maintenance And Cleaning
MAINTENANCE AND CLEANING MAINTENANCE: Upon completion of the assembly, check to make sure all screws, bolts and connectors are tightened and secure. Periodically check furniture for damaged hardware, loose joints, missing parts or sharp edges before and after assembly and frequently during use.DO NOT use furniture if any parts are missing or broken. - Page 15 Coffre Tremont Modèle Couvert: F04502 Child Craft 5216 Portside Dr., Medina, OH 44256 USA PH: 1 330.723.0599 FAX: 1 330.722.5037 www.forever-eclectic.com AB20456_G1 Coffre assemblé GARDER LES INSTRUCTIONS POUR APPEL AU SERVICE CLIENT 1-330-723-0599. NE PAS APPELER POUR UNE UTILISATION FUTURE. DÉTAILLANT OU REVENDEUR POUR LE SERVICE COMME ILS NE SONT PAS AUTORISÉS À...
- Page 16 LISTE DES PIÈCES DE MEUBLES PIÈCES DE MEUBLES Description de la pièce Numéro d’article Quantité A. Bas 23102420 B. Sommet 23102412 C. Rail central 23102424 D. Façade de tiroir 23102425 E. Côté du tiroir supérieur gauche 23102432 F. Côté droit du tiroir supérieur 23102433 G.
- Page 17 PACK MATÉRIEL AB20456_G3 LISTE DES PIÈCES MATÉRIELLES PRÉPARATION Retirez et disposez soigneusement tout le matériel et les Description de la pièce Numéro d’article Quantité pièces. Vérifiez les quantités et faites correspondre la liste des pièces. Construisez Un meuble sur un sol plat et uniforme. AA.
- Page 18 ÉTAPE 1 A x 1 N x 2 BB x 6 BB x 6 N x 2 AB20456_G4 ÉTAPE 2 H x 1 J x 1 AA x 2 BB x 2 BB x 2 AA x 2 AB20456_G5...
- Page 19 ÉTAPE 3 H x 1 AA x 2 BB x 2 BB x 2 AA x 2 AB20456_G6 ÉTAPE 4 C x 1 AA x 1 BB x 1 AB20456_G7...
- Page 20 ÉTAPE 5 AA x 5 AA x 5 AB20456_G8 ÉTAPE 6 K x 1 AB20456_G9...
- Page 21 ÉTAPE 7 BB x 5 BB x 5 AB20456_G10 ÉTAPE 8 AA x 4 AA x 4 AB20456_G11...
- Page 22 ÉTAPE 9 AB20456_G12 ÉTAPE 10 BB x 8 BB x 4 BB x 4 AB20456_G13...
- Page 23 ÉTAPE 11 AA x 4 AA x 4 AB20456_G15 ÉTAPE 12 B x 1 BB x 8 BB x 4 BB x 4 AB20456_G16...
- Page 24 ÉTAPE 13 D x 1 E x 1 F x 1 CC x 4 CC x 2 CC x 2 AB20456_G17 ÉTAPE 14 X 3 D x 1 G x 1 I x 1 CC x 4 CC x 2 CC x 2 AB20456_G18...
- Page 25 ÉTAPE 15 X 4 L x 1 M x 1 O x 2 CC x 2 CC x 6 CC x 2 CC x 2 O x 2 AB20456_G19 ÉTAPE 16 X 4 CC x 2 CC x 2 AB20456_G20...
- Page 26 ÉTAPE 17 X 4 DD x 1 EE x 2 EE x 2 AB20456_G21 INSTALLER LE TIROIR Ces sections de diapositives monté sur le côté de la poitrine doit être complètement déployé pour l'installation. Cette section latérale montée sur le tiroir. Les tiroirs doivent peut-être être poussés diapositives correctement...
-
Page 27: Enlèvement Du Tiroir
ENLÈVEMENT DU TIROIR AB20456_G23 ALIGNEMENT DU KIT ANTI BASCULE Le haut du support anti-basculement concerne 25.4 mm du bord supérieur de la commode. Veuillez vous référer à Anti Tip Instructions du kit pour l'installation AB20456_G24... -
Page 28: Entretien Et Nettoyage
ENTRETIEN ET NETTOYAGE MAINTENANCE: Une fois l’assemblage terminé, vérifiez que toutes les vis, boulons et connecteurs sont serrés et sécurisés. Vérifiez périodiquement les meubles pour la quincaillerie endommagée, les joints desserrés, les pièces manquantes ou les bords tranchants avant et après l’assemblage et fréquemment pendant l’utilisation. N’utilisez PAS de meubles si des pièces sont manquantes ou cassées.
Need help?
Do you have a question about the Tremont F04502 and is the answer not in the manual?
Questions and answers