Table of Contents
Advertisement
Quick Links
Advertisement
Table of Contents

Related Manuals for ureach Intelligent U3

Summary of Contents for ureach Intelligent U3
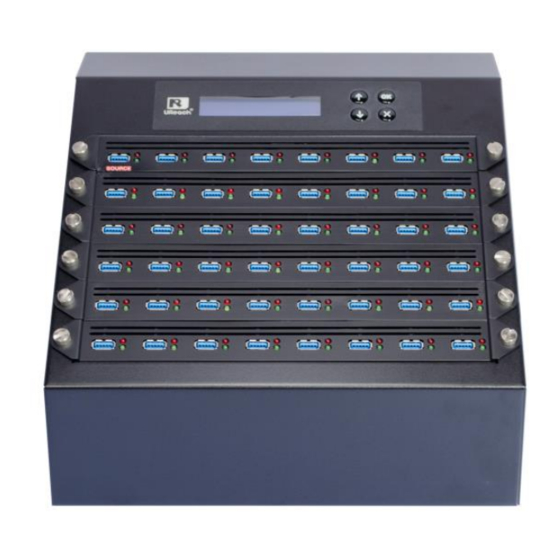
- Page 1 Intelligent U3 USB 3.1 Duplicator & Tester (USB/USB-HDD) User Manual vA.03...
-
Page 2: Table Of Contents
V Version v A.03 Index Product Disclaimer ........................2 Warranty ........................... 3 Piracy Statement ........................3 Before You Start ........................3 Product Introduction ........................ 4 Notice Symbols ......................... 6 Function Table .......................... 7 Function Description....................... 11 1. Copy ............................ 11 2. -
Page 3: Warranty
or any other damages attributable to product malfunction or failure (including without limitation, those attributable to: (1) reliance of the materials provided, (2) costs of product replacement, (3) loss of use, data or profits, (4) delays or business interruptions, (5) and any principle of legal responsibility, arising out of or in reference to the use or overall performance or from delays in servicing or lack of ability to render service) of any U-Reach product. -
Page 4: Product Introduction
Carefully read the entire manual before operating. ⚫ Never turn off the power while the firmware is updating. ⚫ Devices will operate at high temperature during high-speed tasks. Please wear ⚫ protective gloves to prevent burns when handling devices. Devices working in high temperature may cause it to slow down or even shut down. ⚫... - Page 5 Source Port Control Buttons ▲: Forward LED Indicator ▼: Backward Green: Pass/Working OK: Confirm Red: Fail ESC: Escape Back View Power Switch Power Supply 2. Package USB Port for PC-Monitoring Power Cord x 1 12V 12.5A DC Adapter x 1 Duplicator x1 *12V 9A for 8 Ports...
-
Page 6: Notice Symbols
1 pair of Gloves* PC-LINK Cable x 1 User Manual x 1 *Wear protective gloves to prevent burns when handling devices. 3. Power Adapter Standard contents that include power adapter(s) are sufficient for USB devices. Optional power adapter(s) are required when cloning/erasing USB-HDD. Each model may require a different power adapter per its need. -
Page 7: Function Table
Function Table *Below functions and features subject to change without notice. Function Description 1. Copy Data or whole media duplication only. Bit-for-bit comparison between the source and target flash 2. Compare medias. First copies, then compares the target to the source once 3. - Page 8 This feature will show flash’s data information, file format, content size, and capacity. 4.1.2 System Info. This feature will show system information, such as, model number and software version. 4.2.1 Quick Erase Erases flash media content. It will keep the FAT format.
- Page 9 Only USB 3.0 5.5 Target Tolerance No Limit Sets the capacity tolerance range 100% Same between the source and target. The Allow Tolerance default setting is “No limit”. 5.6 Asynchronous Enable Enable opens Asynchronous function. Disable Disable closes this function. 5.7 Power off Time Between Copy&Compare Sets the power-off time between Copy and Compare.
- Page 10 7.1 Copy+ Write Protect Copies data from the source to targets, then sets targets with write protection. 7.2 Copy+Comp+WriteP. Copies data from the source to targets then compares and set targets with write protection. 7. Write Protect 7.3 Set Write Protect Sets targets with write protection.
-
Page 11: Function Description
Function Description 1. Copy Step 1: Prepare source and target devices. Recommendation: Target device(s)’ capacity must be equal to or larger Note than the source device capacity. Step 2: Connect source and target devices. Step 3: Proceed to copy. Scroll to select "1. Copy", then press "OK" to start the duplication process. The number of working/connected targets will be displayed on LCD. -
Page 12: Compare
2. Compare The compare function checks the accuracy of copy result. Scroll to select "2. Compare", then press "OK" to start the verification process. 3. Copy+Compare Sequentially automates from Function 1, Copy to Function 2, then Compare. Scroll to select "3. Copy+Compare", then press "OK" to start the automated duplication and verification process. - Page 13 This function erases flash data while keeping the format if the original flash format is FAT16/32. Use the ▲▼buttons to view status, progress, and information. Note Quick erase function will erase only FAT 16/32 formatted flashes. ➋ Full Erase Completely erases the entire flash media, including format and content. This task takes longer.
- Page 14 The system will format per flash’s capacity. If capacity is above 2GB, the system will format the flash to FAT32 and below 2GB, the system will format the flash to FAT16. Capacity < 2GB Format FAT16 Capacity > 2GB Format FAT32 ➋...
-
Page 15: Setup
5. Setup 5.1 Copy Area ➊ System and Files Also known as "Quick Copy”. The source’s format is automatically analyzed and if it’s recognizable, such as, FAT 16/32/64, NTFS, or Linux ext. 2/3/4, the system will copy the data only, rather than the entire flash. Copies 2GB data only [Copy Area] System and Files... - Page 16 GPT Index Partition Disabling function “ Copy GPT Backup Area” will force the duplicator to ignore this area. GPT Backup Area GPT backup areas will be rebuilt automatically the next time Windows Caution reboots. For Linux, tools such as gdisk can rebuild these backups. 5.3 Button Sound Controls whether to hear a sound when a button is pressed.
- Page 17 No Limit Allow Tolerance Set UP Limit: The target capacity can be bigger than the source capacity. Set UP Limit: The target capacity can be smaller than the source capacity. [Target Tolerance] [Set UP Limit] [Set LOW Limit] Allow Tolerance 5.6 Asynchronous Users can activate Asynchronous copy by selecting “Enable”...
- Page 18 5.9 Delete Disk Signature After Copy Allow user to delete Disk Signature after copy or not. 5.10 Language Sets the system’s language. (English, Japanese, Spanish) 5.11 Select Speed There are 3 transmission speed options: Slower Mode ⚫ Normal Mode (Default) ⚫...
-
Page 19: Log Manager
If you want to change the setting of USB Signal detection, you can go Note through the function “Active USB Revision”. You can choose “Only USB2.0” or “Only USB3.0”. 5.15 Set to Default Restores all settings back to manufacturer defaults. 6. -
Page 20: Write Protect
[Advanced Function] Warning: 1. Clear ALL Log Clear ALL log? Before using function “Clear ALL Log” during PC connection, please observe the following steps: 1. Close the PC-Link software (LV07B) or 2. Disconnect the duplicator from PC Caution *The PC-Link software (LV07B) is designed to continuously record log reports. - Page 21 Step1: Prepare a source USB and some W-mode equipped USB targets. Step2: Plug in USBs. Step3: Scroll to [9. Write Protect] and press “OK.” Select the 3 sub-functions. 7.1 Copy+WriteProtect Copies data from the source to targets and then set write protection on targets. If the sticks were originally protected, the system will automatically Caution release protection, then copy.
-
Page 22: How To Use Pc-Monitoring
7.5 Show USB WP Info Displays basic information for W-Mode USB drives. How to use PC-Monitoring PC-monitoring is a convenient tool to monitor real-time status information such as: duplication progress, testing results, and operation log. This information is viewed on your computer screen. - Page 23 ○ 1 Machine ID (FW Version) ○ 2 Screen Area-This area will display the function currently being executed. ○ 3 Port Information Step 6: If the screen above does not appear, please repeat steps 1 thru 4. If the system requests “Run the program as an Administrator”, right click Note “LV07B”, then set it in “Properties”...
Need help?
Do you have a question about the Intelligent U3 and is the answer not in the manual?
Questions and answers