Advertisement
Quick Links
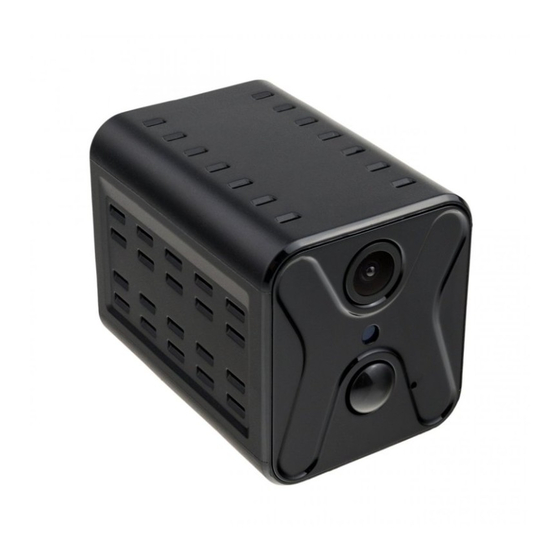
Z9 Portable Plug-n-Play Wi-Fi Camcorder
Overview
Congratulations on your purchase of Z9 Portable Plug-n-Play Wi-Fi
Camcorder!The Z9 requires no setup and installation. It uses Wi-Fi for
real-time surveillance and is able to record video and audio on the
microSD card locally. You can use the smartphone to access Z9 anytime
anywhere.
Z9 has a built-in rechargeable battery which can operate up to 8 hours.
Use the app "Hopeway" to configure the features on Andriod / iOS
smartphone, including PIR body heat trigger and push notification.
Features
Loopback Recording – Overwrite recordings once memory card is full
PIR body heat Trigger – Record 15 seconds video when body heat is
detected
Push Notification – Send a message with small video clip to your
smartphone instantly when body heat is detected
Photo-taking – Capture photo to smartphone
Record to phone – Record video to smartphone
Flexible Connection – AP mode and Router mode
Support max 128GB microSD (TF) card – For card >= 64GB please
format it by Setting -> SD Card Recording -> Format TF card
Charging
Z9 comes with an internal rechargeable battery. It can be charged by
connecting to the USB port of a PC or power bank or 5V DC adapter. If it
is the first time using Z9 or Z9 is not used for a long period, please
charge the battery for 6 hours before use.
Note: Not to be used when charging, please turn off the camera before
charging it.
Status
Red charging LED
Red : charging (please turn off Z9
in order to charge it)
Operating
Off: charging completed
1a. Wi-Fi AP mode
Status LED
1b. Wi-Fi router mode
Power on / off Z9
On: Put the slide switch to the
ON position, the blue LED is on
Off: Put the slide switch to the
OFF position, the blue LED is off
Remark: Power off the camera before
2. Restore to AP mode :
inserting or removing the microSD
card
3
Blue LED flashes slowly: Waiting for
smartphone connection
Blue LED on: Connecting to router
(If password of router is incorrect,
blue LED will flash slowly again,
please
re-configure
the
router
setting)
Red and blue LED flashing
Terminology
Wi-Fi AP mode
Z9 acts as a hot spot, smartphone needs to enable Wi-Fi to directly
connect to Z9
Wi-Fi Router mode
Z9 connects to a router. The user can access Z9 anytime anywhere
through the Internet
Sharing cam
You can invite another user to connect to Z9
Smartphone Requirement
Android 8 or later, iOS 12 or later version
2
Setup
Wi-Fi mode
Step 1: Power on Z9
1. When using the Z9 for the first time, put the slide switch to ON position,
blue LED is on.
Step 2: Install the app "Hopeway"
Andriod / iPhone / iPad:
Go to Android Play Store / Apple App Store, search for "Hopeway",
download and install the app "Hopeway". When installation finishes, the
"Hopeway" icon will be shown.
2.1 Go to the app "Hopeway"
2.2 On the screen, please create a new account if you do not have an
account before. A verification code will be sent to the email, please enter it
in the app. Otherwise, simply login with your existing account. Please enter
LETTER and NUMBER only for the account name and password.
Step 3: Add new device
3.1 Go to phone setting -> Wi-Fi
3.2 Connect to @IPC-xxxxxx and then go back to the app "Hopeway"
3.3 Then scroll down once and the camera will be added, you can watch the
live view now. NO NEED to press the "Add Devices" icon.
4
Advertisement

Subscribe to Our Youtube Channel
Summary of Contents for Zetta Z9
- Page 1 USB port of a PC or power bank or 5V DC adapter. If it Wi-Fi mode is the first time using Z9 or Z9 is not used for a long period, please Step 1: Power on Z9 charge the battery for 6 hours before use.
- Page 2 Please make sure Z9 is turned off and take out the card and insert the card into a card reader and connect the card reader to the PC. The Z9 cannot act as a removable drive when connecting to PC.


Need help?
Do you have a question about the Z9 and is the answer not in the manual?
Questions and answers