Palram Balance Manual
Hide thumbs
Also See for Balance:
- Assembly instructions manual (113 pages) ,
- Assembly instructions manual (6 pages)
Advertisement
Quick Links
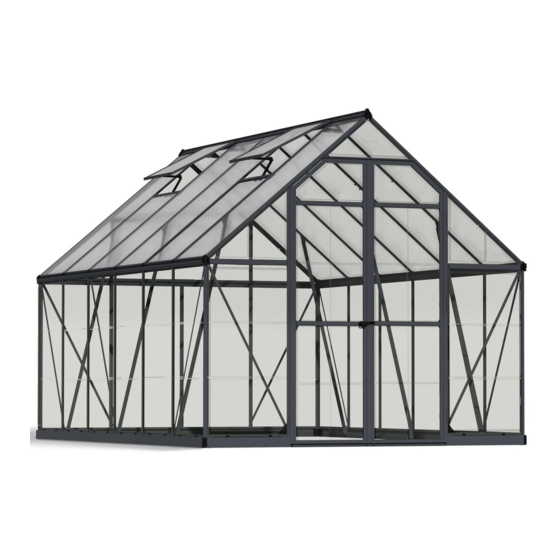
Balance
TM
Approx. Dim.
247L x 244W x 229Hcm / 97.2"L x 96.1"W x 90.2"H
Balance
TM
Approx. Dim.
367L x 244W x 229Hcm / 144.5"L x 96.1"W x 90.2"H
Snow Load
Wind Resistance
75
90
kg/m 2
km/hr
15.4
56
lbs/ft 2
ml/hr
x2
10 mm
5/16"
8'x8'
8'x4' Extension Module
7 mm
1/4"
8'x12'
(8'x8' + Extension)
Find After Sales Service Info inside package 1of 2
EN
10 mm
7 mm
Les informations sur le Service Après-Ventes se trouvent dans l'emballage 1 de 2
FR
5/16"
1/4"
Hinweise zum Kundendienst sind in Paket 1 von 2 zu finden.
DE
Busque la información del Servicio Posventa dentro del paquete 1 de 2
ES
8'x8'
Advertisement

Related Manuals for Palram Balance


Summary of Contents for Palram Balance
- Page 1 Balance 8’x8’ Approx. Dim. 247L x 244W x 229Hcm / 97.2”L x 96.1”W x 90.2”H Balance 8’x4’ Extension Module Approx. Dim. 367L x 244W x 229Hcm / 144.5”L x 96.1”W x 90.2”H 8’x12’ 8’x8’ Snow Load Wind Resistance (8’x8’ + Extension)
- Page 3 IMPORTANT Please read these instructions carefully before you start to assemble this greenhouse. Keep these instructions in a safe place for future reference. » Tools & Equipment » Customer Service • • For assistance with assembly or for replacement parts – please log onto our website Scissors Work gloves or call our service line (number is on the title page).
- Page 4 » During Assembly • Make sure the base is square by measuring the diagonals and level by using a spirit level. • Peel the film covering the panel. Make sure you install it with the UV protected side out. • Important Recommendations You may use Silicon lubricant spray in order to help you slide the panels into the profiles.
- Page 5 IMPORTANT ! Veuillez lire attentivement ces instructions avant de commencer à monter votre serre. Conservez ces instructions en lieu sûr pour toute consultation ultérieure. » Service clientèle » Outils & Equipement (non fournis) • • Pour toute assistance concernant le montage de la serre ou ses pièces de rechange – Gants de travail Ciseaux •...
- Page 6 » Durant l'assemblage • Assurez-vous que la base soit bien carrée en mesurant les diagonales et le nivelage à l’aide d’un niveau à bulle. • Assurez-vous que cette face est bien tournée vers le haut lors de l’installation, Recommandations importantes •...
- Page 7 IMPORTANTE Por favor, lea estas instrucciones cuidadosamente antes de empezar a montar este invernadero. Mantenga estas instrucciones en un lugar seguro para referencia futura. » Herramientas & Equipos » Servicio de Ayuda al Cliente • • Guantes de trabajo Tijeras Para obtener ayuda con el montaje o para las piezas de recambio - por favor entre a nuestro •...
- Page 8 » Durante el montaje • Asegúrese de que la base es cuadrada, midiendo las diagonales y el nivel mediante el uso de un nivel de burbuja. • Pele la película que cubre el panel. Asegúrese de instalarla con el lado con protección UV hacia afuera.
- Page 9 WAŻNE Przed przystąpieniem do montażu szklarni prosimy o uważne zapoznanie się z instrukcją. Zachowaj tę instrukcję w bezpiecznym miejscu do przyszłego użytku. » Narzędzia i sprzęt » Customer Service • • Nożyczki Rękawice ochronne W celu uzyskania dodatkowych informacji oraz w sprawie części zamiennych odwiedź naszą •...
- Page 10 » Podczas Montażu • Upewnij się, że podstawa jest kwadratowa poprzez pomiar przekątnych oraz, że jest Ważne wskazówki równa, używając poziomicy. • • Zdejmij warstwę pokrywającą panel. Upewnij się, że zainstalujesz go stroną z ochroną UV Pewnie umocuj szklarnię w równej pozycji natychmiast po zakończeniu montażu. na zewnątrz.
Need help?
Do you have a question about the Balance and is the answer not in the manual?
Questions and answers