Table of Contents
Advertisement
Quick Links
Advertisement
Table of Contents

Related Manuals for Blue Bird VISION 2011


Summary of Contents for Blue Bird VISION 2011
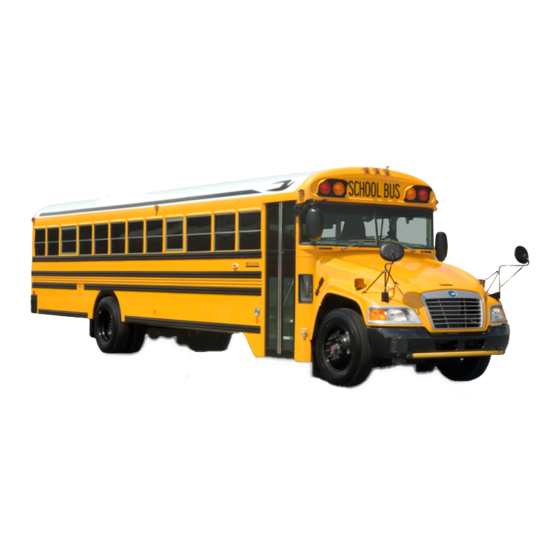
- Page 1 BBCV BLUE BIRD VISION 2011...
- Page 3 10013333 Revision B...
- Page 4 © 2010 Blue Bird Corporation. All rights reserved. All Blue Bird products sold for use in the United States of America and its insular areas comply with all applicable Federal Motor Vehicle Safety Standards (FMVSS) and applicable Federal ADA requirements.
-
Page 5: Table Of Contents
Introduction / 7 Floor / 18 Blue Bird Authorized Dealers / 8 Heater/Defroster / 18 Blue Bird School Bus Support / 8 Insulation / 18 Blue Bird School Bus Training / 8 Lettering / 18 Blue Bird Parts Sales / 8... - Page 6 VISION D R I V E R S H A N D B O O K Driver Orientation / 25 Emergency Pushout Windows / 58 Driver Orientation / 25 Emergency Roof Hatch / 59 Emergency Equipment Locations / 25 Entrance Door Emergency Release / 60 First Aid Kit / 25 Exterior Compartments / 61 Body Fluids Clean-up Kit / 25...
- Page 7 Allison Automatic Transmission Driving Tips / 95 Electric Retarder (If Equipped) / 96 Transmission Indicator Lights / 97 Exhaust System / 98 DPF Regeneration In Blue Bird Buses / 99 Aftertreatment Terms / 99 Levels of Notification / 100 Stationary Regeneration Precautions / 103...
- Page 8 VISION D R I V E R S H A N D B O O K...
-
Page 9: Introduction
…and Congratulations! We at Blue Bird Corporation wish to thank you for your investment of trust in Blue Bird quality, and congratulate you on being a Driver of one of the most innovative vehicles in pupil transportation; the Blue Bird Vision. -
Page 10: Blue Bird Authorized Dealers
Blue Bird Parts sales Blue Bird’s modern Service Parts facility ships parts directly to Blue Bird Autho- rized Dealers and Blue Bird Bus Spec and Bus Care centers nationwide. Blue Bird Parts Sales consists of modern warehousing facilities, efficient ordering and inventory control systems, and expert technical staff who know your bus in- side and out. -
Page 11: Blue Bird Bus Warranty
For your convenience and efficiency, warranty claims are handled at the local Dealer level, as are all other Customer Services. Be assured that your Blue Bird is backed by one of the strongest factory warranties in the industry, and that factory-based Bus Warranty representatives are in constant contact with your local dealer about your warranty issues. -
Page 12: About 2010 Emissions Standards
VISION D R I V E R S H A N D B O O K About 2010 Emissions Standards Buses equipped with 2010 engines are designed to conform to new and stringent federal emissions standards. These standards affect both the equipment installed at the factory and the fuel at the pump. -
Page 13: Regarding Modifications
Regarding Modifications Blue Bird Corporation offers many items as standard and optional equipment to meet federal, state, and local specifications and individual customer requirements. Those interested in modification of this vehicle should consult the Service Man- ual and Blue Bird Engineering Department for a more complete understanding of the vehicle. -
Page 14: About This Driver's Handbook
If questions arise that are not specifically covered in this manual, please contact your Blue Bird Dealer. Your Dealer will either answer your questions or will be able to assist in obtaining the needed information. To report a problem with your bus, con- tact your Blue Bird dealer (or if you deal directly with Blue Bird, contact your Service Representative). -
Page 15: General Specification, Chassis
GENERAL SPECIFICATIONS General Specification, Chassis Alternator 240 Amp Leece Neville, 12 Volt, AVI-160. Axle & suspension, Front Axle: Hendrickson SteerTek, 12,000 lb rating. Petroleum lubed bearings. 50 degree wheel cut. Hubcaps with window seal included. suspensions: Hendrickson SofTek, 8,000 lb (standard) or 10,000 lb (optional) rating. 4”... -
Page 16: Bumpers
SPL Series 140 is used with optional PTS 3000 transmission. engines cummins isB / 2007 emission standards engines. Some Blue Bird 2011 Visions are equipped with Cummins ISB engines which are specially designed to meet 2007 emission standards. These engines incorporate a Cummins Particulate Filter / Muf- fler, and use cooled Exhaust Gas Recirculation to reduce emissions. -
Page 17: Intake
15 psi at sea level. Thermostats opening temperature 190 F; fully open @ 205 F. Fan full-on at engine coolant temperature of 210 F. Fuel/Water Sep- erator supplied with engine. Blue Bird diesel fuel systems are not compatible with biodiesel. Engine manufacturer’s warranty regarding performance, emissions and durability can be affected by using biodiesel. -
Page 18: Horn
Hub Piloted steel 10 stud disc wheels, single front, dual rear, 8.25 x 22.5 rims. Wiring Blue Bird single-zone Multiplex chassis circuit wiring system with MPX Module lo- cated in Power Distribution Unit compartment at front of bus below dash. Includes... -
Page 19: General Specification, Body
Blue Bird two-panel Outward Opening door with manual door control. optional: Bode electically-operated two panel outward opening door. Permanently lubricated bearings and bushings. Mechanical clutching system in the gear case disengages the worm drive to allow emergency manual opening of the door. -
Page 20: Floor
VISION D R I V E R S H A N D B O O K Floor covering. 3/16” thick ribbed black rubber in aisles and at entrance aisle area. Alu- minum aisle trim over join in floor covering, full lenght of body. 1/8” smooth black rubber under seats. -
Page 21: Mirrors
g e n e r a l s p e c i f i c a t i o n s mirrors exterior crossview: A Rosco Mini-Hawkeye crossview mirror system allows a seated driver to view pedestrians while the bus is stopped. The crossview mirror system is comprised of a 10.8”... -
Page 22: Panels, Exterior
VISION D R I V E R S H A N D B O O K Panels, exterior 16 1/4” skirt. Outside side panels are constructed of 20 gauge form fluted steel. Side panels extend from below the side windows to a distance of 16 1/4” below the floor (16 1/4”... -
Page 23: Rubrails
g e n e r a l s p e c i f i c a t i o n s rubrails Four double-ribbed low profile 16 gauge steel applied rubrails are installed along both sides of the body, as follows: One below side windows; one at seat (Passenger) level;... -
Page 24: Switch Panel
VISION D R I V E R S H A N D B O O K switch Panel Mounted on left of driver with rocker-type illuminated switches for electrical equip- ment. Brightness of illumination is controlled by a dimmer slide switch. Ventilation Air intake. -
Page 25: Dimensions
g e n e r a l s p e c i f i c a t i o n s Dimensions The dimensions shown exclude exterior mirrors, marker and signal lights, bumpers, fender skirts, washers, wipers, ad frames and rub rail; and are taken under static con- ditions at design height. - Page 26 VISION D R I V E R S H A N D B O O K...
-
Page 27: Driver Orientation
DRIVER ORIENTATION Driver Orientation This chapter is a brief tour of the features and equipment locations. Vision’s Emergency Equipment Locations Some emergency equipment is optional and differs between states. Generally, all school buses have first aid kits, fire estinguishers, and trianguar roadside hazard re- The First Aid Kit is mounted on the interior header panel flector kits;... -
Page 28: Flare Kit
VISION D R I V E R S H A N D B O O K Flare Kit If the bus is equipped with a flare kit, on most buses it is typically mounted on Vision the floor behind the Driver’s seat and left side seat barrier. The location may differ according to state specs. -
Page 29: Driver's Area
Driver’s Area Blue Bird has designed many new features into the Driver’s area of the . A new Vision one-piece molded dash housing spans the entire front of the bus. All gauges are incorporated in a single new main instrument cluster. -
Page 30: Left Switch Console
VISION D R I V E R S H A N D B O O K Left Switch Console The left switch console under the driver’s side window and shown here consist of, the Radio Switch Panel, the Heater Control Panel, Right and left rearview mirror controls, upper and lower switch banks, a storage compartment, the optional PA mic jack and a 12 volt auxiliary jack as well. -
Page 31: Radio Switch Panel
d r i v e r o r i e n t a t i o n radio switch Panel The radio console switch panel located to the left of the driver and shown below includes a Panasonic AM/FM stereo cassette or CD player with PA system, depend- ing on option ordered. -
Page 32: Upper Left Switch Panel
VISION D R I V E R S H A N D B O O K upper left switch Panel The upper left switch panel located directly below the driver’s window and shown below includes switches that control the heater systems installed on your bus. The panel contains switches for standard and optional equipment heaters including front and rear heaters, the driver’s heater, underseat heaters, and auxiliary heater pump. -
Page 33: Heater Control Panel
d r i v e r o r i e n t a t i o n Heater control Panel The Heater Control panel of the Side Console contains controls for the front heater unit which is housed immedately below the Side Console left of the Driver seat. Ducts from this unit also provide windshield defrosting. -
Page 34: Lower Left Switch Panel
VISION D R I V E R S H A N D B O O K lower left switch Panel The lower left switch panel located directly beside the driver consist of switches for standard and optional equipment. The panel will be equipped only with switches for options that are included on your bus and therefore may differ from the panel shown here. - Page 35 d r i v e r o r i e n t a t i o n noise suppression. strobe light. Controls Includes yellow bezel. the roof-mounted strobe Brake interlock overide. Momentary or on/off. light. Momentary switch When pressed and held, certain noisy overides Brake Interlock devices such as auxilliary fans, heater mirror defrost.
-
Page 36: Right Console Switch Panel
VISION D R I V E R S H A N D B O O K Right Console Switch Panel The right switch panel located toward the center of the bus consist of switches for standard and optional equipment. The panel will be equipped only with switches for options that are included on your bus and therefore may differ from the panel shown here. -
Page 37: Driver's Instrument Panel
d r i v e r o r i e n t a t i o n Driver’s Instrument Panel The driver’s instrument panel behind the steering wheel and shown here consist of the instrument panel cluster, headlight switch, panel dimmer switch, high idle switch and air conditioning vents. -
Page 38: Instrument Cluster
VISION D R I V E R S H A N D B O O K instrument cluster instrument cluster is a single unit of all-electronic guages and warn- Vision’s ing lights, which receive both analog inputs from such components as the fuel tank sender and digital signals from components such as the engine and transmission control modules. -
Page 39: Message Display Center
d r i v e r o r i e n t a t i o n message display center The message display center provides additional information to the vehicle operator. It is located at the bottom center of the instrument panel and is divided into six zones. Each zone displays data relayed to the vehicle operator from vehicle systems. -
Page 40: Warning Bank Indicators
VISION D R I V E R S H A N D B O O K Priority Messages Quad 2A. Displays Gear Selection. n - Neutral, r - Reverse, and d - Drive. No Engine Communication Quad 2B. Displays alternator output voltage (in Volts) and can display the amount of No Transmission Communication current being drawn by the vehicle electrical system (in Amps). - Page 41 System under Routine Op- engine Warn. The engine seat Belt. Indicates driver eration. needs service. seatbelt not engaged. oil Pressure. Indicates low oil pressure. diesel exhaust Fluid. DEF low level warning light. See SCR System in Blue Bird Buses under Routine Op- eration.
-
Page 42: Set The Clock
VISION D R I V E R S H A N D B O O K set the clock To set the clock, be sure the park brake is set then press and hold the bottom button on the face of the instrument cluster for approximately 5 seconds. This will display the Settings and Diagnostics screen. -
Page 43: Contrast Adjustment
d r i v e r o r i e n t a t i o n contrast Adjustment Set the park brake then press and hold the bottom button on the face of the instru- ment cluster for approximately 5 seconds. This will display the Settings and Diag- nostics screen. -
Page 44: Heat And Air Controls
VISION D R I V E R S H A N D B O O K Heat and Air Controls The optional heat and air control panels are defined below. For further explanation of heater switches and controls, see Upper Left Switch Panel and Heater Control Panel, under Left Console Switch Panel found in ths manual. -
Page 45: Heater Valve Lever
d r i v e r o r i e n t a t i o n Heater Valve lever A red lever on the front heater housing to the left of the Driver’s foot area controls the rate of heated fluid flowing through the heater unit, providing a “temperature control”... -
Page 46: Steering Column
VISION D R I V E R S H A N D B O O K Steering Column The steering column of the Vision is designed for better access to the driver’s area with easier adjustment and a greater range of movement. steering Wheel Position A lever at the lower side of the column sets the tilt and telescopic adjustment of the steering wheel. - Page 47 d r i v e r o r i e n t a t i o n Intermittent Windshield Wipe / Wash Turn for Wipe. Press for wash Left Switch Stalk Right Switch Stalk Turn Signals Hazard Flasher Control Cruise Control Set High / Low Beam Resume, Accelerate, On / Off Wipe / Wash...
-
Page 48: Parking Brake, Units With Air Brakes
D R I V E R S H A N D B O O K Parking Brake, Units With Air Brakes On Blue Bird Vision buses equipped with air brakes, the rear wheel air chambers also enclose powerful coil springs. These springs automatically apply the rear brakes whenever air pressure is absent. -
Page 49: Parking Brake, Units With Hydraulic Brakes
Parking Brake, Units With Hydraulic Brakes Blue Bird Vision buses equipped with hydraulic brakes are also equipped with a drum/shoe-type brake mechanism mounted to the driveline at the rear of the trans- mission. -
Page 50: Driver's Seat, Standard
D R I V E R S H A N D B O O K Driver’s Seat, Standard The standard Driver’s seat in the Blue Bird Vision is mounted on a spring-loaded ped- estal. Several manual adjustments are provided for maximum control, safety and comfort: Height control. - Page 51 d r i v e r o r i e n t a t i o n Back Tilt Adjustment Lumbar Adjustment Standard Driver Seat Height Adjustment Fore / Aft Slide Release Rear Position Front Position Flipped Open...
-
Page 52: Driver's Seat, Air
VISION D R I V E R S H A N D B O O K Driver’s Seat, Air The air ride Driver’s seat in the Blue Bird is mounted on an air-powered scis- Vision sor mechanism which houses its own electric air compressor. Several manual adjust- ments are provided for maximum control, safety and comfort: Height control. - Page 53 d r i v e r o r i e n t a t i o n Back Tilt Adjustment Air Ride Driver Seat Lumbar & Height Adjustments Fore / Aft Slide Release...
-
Page 54: Interior Compartments
VISION D R I V E R S H A N D B O O K Interior Compartments Several interior compartments provide convenient access to service-related compo- nents. These are not storage compartments, and should only be opened for service purposes. - Page 55 d r i v e r o r i e n t a t i o n Electric Entrance Door Header Overhead Storage Right Glove Box Wiring Channels Power Distribution Unit Left Console Driver Compartment...
-
Page 56: Passenger Seats
D R I V E R S H A N D B O O K Passenger Seats Blue Bird passenger seats are built to comply with Federal Motor Vehicle Safety Stan- dards (FMVSS). ’s passenger seats are through-bolted to the floor of the passenger Vision compartment. -
Page 57: Passenger Area Heaters
d r i v e r o r i e n t a t i o n Passenger Area Heaters Some buses are equipped with optional passenger area heaters. The exact Vision placement and BTU rating of these heaters varies depending upon specific options and seating configurations. -
Page 58: Passenger Windows
VISION D R I V E R S H A N D B O O K Passenger Windows Opening split sash windows in the Blue Bird , operate similarly to other win- Vision dows familiar to school bus Drivers. To lower a window, place an index finger in both of the spring loaded sliding latches and slide them inward away from the frame. -
Page 59: Emergency Exits
Emergency Exits All emergency exits on this Blue Bird bus meet FMVSS specifications. In true emergency situations, every second counts. It is therefore essential that... -
Page 60: Emergency Pushout Windows
VISION D R I V E R S H A N D B O O K emergency Pushout Windows Four of the windows in the passenger area are emergency pushout windows, two located in the front half of the bus and two in the rear half. There are two variations, the installation of which depend upon state specifications: vertically hinging and horizontally hinging. -
Page 61: Emergency Roof Hatch
d r i v e r o r i e n t a t i o n emergency roof Hatch Depending upon options and/or regulation, the Vision may be equipped with one or two roof-mounted emergency escape hatches. To Open To Close Grasp the red knob. -
Page 62: Entrance Door Emergency Release
VISION D R I V E R S H A N D B O O K entrance door emergency release Electically Operated Door Emergency Release Depending upon purchase options, the entrance door may be manually-operated, electrically operated, or air operated. Manually operated doors employ a door control rod connected to a handle mounted on the dash panel near the Driver. -
Page 63: Exterior Compartments
d r i v e r o r i e n t a t i o n To Open Exterior Compartments engine compartment The engine compartment hood of the Vision is mounted on a torsion spring hinge mechanism just above the front bumper, and is retained in its closed position by two spring latches, one on each side of the hood near the body’s front cowl. -
Page 64: Battery Compartment
VISION D R I V E R S H A N D B O O K Battery compartment A hinged door located on the left side of the Vision directly below the Driver’s win- dow provides access to the vehicle’s batteries. The batteries are mounted on a metal tray which is retained by a pin. -
Page 65: Hazard Rating (Nfpa/Hmis)
• Read the manufacturer’s directions on all products used prior to use. Wash. In order to preserve your vehicle’s finish, Blue Bird requires protection of the finish by washing a minimum once every 3 months. • Wash the vehicle in lukewarm or cold water. -
Page 66: Wax
Bus downtime Treatment During periods of bus downtime, Blue Bird Corporation recommends the applica- tion of Bird Bath™ Bus Guard Protectant available from Blue Bird authorized dealers to protect exterior surfaces. Bus Guard is a triple-zero product that, when properly applied, protects against harmful UV rays and other damaging environmental condi- tions. - Page 67 d r i v e r o r i e n t a t i o n Floor covering. Regular cleaning and care will prolong the life of floor covering and improve the general appearance. Floor coverings should be swept daily and mopped weekly with a mild detergent and water.
-
Page 68: Product Identification Information
VISION D R I V E R S H A N D B O O K Product Identification Information Federal Vehicle certification Plate This decal certifies that the vehicle complies with all appli- cable Federal Motor Vehicle Safety Standards (FMVSS) in effect on the date of manufacture. -
Page 69: Data Plates Reference
DRUM REAR BRAKE AXLE DRUM REAR AXLE REAR AXLE RATIO DIFFERENTIAL CHASSIS SERVICE NO. BLUE BIRD FORT VALLEY FORT VALLEY, GEORGIA BODY NO. MODEL YEAR MFG. BODY DATE STATE / PROVINCE EQUIPPED CAPACITY SPECIFICATION YEAR MAX. DESIGN CAPACITY BODY SERVICE NO. - Page 70 VISION D R I V E R S H A N D B O O K...
-
Page 71: Pre-Trip Inspection
PRE-TRIP INSPECTION Before Placing the Bus in Service Upon taking delivery of any new school bus, Blue Bird recommends the following items be double-checked by your service technician before placing the bus in rou- tine pupil transportation service: • Check the suspension U-bolt torque. • Check the service brake adjustment. - Page 72 VISION D R I V E R S H A N D B O O K 2. Proceed around the left side (Driver’s side) of the bus. 2.1 Check the front left tire. Check for proper inflation pressure. Check the tread depth, and look for any signs of physical damage. Normal tread wear should be uniform across the width of the tread.
- Page 73 p r e t r i p i n s p e c t t i o n 4. Approach the rear axle, at the front of the rear tire. 4.1 Look under the bus, and across to the other side of the axle. Visually inspect for any missing suspension bolts, signs of cracks, misalign- ment, or other physical damage on the opposite side.
-
Page 74: Entrance Area Inspection
VISION D R I V E R S H A N D B O O K 6. Proceed around to the right side of the bus. Approach the rear axle, at the rear of the rear tire. 6.1 Open the fuel filller door and ensure that the fuel cap is in place and securely tightened. -
Page 75: Engine Compartment Inspection
p r e t r i p i n s p e c t t i o n engine compartment inspection 8. Step to the right side of the bus, just forward of the entrance door. Unlatch the hood latch. Walk to the opposite side and release the other hood latch. Step to the front of the hood, grasp the hood handhold and pull back to raise the hood completely. - Page 76 VISION D R I V E R S H A N D B O O K 9 . Step to the right side of the engine compartment. 9.1 Visually inspect the inner side of the wheel. If equipped with hydrau- lic brakes, inspect the calipers for any sign of brake fluid leakage.
-
Page 77: Instrumentation & Driver's Alert Checks
p r e t r i p i n s p e c t t i o n instrumentation & driver’s Alert checks Enter the bus. If the bus is equipped with an electrically-operated or air- operated door, ensure that the emergency release is not tripped. Be seated in the driver’s seat. -
Page 78: Exterior Lights Check
VISION D R I V E R S H A N D B O O K exterior lights check 12. With the help of an assistant, operate all of the exterior lights and verify that they are all working properly. 12.2 Note operation of all running lights, marker and clearance lights, and warning lights on the front of the bus. -
Page 79: Passenger Area Inspection
p r e t r i p i n s p e c t t i o n Passenger Area inspection 14. Perform a general inspection of the cleanliness of the pas- senger area, and a functional check of all emergency exits. 14.1 Open the Rear Emergency Door, checking it for proper operation. -
Page 80: Prepare For Driveaway
VISION D R I V E R S H A N D B O O K • Check the fire estinguisher charge and expiration date. • Inspect the flare kit and / or roadside hazard triangular reflector kit for full content and secure stowage. • Inspect the fire axe and/or crowbar for secure mounting. • Inspect the first aid kit and body fluid kit for fully-stocked content and se- cure mountings. Prepare For driveaway 16. Return to the Driver’s seat. 16.1 Adjust the seat height, back, and position. 16.2 Press the steering column release pedal and adjust the steering ü... -
Page 81: Mirrors And Mirrors Adjustment
Mirrors and Mirrors Adjustment [WARNING] The mirror system on this Blue Bird bus has been designed to meet all field-of-view regulations. However, it is the responsibility of the driver to properly adjust the mirrors to provide adequate safety. - Page 82 VISION D R I V E R S H A N D B O O K 4. Adjust the left-hand flat mirror in the same manner as described for the right-hand flat mirror. 5. Adjust the left-hand convex mirror in the same manner as described for the right-hand convex mirror.
-
Page 83: Routine Operation
States and other regional school bus adminstration organizations sometimes conduct training or practice seminars such as school bus “rodeos. ” Blue Bird encour- ages participation in any program designed to increase the skill and safety of our... -
Page 84: Prior To Starting The Engine
Blue Bird bus. The information and/or instructions in the manufacturer’s manual takes precedence over the more limited information in this manual. Your Blue Bird bus is equipped with an engine alarm system, designed to help prevent major damage due to high coolant temperature and/or low engine oil pres- sure. -
Page 85: High Idle Function
r o u t i n e o p e r a t i o n [CAUTION] Wait until the “Wait to Start” light is no longer illuminated before turning the ignition to the “Start” position. Do not crank the engine continuously for more than 30 seconds. -
Page 86: Engine Cooling System
“long-life” when used in their respective engines. Blue Bird buses built as of March 26, 2009 come from the Blue Bird factory with one of two types of coolant. The standard coolant is Fleetguard ES Compleat 50/50 premix, which is blue in color. -
Page 87: Coolant Testing And Replacement
Blue Bird installs a decal on or near the deaeration tank filler which state the type of coolant installed at the factory. The decal states the approved premixed coolant and coolant manufacturer’s part number for one gallon quantities. - Page 88 Blue Bird buses equipped with Cummins engines may also be equipped with an optional coolant filter. The coolant filter should be replaced every 6 months or 6,000 miles; whichever occurs first . The coolant filter element installed at the Blue Bird fac- tory is compatible with all of the above-described coolants:...
-
Page 89: Service Brakes
Service Brakes Your Blue Bird may be fitted with hydraulic disc brakes or air-powered drum Vision type brakes, depending on the options chosen at the time of manufacture. -
Page 90: Parking Brake (With Hydraulic Brakes)
VISION D R I V E R S H A N D B O O K Parking Brake (With Hydraulic Brakes) A Blue Bird equipped with hydraulic brakes employs a foot-operated parking Vision brake, located to the Driver’s lower left. When the driver presses this lever into the en- gaged position, a mechanical linkage causes a brake shoe assembly to close around a brake drum attached to the driveshaft, preventing the bus from moving. -
Page 91: About Air Brakes
About Air Brakes The optional air brakes system on the Blue Bird uses compressed air pressure Vision to operate drum brakes. The system is divided into two separate circuits; one for rear brakes (primary) and one for front (secondary). -
Page 92: Parking
VISION D R I V E R S H A N D B O O K Parking Each time you park the bus or leave the driver’s seat while the engine is running the following procedure must be followed: 1. Apply the service brakes to bring the vehicle to a complete stop, and con- tinue to hold the brake pedal. -
Page 93: Allison Automatic Transmissions
Operator’s Manual for more details about operation, care, and maintenance. If you did not receive this manual with your bus, please contact the transmission supplier. Both Blue Bird Body Company and Allison Transmissions continually strive to improve the quality and performance of their respective products. For this reason, information and instructions in the Allison Transmission Operator’s Manual supplied... -
Page 94: Allison 2000 Bus Series Transmission Gear Selection
VISION D R I V E R S H A N D B O O K Allison 2000 Bus series Transmission Gear selection [WARNING] When leaving the vehicle while the engine is running, the opera- tor must be sure the transmission is in Neutral, the parking brake is engaged, and the wheels are chocked. -
Page 95: Allison Model 3000 Bus Series Transmission
r o u t i n e o p e r a t i o n Allison model 3000 Bus series Transmission The Allison electronic transmission provides five forward speeds and one reverse. Fourth gear is a 1-to-1 ratio while the fifth gear is an overdrive with a 0.75-to-1 ratio. The push-button shift selector is located on the right area of the dash. -
Page 96: Range Inhibit Feature
VISION D R I V E R S H A N D B O O K [WARNING] Do not allow your vehicle to coast in neutral. This practice can result in transmission damage. Engine retard and braking assistance is not available when the transmission is in neutral. -
Page 97: Allison Automatic Transmission Driving Tips
r o u t i n e o p e r a t i o n Allison Automatic Transmission driving Tips Accelerator control. The pressure of your foot on the accelerator pedal influences the automatic shifting. An electronic signal tells the ECU how far the driver has de- pressed the pedal, and the transmission adjusts its shifting for maximum perfor- mance. -
Page 98: Electric Retarder (If Equipped)
VISION D R I V E R S H A N D B O O K [WARNING] If you only downshift or only use the service brakes when driv- ing down a steep grade, you can lose control. To maintain control, combine downshifting, braking, and other retarding devices. -
Page 99: Transmission Indicator Lights
r o u t i n e o p e r a t i o n Transmission indicator lights The instrument panel contains two indicator lights amd one priority message associ- ated with the transmission: range inhibited (priority message). Under certain operating conditions, the Trans- mission Control Module (TCM) may restrict gear selection to protect the engine / transmission from damage. -
Page 100: Exhaust System
90 percent from 2004 levels. The exhaust system of the Cummins Ultra Low Sulfer, per the engine engine in Blue Bird buses are aftertreatment systems which incorporate a Diesel Par- manufacturer’s specifications. ticulate Filters (DPF) and a Selective Catalytic Reduction (SCR) system instead of or- In Cummins, use oils meeting API dinary mufflers. -
Page 101: Dpf Regeneration In Blue Bird Buses
The Cummins equipped Blue Bird bus system is not complicated. Nor should the de-rated, and reduction of power regeneration process be regarded with alarm. Both Drivers and service technicians while driving. -
Page 102: Levels Of Notification
VISION D R I V E R S H A N D B O O K HesT indicator (High exhaust system Temperature). An instrument panel indica- tor which appears when the exhaust temperature is unusually high due to recent regeneration. This is a normal behavior of the aftertreatment system, intended to notify the driver and technician that the exhaust system temperature is high and that caution should be observed around the exhaust system. - Page 103 r o u t i n e o p e r a t i o n Level 1 level 1 regeneration notification: dPF indicator Appears. In low-demand operat- ing conditions, it is possible that the regeneration system does not have sufficient Regen opportunity to prevent particulate build-up in the DPF.
- Page 104 VISION D R I V E R S H A N D B O O K Level 3 level 3 notification: check engine indicator Appears. If the bus continues to be Regen operated without taking the measures indicated by a Level 2 Notification, particulate Needed accumulation worsens.
-
Page 105: Stationary Regeneration Precautions
r o u t i n e o p e r a t i o n stationary regeneration Precautions During active regeneration, the exhaust system can reach extremely high temper- atures. Automatic active regeneration, which occurs while driving the bus, is pro- grammed to occur only when the bus is moving at a minimum speed, and it stops when the vehicle slows or stops. -
Page 106: Scr System In Blue Bird Buses
Exhaust gas and exhaust surface temperatures will remain elevated until they have had time to cool to normal levels. SCR System in Blue Bird Buses The Selective Catalytic Reduction (SCR) system uses diesel exhaust fluid (DEF) as a chemical reactant. -
Page 107: Def Levels Of Priority Notification
DEF tank. Conversely, care should be given not to put DEF in the diesel fuel tank. Read all decals carefully before refilling. Refer to Blue Bird and Cummins Service Manuals for detailed description of the aftertreatment system. - Page 108 VISION D R I V E R S H A N D B O O K deF level 4. When the DEF level reaches 0% in the tank, a deF TAnK emPTY warning will appear in Quad 1 of the Message Display, this DEF TANK EMPTY warning display will flash from positive to negative (DEF TANKIEMPTY).
-
Page 109: General Propane Tank Filling Procedures
r o u t i n e o p e r a t i o n General Propane Tank Filling Procedures The most important procedure of filling any propane tank is safety. Understanding [WARNING] Technicians work- the properties & characteristics and safe handling practices of the fuel is required ing with, or around, fuel systems before conducting any propane tank filling efforts. -
Page 110: Propane Powered Motor Vehicle Filling Procedures
D R I V E R S H A N D B O O K Propane Powered Motor Vehicle Filling Procedures [WARNING] For passenger safety, Blue Bird recommends all 1. Entering the propane fueling station. occupants disembark to a safety zone before fuel filling procedures 1.1 Park the vehicle in close proximity to the motor fuel dispensing station. - Page 111 r o u t i n e o p e r a t i o n 6. Connect the fuel nozzle to the vehicle fueling receptacle. 6.1 The propane fueling nozzle has to be screwed on securely. A. Wear protective gloves while fueling a propane tank. B.
- Page 112 VISION D R I V E R S H A N D B O O K E. Immediately close the filling nozzle NOTE: The 80% fixed liquid level valve can be used to verify the accuracy of the automatic stop fill device Release or close the fueling nozzle.
-
Page 113: Enroute Emergencies
ENROUTE EMERGENCIES Enroute Emergencies In the case of any enroute emergency, the Driver must ensure the safety of the pas- sengers before performing any procedure on the bus. Safely maneuver the bus to the nearest safe location; a parking lot or emergency lane if possible, and take ap- propriate measures to arrange for pick up of the passengers and notify public safety officials. -
Page 114: Using Booster Cables
VISION D R I V E R S H A N D B O O K Using Booster Cables [WARNING] Ensure that the ignition switch of the disabled vehicle is in the “OFF” position. Always connect the POS (+) battery cable first. Connect the NEG (-) cable to the chassis, away from the batteries. -
Page 115: Starting Problems
e n r o u t e e m e r g e n c i e s Starting Problems For more detailed instructions, refer to the engine manufacturer’s Operator’s Man- ual. One or more of the following items may cause an occasional starting problem: • The Park Brake must be on to start the bus. -
Page 116: Jacking And Towing
VISION D R I V E R S H A N D B O O K Jacking and Towing Jack Points Front Jack Point [WARNING] Proper jacking procedures and basic safety measures must be observed to ensure the safety of personnel while working under the bus. - Page 117 e n r o u t e e m e r g e n c i e s 3. To loosen the tapered dowels which surround each stud, use a 1.5” diameter brass drift and 5-6 lb hammer. Hold the brass drift against the center of the axle shaft flange, inside the round driving lugs.
-
Page 118: Air Tank Schrader Valve
VISION D R I V E R S H A N D B O O K 6.5 Repeat the procedure for the spring brake chamber on the oppo- site side of the bus. The spring brakes are now released, having their springs compressed by the release bolts. -
Page 119: Scheduled Maintenance
A few Notes pages are provided at the back of this handbook for that purpose. For more comprehensive service and maintenance information, the Service Tech- nician should obtain and become familiar with the current Blue Bird Service Manual for the particular model(s) being serviced. -
Page 120: Fluids & Filters
VISION D R I V E R S H A N D B O O K Fluids & Filters Fluids & Filters, Vision Fluid Type Capacity Filter Comments Engine, Cummins ISB 21.4 Quarts High-Quality SAE 15W-40 (including filter) See your Cummins ISB Owner’s Manual for more heavy duty engine oil, such as 19 Quarts details. - Page 121 s c h e d u l e d m a i n t e n a n c e Rear Axle Viscosity /Temperature Chart Meritor Lubricant Specification Description Cross Reference Minimum Outside Temperature Maximum Outside Temperature 0-76-A Hypoid Gear Oil GL-5, S.A.E.
-
Page 122: Maintenance Task Schedule
VISION D R I V E R S H A N D B O O K Maintenance Task Schedule Ensure that the Safety Information, warnings and instructions are read and under- stood before operation or maintenance procedures are performed. Use whichever interval listed (time, mileage, engine hours) occurs first. - Page 123 s c h e d u l e d m a i n t e n a n c e First 1000 Miles Then Every 3 Months or 6000 Miles Frame Inspect & Tighten Body Tie Downs Body Inspect for missing, damaged rubber pads. Tighten clamps Tie Down Clamps to 37–41 ft lb.
- Page 124 VISION D R I V E R S H A N D B O O K First 11,000 Miles Then Every 6 Months or 5000 Miles Cooling System Inspect Charge Air Cooler Inspect for clogging debris. Every Day Doors Test Wheelchair Lift Follow the manufacturers recommendations.
- Page 125 s c h e d u l e d m a i n t e n a n c e Electrical Inspect All Lights Check all running, stop, marker, hazard, and warning lights for proper operation. Engine Inspect Oil Level See Engine operators manual for oil specifications.
- Page 126 VISION D R I V E R S H A N D B O O K Every 60,000 Miles Fuel System Replace Fuel Filter Every 90,000 Miles Fuel System Replace Spark Plugs Every Month Exterior Structure Wash Body Wash the vehicle in lukewarm or cold water. Do not use hot water or wash in the direct sunlight.
- Page 127 s c h e d u l e d m a i n t e n a n c e Every Month or 3000 Miles Doors Lubricate All Doors Vandal Locks Spray Apply lubricant into key locks. Use LPS #1 for sliding bolt locks.
- Page 128 VISION D R I V E R S H A N D B O O K Seats Lubricate Driver's Seat Lubricate per manufactuers recommendation. Inspect & Tighten Passenger Seats Use standard torque for bolt size , tread type and grade. Mountings Warning Devices &...
- Page 129 s c h e d u l e d m a i n t e n a n c e Every 3 Months or 5000 Miles Brakes Lubricate Air Brakes S-Cam See Meritor Cam Brakes Appendix in Air Brakes Chapter for guidelines.
- Page 130 VISION D R I V E R S H A N D B O O K Inspect & Tighten Intake Tract Worm Gear Tighten to 38–42 in lb. Clamps Steering Lubricate Axle Steering Linkage Drag Link NLGI #2 EP multipurpose grease rated GC-LB or equivalent.
- Page 131 s c h e d u l e d m a i n t e n a n c e Every 6 Months or 6000 Miles Axle & Suspension, Front Lubricate AirTek Suspension Grease Use NLGI #2 EP or equivalent. Fittings Lube with suspension loaded.
- Page 132 VISION D R I V E R S H A N D B O O K Cooling System Replace Coolant Filter Lubricate Shutters Pivots Use Never Seize spray lubricant. Electrical Inspect Battery Battery Posts Clean and apply anti corrosion agent. Exhaust System Inspect Exhaust Pipe Joints Inspect for loose clamps, leaks, damage.
- Page 133 s c h e d u l e d m a i n t e n a n c e Every 6 Months or 12,000 Miles Axle & Suspension, Rear Inspect & Tighten Comfort Air Suspension Tighten to 20–30 ft lb. Air Spring Anchor Bolts Inspect &...
- Page 134 VISION D R I V E R S H A N D B O O K Every 12 Months or 12,000 Miles Heaters & Defrosters Tighten Front Heater Fasteners All fasteners holding such heaters in place in unit. For details on fasteners check installation prints. Clean Front Heater FIlter &...
- Page 135 s c h e d u l e d m a i n t e n a n c e Every 12 Months or 24,000 Miles Brakes Clean Air Brakes Pop Off Valves Fuel System Inspect Fuel Pressure Regulator Leak check all connections Inspect Injectors Check for external leaks Steering...
- Page 136 VISION D R I V E R S H A N D B O O K Every 12 Months or 90,000 Miles Axle & Suspension, Rear Replace Rear Axle Synthetic Lubricant Viscosity depends upon operating climate. See Viscosity/Temperature chart. Fuel System Inspect Controller Check for damage;...
- Page 137 n o t e s otes...
- Page 138 VISION D R I V E R S H A N D B O O K otes...
Need help?
Do you have a question about the VISION 2011 and is the answer not in the manual?
Questions and answers