Table of Contents
Advertisement
Quick Links
Advertisement
Chapters
Table of Contents

Subscribe to Our Youtube Channel
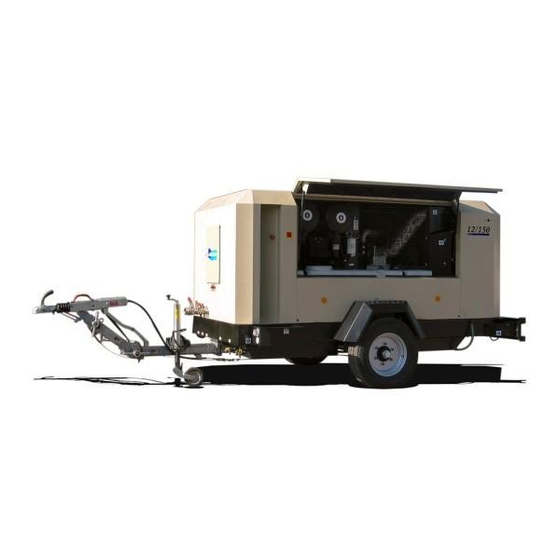
Related Manuals for Doosan 12/150


Summary of Contents for Doosan 12/150
- Page 1 12/150 OPERATION AND MAINTENANCE MANUAL Original Instruction This manual contains important safety information and must be made available to personnel who operate and maintain this machine. 12/150 SERIAL No : 705000−707000 23136591_en_C_10/11...
- Page 2 Machine models represented in this manual may be used in various locations world−wide. Machines sold and shipped into European Union Territories require that the machine display the CE Mark and conform to various directives. In such cases, the design specification of this machine has been certified as complying with EC directives. Any modification to any part is absolutely prohibited and would result in the CE Certification and marking being rendered invalid.
-
Page 3: Table Of Contents
CONTENTS & ABBREVIATIONS CONTENTS ABBREVIATIONS & SYMBOLS CONTENTS #### Contact the company for serial number −>#### Up to Serial No. FOREWORD ####−> From Serial No. WARRANTY Not illustrated † Option As required ISO SYMBOLS High ambient machine F.H.R.G. Fixed height running gear SAFETY V.H.R.G. -
Page 4: Foreword
(Where ASME certification is valid). © COPYRIGHT 2011 DOOSAN COMPANY All components, accessories, pipes and connectors added to the compressed air system should be: S of good quality, procured from a reputable manufacturer and, wherever possible, be of a type approved by the company. -
Page 5: Warranty
Air End, is returned assembled and The original airend is returned assembled and unopened. unopened. Continued use of genuine Doosan parts, fluids, oil and filters. Portable Compressor Airend Limited Optional Warranty − The earlier of sixty (60) months from shipment to or the Maintenance is performed at prescribed intervals. - Page 6 5 yrs/5000 hrs using OEM fluids and filters with $250 deductible (in generators as of 1/1/01) 2000 24 months / 4,000 hrs. available from the company with use of genuine Doosan parts and oils at prescribed service intervals. Contact the company network. KUBOTA (North America only) 2000 Major components 36 months/3000 hrs (parts only) (Western Europe &...
- Page 7 (rotors, housings, gears and bearings), and is automatically available when the following conditions are met: 1. The original airend is returned assembled and unopened. 2. Submissions of proof that Doosan fluid, filters and separators have been used. Refer to the Operation and Parts manual for the correct fluids, filters and separator elements required.
- Page 8 To initiate the machine warranty, fill out the ”Warranty Registration” form 83242 11/99 supplied as part of the machine documentation, keep a copy for your records and mail the original to: Doosan Warranty Team Doosan BENELUX S.A. Drève Richelle 167 1410 Waterloo −...
- Page 9 WARRANTY PORTABLE POWER EXTENDED WARRANTY REGISTRATION FORM Customer Details Service Provider Details Company Name : Service Provider / Distributor : Contact Name : Branch Office : Signature : Machine Details Company Address : Product Type : Model : Serial Number : SAMPLE Engine Serial Number : Engine Model Number :...
- Page 10 ISO SYMBOLS GRAPHIC FORM AND MEANING OF ISO SYMBOLS Prohibition / Mandatory Information / Instructions Warning WARNING: Electrical shock risk. WARNING − Pressurised component or WARNING − Hot surface. system. WARNING − Pressure control. WARNING − Corrosion risk. WARNING − Air/gas flow or Air discharge. WARNING −...
- Page 11 ISO SYMBOLS WARNING − Do not undertake any WARNING − Consult the operation and maintenance on this machine until the Do not breathe the compressed air from this maintenance manual before commencing electrical supply is disconnected and the air machine. any maintenance.
-
Page 12: Iso Symbols
ISO SYMBOLS Lifting point. On (power). Off (power). Read the Operation and Maintenance manual When parking use prop stand, handrake and Compressor oil filling before operation or maintenance of this wheel chocks. machine is undertaken. Diesel fuel Rough Service Designation. Parking brake. - Page 13 Safety Decals are available free of charge. Decal part numbers are on the bottom of each decal and are also listed in the compressor’s parts manual. Submit orders for Safety Decals to the Doosan Portable Power EMEA Aftermarket Department. The no charge order should contain only Safety Decals.
-
Page 14: Safety
SAFETY WARNINGS COMPRESSED AIR Warnings call attention to instructions which must be followed Compressed air can be dangerous if incorrectly handled. Before precisely to avoid injury or death. doing any work on the unit, ensure that all pressure is vented from the system and that the machine cannot be started accidentally. - Page 15 SAFETY Should compressor lubricant come into contact with the eyes, then When adjusting variable height running gear:− irrigate with water for at least 5 minutes. Ensure front (towing eye) section is set level Should compressor lubricant come into contact with the skin, then When raising towing eye, set rear joint first, then front joint.
- Page 16 GENERAL INFORMATION 12/150 FIXED HEIGHT RUNNING GEAR Ball hitch TOP VIEW SIDE VIEW FRONT VIEW A Instrument panel access door D Access items: Fuel fill B Package air inlet Engine oil filter Fuel filter C Access items: Engine and compressor air filter Separator element &...
- Page 17 GENERAL INFORMATION 12/150 VARIABLE HEIGHT RUNNING GEAR Ball hitch TOP VIEW SIDE VIEW FRONT VIEW A Instrument panel access door D Access items: Fuel fill B Package air inlet Engine oil filter Fuel filter C Access items: Engine and compressor air filter Separator element &...
-
Page 18: General Information
GENERAL INFORMATION COMPRESSOR VARIABLE HEIGHT RUNNING GEAR Braked version Actual free air delivery. −1 14,9 m (526 CFM) Shipping weight. 2900kg (6393Lbs) Normal operating discharge pressure. Maximum weight. 3000kg (6614Lbs) 12 bar (174 PSI) Maximum horizontal towing force. 2690kg (5931Lbs) Maximum allowable pressure. -
Page 19: Operating Instructions
OPERATING INSTRUCTIONS COMMISSIONING Ensure that all transport and packing materials are discarded. Ensure that the correct fork lift truck slots or marked lifting / tie down Upon receipt of the unit, and prior to putting it into service, it is important points are used whenever the machine is lifted or transported. -
Page 20: Prior To Starting
OPERATING INSTRUCTIONS PRIOR TO STARTING 5. Drain the fuel filter water separator of water, ensuring that any released fuel is safely contained. 1. Place the unit in a position that is as level as possible. The 6. Open the service valve(s) to ensure that all pressure is relieved design of the unit permits a 15 degree lengthways and sideways limit from the system. - Page 21 OPERATING INSTRUCTIONS Control Panel DIAGNOSTIC/AUTO SHUTDOWN (STANDARD) CONTROLS (STANDARD) 1. Compressor fault − Needs attention. See Wedge diagnostic 6. Power Switch − Flip “ON” to activate systems prior to Starting. panel for more detail. Flip “OFF” to stop engine. 2. Engine Fault − Needs attention. See Wedge diagnostic panel 7.
- Page 22 OPERATING INSTRUCTIONS WEDGE DIAGNOSTIC DISPLAY CODES OPERATING CONTROLS AND INSTRUMENTS 5. Low Battery Voltage: Alarm indicator lamp. Indicates battery or charging system requires service. The operating controls and instruments are arranged on the control 6. Low Radiator Coolant Level: Alarm indicator lamp. Indicates panel as shown above.
- Page 23 OPERATING INSTRUCTIONS If the fault indicator lamp is illuminated, refer to the Alert/Shutdown list below. If the fault indicator lamp is illuminated, refer to the Engine diagnostic list below. ALERT/SHUTDOWN CONDITIONS SOFTWARE VERSION 2.18 ALERT SHUTDOWN CONDITION CONDITION CODE LIGHT BLINKS CODE LIGHT STEADY DELAY...
- Page 24 OPERATING INSTRUCTIONS ALERT SHUTDOWN CONDITION CONDITION CODE LIGHT BLINKS CODE LIGHT STEADY DELAY (sec) Machine Over Pressure CPRSR Malfunction. Safety Valve Open CPRSR Malfunction. Seperator Tank Temp > 119_C (247_F) CPRSR Malfunction. Machine ID Not Valid CPRSR Malfunction. Sep. Tank Temp (RT1) CPRSR Malfunction.
- Page 25 OPERATING INSTRUCTIONS Engine Codes: Cummins Engine Model QSB6.7 ENGINE DIAGNOSTIC CODES Displayed Code Definition Engine Control Module − Critical Internal Failure Engine Speed/Position Sensor Circuit − Lost Both of Two Signals Intake Manifold Pressure Sensor Circuit − Voltage Above Normal, or Shorted High Intake Manifold Pressure Sensor Circuit −...
- Page 26 OPERATING INSTRUCTIONS Displayed Code Definition SAE J1939 Multiplexing Configuration Error SAE J1939 Multiplexing Throttle Error Barometric Pressure Sensor Circuit − Data Incorrect Real Time Clock Power Interrupt− Data Incorrect Injector Solenoid Cylinder #1 Circuit − Current Below Normal, or Open Circuit Injector Solenoid Cylinder #5 Circuit −...
- Page 27 OPERATING INSTRUCTIONS Displayed Code Definition Cylinder Power Imbalance Between Cylinders − Data Incorrect 1139 Injector Cylinder #1 − Mechanical System Malfunction 1141 Injector Cylinder #2 − Mechanical System Malfunction 1142 Injector Cylinder #3 − Mechanical System Malfunction 1143 Injector Cylinder #4 − Mechanical System Malfunction 1144 Injector Cylinder #5 −...
-
Page 28: Emergency Stopping
OPERATING INSTRUCTIONS STARTING THE MACHINE DUAL PRESSURE WHEN FITTED Machines which operate in excess of 7 bar (100 psi) can optionally WARNING: Under no circumstances should volatile be fitted with a dual pressure switch inside the unit. This switch liquids such as Ether be used for starting this selects between 7 bar (100 psi) and the machine rated pressure, machine. -
Page 29: Decommissioning
S Do not allow lubricants or coolants to be released into land Airend − surfaces or drains. Remove the intake connection and fill the airend intake with Doosan compressor fluid PRO−TEC, XHP605 or XHP405. S Do not dispose of a complete machine without documentation relating to instructions for its use. -
Page 30: Maintenance
MAINTENANCE MAINTENANCE 3 Monthly. 6 Monthly. 12 Monthly. Initial 500 Daily Weekly Monthly 250 hrs. 500 hrs 1000 hrs miles /850 km Compressor Oil Level Engine Oil Level *Radiator Coolant Level Gauges/Lamps *Air Cleaner Service Indicators Fuel Tank (Fill at end of day) *Fuel/Water Separator Drain Oil Leaks Fuel Leaks... - Page 31 MAINTENANCE Initial 500 3 Monthly. 6 Monthly. Daily Weekly Monthly miles Monthly. Monthly. 250 hrs. 500 hrs /850 km 1500 hrs 1000 hrs *Fuel/Water Separator Element Compressor Oil Filter Element Compressor Oil Engine Oil Change Engine Oil Filter *Water Pump Grease. *Wheels (Bearings, Seals, etc.) *Engine Coolant Fuel Filter Element...
-
Page 32: Routine Maintenance
MAINTENANCE Initial 500 3 Monthly. 6 Monthly. 12 Monthly. Daily Weekly Monthly miles 250 hrs. 500 hrs 1000 hrs /850 km Scavenge line Pressure system Engine breather element Pressure gauge Pressure regulator Separator tank (2) exterior Lubricator (Fill) 2 Yrs 4 Yrs 6 Yrs Safety valve... - Page 33 MAINTENANCE Prior to attempting any maintenance work on a running Clean the exterior of the filter housing and remove the spin−on machine, ensure that:− element by turning it in a counter−clockwise direction. S the work carried out is limited to only those tasks which require INSPECTION the machine to run.
- Page 34 MAINTENANCE CAUTION: Start the machine (refer to PRIOR TO COOLING FAN DRIVE STARTING and STARTING THE UNIT in the Periodically check that the fan mounting bolts in the fan hub have OPERATING INSTRUCTIONS section of this manual) not loosened. If, for any reason, it becomes necessary to remove and check for leakage before the machine is put back the fan or re−tighten the fan mounting bolts, apply a good grade of into service.
- Page 35 MAINTENANCE PRESSURE SYSTEM Ensure that an M10 safety screw is fitted to the handbrake pivot. The brake actuators must not be pre−tensioned − if necessary At 500 hour intervals it is necessary to inspect the external surfaces loosen the brake linkage [7] on the brake equalisation assembly [8]. of the system (from the airend through to the discharge valve(s)) including hoses, tubes, tube fittings and the separator tank, for Check that brake actuators and cables [11] operate smoothly.
-
Page 36: Lubrication
MAINTENANCE 3: COMPENSATOR ASSEMBLY ADJUSTMENT Re−adjustment Variable Height models The handbrake lever [1] should be engaged forcefully several times to set the braking system. Fit an M10 safety screw to the handbrake pivot. Check the setting of the brake equalisation assembly [8], which should be at right angles to the pulling direction. - Page 37 MAINTENANCE Completely drain the receiver/separator system including the piping NOTE: Always specify PRO−TEC oil for use at all ambient and oil cooler by removing the drain plug(s) and collecting the used temperatures above −23_C. oil in a suitable container. Replace the drain plug(s) ensuring that each one is secure. COMPRESSOR OIL FILTER ELEMENT Refer to the SERVICE / MAINTENANCE CHART in this section for NOTE: If the oil is drained immediately after the machine has been...
-
Page 38: Speed & Pressure Regulation
MAINTENANCE SPEED AND PRESSURE REGULATION S Start the machine (Refer to STARTING INSTRUCTIONS in the OPERATING INSTRUCTIONS section of this manual). ADJUSTMENT S Adjust the service valve on the outside of the machine to Normally, regulation requires no adjusting, but if correct adjustment maintain rated pressure at full speed. - Page 39 MAINTENANCE TABLE 1 INCH FASTENERS NOMINAL DESIGN TORQUE 8AE J249 8AE J249 TYPICAL RECTANGULAR TORQUE GRADE 5 GRADE 8 PATTERN (HEAD MARKING) (HEAD MARKING) CAPSCREW OR NUT THREAD SIZE AND PITCH TYPICAL SQUARE TORQUE PATTERN (Nm.) (FT−LBF) (Nm.) (FT−LBF) 1/4 − 20 5/16 −...
- Page 40 MAINTENANCE TABLE 2 METRIC FASTENERS NOMINAL DESIGN TORQUE TYPICAL RECTANGULAR TORQUE PROPERTY PROPERTY PROPERTY PATTERN GRADE 10.9 GRADE 8.8 GRADE 12.9 (HEAD MARKING) (HEAD MARKING) (HEAD MARKING) CAPSCREW OR NUT THREAD SIZE AND PITCH TYPICAL SQUARE TORQUE PATTERN (Nm.) (FT−LBF) (Nm.) (FT−LBF) (Nm.)
-
Page 41: Compressor Lubrication
Alternate: XHP 405 ISO Viscosity Grade 68 Group 3 or 5 with Preferred Doosan Fluids − Use of these fluids with original Doosan rust and oxidation branded filters can extend airend warranty. Refer to operator’s inhibitors designed manual warranty section for details or contact your Portable Power for air compressor representative. -
Page 42: Machine Systems
MACHINE SYSTEMS 12/150_23136591−C en... - Page 43 MACHINE SYSTEMS ELECTRICAL PARTS LIST DESCRIPTION DESCRIPTION Battery 22413876 Switch inputs CAN SHLD Starter solenoid ECON Engine controller IQ filter restriction Wedge Controller Fuse − 20A Alert, low fuel Cummins Engine Controller Fuse Low fuel shutdown − 30A Switch, Start−Run Frequency throttle.
- Page 44 MACHINE SYSTEMS WIRING DIAGRAM 23296643_B SHEET 2 12/150_23136591−C en...
- Page 45 MACHINE SYSTEMS ELECTRICAL PARTS LIST DESCRIPTION DESCRIPTION Sensor, Mag Speed 36785319 SHEET 3 Continued on 23296643_B, sheet 3 Regulator Heater Option 36785319 Blue Wedge Comms Connector Brown Switched Power Relay Green Solenoid Valve, Start−Run 36840841 Grey Solenoid Valve, Unloader 36840841 Orange Wedge Controller Connector Pink...
- Page 46 MACHINE SYSTEMS WIRING DIAGRAM 23296643_B SHEET 3 12/150_23136591−C en...
- Page 47 MACHINE SYSTEMS ELECTRICAL PARTS LIST DESCRIPTION DESCRIPTION Batteries, 240VDC System 22413876 SHEET 2 Continued on 23296643_B, sheet 2 Starter, Engine 23190218 Blue Circuit Breaker Air Intake Heater 22101968 Brown Wedge Controller Fuse − 20A Green Cummins Engine Controller Fuse Grey −...
-
Page 48: Electrical System
MACHINE SYSTEMS GENERAL INFORMATION AND OPERATIONAL Pressure Control THEORY The discharge pressure is controlled by manipulating the engine speed and compressor inlet valve position. The inlet valve position is This machine has an electronic monitor and control system to controlled pneumatically and the engine speed setpoint is provide discharge air pressure control and engine and package determined by the WEDGE controller. -
Page 49: Service Tools
SERVICE TOOLS ELECTRONIC SYSTEMS The following special tools are recommended to perform service procedures in this manual. The tools can be purchased from Doosan or equivalent substitutes can be used. Tool Tool Description 22216691 Digital Multimeter Used to Measure electrical circuits:... - Page 50 SERVICE TOOLS SERVICE TOOLS Tool No. Tool Description Tool Illustration 22216691 Digital Multimeter 54729660 Weather−Pack Terminal Removal Tool 54699632 Deutsch Terminal Removal Tool (Blue) 54699640 Deutsch Terminal Removal Tool (Red) 54699624 Deutsch Terminal Removal Tool (Yellow) 22216667 Crimp Tool for Deutsch Pins Crimp 54729710 Electrical Contact Cleaner 54699616...
- Page 51 SERVICE TOOLS 22073886 Packard Crimp Tool 22073878 Thermistor Simulator 54749635 Connector Repair Kit 54699657 Deutsch Terminal Removal Tool 54749643 Packard Metri−Pack Removal Tool 12/150_23136591−C en...
-
Page 52: Fault Finding
FAULT FINDING FAULT CAUSE REMEDY No reaction from Batteries not connected. Connect batteries. instrument panel when instrument panel when key turned to (I) Fuse at starter motor ‘blown’. Replace fuse. position. Engine fails to start. Low battery charge. Check the fan belt tension, battery and cable connections. Bad earth connection. - Page 53 Top up the oil level and check for leaks. Dirty or blocked oil cooler. Clean the oil cooler fins. Incorrect grade of oil. Use Doosan recommended oil. Defective by-pass valve. Check the operation of the element and replace if necessary. Recirculation of cooling air.
-
Page 54: Options
OPTIONS OPTIONS − Dual pressure CAUTION: Blockage of the condensate will result in flooding of the vessels. If flooding occurs, excessive SAFETY condensate may enter the air stream and could result in damage to downstream equipment. WARNING: Any pneumatic equipment that is, or CAUTION: Do not remove u−bolts from both filters at may be connected to the machine must be suitable for use with at least the higher, rated pressure. - Page 55 OPTIONS MAINTENANCE DAILY MAINTENANCE Verify, during full−load (maximum compressed air delivery) that the IQ system filter restriction indicators do not show excessive restriction. The gauge shown above will display IQ system outlet pressure. Compare this value to full system pressure shown on the control panel.
-
Page 56: Engine Instruction Manual
ENGINE INSTRUCTION MANUAL CONTENTS FOREWORD EXTERNAL VIEWS GENERAL INFORMATION Main data and specifications Engine identification After sales support EMISSION CONTROL LABEL FUEL, LUBRICANT, AND COOLANT Fuel Lubricant Coolant OPERATION Check before operation Check and operation after start− up Operation and care of a new engine MAINTENANCE SCHEDULE PERIODICAL INSPECTION AND MAINTENANCE... -
Page 57: Foreword
FOREWORD In order to get the fullest use and benefit from your engine, it is important that you operate and maintain it correctly. This Manual is designed to help you do this. Please read this Manual carefully and follow its operating and maintenance recommendations. This will ensure many years of trouble−free and economical engine operation. -
Page 58: External Views
EXTERNAL VIEWS DIESEL ENGINE Engine External View Fig. 2 (Right−hand Side) Fig. 1 (Left−hand Side) (1) Air inlet (16) Lubricating oil cooler (2) Fan drive (17) Oil pan drain plug (3) Electronic control module (18) Turbocharger exhaust outlet (4) Engine speed sensor (crankshaft) (19) Flywheel housing (5) Dipstick (20) Turbocharger compressor inlet. -
Page 59: General Information
GENERAL INFORMATION EPA CERTIFIED ENGINE DATA and SPECIFICATIONS Engine model name QSB6.7 No. of cylinders − bore x stroke. mm (in) 6 − 107 x 124 (4.21 x 4.88) Engine displacement L(cid) 6,7 (409) Compression ratio 17,2:1 Aspiration Turbocharged Firing order 1−5−3−6−2−4 Valves Per Cylinder 2 Intake... -
Page 60: Engine Identification
The engine serial number is stamped on a plate. Doosan Genuine Parts Genuine Doosan parts are identical with those used in the engine production, and accordingly, they are warranted. Genuine Doosan parts are supplied by your branch or distributor. -
Page 61: Fuel, Lubricant, And Coolant
FUEL, LUBRICANTS, AND COOLANT FUEL HANDING AND STORING BIO−DIESEL FUEL For more information please refer to Cummins Service Bulletin WARNING: Handle fuel carefully. Do not fill the fuel 3379001−18(03 Aug 2009) tank when engine is running. Consult your local fuel distributor for properties of the diesel fuel DO NOT smoke while you fill the fuel tank or service available in your area. -
Page 62: Lubricant
FUEL, LUBRICANTS, AND COOLANT Chlorides <40mg/L DIESEL FUEL ADDITIVE Sulfates <100 mg/L IMPORTANT: Treat fuel when outside temperature drops below 0_C (32_F). For best results, use with untreated fuel. Follow all Total Dissolved Solids <340 mg/L recommended instructions on label. Total Hardness <170 mg/L Use a fuel conditioner (Winter) to treat fuel during the cold weather... -
Page 63: Operation
Fig. 7 Use of Genuine Doosan Fan Belt. Always use Genuine Doosan fan belts as they provide high driving ability and long operating durability. Use of non−Doosan fan belts could result in premature belt wear or belt elongation leading to engine overheating or excessive belt noise. -
Page 64: Check And Operation After Start− Up
OPERATION CHECKS AND OPERATION AFTER START−UP Check after the Engine Start−up Check the following items in the engine warming−up operation. Engine oil pressure − The engine oil pressure gauge readings (where fitted) may vary depending on ambient temperature and type of oil. The gauge should register around 55 to 85 psi in the warming−up period. -
Page 65: Operation And Care Of A New Engine
If the found, please consult your local Doosan branch or dealer. level is correct, contact your local Doosan branch or dealer to establish the cause. Overcooling Operating the engine at low coolant temperature will not only increase (2) Coolant Temperature −... -
Page 66: Maintenance Schedule
ENGINE MAINTENANCE SCHEDULE Lubrication and Maintenance Service Interval Chart NOTE: The Service intervals below are for standard industrial engines. See details in Sections which follow these charts. Item Lubrication and Maintenance Service Intervals Daily 1000 2000 5000 Hours/6 Hours Hours/24 Hours Required Months... -
Page 67: Periodical Inspection And Maintenance
PERIODICAL INSPECTION AND MAINTENANCE LUBRICATION & MAINTENANCE/DAILY IMPORTANT: Immediately after completing any oil change, crank engine for 30 seconds without permitting engine to start. Daily Pre−starting Checks This will help insure adequate lubrication to engine components before engine starts. Do the following BEFORE STARTING THE ENGINE for the first time each day: NOTE: Crankcase oil capacity may vary slightly. - Page 68 PERIODICAL INSPECTION AND MAINTENANCE Checking Tensioner Spring Tension To replace belt with manual tensioner, release tension at belt tensioner. A belt tension gauge will not give an accurate measure of the belt tension when automatic spring tensioner is used. Measure tensioner 3.
- Page 69 PERIODICAL INSPECTION AND MAINTENANCE Precautions For Welding On Engines Equipped With Electronic Engine Control Unit (ECU) IMPORTANT: ALWAYS disconnect Electronic Control Unit (ECU) connectors and engine control system−to−machine ground before welding on engine or machine. High currents or electro−static discharge in electronic components from welding may cause permanent damage.
-
Page 70: Cold Weather Operation
COOLANT 1. Always ensure that the batteries are kept fully charged in the cold All Doosan portable compressor engines are factory filled with a season. This takes a longer period of running than in warm weather 50/50 Ethylene glycol base antifreeze/water mix. which provides operation. -
Page 71: Troubleshooting
ENGINE TROUBLESHOOTING This item contains a simple troubleshooting. When a failure takes place on your engine, diagnose the cause referring this troubleshooting. Should the cause of failure not be detected or you are unable to manage the failure, consult your machine supply source or nearest company engine service outlet. Symptom Problem Solution... - Page 72 ENGINE TROUBLESHOOTING Symptom Problem Solution Below normal Engine temperature Defective thermostat. Remove and check thermostat. Defective temperature gauge or sender. Check gauge, sender, and connections. Lack of power Engine overloaded. Reduce load. Intake air restriction. Service air cleaner. Clogged fuel filter. Replace filter elements.
- Page 73 ENGINE TROUBLESHOOTING Symptom Problem Solution Engine emits black or gray exhaust Improper type of fuel. Use proper fuel. smoke Clogged or dirty air cleaner. Service air cleaner. Engine overloaded. Reduce load. Injection nozzles dirty. See your authorized servicing dealer. Electronic fuel system problem See your authorized servicing dealer.
- Page 74 ENGINE TROUBLESHOOTING Symptom Problem Solution Battery uses too much Water Cracked battery case. Check for moisture and replace as necessary. Defective battery. Test battery. Battery charging rate too high. Test charging system. Batteries will not charge Loose or corroded connections. Clean and tighten connections.
- Page 75 ENGINE TROUBLESHOOTING INTERMITTENT FAULT DIAGNOSTICS 6. Remove and clean batteries. Store them in a cool, dry place and keep them fully charged. (WITH ELECTRONIC CONTROLS) 7. Disengage the clutch for any driveline. Intermittent faults are problems that periodically “go away”. A problem such as a terminal that intermittently doesn’t make contact 8.
- Page 76 ENGINE TROUBLESHOOTING DIAGNOSTIC TOOLS S PowerSpec CE reads Cummins engine configuration settings. QC5100 S PowerSpec CE transfers a HotSpec created by the PowerSpec (ccn: 46518098) PC application to your Cummins engine. S PowerSpec CE reads active and inactive faults. S PowerSpec CE clears inactive faults. S PowerSpec CE reads and resets vehicle trip data.
- Page 77 Standing at the rear of the unit facing the NOTICE drawbar (front) will determine the right and left sides. Doosan can bear no responsibility for injury or damages FASTENERS resulting directly from the use of non−approved repair parts. Both SAE/inch, ISO/metric hardware have been used in the design and assembly of these units.
- Page 78 Part numbers for original individual decals and unless expressly agreed to by Doosan Company their mounting locations are shown within Parts (“Company”) in writing. No additional or contrary terms List Section.
- Page 79 Doosan offers an airend exchange program to benefit implied, except that of title, and all implied warranties, portable compressor users. including any warranty of merchantability and fitness for a particular purpose, are hereby disclaimed.
- Page 80 Office hours: Monday − Friday 8:00 a.m. to 5:30 p.m. (EST) For information on how to order parts or information regarding your local distributor (Europe, Middle East, Africa) please contact: Facility: Doosan Portable Power EMEA Aftermarket ESA Dréve Richelle 167 B−1410 Waterloo, Belgium Telephone:...
Need help?
Do you have a question about the 12/150 and is the answer not in the manual?
Questions and answers