Table of Contents
Advertisement
Quick Links
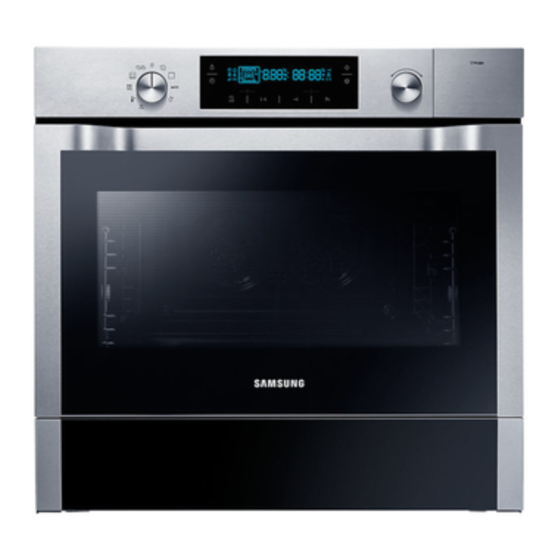
NQ50H7935ES
Combi Steam Built-in
Oven
user manual
Please be advised that the Samsung warranty does NOT cover service calls
to explain product operation, correct improper installation, or perform normal
cleaning or maintenance.
This manual is made with 100 % recycled paper.
imagine
the possibilities
Thank you for purchasing this Samsung product.
NQ50H7935ES_ET_DG68-00471H-01_EN.indb 1
2014-10-23
11:34:35
Advertisement
Table of Contents

Subscribe to Our Youtube Channel
Related Manuals for Samsung NQ50H7935ES


Summary of Contents for Samsung NQ50H7935ES
- Page 1 Combi Steam Built-in Oven user manual Please be advised that the Samsung warranty does NOT cover service calls to explain product operation, correct improper installation, or perform normal cleaning or maintenance. This manual is made with 100 % recycled paper.
-
Page 2: Table Of Contents
contents SAFETY INFORMATION Safety information OVEN FEATURES Oven Oven controls Accessories BEFORE YOU BEGIN Setting the clock Setting the energy save mode Switching off the beeper Child safety lock Filling the water tank Setting the water hardness OVEN USE Types of heating Using the steam mode Using the combi steam mode Using the reheat mode... -
Page 3: Safety Information
USING THIS INSTRUCTION BOOKLET You have just purchased a SAMSUNG oven. Your Owner’s Instructions contain valuable information on cooking with your oven: • Safety precautions • Suitable accessories and cookware • Useful cooking tips • Cooking tips LEGEND FOR SYMBOLS AND ICONS Hazards or unsafe practices that may result in severe personal injury or death. - Page 4 WARNING This appliance is not intended for use by persons (including children) with reduced physical, sensory or mental capabilities, or lack of experience and knowledge, unless they have been given supervision or instruction concerning use of the appliance by a person responsible for their safety.
- Page 5 This appliance can be used by children aged from 8 years and above and persons with reduced physical, sensory or mental capabilities or lack of experience and knowledge if they have been given supervision or instruction concerning use of the appliance in a safe way and understand the hazards involved.
- Page 6 Install in the Cabinet Kitchen Cabinets in contact with the oven must be heat- resistant up to 100 °C. Samsung will take no responsibility for damage of cabinets from the heat. English - 6 NQ50H7935ES_ET_DG68-00471H-01_EN.indb 6...
- Page 7 Fig1. Slide the oven partly into the recess. Lead the connection cable to the power source. Fig2. Slide the oven completely into the recess. Fig3. Fasten the oven using the two screws (4 X 25 mm) provoded. Fig4. Make the electrical connection. Check that the appliance works.
- Page 8 Building-in dimensions 200 cm² Min. 550 Min. 50 Min. 564~568 Min. 446 Max. 450 454.2 Space for power outlet (30 ¢ Hole) 200 cm² Built-under Dimensions Be sure to hold the appliance with 2 side handles and door handle when unpacking the product. Min.
- Page 9 CLEANING YOUR OVEN 1. Cleaning inside the cavity. • Lift up both left and right shelves at the front (1). Move them towards the middle (2) and pull them out. Wipe any leftovers from the ceiling or walls using a neutral cloth dipped in detergent. •...
- Page 10 CHANGING THE LAMP Replacing the rear oven lamp and cleaning the glass cap 1. Take off the cap by turning counterclockwise. 2. Remove the metal ring and the sheet ring and clean the glass cap. 3. If necessary, replace the bulb with a 25 watt, 230 V, 300 °C heat - resistant oven light bulb.
- Page 11 If you have any questions or concerns, contact your nearest service centre or find help and information online at www.samsung.com. • This microwave oven is supposed for heating food. It is intended for domestic home-use only.
-
Page 12: Oven Features
oven features OVEN Control box Water tank Grill heater Oven light Level 4 Level 3 Level 2 Level 1 Door Door handle • Shelf levels are numbered from the bottom up. • The levels 3 and 4 are mainly used for the grill function. •... -
Page 13: Oven Controls
OVEN CONTROLS DISPLAY STEAM MODE START OVEN MODE STOP/CANCEL COMBI STEAM MODE SELECT MULTI-LEVEL COOK MODE END TIME AUTO DEFROST MODE COOK TIME KEEP WARM MODE STEAM LEVEL REHEAT MODE CLOCK STEAM CLEAN MODE MODE SELECTOR AUTO MENU MODE MULTI-FUNCTION SELECTOR LAMP 15 + 16. -
Page 14: Accessories
ACCESSORIES The following accessories are provided with your Steam Oven: 1. Baking Tray. 2. Oven Rack. (for all levels) 3. Steam dish, perforated, 40 mm deep, (useful for steam mode) For steaming, you can place only the perforated steam dish or perforated steam dish in level 2 with the baking tray underneath. -
Page 15: Before You Begin
before you begin SETTING THE CLOCK When the appliance is first plugged in, the display lights up. (example 15:15) When connecting the power for the first time, please use the product after setting the time. 1. Turn the MODE SELECTOR to the “OFF” position. -
Page 16: Setting The Energy Save Mode
SETTING THE ENERGY SAVE MODE The oven has an energy save mode. This facility saves electricity when the oven is not in use. Standby mode The oven will default to Standby mode after 10 minutes if not operated. ECO mode 1. -
Page 17: Child Safety Lock
CHILD SAFETY LOCK The oven’s Child Safety Lock allows you to lock the control panel to protect the oven against unintended use. To Lock the Oven 1. Turn the MODE SELECTOR to “OFF” position. 2. Press STEAM LEVEL and COOK TIME at the same time and hold for 3 seconds. -
Page 18: Filling The Water Tank
FILLING THE WATER TANK You will see the water tank on the right-hand side. Only fill the tank with fresh tap water or with still bottled water. If your water is very hard, we recommend that you use softened water (see also “Water hardness”). Caution Do not fill the water tank with distilled water or any other liquids. -
Page 19: Setting The Water Hardness
SETTING THE WATER HARDNESS It is necessary to descale your appliance at regular intervals. This is the only way to prevent damage. Your appliance has a system that automatically displays when it needs descaling. It is preset to a water hardness 3. Change the value of water type in your home. Checking the Water Hardness Information on the hardness of the water in your area can be obtained from the local water board. -
Page 20: Oven Use
oven use TYPES OF HEATING The following table represents the various oven modes and settings of your oven. Use the cooking guide tables for those modes as guidelines for cooking. Steam Mode Steam (use the button ‘steam level’ to set steam level 1, 2 or 3) Food is cooked by steam provided by the steam generator and injected into the cavity by several jet nozzles. - Page 21 Oven Mode Convection Food is heated by hot air from the left and right sides of the oven. This setting provides uniform heating and is ideal for baking. Suggested temperature: 180 °C Roasting (Convection + Top) Hot air and top heating element combine, making this setting ideal for crisping and browning.
- Page 22 Multi-level Cook Mode Multi-level cook is available for when you wish to cook a larger quantity of food on two levels. The entire oven cavity may then be utilized. For example, cooking two trays of biscuits. Suggested temperature: 180 °C Keep Warm Mode The food will be kept warm by help of the heat, provided by the bottom heating element.
-
Page 23: Using The Steam Mode
USING THE STEAM MODE 1. Fill the water tank up to the maximum line and place it back. Then place your food into the cooking cavity. 2. Turn the MODE SELECTOR to Steam mode position (default cook time 20 min. temperature 100 °C). - Page 24 If there is too little water while cooking, you will see the symbol in the display along with a beep being played. Add water into the tank and press START to continue with the steaming. • You can add water into the tank at any time while cooking.
- Page 25 Steam Mode Setting Food is cooked by steam provided by the steam generators and injected into the cavity by two jet nozzles. Perforated steam dish, is usually placed on level * Temperatures Setting: 40-100 °C * Please ensure that (glass) baking dishes are suitable for 40-250 °C cooking temperatures.
- Page 26 Steam mode Time Food Item Accessory (shelf level) (°C) (min.) Frozen Yeast 100 °C 25-30 Steam dish, perforated (2) Dumplings White Rice (basmati or pandan) (Use a flat pyrex dish, 100 °C 30-35 Oven rack (2) add double quantity of water) Milk Rice (Use a flat pyrex dish, 100 °C...
-
Page 27: Using The Combi Steam Mode
USING THE COMBI STEAM MODE 1. Fill the water tank up to the maximum line and place it back. Then place your food into the cooking cavity. 2. Turn the MODE SELECTOR to Combi Steam mode position (default: 180 °C). 3. - Page 28 1) During cooking, COOK TIME and TEMPERATURE can be changed. • Cooking time: press COOK TIME and then turn the MULTI-FUNCTION SELECTOR. • Temperature: press SELECT and then turn the MULTI-FUNCTION SELECTOR. 2) In Combi Steam Mode settings, the top bottom and steam heating elements switch off and on throughout cooking to regulate the temperature.
-
Page 29: Using The Reheat Mode
USING THE REHEAT MODE 1. Fill the water tank up to the maximum line and place it back. Then place your food into the cooking cavity. 2. Turn the MODE SELECTOR to Reheat Mode position (default: 20 min.). 3. Press STEAM LEVEL and set the steam level 1, 2 and 3. -
Page 30: Using Oven Mode
Reheat Guide Use settings and times in this table as guide lines for reheating. We recommend to always fill the water tank with fresh water to the maximum level. Use settings and times in this table with steam level 3 as guide lines for steaming. Food Item Mode Time (min.) - Page 31 DISPLAY COOKING MODE DEFAULT TEMP Pizza (Convection + Bottom) Intensive (Top + Bottom + Convection) ProRoasting Eco Convection 3. To change temperature, press SELECT and turn MULTI-FUNCTION SELECTOR to set desired temperature. If the blinking has already stopped before you have set the temperature, press SELECT again and then turn the MULTI-FUNCTION SELECTOR.
- Page 32 Convection Setting Food is heated by hot air from two fans which located in center of the oven. This setting provides uniform heating and is ideal for baking. Place the baking tray on Level * Temperatures Setting: 40-250 °C * Please ensure that glass baking dishes are suitable for 40-250 °C cooking temperatures.
- Page 33 Roasting (Convection + Top) Setting Hot air and top heating element combine, making this setting ideal for crisping and browning. This setting is especially recommended for cooking meats. When cooking meat, place on oven rack on Level and set baking tray on Level to catch drippings.
- Page 34 Conventional Setting Heat comes from top and bottom heating elements. This setting is suitable for baking and roasting. Baking tray or oven rack is usually placed on Level * Temperatures Setting: 40-250 °C * Please ensure that glass baking dishes are suitable for 40-250 °C cooking temperatures.
- Page 35 Grill Setting Food is heated by the top heating elements. For grilling, oven rack is usually placed on Level or Oven rack with baking tray on Level Level * Temperatures Setting: 150-250 °C * Please ensure that glass baking dishes are suitable for 150-250 °C cooking temperatures.
- Page 36 Fan Grill Setting The heat generated by the top heating element is distributed by the fan. This mode can be used for grilling meat, fish, poultry and vegetables. It is not necessary to turn over food and it will get the crispy texture. For grilling, oven rack or baking tray are usually placed on Level * Temperatures Setting: 40-250 °C...
- Page 37 Pizza (Convection + Bottom) Setting Hot air and the bottom heating element combine to heat food. This is a useful setting for crisping and browning. Baking tray or oven rack is often used on Level * Temperatures Setting: 40-250 °C * Please ensure that glass baking dishes are suitable for 40-250 °C cooking temperatures.
- Page 38 Intensive (Top + Bottom + Convection) Setting This mode activates all heating elements such as upper, lower and convection fan alternately. The heat is distributed evenly in the oven. This mode is suitable for big quantities of food, which need heat supply, such as large gratins and pies. Baking tray or oven rack is often used on Level * Temperatures Setting: 40-250 °C * Please ensure that glass baking dishes are suitable for 40-250 °C cooking...
- Page 39 ProRoasting Setting This mode includes an automatic heating-up cycle over 200 °C. The top heater and the convection fan is operating during the process of searing the meat. After this stage the food is cooked gently by the low temperature of preselection.
- Page 40 ECO Convection Setting This mode uses the optimized heating system so that you save the energy during cooking your dishes. The cooking time will be increased a little but you can achieve the even baking results on your dishes. Baking tray or oven rack is often used on Level * Temperatures Setting: 40-250 °C * Please ensure that glass baking dishes are suitable for 40-250 °C cooking temperatures.
-
Page 41: Using Multi-Level Cook Mode
USING MULTI-LEVEL COOK MODE This mode is suitable for cooking with two different levels at the same time. This mode works by the circulation of heated air. The entire oven cavity may then be utilized. For example, cooking two trays of biscuits. The cooking time will be increased compared with 1 level cooking but you can bake double quantity at once. - Page 42 For Multi-Level Cook, 2 baking trays or 1 baking tray and oven rack are usually placed on Level * Temperatures Setting: 40-250 °C * Please ensure that glass baking dishes are suitable for 40-250 °C cooking temperatures. Cooking guide Use temperatures and times in this table as guidelines for baking. We recommend to preheat the oven with Multi-level Cook mode.
-
Page 43: Using The Keep Warm Mode
USING THE KEEP WARM MODE In the keep warm setting, the food that you have cooked can be kept warm. 1. Turn the MODE SELECTOR to the KEEP WARM mode. 2. Press SELECT. The temperature is blinking (Default : 70 °C). 3. -
Page 44: Setting Cook Time
SETTING COOK TIME After you get cooking function, you can set how much time you will cook. And the setting time is over, heating elements automatically turn off. 1. Select the desired oven mode and temperature. 2. Press COOK TIME. 3. -
Page 45: Setting End Time
SETTING END TIME After you get cooking function, you can set when the cook is over. And the setting time is over, heating elements automatically turn off. 1. Select the desired oven mode and temperature. 2. Press END TIME. The current time will be shown blinking on the display. -
Page 46: Setting Delay Start
SETTING DELAY START If the end timer is entered after the cook timer has already been set, the cook timer and the end timer are calculated and if necessary the oven sets a delay start point. Example: Current time : 12:00. Cook time : 2:00 if you wish to end cooking at 18:00. -
Page 47: Using The Auto Menu Mode
USING THE AUTO MENU MODE Auto Menu Mode allows you to choose from 35 pre-programmed settings to conveniently cook, roast or bake your favorite foods. Cooking time and power level are automatically set. Simply select one of the 35 settings and set the weight to start cooking. -
Page 48: Guide To Auto Menu Setting
GUIDE TO AUTO MENU SETTING The following table presents 35 Auto Programmes for Steam cooking, Baking, Grilling, Roasting and Reheat. The tables contains its quantities and appropriate recommendations. Before using those programmes always fill water tank up to maximum level with fresh water. - Page 49 2. Baking Shelf Food Item Weight Accessory Recommendation level Put apple pie into a round metal dish. Put on A:13 Apple pie 1.2-1.4 Oven rack the oven rack. The weight ranges include apple and so on. Base for Put batter into metal base dish on the oven A:14 0.3-0.5 Oven rack...
- Page 50 Shelf Food Item Weight Accessory Recommendation level Marinate lamb chops. Put lamp chops on Lamb Oven rack / oven rack and baking tray. Turnover, as soon A:26 0.3-0.6 4 / 1 chops Baking tray as the oven beeps and press start to continue process.
-
Page 51: Using The Auto Defrost Mode
USING THE AUTO DEFROST MODE Auto Defrosting Setting The following table presents 5 Auto Programmes for Defrosting. It contains its quantities and appropriate recommendations. 1. Fill the water tank up to the maximum line and place it back. Then place your food into the cooking cavity. - Page 52 Guide to Auto Defrost Setting Standing Food Item Weight Shelf level time Always shield the edges with aluminium foil. Defrost This programme is suitable for beef, lamb, 0.2-0.5 Frozen Meat 10-30 pork, steaks, chops, minced meat. Put the 0.8-1.5 (-18 °C) meat on the oven rack.
-
Page 53: Test Dishes
TEST DISHES According to standard EN 60350 1. Baking The recommendations for baking refer to preheated oven. Insert baking tray with slanted side towards the door front. Type of Shelf Temp. Cooking Dish & Notes Cooking mode food level (°C) time (min.) Conventional 150-170... -
Page 54: Descaling And Cleaning
descaling and cleaning DESCALE MODE When you see the message on the display, the oven needs to be descaled. If you do not perform to 2 step of descale mode (cleaning and rinse mode), the descale message does not disappear. Since then you operate the steam mode 2 more hours after the descale message is displayed, the steam-related functions are limited. - Page 55 6. Press START. A rinse mode takes place with clean water. After 10 minutes later, the descale mode will be completed. 7. When done, the machine will make a beep. Empty both the tank and the drip tray and clean the tank with water. 8.
-
Page 56: Using The Steam Clean Feature
USING THE STEAM CLEAN FEATURE The Steam Clean feature allows you to sanitize your oven in just 10 minutes. The STEAM CLEAN process takes 7 minutes, and the standby time for the process is 3 minutes. In these 3 minutes the steam will soak all the leftovers and you can wipe them from the ceiling or walls with a soft cloth. -
Page 57: Cleaning
CLEANING 1. Cleaning inside the cavity. • Lift up both left and right shelves at the front (1). Move them towards the middle (2) and pull them out. Wipe any leftovers from the ceiling or walls using a neutral cloth dipped in detergent. -
Page 58: Changing The Lamp
• NEVER use benzene, thinner or a metal scrubber to clean. Otherwise, it can cause discoloration or damage to the surface. WARNING • Do not spray water onto the machine when cleaning it. This can lead to electric shock or fire. •... -
Page 59: Troubleshooting And Information Code
troubleshooting and information code TROUBLESHOOTING If you have problems with your oven, try the solutions suggested below. They may save you the time and inconvenience of an unnecessary service call. Neither the oven’s display nor the oven operate. • Make sure the plug is properly connected to a grounded outlet. •... - Page 60 The light bulb is not working. • The light bulb is loose or defective. Tighten or replace the bulb. • The switch operating light is broken, please contact the Samsung Call Center. The fan continues to operate after the oven has been turned off.
-
Page 61: Information Codes
TEMP SENSOR SHORT ERROR It occurs due to a defective sensor, misplaced If any of these errors occur, wires, a defective PCB. please contact SAMSUNG Customer Service. ABNORMAL TEMP SENSING ERROR It occurs due to a defective sensor, misplaced wires, a defective PCB. -
Page 62: Technical Data
SAMSUNG strives to improve its products at all times. Both the design specifications and these user instructions are thus subject to change without notice. TECHNICAL DATA Model NQ50H7935ES Power source 230 V / 50 Hz Power consumption Maximum power... -
Page 63: Product Data Sheet
PRODUCT DATA SHEET SAMSUNG SAMSUNG Model identification NQ50H7935ES Energy Efficiency Index per cavity (EEI 77.63 cavity Energy Efficiency Class per cavity Energy consumption required to heat a standardised load in a cavity of an electric heated oven during a cycle in conventional mode per... - Page 64 Mobilfunk max. 0,60 €/Anruf) ITALIA 800-SAMSUNG (800.7267864) www.samsung.com/it/support CYPRUS 8009 4000 only from landline, toll free www.samsung.com/gr/support 80111-SAMSUNG (80111 726 7864) only from land line GREECE (+30) 210 6897691 from mobile and land line www.samsung.com/support LUXEMBURG 261 03 710 NETHERLANDS 0900-SAMSUNG (0900-7267864) (€...
Need help?
Do you have a question about the NQ50H7935ES and is the answer not in the manual?
Questions and answers