Advertisement
Quick Links
Operations & Parts
Manual
www.cantekamerica.com
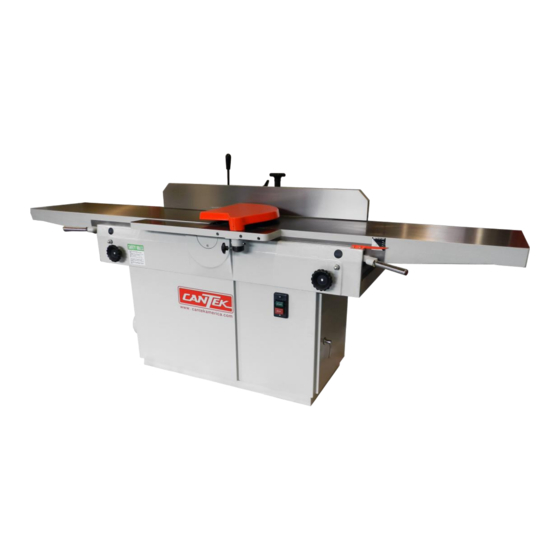
J168LH
HEAVY DUTY 16" JOINTER
Please ensure you have your serial number available when contacting us for parts or service.
Cantek America Inc. | 1.888.982.2683 | Parts: sales@cantekamerica.com | Service: service@cantekamerica.com
Advertisement

Related Manuals for Cantek J168LH


Summary of Contents for Cantek J168LH
- Page 1 Operations & Parts Manual www.cantekamerica.com J168LH HEAVY DUTY 16” JOINTER Please ensure you have your serial number available when contacting us for parts or service. Cantek America Inc. | 1.888.982.2683 | Parts: sales@cantekamerica.com | Service: service@cantekamerica.com...
- Page 2 SPECIFICATIONS: Cutting Capacity: Maximum width ....................................16” (406mm) Maximum depth of cut ..................................3/4” (19mm) Table Size Width ........................................16” (406mm) Length ....................................... 96” (2438mm) Height from floor ..................................31-1/2” (800mm) Fence Size (LxH) ................................. 47”x5-1/2” (1194x140mm) Tilt degree ........................................45 (F & R) Positive Stops ......................................
- Page 3 FEATURES OF YOUR JOINTER Outfeed Table 13. PB Switch Fence 14. Base Fence Handle 15. Table Lock Lock Handle 16. Door Handle Support, Spur Gear 17. Stand Door Control Handle-Forward/Backward 18. Handle-Table Raising/Lowering Rack 19. Infeed Table Safety Cover-Cutterhead 20. Exocentric Shaft Middle Base 21.
- Page 4 REMOVE ADJUSTING KEYS INTRODUCTION WREN-CHES. From habit of checking to see that keys and adjusting We thank you for your purchase of a 16" Jointer. It has been wrenches are removed from tool before turning it on. designed, engineered and manufactured to give you the best possible dependability and performance.
- Page 5 ADDITIONAL SAFETY RULES FOR JOINTERS KEEP cutterhead sharp and free of all rust and pitch. ALWAYS use a push block when jointing stock that does not give a reasonable distance of safety for your hands. NEVER PASS HANDS DIRECTLY OVER CUTTERHEAD.
- Page 6 After wire connection is complete turn the drive motor on momentarily to check if it is on the proper direction. Run the machine without cutting for a short period of time to check if that all powered functions are operating properly. Belt Adjusting Remove the three knurled nuts and the belt guard for accessing to the drive motor.
- Page 7 Knives Removing After a period of using the dull knives should be replaced or reground. To remove the knives, Release lock screws (C) on knife (A) and knife gib (B) Fig. 6. Remove the knife and knife gib. Remove two springs (D) placed below the knife (A). Fig.
- Page 8 straight gage (B), and tighten the screws securely. After the outfeed table has been set at the correct height, it should not be changed except for special operations. If the outfeed table is too high, the result will be as shown in Fig. 11.
- Page 9 The Depth of Cut The thickness which will be cut out is determined by the distance between the height of infeed table and knife tip of cutterhead. Loosen table lock (C) Fig. 14 Push or pull hand lever (A) to raise or lower table, gage (B) shows the distance the table has been raised or lowered as shown in Fig.
- Page 10 Jointing Warped Pieces WARNING When joint short or thin pieces, use a push block to eliminate all ALWAYS USE GUARD AND KEEP HANDS danger to the hands. Two types are shown in Fig. 16. Push blocks AWAY FROM CUTTERHEAD!! are easily made from scrap material. CAUTION NEVER CHANGE THE POSITION OF THE OUTFEED TABLE UNLESS IT IS...
- Page 11 of the knife, stroking lengthwise by sliding the stone back and forth across the table. Do the same amount of whetting on each of the three blades. Fig. 19 Fig. 21 Blade Care When blades become dull enough so that it is noticeable when cutting, they should be resharpened.
- Page 12 TROUBLE SHOOTING: Symptom Possible Causes And Corrections Check whether the knife tip is higher than outfeed table. Finished stock is concaved on the end. Raise outfeed table so that the surface and knife tip line are on same level as shown in Fig. 22 ...
- Page 13 Fig. 24 Fig. 25 Fig.26...
- Page 14 PARTS LIST: PARTNO. DESCRIPTION Q"TY C002009 Stand P066001 Washer,Φ12 S284023 Spring Washer,Φ3/8 S100003 Hex. Head Screw,3/8"-16NC C074013 Cover, Dust Chute S239003 Screw, Dust Chute,3/16"-24NC T004014 Assembly, Motor Pulley,2P-3HP T004041 Assembly, Motor Pulley,2P-5HP T004052 Assembly, Motor Pulley,2P-7 1/2HP C022027 Plate, Switch P074013P18 Contactor,HKP-18 P092303...
- Page 16 PARTS LIST: PARTNO. DESCRIPTION Q"TY P041205R Motor,2P 3HP(2.2KW).R P040205R Motor,2P 3HP(2.2KW).R C064038 Pulley,3HP 50HZ C064019 Pulley,3HP 60HZ S214013 Fixed Screw,M10-P1.5 C063054 Bracket, Motor S282011 Washer,Φ10.5 S284008 Spring Washer,Φ10.2 S137040 Hex. Head Screw,M10-P1.5 S273010R Nut,M10-P1.5 C015033 Plate C048005 S282012 Washer,Φ13 S273012R Nut,M12-P1.75 S214014 Fixed Screw,M10-P1.5...
- Page 17 PARTS LIST: PARTNO. DESCRIPTION Q"TY P041206R Motor,2P 5HP(3.7KW).R P040206R Motor,2P 5HP(3.7KW).R C064039 Pulley,Φ139.7x58L;5HPx2P,50HZ C064040 Pulley,Φ114.3x58L,5HPx2P,60HZ S214013 Fixed Screw,M10-P1.5 C063054 Bracket, Motor S282011 Washer,Φ10.5 S284008 Spring Washer,Φ10.2 S137045 Hex. Head Screw,M10-P1.5 S273010R Nut,M10-P1.5 C015033 Plate C048005 S282012 Washer,Φ13 S273012R Nut,M12-P1.75 S214014 Fixed Screw,M10-P1.5 S300055 Belt,A-55"L...
- Page 18 PARTS LIST: PARTNO. DESCRIPTION Q"TY P039127R Motor ,2P7 1/2HP(5.5KW).R C064039 Pulley Φ 114.3x58L,7 1/2HPx2P,60HZ C064040 Pulley Φ 139.7x58L,7 1/2HPx2P,50HZ S214013 Fixed Screw,M10-P1.5 C063054 Bracket, Motor S282011 Washer,Φ10.5 S284008 Spring Washer,Φ10.2 S137045 Hex. Head Screw,M10-P1.5 S273010R Nut,M10-P1.5 C015033 Plate C048005 S282012 Washer,Φ13 S273012R Nut,M12-P1.75...
- Page 19 PARTS LIST: PARTNO. DESCRIPTION Q"TY C004047 Table Base T001026 Cutterhead Assembly S284023 Spring Washer,Φ3/8 S100004 Hex. Head Screw,3/8"-16NC T012037 Infeed Table Assembly T012038 Outfeed Table Assembly S273091 Nut,3/8"-16NC S100006 Hex. Head Screw,3/8"-16NC P108102 Plate, Measure C057039 Handle, Table Raising (L) P051001 Bushing,Φ19.05 C046086...
- Page 21 PARTS LIST: PARTNO. DESCRIPTION Q"TY P052002 Helical Cutterhead,Φ96x549.5L(403L) C009024 Support, Bearing (LH) S026204ZZ Bearing,6204ZZ Φ20x∮47x14 C009025 Support, Bearing(RH) S026206ZZ Bearing,6206ZZ. Φ30x∮62x16 C053071 Washer,Φ8 S136620 Hex. Head Screw,M8-P1.25 C010007 Support, Cover (LH) C010008 Support, Cover (RH) S201020 Hex. Head Screw,M6-P1.0 C064020 Pulley S003178 S282113...
- Page 22 PARTS LIST: PARTNO. DESCRIPTION Q"TY C011012 Cutterhaed C009024 Support, Bearing (LH) S026204ZZ Bearing,6204ZZΦ20xΦ47x14 C053071 Washer, Φ9 S284007 Spring Washer, Φ8.2 S136020 Hex. Head Screw,M8-P1.25 S201020 Hex. Head Screw,M6-P1.0 C009025 Support, Bearing(RH) S026206ZZ Bearing,6206ZZ. Φ30xΦ62x16 C064020 Pulley S003174 S282049 Washer, Φ11 S284008 Spring Washer, Φ10.2 S137020...
- Page 23 PARTS LIST: PARTNO. DESCRIPTION Q"TY C087004 Table Lip C006040 Infeed table S284008 Spring Washer,Φ10.2 S203040 Hex. Head Screw,M10-P1.5 C008024 Rubber Pad, Dust Free S282008 Washer,Φ5.3 S225016 Screw, Dust Chute,M5-P0.8 C017079 Support C048057 Bar, Table Elevator P051001 Bushing, Φ19.05 C046088 Shaft C046087 Shaft, Rear S214002...
- Page 24 PARTS LIST: PARTNO. DESCRIPTION Q"TY C087004 Table Lip C006058 Outfeed Table S284008 Spring Washer,Φ10.2 S203040 Hex. Head Screw,M10-P1.5 C017079 Support C048057 Bar, Table Elevator P051001 Bushing,Φ19.05 C046088 Shaft C046087 Shaft, Rear S214002 Fixed Screw,M10-P1.5 C060019 Spring S326001 Screw, For Spring,1/4" S273089 Nut,1/4"-20NC C008081...
- Page 25 PARTS LIST: PARTNO. DESCRIPTION Q"TY C015079 Ledge, Table C075054 Guard C046025 Collar, Shaft C060018 Shaft C051033 Spring S196006 Fixed Screw,3/8"-16NC S194006 Fixed Screw,1/4"-20NC S273089 Nut,1/4"-20NC P031005 Knob,5/16"-18NC S284023 Spring Washer,Φ3/8 S186005 Hex. Head Screw,3/8"-16NC...
- Page 26 PARTS LIST: PARTNO. DESCRIPTION Q"TY C057014 Adjustment, Handle C080004 Adjustment, Plate S284006 Spring Washer,Φ6.1 S135018 Hex. Head Screw,M6-P1.0...
- Page 27 PARTS LIST: PARTNO. DESCRIPTION Q"TY C015039 Support, Gear C015034 Support, Rack C032015 Rack C074171 Cover, Cutterhead C051028 Collar S199014 Hex. Head Screw,M4-P0.7 S233012 Screw, Dust Chute,M6-P1.0 S282011 Washer,Φ10.5 S284008 Spring Washer,Φ10.2 S203035 Hex. Head Screw,M10-P1.5 C039006 Shaft, Gear C057013 Handwheel S212012 Screw, Dust Chute,M6-P1.0 C057011...
- Page 28 S136018 Hex. Head Screw,M8-P1.25 S136035 Hex. Head Screw,M8-P1.25 S203020 Hex. Head Screw,M10-P1.5 S273042 Nut,M10-P1.5 T027014 ToolBox...
- Page 29 PARTS LIST: PARTNO. DESCRIPTION Q"TY S296008 Allen Wrench,M8 S296009 Allen Wrench,M10 S290071 Open End Wrench,10x12 S290073 Open End Wrench,12x14 S290074 Open End Wrench,17x19...
Need help?
Do you have a question about the J168LH and is the answer not in the manual?
Questions and answers