Husqvarna 543 XP Operator's Manual
Hide thumbs
Also See for 543 XP:
- Operator's manual (310 pages) ,
- Workshop manual (62 pages) ,
- Operator's manual (132 pages)
Table of Contents
Advertisement
Available languages
Available languages
Quick Links
Advertisement
Chapters
Table of Contents

Related Manuals for Husqvarna 543 XP


Summary of Contents for Husqvarna 543 XP
- Page 1 ® ® 543 XP , 543 XP Operator's manual 2-39 Bedienungsanweisung 40-79 Manual de usuario 80-118 Manuel d'utilisation 119-157 Manuale dell'operatore 158-196 Gebruiksaanwijzing 197-234 Manual do utilizador 235-273 Navodila za uporabo 274-310...
-
Page 2: Table Of Contents
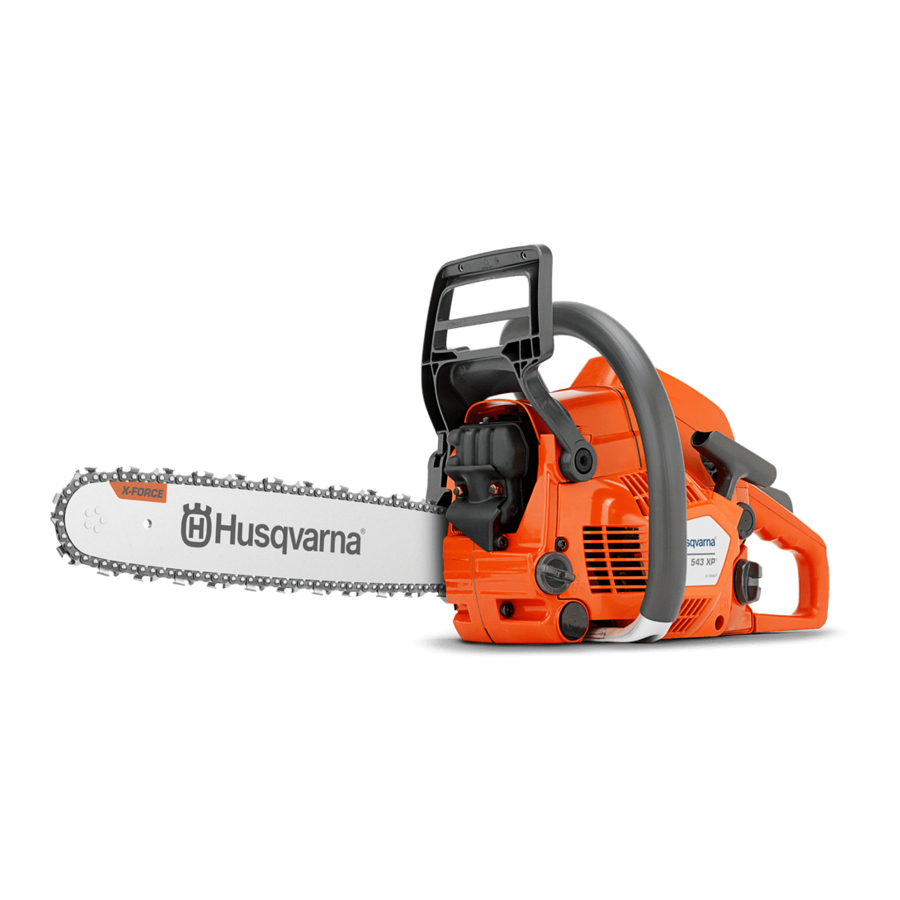
Intended use Product description This chainsaw for forest service is designed for forest The Husqvarna 543 XP, 543 XPG are chainsaw models work such as felling, limbing and cutting. with a combustion engine. Work is constantly in progress to increase your safety... - Page 3 Technical 11. Choke control of the product is specified in data on page 34 . 12. Fuel tank 13. Air purge bulb 14. Starter rope handle 15. Starter housing Both of the operator's hands must be used 16. Chain oil tank to operate the chainsaw.
-
Page 4: Safety
Euro V Emissions The rating plate showing yyyywwxxxxx serial number. yyyy is the production year, ww is the WARNING: Tampering with the engine production week. voids the EU type-approval of this product. Note: Other symbols/decals on the product refer to certification requirements for certain markets. - Page 5 and saw chain attached to the product the clutch can on the front handle. All people, whether right or left come loose and cause serious injury. handed, should use this grip. Use a firm grip with thumbs and fingers encircling the handles. This grip minimizes the risk of kickback and lets you keep the product under control.
- Page 6 Use boots with saw protection, steel toe-cap and should consult an expert before continuing. Do not non-slip sole. hesitate to contact your dealer or Husqvarna if you • Always have a first-aid kit with you. have any questions about the use of the product.
- Page 7 it releases the throttle trigger (B). If you release the Start/stop switch handle, the throttle trigger and the throttle trigger lockout Use the start/stop switch to stop the engine. move back to their initial positions. This function locks the throttle trigger at idle speed. Chain catcher Muffler The chain catcher catches the saw chain if it breaks or...
- Page 8 • Fuel and fuel vapour are highly flammable and • If the safety checks in this operator's manual is can cause serious injury when inhaled or allowed not approved after you do maintenance, speak to to come in contact with the skin. For this reason your servicing dealer.
-
Page 9: Assembly
not correctly lubricated, the risk of wear on the guide bar, saw chain and chain drive sprocket increases. Assembly Introduction 4. Install the saw chain correctly around the drive sprocket and put it in the groove on the guide bar. WARNING: Read and understand the safety chapter before you assemble the... -
Page 10: Operation
6. Make sure that the vibration damping system • If Husqvarna two-stroke oil is not available, use a operates correctly and that it is not damaged. two-stroke oil of good quality for air-cooled engines. Speak to your servicing dealer to select the correct 7. - Page 11 To fill the fuel tank dealer when you select your chain oil. WARNING: • Use Husqvarna chain oil for maximum saw chain life Obey the procedure that and to prevent negative effects on the environment. follows for your safety. If Husqvarna chain oil is not available, we recommend you to use a standard chain oil.
- Page 12 chain before it touches you. There are also some Note: To see where the chain oil tank is on your positions in which your hand can not touch the front Product overview on page 2 . product, refer to hand guard to engage the chain brake. •...
- Page 13 2. Push the air purge bulb approximately 6 times or 2. Push the air purge bulb approximately 6 times or until fuel starts to fill the bulb. It is not necessary to until fuel starts to fill the bulb. It is not necessary to fill the air purge bulb fully.
- Page 14 better control of the product and the position of the CAUTION: Do not pull the starter kickback zone. rope to full extension and do not let go of the starter rope handle. This can cause damage to the product. a) If you start your product with a cold engine, pull the starter rope handle until the engine fires.
- Page 15 1. Put the trunk on a saw horse or runners. 1. Cut on the push stroke approximately ⅓ through the trunk. 2. Cut through the trunk on the pull stroke until the two WARNING: Do not cut trunks in a kerfs touch.
- Page 16 a) Keep the product on the trunk and let the guide WARNING: There is a high accident bar move along the trunk. risk when you use the limbing technique. b) Cut on the push stroke. Kickback information on page 12 for Refer to instructions how to prevent kickback.
- Page 17 To keep a safe distance 6. Do not let the tree fall onto a different standing tree. It is dangerous to remove a caught tree and there is 1. Make sure that persons around you keep a safe To free a trapped tree a high accident risk.
- Page 18 45º-70º To fell a tree a) Make the top directional cut. Align the felling Husqvarna recommends you to make the directional direction mark (1) of the product with the felling cuts and then use the safe corner method when you direction of the tree (2).
- Page 19 3. Put a wedge in the kerf straight from behind. 1. If the usable cutting length is longer than the tree diameter, do these steps (a-d). a) Make a bore cut straight into the trunk to complete the felling hinge width. 4.
- Page 20 To cut trees and branches that are in tension 7. Continue to cut more into the tree until the tree/ branch bends and the tension is released. 1. Figure out which side of the tree or branch that is in tension.
-
Page 21: Maintenance
2. For temperatures below -5°C/23°F or in conditions Put the winter plug in in position 1 if the with snow, a winter cover is available. Assemble the temperature increases above 0°C/32°F. Risk winter cover on the starter housing. The winter cover of too high engine temperature and damage decreases the flow of cool air and keeps snow away to the engine. - Page 22 Daily maintenance Weekly maintenance Monthly maintenance Clean and do a check of the chain Remove burrs from the edges of the Clean the external parts of the carbu- To do a check of the To do a check of brake. Refer to guide bar.
- Page 23 Maintenance and checks of the safety To do a check of the chain brake devices on the product To start the product on 1. Start the product. Refer to page 12 for instructions. To do a check of the brake band WARNING: Make sure that the saw 1.
- Page 24 4. Start the product and apply full throttle. 2. Push the start/stop switch to the STOP position. The engine must stop. 5. Release the throttle trigger and make sure that the saw chain stops and stays stationary. WARNING: If the saw chain rotates when the throttle trigger is in the idle position, speak to your servicing dealer.
- Page 25 Carburetor with adjustment limitations Note: The idle speed is correctly adjusted when the engine runs correctly in all positions. The idle speed Note: If you do not know which carburetor type that must also be safely below the speed at which the saw you have on your product, speak to your servicing chain starts to rotate.
- Page 26 3. Pull out the starter rope approximately 30 cm/12 in 10. Make a tight knot at the end of the starter rope. and put it in the notch on the pulley. 4. Let the pulley rotate slowly rearward to release the recoil spring.
- Page 27 Replace a worn or damaged guide bar or saw chain with the guide bar and saw chain combination recommended by Husqvarna. This is necessary to keep the safety Accessories on functions of the product. Refer to page 35 , for a list of replacement bar and chain combinations that we recommend.
- Page 28 • Number of teeth on bar tip sprocket (T). • Drive link width, mm/in. • Chain pitch, in. The distance between the drive links of the saw chain must align with the distance of the teeth on the bar tip sprocket and drive sprocket. General information about how to sharpen the cutters Do not use a blunt saw chain.
- Page 29 It is not easy to sharpen a saw chain correctly without gauge setting for your saw chain. the correct equipment. Use Husqvarna file gauge. This will help you to keep maximum cutting performance and the kickback risk at a minimum.
- Page 30 3. Use the flat file to remove the part of the depth Note: Product overview on page 2 for the Refer to gauge that extends through the depth gauge tool. position of the chain tensioning screw on your product. To do a check of the saw chain lubrication 1.
- Page 31 To do a check of the guide bar 4. Lubricate the needle bearing with a grease gun. Use engine oil or a bearing grease of high quality. 1. Make sure that the oil channel is not blocked. Clean if it is necessary. 2.
- Page 32 ™ 7. Turn the guide bar daily to extend its life cycle. the air filter. AirInjection extends the life of the air filter and the engine. To do maintenance on the fuel tank and the chain oil tank • Drain and clean the fuel tank and the chain oil tank regularly.
-
Page 33: Troubleshooting
Troubleshooting The engine does not start Product part to examine Possible cause Action Starter pawls The starter pawls are blocked. Adjust or replace the starter pawls. Clean around the pawls. Speak to an approved service work- shop. Fuel tank Incorrect fuel type. Drain the fuel tank and fill with cor- rect fuel. -
Page 34: Transportation And Storage
Remove the spark plug cap from the spark plug and engage the chain brake. • Attach the product safely during transportation. Technical data Technical data Husqvarna 543 XP Husqvarna 543 XPG Engine Cylinder displacement, cm 43.1 43.1 Idle speed, rpm... -
Page 35: Accessories
Accessories Recommended cutting equipment Kickback and guide bar nose radius Chainsaw models Husqvarna 543 XP, 543 XPG For sprocket nose bars the nose radius is specified by have been evaluated for safety according to EN the number of teeth, such as 10T. For solid guide bars... - Page 36 The usable cutting length is usually 1 in less than the Filing equipment and filing angles nominal guide bar length. Use a Husqvarna file gauge to sharpen the saw chain. Pixel A Husqvarna file gauge makes sure that you get the correct filing angles.
- Page 37 0.025 in / 0.65 3 / 16 in / 4.8 mm 505 69 81-08 30° 85° 0.025 in / 0.65 3 / 16 in / 4.8 mm 505 69 81-09 30° 85° 0.025 in / 0.65 S35G 3 / 16 in / 4.8 mm 587 80 91-01 30°...
-
Page 38: Declaration Of Conformity
Declaration of Conformity EU Declaration of Conformity We, Husqvarna AB, SE-561 82 Huskvarna, Sweden, tel: +46-36-146500, declare on our sole responsibility that the product: Description Chainsaws for forest service Brand Husqvarna Type / Model 543 XP, 543 XPG Identification Serial numbers dating from 2022 and onwards... - Page 39 UK Declaration of Conformity We, Husqvarna AB, SE-561 82 Huskvarna, Sweden, tel: +46-36-146500, declare on our sole responsibility that the product: Description Chainsaws for forest service Brand Husqvarna Type / Model 543 XP, 543 XPG Identification Serial numbers dating from 2022 and onwards...
-
Page 40: Einleitung
Wartung................ 61 Konformitätserklärung...........79 Einleitung Verwendungszweck Produktbeschreibung Diese Motorsäge wurde für forsttechnische Husqvarna 543 XP, 543 XPG sind Motorsägenmodelle Anwendungen wie Fällen, Entasten und Sägen mit Verbrennungsmotor. entwickelt. Wir arbeiten laufend daran, Ihre Sicherheit und die Effektivität während des Betriebs zu verbessern. - Page 41 9. Gashebel Etikett mit Geräuschemissionen 10. Start-/Stoppschalter gemäß EU- und UK-Richtlinien und 11. Choke-Hebel Verordnungen sowie der australischen „Protection of the Environment Operations 12. Kraftstofftank (Noise Control) Regulation 2017“ 13. Kraftstoffpumpe (Umweltschutz-/Lärmschutzbestimmung) 14. Startseilhandgriff von New South Wales. Der garantierte 15.
-
Page 42: Sicherheit
Hinweis: Einstellen der Ölpumpe. Sonstige Symbole/Aufkleber am Gerät beziehen sich auf Zertifizierungsanforderungen, die in bestimmten Ländern gelten. Emissionen nach Euro V Auf dem Typenschild ist yyyywwxxxxx die Seriennummer ange- geben. yyyy ist das Pro- WARNUNG: Bei jeglichen duktionsjahr, ww steht für Manipulationen des Motors erlischt die EU- die Produktionswoche. - Page 43 • Verwenden Sie niemals das Gerät, wenn Grund unter den Füßen haben, auf dem Sie sicher Sie müde sind, Alkohol getrunken oder stehen. Medikamente eingenommen haben, die Ihre Sehkraft, Urteilsvermögen oder Körperkontrolle beeinträchtigen können. • Vermeiden Sie es, das Gerät bei schlechtem Wetter zu benutzen.
- Page 44 Augen, können die Folge sein. Rat, bevor Sie fortfahren. Zögern Sie nicht, Ihren • Verwenden Sie Handschuhe mit Schnittschutz. Händler oder Husqvarna anzusprechen, wenn Sie • Verwenden Sie Hosen mit Schnittschutz. Fragen bezüglich des Gebrauchs des Geräts haben.
- Page 45 Anwendung der Wartung der Sägekette und • Wenn die Sicherheitsvorrichtungen defekt Führungsschiene verringern die Gefahr von Unfällen. sind, wenden Sie sich an Ihre Husqvarna- Servicewerkstatt. Kettenbremse mit Handschutz Ihr Gerät ist mit einer Kettenbremse versehen, welche die Sägekette bei einem Rückschlag stoppt. Die Kettenbremse verringert die Unfallgefahr nur, wenn Sie selbst die erforderlichen Vorsichtsmaßnahmen...
- Page 46 Sicherer Umgang mit Kraftstoff Start-/Stoppschalter Drücken Sie den Start-/Stopp-Schalter, um den Motor WARNUNG: Lesen Sie die folgenden abzustellen. Warnhinweise, bevor Sie das Gerät benutzen. • Beim Tanken und Mischen von Kraftstoff (Benzin und Zweitaktöl) ist für gute Belüftung zu sorgen. •...
-
Page 47: Montage
Sicherheitshinweise für die Wartung • Behalten Sie den korrekten Tiefenbegrenzerabstand bei. Befolgen Sie die Anweisungen und verwenden Sie die empfohlene Tiefenbegrenzereinstellung. WARNUNG: Lesen Sie die folgenden Ein zu großer Tiefenbegrenzerabstand erhöht die Warnhinweise, bevor Sie das Gerät warten. Rückschlaggefahr. • Sie dürfen nur die Wartungs- und Servicearbeiten ausführen, die in dieser Bedienungsanleitung beschrieben sind. -
Page 48: Betrieb
So montieren Sie Führungsschiene und WARNUNG: Tragen Sie bei Kette der Montage der Sägekette immer Schutzhandschuhe. 1. Deaktivieren Sie die Kettenbremse. 5. Achten Sie darauf, dass die Schneiden der 2. Entfernen Sie die Schienenmuttern und Sägezähne auf der Oberkante der Führungsschiene den Kupplungsdeckel. - Page 49 6. Stellen Sie sicher, dass das Antivibrationssystem Leistung Husqvarna Zweitaktöl. ordnungsgemäß funktioniert und unbeschädigt ist. • Wenn Husqvarna Zweitaktöl nicht verfügbar ist, verwenden Sie ein qualitativ hochwertiges Zweitaktöl 7. Stellen Sie sicher, dass der Schalldämpfer für luftgekühlte Motoren. Wenden Sie sich an Ihren ordnungsgemäß...
- Page 50 • Verwenden Sie Husqvarna-Kettenöl, um die maximale Lebensdauer der Sägekette zu gewährleisten und negative Auswirkungen auf die Umwelt zu vermeiden. Wenn Husqvarna- Kettenöl nicht verfügbar ist, empfehlen wir, ein Standardkettenöl zu verwenden. • Verwenden Sie ein Kettenöl mit guter Haftung an der Sägekette.
- Page 51 Informationen zu Rückschlägen fest mit beiden Händen halten. Wenn es zu einem Rückschlag kommt, kann die Kettenbremse nicht die Sägekette anhalten, bevor sie Sie trifft. Es gibt WARNUNG: Ein Rückschlag kann auch einige Positionen, in denen Ihre Hand nicht schwere Verletzungen des Bedieners oder an den Handschutz reicht, um die Kettenbremse zu anderer Personen verursachen.
- Page 52 2. Drücken Sie die Kraftstoffpumpe ca. 6 Mal, bis sich 2. Drücken Sie die Kraftstoffpumpe ca. 6 Mal, bis sich die Pumpe mit Kraftstoff füllt. Es ist nicht erforderlich, die Pumpe mit Kraftstoff füllt. Es ist nicht erforderlich, die Kraftstoffpumpe vollständig zu füllen. die Kraftstoffpumpe vollständig zu füllen.
- Page 53 So stoppen Sie das Gerät 5. Ziehen Sie dann schnell und kraftvoll am Startseil. • Drücken Sie den Start-/Stopp-Schalter in die Stellung „0“, um den Motor abzustellen. Ziehende und schiebende Kette ACHTUNG: Ziehen Sie das Startseil nicht vollständig aus, und Sie können mit dem Produkt in 2 verschiedenen lassen den Startseilgriff nicht los.
- Page 54 WARNUNG: Stellen Sie sicher, dass die Sägekette nicht den Boden berührt, nachdem Sie den Stamm durchgesägt haben. 2. Stoppen Sie, nachdem Sie rund zwei Drittel durch den Stamm gesägt haben. Drehen Sie den Stamm, um von der gegenüberliegenden Seite hineinzusägen. So verwenden Sie die Schneidtechnik WARNUNG: Setzen Sie die volle...
- Page 55 1. Sägen Sie mit ziehender Kette ca. ⅓ durch den Stamm. 2. Durchtrennen Sie den restlichen Teil des Stamms mit schiebender Kette. 1. Entfernen Sie die Äste auf der rechten Seite des Stamms. a) Halten Sie die Führungsschiene auf der rechten Seite des Stamms, und drücken Sie den Gerätekörper gegen den Stamm.
- Page 56 So halten Sie einen ausreichenden b) Sägen Sie mit „schiebender“ Kette. Sicherheitsabstand ein 1. Stellen Sie sicher, dass Personen in Ihrem Umfeld einen ausreichenden Sicherheitsabstand von mindestens 2 1/2 Baumlängen einhalten. 2. Stellen Sie sicher, dass keine Person sich vor oder während dem Fällen im Gefahrenbereich aufhält.
- Page 57 Es besteht sehr große Unfallgefahr. Siehe befreien Sie einen eingeklemmten Baum auf Seite 59 . So fällen Sie einen Baum Husqvarna empfiehlt Ihnen, die Kerbschnitte zu machen und zum Fällen des Baumes die „Safe Corner“- Methode anzuwenden. Mit der „Safe Corner“-Methode WARNUNG: Bei gefährlichen...
- Page 58 So machen Sie Kerbschnitte 1. Machen Sie Kerbschnitte, die ¼ des Baumdurchmessers betragen. Legen Sie einen 45 °-70 °-Winkel zwischen dem oberen und dem unteren Kerbschnitt an. 1. Wenn die effektive Schnittlänge größer als der Baumdurchmesser ist, folgen Sie diesen Schritten 45º-70º...
- Page 59 d) Sägen Sie mit schiebender Kette bis ⅓ des • Am Traktor Stamms übrig ist, um die sichere Ecke zu erhalten. • Tragbar 3. Legen Sie einen Keil gerade von hinten in die Kerbe. Sägen in Baumstämmen und Ästen, die unter Spannung stehen 1.
- Page 60 1. Bewegen Sie den Stopfen bei Temperaturen unter WARNUNG: Sägen Sie einen 0 °C von Position 1 in Position 2. Baumstamm, der unter Spannung steht, nie einfach durch. WARNUNG: Sägen Sie sehr vorsichtig beim Schneiden von Bäumen, die unter Spannung stehen. Es besteht die Gefahr, dass sich der Baum vor oder nach dem Sägen schnell bewegt.
-
Page 61: Wartung
Beheizte Handgriffe (543 XPG) Elektrische Vergaserheizung (543 XPG) Bei Modellen mit der Bezeichnung „G“ ist sowohl der Die Einstellung der Vergaserheizung erfolgt elektrisch vordere als auch der hintere Handgriff mit elektrischen über einen Thermostat. Dadurch wird die korrekte Heizschleifen versehen. Ein Generator versorgt die Vergasertemperatur beibehalten und Eisbildung im Heizspiralen mit Strom. - Page 62 Tägliche Wartung Wöchentliche Wartung Monatliche Wartung Sicherstellen, dass Führungsschiene Luftfilter reinigen oder ersetzen. Sie- Den Kraftstofftank leeren. So reinigen Sie den Luftfilter auf und Sägekette ausreichend geölt sind. Seite 67 . Die Sägekette überprüfen. Siehe Den Bereich zwischen den Kühlrip- Den Öltank leeren.
- Page 63 Kontrollieren Sie den Gashebel und die 3. Halten Sie das Gerät mit beiden Händen über einen Baumstumpf oder eine andere stabile Oberfläche. Gashebelsperre. 1. Prüfen Sie, ob sich der Gashebel und die WARNUNG: Der Motor muss Gashebelsperre frei bewegen lassen und ob die Rückholfeder korrekt funktioniert.
- Page 64 So prüfen Sie den Rechtshandschutz 2. Stellen Sie sicher, dass der Schalldämpfer fest am Produkt montiert ist. • Kontrollieren Sie, ob der Rechtshandschutz unbeschädigt ist, er darf keine Defekte wie z.B. Risse aufweisen. So prüfen Sie das Antivibrationssystem 1. Kontrollieren Sie, dass die Antivibrationseinheiten keine Risse oder Deformationen aufweisen.
- Page 65 Sie können die Einstellschrauben nur die max. Drehzahl bestehen, bei der die Sägekette sich zu ½ Umdrehung drehen. drehen beginnt. WARNUNG: Wenn Sie die Schraube für niedrige Drehzahl drehen und die Sägekette nicht anhält, wenden Sie sich an den nächsten Servicehändler. Verwenden Sie das Produkt erst wieder, wenn es richtig eingestellt wurde.
- Page 66 3. Ziehen Sie das Startseil ca. 30 cm/12 Zoll heraus, 10. Sichern Sie dann das Startseil mit einem festen und setzen Sie es in die Aussparung an der Knoten. Riemenscheibe ein. 4. Lassen Sie die Riemenscheibe sich langsam nach hinten drehen, um die Rückzugfeder zu lösen. 5.
- Page 67 Eine Sägekette, die sich nicht bewegt, kann auch zu Verletzungen führen. Tauschen Sie abgenutzte oder beschädigte Führungsschienen und Sägeketten mit den von Husqvarna empfohlenen Kombinationen von Führungsschienen und Sägeketten aus. Dies ist Hinweis: Aufgrund der unterschiedlichen notwendig, damit die Sicherheitsfunktionen des Geräts Arbeitsbedingungen, Wetterlagen und Jahreszeiten 956 - 007 - 10.05.2022...
- Page 68 Zubehör auf Seite ordnungsgemäß arbeiten. Unter • Loch für Kettenöl und Loch für Kettenspannzapfen. 76 finden Sie eine Liste der von uns empfohlenen Die Führungsschiene muss am Gerät ausgerichtet Ersatzschienen-/Kettenkombinationen. sein. • Länge der Führungsschiene in cm Informationen über die Länge der Führungsschiene können in der Regel am hinteren Ende der Führungsschiene finden.
- Page 69 Tiefenbegrenzerabstands Ohne Hilfsmittel ist es nicht leicht, eine Sägekette Der Tiefenbegrenzerabstand (C) nimmt ab, wenn Sie korrekt zu schärfen. Verwenden Sie Husqvarna den Schneidezahn (A) schärfen. Um die maximale Schärflehre. Dies hilft Ihnen, die maximale Schneidleistung zu erhalten, müssen Sie Feilmaterial Schnittleistung zu erhalten und die Rückschlaggefahr...
- Page 70 Führungsschiene sitzt, sich aber noch immer einfach bewegen kann. 1. Verwenden Sie eine Flachfeile und eine Schärflehre zum Einstellen des Tiefenbegrenzerabstands. Verwenden Sie nur die Husqvarna Schärflehre für den Tiefenbegrenzerabstand, um das korrekte Maß und den richtigen Winkel für den Tiefenbegrenzer zu erhalten.
- Page 71 So prüfen Sie die Schneidausrüstung 3. Wenn die Sägekettenschmierung nicht ordnungsgemäß funktioniert, führen Sie eine 1. Stellen Sie sicher, dass es keine Risse an den Prüfung der Führungsschiene durch. Eine Anleitung So prüfen Sie die Führungsschiene auf Nieten und Gliedern gibt und dass keine Nieten finden Sie in Seite 71 .
- Page 72 3. Reinigen Sie die Nut in der Führungsschiene. • Ersetzen Sie den Kraftstofffilter jährlich oder ggf. häufiger. ACHTUNG: Verunreinigungen im Tank führen zu Betriebsstörungen. So stellen Sie den Kettenölfluss ein 4. Überprüfen Sie die Nut in der Führungsschiene auf WARNUNG: Stoppen Sie den Motor, Verschleiß.
- Page 73 ™ in den Luftfilter gelangen. AirInjection erhöht die 1. Reinigen Sie das Kühlsystem wöchentlich oder bei Lebensdauer des Luftfilters und des Motors. Bedarf häufiger mit einer Bürste. 2. Stellen Sie sicher, dass das Kühlsystem nicht verschmutzt oder verstopft ist. ACHTUNG: Eine Verschmutzung oder Verstopfung des Kühlsystems führt zur Überhitzung des Gerätes, was das...
-
Page 74: Fehlerbehebung
Fehlerbehebung Der Motor springt nicht an Zu überprüfendes Bauteil des Pro- Mögliche Ursache Maßnahme dukts Starterklinken Die Starterklinken sind blockiert. Stellen Sie die Starterklinken ein oder tauschen Sie sie aus. Reinigen Sie den Bereich um die Starterklinken. Wenden Sie sich an eine autorisierte Servicewerkstatt. -
Page 75: Transport Und Lagerung
• Entfernen Sie die Zündkappe von der Zündkerze, und aktivieren Sie die Kettenbremse. • Befestigen Sie das Gerät während des Transports sicher. Technische Angaben Technische Daten Husqvarna 543 XP Husqvarna 543 XPG Motor Hubraum, cm 43,1 43,1 Leerlaufdrehzahl, U/min 2500-2700 2500-2700 Motorhöchstleistung nach ISO 8893,... -
Page 76: Zubehör
Motorleistung, m/s. Zubehör Empfohlene Schneidausrüstung Sägekette mit geringem Rückschlag Die Kettensägenmodelle Husqvarna 543 XP, 543 Eine Kette mit niedrigem Rückschlag erfüllt die Kriterien XPG wurden gemäß EN ISO 11681-1:2011 auf für Sägeketten mit niedrigem Rückschlag gemäß ANSI Sicherheit geprüft (Maschinen für die Forstwirtschaft –... - Page 77 18/46 Die effektive Schnittlänge ist in der Regel 1 Zoll weniger Feilausrüstung und Feilwinkel als die nominale Länge der Führungsschiene. Verwenden Sie eine Husqvarna-Feilenlehre zum Pixel Schärfen der Sägekette. Eine Husqvarna-Feilenlehre stellt sicher, dass Sie die richtigen Feilwinkel erhalten. Pixel ist eine Führungsschienen-Sägeketten- Die Teilenummern können Sie der unten stehenden...
- Page 78 0,025 Zoll/ SP33G 3/16 Zoll/4,8 mm 586 93 84-01 30° 80° 0,65 mm 0,025 Zoll/ 3/16 Zoll/4,8 mm 505 69 81-08 30° 85° 0,65 mm 0,025 Zoll/ 3/16 Zoll/4,8 mm 505 69 81-09 30° 85° 0,65 mm 0,025 Zoll/ S35G 3/16 Zoll/4,8 mm 587 80 91-01 30°...
-
Page 79: Konformitätserklärung
Maskinprovning AB Box 7035, SE-750 07 Uppsala, Sweden hat die EG-Typenprüfung gemäß Maschinenrichtlinie (2006/42/EG) Artikel 12, Punkt 3b, Anlage IX im Namen von Husqvarna AB durchgeführt. 0404, RISE SMP Svensk Maskinprovning ABbestätigte die Konformität mit der Richtlinie 2000/14/EG, Konformitätsbewertungsverfahren nach: Anhang V. -
Page 80: Introducción
Uso previsto Descripción del producto Esta motosierra para servicios forestales está concebida Las Husqvarna 543 XP, 543 XPG son modelos de para realizar tareas en el bosque como la tala, el motosierra con motor de combustión. desramado y el corte. - Page 81 9. Acelerador Etiqueta de emisiones sonoras al medio 10. Interruptor de arranque/parada ambiente conforme con las directivas 11. Control del estrangulador y normativas europeas y del Reino Unido, y con la regulación de 2017 12. Depósito de combustible sobre de protección del medio ambiente 13.
-
Page 82: Seguridad
Nota: Ajuste de la bomba de Los demás símbolos/etiquetas que aparecen en aceite. el producto corresponden a requisitos de homologación en determinados mercados. Emisiones Euro V En la placa de caracterís- yyyywwxxxxx ticas técnicas se indica el número de serie. aaaa es ADVERTENCIA: La manipulación el año de producción y ss... - Page 83 • No use el producto en condiciones atmosféricas involuntariamente una rama, un árbol u otro objeto desfavorables como niebla, lluvia intensa, y producir una reculada. tempestad, frío intenso, etc. El trabajo con mal tiempo es fatigoso y puede crear circunstancias peligrosas, como terreno resbaladizo, cambio imprevisto de la dirección de derribo de los árboles, etc.
- Page 84 • Utilice botas con protección anticorte, puntera de Husqvarna si tiene alguna duda en cuanto al acero y suela antideslizante. empleo del producto. Estaremos encantados de poder aconsejarle y ayudarle a utilizar el producto de •...
- Page 85 Freno de cadena con protección contra reculadas el mantenimiento adecuado tanto de la cadena como de la espada ayudan a reducir el riesgo de accidentes. El producto cuenta con un freno de cadena que detiene la cadena en caso de reculada. El freno de cadena reduce el riesgo de accidentes, pero solo es usted, el usuario, quien puede impedirlos.
- Page 86 producto se utiliza cerca de materiales o • No reposte nunca la máquina con el motor en vapores inflamables. marcha. • Antes de arrancar, aparte siempre el producto unos 3 metros (10 ft) del lugar y de la fuente de repostaje. ADVERTENCIA: No utilice nunca un producto que no tenga silenciador o...
-
Page 87: Montaje
Instrucciones de seguridad para el equipo de • Asegúrese de que la cadena de sierra tiene la corte tensión correcta. Si la cadena de sierra no está bien tensada en la espada, puede soltarse. Si la tensión ADVERTENCIA: de la cadena de sierra es incorrecta, el desgaste de Lea las siguientes la espada, la cadena de sierra y el piñón de arrastre instrucciones de advertencia antes de... -
Page 88: Funcionamiento
2. Retire las tuercas de la espada y la cubierta del ADVERTENCIA: Use siempre embrague. Retire la protección de transporte (A). guantes protectores cuando monte la cadena de sierra. 5. Asegúrese de que los bordes de los eslabones de corte están orientados hacia delante en la parte superior de la espada. - Page 89 PRECAUCIÓN: • Si no se dispone de aceite para motores de dos No mezcle tiempos Husqvarna, puede utilizarse un aceite para combustible para más de 1 mes como motores de dos tiempos de buena calidad para máximo. motores refrigerados por aire. Póngase en contacto con su taller de servicio para seleccionar el aceite correcto.
- Page 90 • Utilice aceite para cadena Husqvarna para prolongar al máximo la vida útil de la cadena de sierra y evitar efectos adversos en el medio ambiente. Si el aceite para cadena Husqvarna no está disponible, le recomendamos que utilice un aceite para cadena estándar.
- Page 91 del freno de cadena en la página 102 para obtener La reculada se produce cuando la zona de riesgo de reculada de la espada toca un objeto. Una reculada instrucciones sobre cómo comprobar el freno de puede producirse de forma repentina y violenta; esta cadena.
- Page 92 Arranque del producto. 3. Sitúe el estrangulador en la posición de estrangulamiento. ADVERTENCIA: Al arrancar el producto, los pies deben encontrarse en una posición estable. ADVERTENCIA: Si la cadena de sierra gira a ralentí, póngase en contacto con su taller de servicio y no utilice el producto.
- Page 93 7. Suelte rápidamente el bloqueo del acelerador para La cadena de sierra empujará el producto en la que el producto funcione a ralentí. dirección del operador. 8. Mueva la protección contra reculadas hacia atrás para desacoplar el freno de cadena. ADVERTENCIA: Si la cadena de sierra se atasca en el tronco,...
- Page 94 2. Aparte los trozos cortados de la zona de trabajo. 2. Utilice la técnica de cadena tirante para cortar el tronco hasta que los dos cortes entren en contacto. ADVERTENCIA: Mantener los trozos cortados en la zona de trabajo aumenta el riesgo de reculada y puede dificultar el equilibrio.
- Page 95 b) Corte con la cadena impelente. ADVERTENCIA: Corte las ramas una a una. Tenga cuidado al retirar las ramas pequeñas y no corte arbustos ni varias ramas pequeñas a la vez. Las ramas pequeñas pueden quedarse atrapadas en la cadena de sierra e impedir el funcionamiento seguro del producto.
- Page 96 Mantenimiento de una distancia de seguridad 6. Evite que el árbol caiga sobre la copa de otro árbol. Es peligroso retirar un árbol atascado y hay un 1. Asegúrese de que las personas que se encuentren elevado riesgo de accidente. Consulte la sección cerca guarden una distancia mínima equivalente a 2 Liberación de un árbol atascado en la página 98 .
- Page 97 45º-70º Para talar un árbol Husqvarna recomienda hacer cortes de dirección y a) Haga el corte de indicación superior. Alinee la seguir el método de esquina segura al talar un árbol. marca de dirección de derribo (1) del producto El método de esquina segura le ayuda a conseguir una...
- Page 98 3. Ponga una cuña en el corte en posición recta desde atrás. 1. Si la longitud efectiva de corte supera el diámetro del árbol, siga estos pasos (a-d). a) Haga un corte de cala directamente en el tronco para completar la anchura de la faja de desgaje. 4.
- Page 99 • Portátil 6. Si necesita cortar a través del árbol o rama, efectúe de 2 a 3 cortes de 2,5 cm (1 pulg) de separación y una profundidad de 5 cm (2 pulg). Corte de árboles y ramas tensos 1. Determine el punto del árbol o la rama que se encuentra tenso.
-
Page 100: Mantenimiento
2. Hay disponible una cubierta de invierno para trabajar invernal en la posición 1 si la temperatura a temperaturas inferiores a –5 °C (23 °F) o con aumenta por encima de 0 °C/32 °F. Riesgo nieve. Monte la cubierta de invierno en el cuerpo de temperatura excesiva del motor y de del mecanismo de arranque. - Page 101 Mantenimiento diario Mantenimiento semanal Mantenimiento mensual Limpie e inspeccione el freno de ca- Lime las rebabas de los bordes de Limpie los componentes externos del Compro- Com- dena. Consulte la sección la espada. Consulte la sección carburador. bación del freno de cadena en la pá- probar la protección contra reculadas gina 102 .
- Page 102 Mantenimiento y comprobaciones de 4. Suelte el mango delantero y deje que la punta de la espada caiga contra el tocón. los dispositivos de seguridad del producto Comprobación de la cinta de freno 1. Limpie el freno de cadena y el tambor de embrague de serrín, resina y suciedad con un cepillo.
- Page 103 Comprobación del sistema amortiguador de 2. Presione el bloqueo del acelerador y asegúrese de que vuelve a su posición inicial al soltarlo. vibraciones 1. Asegúrese de que no los amortiguadores de vibraciones no presenten fisuras ni deformación. 2. Compruebe que los amortiguadores de vibraciones estén bien montados entre la parte del motor y la parte de los mangos.
- Page 104 Ajuste de la aguja de régimen bajo (L) 3. Si el producto tiene una red apagachispas especial, limpie el apagachispas una vez por semana. • Gire la aguja de régimen bajo hacia la derecha hasta que la cadena se pare. Nota: Si el producto no acelera correctamente o el ralentí...
- Page 105 10. Haga un nudo resistente en el extremo de la cuerda PRECAUCIÓN: Unos ajustes de arranque. incorrectos pueden provocar daños en el motor. Sustitución de una cuerda de arranque rota o desgastada 1. Afloje los tornillos del cuerpo del mecanismo de arranque.
- Page 106 Si la espada o la cadena de sierra se desgastan o presentan algún tipo de desperfecto, cámbielas por una combinación de espada y cadena de sierra recomendada por Husqvarna. Esto es necesario para conservar los niveles de seguridad del producto. Accesorios en la página 115 para ver una lista...
- Page 107 • Longitud de la espada, pulg/cm. La información • Orificio para aceite de cadena y orificio para pasador sobre la longitud de la espada suele encontrarse en tensor de cadena. La espada debe corresponderse la parte posterior de la espada. con el producto.
- Page 108 Utilice el calibrador de profundidad (B) para obtener el ajuste de calibre de afilado Husqvarna. De esta forma, conseguirá Accesorios en de profundidad recomendado. Consulte maximizar el rendimiento de corte y minimizar el riesgo la página 115 para obtener instrucciones sobre cómo...
- Page 109 1. Utilice una lima plana y un calibrador de profundidad para ajustar el calibre de profundidad. Utilice solamente el calibrador de profundidad Husqvarna para obtener el ajuste de calibre de profundidad y el ángulo del calibre de profundidad adecuados.
- Page 110 Para inspeccionar el equipo de corte 3. Si la lubricación de la cadena de sierra es incorrecta, Comprobación de la revise la espada. Consulte espada en la página 110 para ver las instrucciones. 1. Asegúrese de que no haya grietas en los remaches y eslabones, y que no haya ningún remache flojo.
- Page 111 Ajuste del flujo de aceite para cadena 4. Examine si la ranura de la espada presenta indicios de desgaste. Cambie la espada si es necesario. ADVERTENCIA: Detenga el motor antes de realizar ajustes en la bomba de aceite. • Gire el tornillo de ajuste de la bomba de aceite. Utilice un destornillador o una llave combinada.
-
Page 112: Resolución De Problemas
Para limpiar el sistema de refrigeración 1. Limpie el sistema de refrigeración con un cepillo una vez a la semana o con más frecuencia si es El sistema de refrigeración ayuda a reducir la necesario. temperatura del motor. El sistema de refrigeración 2. -
Page 113: Transporte Y Almacenamiento
Parte del producto que se debe exa- Causa posible Acción minar No hay chispa al arrancar La bujía está sucia o mojada. Asegúrese de que la bujía de encen- dido está seca y limpia. La distancia entre los electrodos es Limpie la bujía. -
Page 114: Datos Técnicos
Si la cadena de 5. Realice un servicio completo del producto. sierra y la espada no se limpian, pueden endurecerse o bloquearse. Datos técnicos Datos técnicos Husqvarna 543 XP Husqvarna 543 XPG Motor Cilindrada, cm 43,1 43,1 Régimen de ralentí, rpm... -
Page 115: Accesorios
Equipo de corte recomendado Rebote y radio de la punta de la espada Los modelos de motosierra Husqvarna 543 XP, 543 XPG se han sometido a evaluaciones de seguridad En espadas con punta de piñón, el radio de la punta de acuerdo con la norma EN ISO 11681-1:2011 está... - Page 116 Utilice un calibrador de afilado Husqvarna para Pixel afilar la cadena de sierra. Un calibrador de afilado Husqvarna garantiza la obtención de los ángulos de Se denomina "Pixel" a una combinación de espada afilado correctos. En la tabla siguiente se indican las y cadena de sierra que es más ligera, y que está...
- Page 117 3/16 pulg./4,8 SP33G 586 93 84-01 0,025'' / 0,65 mm 30° 80° 3/16 pulg./4,8 505 69 81-08 0,025'' / 0,65 mm 30° 85° 3/16 pulg./4,8 505 69 81-09 0,025'' / 0,65 mm 30° 85° 3/16 pulg./4,8 S35G 587 80 91-01 0,025'' / 0,65 mm 30°...
-
Page 118: Declaración De Conformidad
Declaración de conformidad Declaración de conformidad CE Nosotros, Husqvarna AB, SE-561 82 Huskvarna (Suecia), tel. +46-36-146500, declaramos bajo nuestra exclusiva responsabilidad que el producto: Descripción Motosierras para servicio forestal Marca Husqvarna Tipo/Modelo 543 XP, 543 XPG Identificación Números de serie a partir del año 2022... -
Page 119: Introduction
Introduction Utilisation prévue Description du produit Cette tronçonneuse pour services forestiers est conçue Les Husqvarna 543 XP, 543 XPG sont des modèles de pour des travaux forestiers tels que l'abattage, l'élagage tronçonneuses équipées d'un moteur à combustion. et la coupe. - Page 120 9. Gâchette d'accélération of the Environment Operations (Noise Control) Regulation 2017 ». Le niveau 10. Interrupteur marche/arrêt de puissance sonore garanti du produit 11. Starter Caractéristiques est spécifié à la section 12. Réservoir de carburant techniques à la page 154 . 13.
-
Page 121: Sécurité
Émissions Euro V La plaque signalétique in- yyyywwxxxxx dique le numéro de série. AVERTISSEMENT: yyyy désigne l'année de toute altération production et ww corres- du moteur a pour effet d'annuler pond à la semaine de pro- l'homologation de type UE de ce produit. duction. - Page 122 • N'utilisez jamais le produit si vous êtes fatigué, • Par manque d'attention, la zone de rebond du nez avez consommé de l'alcool ou pris des médicaments du guide peut buter sur une souche, un rondin, susceptibles d'affecter votre vue, votre jugement ou une branche ou un arbre voisin et occasionner un la maîtrise de votre corps.
- Page 123 Il peut en résulter des blessures graves, surtout au expert avant de poursuivre. N'hésitez pas à prendre niveau des yeux. contact avec votre revendeur ou avec Husqvarna • Utilisez des gants de protection anti-chaîne. si vous avez des questions sur l'utilisation du •...
- Page 124 Frein de chaîne avec arceau protecteur un entretien approprié de la chaîne et du guide-chaîne diminuent le risque d'accident. Votre produit est équipé d'un frein de chaîne qui arrête la chaîne en cas de rebond. Le frein de chaîne réduit le risque d'accident, mais seul l'utilisateur peut les prévenir.
- Page 125 utilisez le produit à proximité de matériaux • Ouvrez le bouchon du réservoir lentement pour inflammables et/ou de vapeurs. laisser baisser la surpression pouvant régner dans le réservoir. • Serrer soigneusement le bouchon du réservoir après AVERTISSEMENT: n'utilisez jamais le remplissage. un produit dont le silencieux est absent •...
-
Page 126: Montage
disponibilité d'un service de réparation et d'entretien • Vérifiez que la chaîne de sciage est bien tendue. professionnel pour votre produit. Si la chaîne n'est pas bien plaquée contre le guide- chaîne, elle peut dérailler. Une mauvaise tension de Consignes de sécurité relatives à l'équipement la chaîne augmente l'usure du guide-chaîne, de la de coupe chaîne et du pignon d'entraînement. -
Page 127: Utilisation
2. Retirez les écrous du guide-chaîne et le carter de AVERTISSEMENT: portez l'embrayage. Retirez le fourreau de transport (A). toujours des gants de protection lorsque vous montez la chaîne. 5. Assurez-vous que le bord tranchant des dispositifs de coupe est dirigé vers l'avant sur le dessus du guide-chaîne. - Page 128 • Pour un résultat et un fonctionnement optimaux, utilisez de l'huile deux temps Husqvarna. • Si l'huile deux temps Husqvarna n'est pas REMARQUE: Ne mélangez jamais disponible, utilisez une huile deux temps de haute plus d'un mois de carburant à chaque fois.
- Page 129 à votre atelier d'entretien lorsque vous sélectionnez votre huile de chaîne. • Utilisez de l'huile de chaîne Husqvarna pour optimiser la durée de vie de la chaîne et éviter de nuire à l'environnement. Si l'huile de chaîne Husqvarna n'est pas disponible, nous 3.
- Page 130 personnes. Afin de réduire ce risque, vous • La fonction d'inertie serre-t-elle toujours le frein de devez connaître les causes du rebond et chaîne en cas de rebond ? savoir comment les éviter. Non. Premièrement, le frein de chaîne doit fonctionner correctement.
- Page 131 2. Appuyez environ 6 fois sur la poire de la pompe 2. Appuyez environ 6 fois sur la poire de la pompe à carburant ou jusqu'à ce qu'elle commence à à carburant ou jusqu'à ce qu'elle commence à se remplir de carburant. Il n'est pas nécessaire se remplir de carburant.
- Page 132 Pour arrêter le produit 5. Tirez la poignée du câble du démarreur avec force. • Mettez le bouton de marche/arrêt sur la position 0 pour arrêter le moteur. Méthode tirée et méthode poussée REMARQUE: ne tirez pas complètement sur le câble du démarreur Vous pouvez couper le bois avec le produit dans et ne lâchez pas la poignée du câble 2 positions différentes.
- Page 133 AVERTISSEMENT: Vérifiez que la chaîne ne touche pas le sol lorsque vous terminez le trait de coupe. 2. Coupez environ ⅔ dans le tronc, puis arrêtez-vous. Retournez le tronc et coupez depuis l'autre côté. Pour utiliser la technique de coupe AVERTISSEMENT: Utilisez le produit à...
- Page 134 2. Coupez la partie restante du tronc avec la méthode a) Maintenez le guide-chaîne sur le côté droit du poussée pour terminer la coupe. tronc et maintenez le corps du produit contre le tronc. b) Sélectionnez la technique de coupe applicable pour la tension dans la branche.
- Page 135 a) Sélectionnez la technique de coupe applicable 2. Veillez à ce que personne ne se trouve dans cette pour la tension dans la branche. zone dangereuse avant et pendant l'abattage. Calcul du sens de chute 1. Étudiez le sens dans lequel l'arbre doit tomber. L'objectif est de l'abattre dans une position où...
- Page 136 Reportez-vous à la section Dégagement d'un arbre bloqué à la page 138 . Pour abattre un arbre Husqvarna vous recommande d'effectuer des encoches directionnelles, puis d'utiliser la méthode du coin de AVERTISSEMENT: Lors des sécurité...
- Page 137 Pour effectuer l'entaille directionnelle 1. Effectuez des entailles directionnelles sur ¼ du diamètre de l'arbre. Mesurez un angle de 45°-70° entre l'entaille supérieure et l'entaille inférieure. 1. Si la longueur de coupe effective est plus longue que 45º-70º le diamètre de l'arbre, suivez les étapes (a-d). a) Effectuez un sciage en plongée dans le tronc pour terminer la largeur de la charnière.
- Page 138 3. Placez une cale dans l'entaille directement depuis • Mobile l'arrière. Pour couper un arbre ou une branche sous tension 1. Déterminez le côté de l'arbre ou de la branche qui est en tension. 2. Déterminez le point de tension maximale. 4.
- Page 139 blessures graves si vous êtes dans une 2. Un capot d'hiver est disponible en cas de position incorrecte ou si vous ne coupez températures inférieures à -5 °C (23 °F) ou par pas correctement. temps neigeux. Montez le capot d'hiver sur le corps du lanceur.
-
Page 140: Entretien
de maintenir la bonne température du carburateur et d'éviter la formation de glace à l'intérieur de celui-ci. Entretien Introduction sécurité avant de procéder à l'entretien du produit. AVERTISSEMENT: assurez-vous de lire et de comprendre le chapitre sur la Calendrier d'entretien Pour procéder à... - Page 141 Pour procéder à l'entretien quotidien Entretien hebdomadaire Entretien mensuel Contrôlez le pignon d'entraînement de la chaîne. Reportez-vous à la sec- tion Pour contrôler le rim à la page 149 . Nettoyez la prise d'air du démarreur. Assurez-vous que les vis et les écrous sont serrés.
- Page 142 4. Lâchez la poignée avant et laissez le nez du guide- 2. Appuyez sur le blocage de la gâchette d'accélération chaîne tomber sur la souche. et assurez-vous qu'il retourne à sa position initiale lorsque vous le relâchez. 3. Vérifiez que la gâchette d'accélération est bloquée en position de ralenti lorsqu'elle est déverrouillée.
- Page 143 Pour contrôler le système anti-vibrations 3. Si votre produit est équipé d'une grille antiflamme spéciale, nettoyez-la une fois par semaine. 1. Assurez-vous que les dispositifs anti-vibrations ne sont pas fissurés ni déformés. 2. Assurez-vous que les dispositifs anti-vibrations sont fixés correctement sur le moteur et les poignées. Aperçu du produit à...
- Page 144 des aiguilles d'une montre jusqu'à ce que la • Assurez-vous que la chaîne ne tourne pas lorsque le chaîne s'arrête. moteur tourne au ralenti. • Si le produit n'est pas facile à démarrer ou a une Pour régler l'aiguille de ralenti (L) capacité...
- Page 145 8. Passez le câble du démarreur à travers le trou du 3. Assurez-vous que vous pouvez tourner la poulie boîtier du démarreur et de la poignée du câble du de ½ tour une fois que le câble du démarreur est démarreur.
- Page 146 Remplacez un guide-chaîne ou une chaîne usé(e) ou endommagé(e) par la combinaison guide-chaîne/chaîne Pour contrôler la bougie d'allumage recommandée par Husqvarna. Cela est nécessaire pour maintenir les fonctions de sécurité du produit. Reportez- Accessoires à la page 155 pour vous à la section...
- Page 147 émoussées. Si la chaîne est émoussée, vous devez appliquer plus de pression pour pousser le guide-chaîne Il est difficile d'affûter correctement une chaîne sans équipement adapté. Utilisez la jauge de profondeur Husqvarna. Elle vous aidera à préserver des 956 - 007 - 10.05.2022...
- Page 148 1. Pour le réglage de la jauge de profondeur, utilisez une lime plate et un gabarit d'affûtage. Utilisez uniquement le gabarit d'affûtage Husqvarna pour obtenir l'épaisseur souhaitée et le bon angle pour la jauge de profondeur.
- Page 149 Pour régler la tension de la chaîne Pour contrôler la lubrification de la chaîne de sciage AVERTISSEMENT: une chaîne 1. Démarrez le produit et faites-le tourner aux ¾ de dont la tension est inappropriée peut se sa vitesse. Maintenez le guide-chaîne à environ désolidariser du guide-chaîne et provoquer 20 cm/8 po au-dessus d'une surface de couleur des blessures graves, voire mortelles.
- Page 150 Pour contrôler le guide-chaîne 4. Lubrifiez le roulement à aiguilles à l'aide d'un pistolet à graisse. Utilisez de l'huile moteur ou une graisse 1. Assurez-vous que la conduite d'huile n'est pas pour roulement de haute qualité. obstruée. Nettoyez-la si nécessaire. 2.
- Page 151 6. Vérifiez que le pignon du nez du guide-chaîne tourne b) Tournez la vis de réglage dans le sens contraire librement et que l'orifice de lubrification situé à cet des aiguilles d'une montre pour augmenter le endroit n'est pas obstrué. Nettoyez-le et lubrifiez-le si débit d'huile de chaîne.
-
Page 152: Dépannage
de refroidissement du cylindre, la conduite de 1. Nettoyez le circuit de refroidissement avec une refroidissement et le carter de cylindre. brosse une fois par semaine ou plus fréquemment si nécessaire. 2. Assurez-vous que le système de refroidissement n'est pas encrassé ou colmaté. REMARQUE: un circuit de refroidissement sale ou colmaté... -
Page 153: Transport Et Stockage
Pièce du produit à examiner Cause possible Action Bougie et cylindre La bougie d’allumage est desserrée. Serrez la bougie d’allumage. Le moteur est noyé en raison de Retirez et nettoyez la bougie. Placez démarrages répétés à plein régime le produit sur le côté en positionnant après l'allumage. -
Page 154: Caractéristiques Techniques
Caractéristiques techniques Caractéristiques techniques Husqvarna 543 XP Husqvarna 543 XPG Moteur Cylindrée, cm 43,1 43,1 Régime de ralenti, tr/min 2 500-2 700 2 500-2 700 Puissance moteur maximale selon 2,2/2,9 @ 9 600 2,2/2,9 @ 9 600 ISO 8893, kW/ch/tr/min Système d'allumage... -
Page 155: Accessoires
Rebond et rayon du nez du guide- chaîne La sécurité des modèles de tronçonneuses Husqvarna 543 XP, 543 XPG a été évaluée conformément à EN Pour les guides avec nez de pignon, le rayon du nez est ISO 11681-1:2011 (machines pour les travaux forestiers déterminé... - Page 156 Équipement et angles d'affûtage 1 po de moins que la longueur de guide-chaîne nominale. Utilisez une jauge de profondeur Husqvarna pour affûter la chaîne. Une jauge de profondeur Husqvarna vous Pixel permet de vous assurer que vous avez les bons angles d'affûtage.
-
Page 157: Déclaration De Conformité
Déclaration de conformité Déclaration de conformité UE Nous, Husqvarna AB, SE-561 82 Huskvarna, Suède, tél : +46-36-146500, déclarons sous notre entière responsabilité que le produit : Description Tronçonneuses pour services forestiers Marque Husqvarna Type/Modèle 543 XP, 543 XPG Identification Les numéros de série à partir de 2022 et ultérieurs est entièrement conforme à... -
Page 158: Introduzione
Uso previsto Descrizione del prodotto Questa motosega è pensata per lavori di silvicoltura Husqvarna 543 XP, 543 XPG sono modelli di motosega come l'abbattimento, la sramatura e il taglio. con motore a benzina. Il lavoro è in costante evoluzione per aumentare... - Page 159 11. Comando della valvola dell'aria (Noise Control) Regulation 2017". Il livello di potenza sonora garantito del prodotto è 12. Serbatoio del carburante Dati tecnici alla pagina 192 . specificato in 13. Primer del carburante 14. Impugnatura della fune di avviamento 15.
-
Page 160: Sicurezza
Emissioni Euro V La targhetta dati di funzio- yyyywwxxxxx namento mostra il numero AVVERTENZA: di serie. yyyy è l'anno di La manomissione del produzione, ww è la setti- motore rende nulla l'omologazione UE del mana di produzione. prodotto. Nota: I restanti simboli/decalcomanie applicati sul prodotto riguardano particolari requisiti necessari per ottenere la certificazione in alcuni mercati. - Page 161 comporta spesso situazioni di rischio quali terreno inavvertitamente un ramo, un albero abbattuto o altri scivoloso, cambio di direzione di caduta dell'albero oggetti che potrebbero causare il contraccolpo. ecc. • Non avviare mai un prodotto senza che la barra di guida, la catena e tutti i coperchi siano correttamente montati.
- Page 162 Possono insorgere gravi lesioni, in particolare agli di continuare. Non esitate a contattare il rivenditore occhi. o Husqvarna per qualsiasi domanda sull'utilizzo del • Utilizzare guanti dotati di protezione per sega. prodotto. Oltre a offrirvi assistenza e consulenza, •...
- Page 163 Freno della catena con protezione anticontraccolpo guida applicata correttamente diminuiscono il rischio di incidenti. Il prodotto è dotato di un freno della catena che arresta la catena in caso di contraccolpo. Il freno della catena riduce il rischio di incidenti, ma solamente l'operatore può...
- Page 164 quando si aziona il prodotto vicino a • Allontanare sempre la macchina ad almeno 3 m dal materiali infiammabili e/o fumi. luogo e dalla fonte di rifornimento prima della messa in moto. AVVERTENZA: Non utilizzare un prodotto senza marmitta o con marmitta difettosa.
-
Page 165: Montaggio
Istruzioni di sicurezza per l'attrezzatura di • Assicurarsi che la catena sia correttamente tesa. Se taglio la catena non è serrata contro la barra di guida, la catena può sganciarsi. Una tensione della catena non corretta aumenta l'usura della barra di guida, AVVERTENZA: della catena e del pignone di azionamento della Leggere le seguenti... -
Page 166: Utilizzo
2. Rimuovere i dadi della barra e il coperchio della AVVERTENZA: Indossare frizione. Rimuovere il carter di trasporto (A). sempre guanti protettivi quando si monta la catena. 5. Assicurarsi che i bordi dei taglienti siano rivolti in avanti sul lato superiore della barra di guida. 6. - Page 167 Husqvarna. carburante più di 1 volta al mese. • Se l'olio per motori a due tempi Husqvarna non è disponibile, utilizzare un olio per motori a due Rifornimento di carburante tempi raffreddati ad aria di buona qualità. Rivolgetevi...
- Page 168 Utilizzare l'olio della catena Husqvarna per ottenere la massima durata della motosega e per evitare gli effetti negativi sull'ambiente. Se l'olio della catena Husqvarna non è disponibile, si consiglia di utilizzare un comune olio per catene. • Utilizzare un olio per catene con una buona aderenza alla catena.
- Page 169 con grande violenza, scagliando il prodotto contro operazione ogni volta prima di utilizzare il prodotto. l'operatore. In secondo luogo, il contraccolpo deve essere grande per innestare il freno della catena. Se il freno della catena è troppo sensibile, si può innestare durante il funzionamento accidentato.
- Page 170 3. Impostare il comando della valvola dell'aria fino alla Avviamento dell'unità posizione di comando della valvola dell'aria. AVVERTENZA: È necessario tenere i piedi in una posizione stabile quando si accende il prodotto. AVVERTENZA: Se la catena gira a regime minimo, rivolgetevi al vostro rivenditore di assistenza e non utilizzate il prodotto.
- Page 171 7. Disinnestare rapidamente il blocco del grilletto • Il taglio con catena in spinta è quando si taglia con dell'acceleratore per impostare il prodotto al regime la parte superiore della barra di guida. La catena minimo. spinge il prodotto in direzione dell'operatore. 8.
- Page 172 di contraccolpo e può provocare lesioni 2. Tagliare il tronco con catena a tirare fin quando i due gravi o letali. intagli si incontrano. 2. Rimuovere i pezzi segati dall'area di lavoro. AVVERTENZA: I pezzi segati nell'area di lavoro aumentano il rischio di contraccolpo e la possibilità...
- Page 173 b) Tagliare con catena in spinta. AVVERTENZA: Tagliare i rami uno alla volta. Prestare attenzione quando si rimuovono i rami piccoli e non tagliare cespugli o più rami piccoli allo stesso tempo. I rami piccoli possono impigliarsi nella catena e impedire un utilizzo sicuro del prodotto.
- Page 174 Mantenere una distanza di sicurezza 6. Non far cadere l'albero su un altro albero in verticale. Rimuovere un albero rimasto impigliato è 1. Assicurarsi che le persone lì intorno mantengano un'operazione pericolosa e il rischio di incidenti è una distanza di sicurezza di minimo di 2 volte e 1/2 Liberazione di un albero intrappolato alto.
- Page 175 45º-70º Abbattimento di un albero a) Praticare il taglio direzionale superiore. Allineare Husqvarna consiglia di eseguire i tagli direzionali e di il segno della direzione di caduta (1) del utilizzare poi il metodo con angolo di sicurezza quando prodotto con la direzione di caduta dell'albero si abbatte un albero.
- Page 176 d) Tagliare con catena in spinta fino a quando non rimane ⅓ del tronco per completare l'angolo di sicurezza. 1. Se la lunghezza di taglio effettiva è più lunga del diametro dell'albero, procedere come indicato di seguito (a-d). a) Eseguire un foro direttamente nel tronco per 3.
- Page 177 • Montato sul trattore AVVERTENZA: Prestare la massima attenzione quando si taglia un albero in tensione. Vi è il rischio che l'albero si sposti rapidamente prima o dopo il taglio. Si possono verificare gravi lesioni se ci si trova in una posizione non corretta o nel caso in cui il taglio è...
-
Page 178: Manutenzione
1. Con temperature inferiori a 0 °C/ 32 °F, spostare il ATTENZIONE: Rimuovere il tappo dalla posizione 1 alla posizione 2. coperchio invernale se la temperatura aumenta oltre -5 °C/23 °F. Mettere il tappo invernale in posizione 1 se la temperatura aumenta oltre 0 °C/ 32 °F. - Page 179 Programma di manutenzione Manutenzione giornaliera Manutenzione settimanale Manutenzione mensile Pulire i componenti esterni del pro- Pulire il sistema di raffreddamento. Controllare il nastro del freno. Fare Per pulire il si- Controllo del nastro del dotto e verificare che non vi siano Fare riferimento a riferimento a stema di raffreddamento alla pagina...
- Page 180 Manutenzione giornaliera Manutenzione settimanale Manutenzione mensile Effettuare un controllo dell'interrutto- Con- re di arresto. Fare riferimento a trollo dell’interruttore di avviamen- to/arresto alla pagina 181 . Controllare che non vi siano perdite di carburante nel motore, nel serba- toio o nei flessibili carburante. Accertarsi che la catena non giri quando il motore è...
- Page 181 Controllo del fermo della catena 3. Applicare la massima accelerazione e inclinare il polso sinistro verso la protezione anticontraccolpo 1. Accertarsi che il fermo della catena sia integro. per attivare il freno della catena. La catena deve arrestarsi immediatamente. 2. Assicurarsi che il fermo della catena sia stabile e fissato al corpo dell'unità.
- Page 182 Controllo della marmitta le emissioni di scarico dannose provenienti dal prodotto. È consentito ruotare le viti di regolazione solo di mezzo AVVERTENZA: giro al massimo. Non utilizzare un prodotto con una marmitta difettosa o in cattive condizioni. AVVERTENZA: Non utilizzare un prodotto con la retina parascintille mancante o danneggiata sulla marmitta.
- Page 183 3. Estrarre la fune di avviamento per circa 30 cm (12 AVVERTENZA: Se la catena non si poll.) e inserirla nel dentello della puleggia. ferma quando si gira la vite del minimo, rivolgersi al più vicino centro assistenza. Non usare il prodotto fino a quando non è stata eseguita la corretta regolazione.
- Page 184 Montare il carter avviamento sul 10. Fare un nodo stretto all'estremità della fune di avviamento. prodotto 1. Estrarre la fune di avviamento e collocare l'avviamento nella sua posizione contro il carter motore. 2. Rilasciare lentamente la fune di avviamento finché i ganci non si innestino sulla puleggia.
- Page 185 Sostituire la barra di guida se usurata o danneggiata con le combinazioni di barra di guida e catena consigliate da Husqvarna. Questa operazione è necessaria per mantenere le funzioni di sicurezza del prodotto. Per un elenco delle combinazioni di barre e catene di ricambio Accessori alla pagina 193 .
- Page 186 Utilizzare la dima di affilatura legno ma solo polvere di segatura. Husqvarna. Aiuta a mantenere sempre le migliori prestazioni di taglio e il rischio di contraccolpo al Una catena affilata penetra nel legno e i trucioli sono minimo.
- Page 187 4. Rimuovere il materiale di lato a tutti i denti di taglio. Husqvarna per avere profondità e angolo corretti. 5. Ruotare il prodotto e rimuovere il materiale di 2. Posizionare lo strumento di misurazione dell'aggetto limatura sull'altro lato.
- Page 188 Controllo dell'anello pignone 3. Sollevare la parte anteriore della barra di guida e girare la vite tendicatena. Utilizzare una chiave. Il tamburo della frizione è dotato di un anello pignone, 4. Serrare la catena fino a quando non aderisce alla sostituibile.
- Page 189 Per controllare l'attrezzatura di taglio 4. Verificare se la scanalatura della barra di guida presenta segni di usura. Sostituire la barra di guida 1. Accertarsi che non vi siano crepe nei rivetti e se necessario. collegamenti e che non vi sia alcun rivetto allentato. Sostituirli se necessario.
- Page 190 Regolazione del flusso dell'olio della Per pulire il sistema di raffreddamento catena Il sistema di raffreddamento mantiene bassa la temperatura del motore. Il sistema di raffreddamento AVVERTENZA: Arrestare il motore comprende la presa d'aria sull’avviamento e il collettore prima di effettuare le regolazioni alla pompa dell'aria, i ganci sul volano, le alette di raffreddamento dell'olio.
-
Page 191: Ricerca Guasti
Ricerca guasti Il motore non si avvia Parte del prodotto da esaminare Possibile causa Intervento Ganci di avviamento I ganci di avviamento sono bloccati. Regolare o sostituire i ganci di avvia- mento. Pulire la zona circostante i ganci. Rivolgersi a un centro assistenza au- torizzato. -
Page 192: Trasporto E Rimessaggio
Rimuovere dalla candela il suo cappuccio e inserire il freno della catena. • Bloccare il prodotto in modo sicuro durante il trasporto. Dati tecnici Dati tecnici Husqvarna 543 XP Husqvarna 543 XPG Motore Cilindrata, cm 43,1 43,1 Regime minimo, giri/min... -
Page 193: Accessori
Attrezzatura di taglio consigliata Contraccolpo e raggio della punta della barra laminata La sicurezza dei modelli di motosega Husqvarna 543 XP, 543 XPG è stata testata in conformità alla norma Per le barre con puntale a pignone, il raggio della punta EN ISO 11681-1:2011 (Macchine per la silvicoltura - è... - Page 194 Pixel Utilizzare una dima di affilatura Husqvarna per affilare la catena. Una dima di affilatura Husqvarna garantisce Il nome Pixel indica una combinazione barra/catena dal gli angoli di affilatura corretti. I numeri di codice sono peso ridotto e concepita per una maggiore efficienza in indicati nella tabella riportata di seguito.
- Page 195 3 / 16 poll. / 4,8 0,025 poll. / 0,65 SP33G 586 93 84-01 30° 80° 3 / 16 poll. / 4,8 0,025 poll. / 0,65 505 69 81-08 30° 85° 3 / 16 poll. / 4,8 0,025 poll. / 0,65 505 69 81-09 30°...
-
Page 196: Dichiarazione Di Conformità
Maskinprovning AB Box 7035, SE-750 07 Uppsala, Sweden ha eseguito il controllo di omologazione CE in base alla Direttiva Macchine (2006/42/CE) articolo 12, clausola 3b, allegato IX per conto di Husqvarna AB. 0404, RISE SMP Svensk Maskinprovning AB ha certificato la conformità alla Direttiva del Consiglio 2000/14/CE, procedura di valutazione della conformità:... - Page 197 Verklaring van overeenstemming....... 234 Inleiding Gebruik Productbeschrijving Deze kettingzaag voor bosbouwtoepassingen is De Husqvarna 543 XP, 543 XPG zijn bestemd voor boswerkzaamheden zoals vellen, snoeien kettingzaagmodellen met een verbrandingsmotor. en zagen. Er wordt voortdurend gewerkt aan het verhogen van uw veiligheid en efficiëntie tijdens bedrijf.
- Page 198 9. Gashendel Regulation 2017". Het gegarandeerde geluidsvermogensniveau van het product 10. Start/stop-schakelaar Technische gegevens op staat vermeld in 11. Chokehendel pagina 230 . 12. Brandstoftank 13. Primerbalg van brandstofpomp 14. Startkoordhendel De gebruiker moet steeds beide handen 15. Starterhuis gebruiken om deze motorkettingzaag te bedienen.
- Page 199 Euro V-emissies Het serienummer staat op yyyywwxxxxx het productplaatje. yyyy is WAARSCHUWING: het productiejaar, ww is De EU- de productieweek. typegoedkeuring van dit product vervalt als ongeoorloofde wijzigingen aan de motor aangebracht worden. Let op: Overige op de machine aangegeven symbolen/plaatjes verwijzen naar eisen aan certificering voor bepaalde markten.
- Page 200 regen, harde wind, hevige koude enz. Werken in de buurt of een ander voorwerp raken, en terugslag slechte weersomstandigheden is vermoeiend en kan veroorzaken. tot gevaarlijke situaties leiden, zo kan de grond glad zijn, de wind de valrichting van de boom beïnvloeden enz.
- Page 201 Dit kan leiden tot ernstig letsel, vooral om contact op te nemen met uw leverancier of aan ogen. met Husqvarna als u nog vragen hebt over het • Draag handschoenen met zaagbescherming. gebruik van dit product. We zijn graag bereid om •...
- Page 202 Kettingrem met terugslagbeveiliging acht te nemen en de zaagketting en geleider goed te onderhouden, verkleint u de kans op ongevallen. Uw product heeft een kettingrem die de zaagketting stopt in het geval van terugslag. Een kettingrem vermindert het risico op ongevallen, maar alleen u kunt ze voorkomen.
- Page 203 • Verwijder het product altijd ten minste 3 m (10 ft) uit WAARSCHUWING: Gebruik het de buurt van de tankplaats en brandstofbron voordat product nooit zonder geluiddemper of u het product gaat starten. met een defecte geluiddemper. Wanneer de geluiddemper defect is, stijgt het geluidsniveau en neemt het risico op brand toe.
- Page 204 • Gebruik alleen goedgekeurde combinaties van • Zorg dat de zaagketting de juiste spanning heeft. Als zaagblad/zaagketting en de hulpmiddelen voor de zaagketting niet strak tegen het zaagblad loopt, Accessoires op pagina 231 voor vijlen. Zie kan de zaagketting van het zaagblad lopen. Een instructies.
- Page 205 6. Controleer of het trillingdempingssysteem correct Voorgemengde brandstof werkt en niet beschadigd is. • Gebruik voorgemengde Husqvarna-alkylaatbrandstof 7. Controleer of de geluiddemper correct is voor optimale prestaties en een lange levensduur aangebracht en niet beschadigd is. van de motor. Deze brandstof bevat minder 8.
- Page 206 2. Voeg de volledige hoeveelheid olie toe. prestaties Husqvarna tweetaktolie. 3. Schud het brandstofmengsel. • Als geen Husqvarna tweetaktolie beschikbaar is, 4. Giet de resterende hoeveelheid benzine in de gebruik dan een andere hoogwaardige tweetaktolie houder. voor luchtgekoelde motoren. Bespreek de keuze van de tweetaktolie met uw servicedealer.
- Page 207 Bespreek de keuze van de kettingolie met uw servicedealer. • Gebruik kettingolie van Husqvarna voor een Terugslag gebeurt altijd in de richting van de maximale levensduur van de zaagketting en om geleider. Meestal raakt het product de gebruiker, negatieve effecten op het milieu te voorkomen.
- Page 208 1. Duw de terugslagbeveiliging naar voren om de WAARSCHUWING: Geen enkele kettingrem in te schakelen. zaagketting kan terugslag volledig voorkomen. Volg altijd de instructies. Veelgestelde vragen over terugslag • Zal mijn hand de kettingrem bij terugslag altijd activeren? Nee. Er is enige kracht nodig om de 2.
- Page 209 1. Duw de terugslagbeveiliging naar voren om de 5. Trek snel en stevig aan de greep van het startkoord. kettingrem in te schakelen. 2. Druk 6 keer op het primerbalgje van de brandstofpomp of anders net zo vaak tot het balgje zich met brandstof vult.
- Page 210 Product stoppen • Druk de start-/stop-schakelaar naar positie '0' om de motor te stoppen. Zaagtechnieken gebruiken WAARSCHUWING: Gebruik volgas tijdens het zagen en breng het toerental terug naar stationair na elke zaagsnede. Trekslag en duwslag U kunt met het product op twee manieren hout zagen. OPGELET: De motor kan beschadigd •...
- Page 211 2. Zaag de rest van de stam door met een duwslag om WAARSCHUWING: Zorg dat de de zaagsnede te voltooien. zaagketting de grond niet raakt wanneer u de zaagsnede voltooit. 2. Zaag ongeveer ⅔ door de stam en stop dan. Roteer de stam en zaag van de andere kant.
- Page 212 b) Selecteer de toepasselijke zaagtechniek voor de a) Selecteer de toepasselijke zaagtechniek voor de spanning in de tak. spanning in de tak. WAARSCHUWING: WAARSCHUWING: u niet zeker weet hoe u de u niet zeker weet hoe u de tak moet doorzagen, neemt u tak moet doorzagen, neemt u contact op met een professionele contact op met een professionele...
- Page 213 Een vastgeraakte boom losmaken op pagina 215 . Boom kappen Husqvarna raadt u aan de inkepingen aan te brengen en vervolgens gebruik te maken van de veilige hoek- 956 - 007 - 10.05.2022...
- Page 214 methode bij het vellen van een boom. De veilige hoek- b) Maak de onderste inkeping. Zorg dat het uiteinde methode helpt u een juist scharnierstuk te maken en de van de onderste inkeping op hetzelfde punt valrichting te sturen. uitkomt als dat van de bovenste inkeping. WAARSCHUWING: Vel geen bomen met een diameter die groter is dan...
- Page 215 Een vastgeraakte boom losmaken c) Trek het zaagblad 5-10 cm naar achteren. d) Zaag door de rest van de stam om een veilige WAARSCHUWING: hoek te voltooien van 5-10 cm breed. Het is erg gevaarlijk om een vastgeraakte boom op de grond te krijgen en het ongevalsrisico is erg groot.
- Page 216 Het product gebruiken bij koud weer Let op: In sommige situaties is het alleen veilig om een lier te gebruiken en niet uw product. OPGELET: Bij sneeuw en koud weer 4. Ga op een plek staan waar de boom of tak u niet kan kunnen gebruiksproblemen optreden.
- Page 217 hoger is dan 0 °C. Risico op te hoge Elektrische carburateurverwarming (543 XPG) motortemperatuur en schade aan de motor. De carburateurverwarming wordt elektrisch afgesteld via Elektrisch verwarmde handgrepen (543 XPG) een thermostaat. Dit houdt de carburateur op de juiste temperatuur en voorkomt ijsvorming in de carburateur. Op modellen met de aanduiding 'G' zijn zowel de voorste als de achterste handgrepen voorzien van elektrische verwarmingselementen.
- Page 218 Dagelijks onderhoud Wekelijks onderhoud Maandelijks onderhoud Draai het zaagblad, controleer de Reinig het gebied rond de carbura- Controleer alle kabels en aansluitin- smeeropening en reinig de groef in teur. gen. het zaagblad. Zie De geleider contro- leren op pagina 227 . Controleer of het zaagblad en de Reinig of vervang het luchtfilter.
- Page 219 De gashendel en de vergrendeling van de 3. Houd het product met 2 handen boven een boomstronk of een ander stabiel oppervlak. gashendel controleren 1. Controleer of de gashendel en de WAARSCHUWING: De motor gashendelvergrendeling vrij bewegen en of de retourveer correct werkt.
- Page 220 Controleer de rechterhandbescherming 2. Zorg ervoor dat de geluiddemper correct aan het product is bevestigd. • Controleer of de rechterhandbescherming beschadigingen vertoont zoals materiaalbarsten. Trillingsdempingssysteem controleren 1. Controleer de trillingdempers op scheuren of vervorming. 2. Controleer of de trillingdempers op de juiste wijze 3.
- Page 221 Basisafstellingen en inlopen Dit kan schade aan de zuiger en de cilinder veroorzaken. De basisafstellingen van de carburateur worden in de fabriek uitgevoerd. Voor het aanbevolen stationaire Controleren of de carburateur correct is toerental, zie Technische gegevens op pagina 230 . afgesteld OPGELET: Laat het product gedurende...
- Page 222 Gebruik een beschermingsbril en 3. Controleer of u de poelie ½ slag kunt draaien nadat beschermingshandschoenen. het startkoord volledig is afgerold. 6. Verwijder het oude startkoord van de greep en de poelie. 7. Bevestig een nieuw startkoord aan de poelie. Wikkel het startkoord ongeveer 3 omwentelingen rond de poelie.
- Page 223 Als het zaagblad of de zaagketting versleten of beschadigd is, moet u deze vervangen door een door Husqvarna aanbevolen combinatie van zaagblad en zaagketting. Zo blijven de veiligheidsfuncties van het Accessoires op pagina 231 product behouden. Zie voor een lijst met aanbevolen combinaties voor het...
- Page 224 Algemene informatie over het slijpen van hulpmiddelen een zaagketting correct te slijpen. Gebruik zaagtanden een Husqvarna-vijlmal. Hiermee zorgt u voor maximale zaagprestaties en beperkt u het risico op terugslag. Gebruik geen ongeslepen zaagketting. Als de zaagketting bot is, dient u meer druk toe te passen WAARSCHUWING: om de geleider door het hout te drukken.
- Page 225 Let op: Accessoires op pagina 231 voor derde kettingslijpbeurt. informatie over welke vijl en mal door Husqvarna We raden u aan onze vijlmal voor de tanddiepte te wordt aangeraden voor uw zaagketting. gebruiken, om de juiste maat voor de tanddiepte en de 2.
- Page 226 2. Draai de zaagbladmoeren met de hand zo vast 3. Indien de kettingsmering niet correct werkt, De geleider mogelijk aan. controleer dan het zaagblad. Zie controleren op pagina 227 voor instructies. 3. Til de voorkant van de geleider op en draai Neem contact op met uw servicedealer als de de stelschroef van de ketting aan.
- Page 227 Snijuitrusting controleren 4. Controleer de geleidergroef op slijtage. Vervang het zaagblad indien nodig. 1. Controleer op scheurtjes in klinknagels en schakels en op losse schakels. Vervang indien nodig. 5. Controleer de punt van de geleider op ruwheid en overmatige slijtage. 2.
- Page 228 Toevoer van de kettingolie afstellen Koelsysteem reinigen Het koelsysteem zorgt ervoor dat de motor niet te warm WAARSCHUWING: Stop de motor wordt. Het koelsysteem bestaat uit de luchtinlaat op voordat u de oliepomp gaat afstellen. de starter en de luchtgeleidingsplaat, de haken op het vliegwiel, de koelribben van de cilinder, het koelkanaal •...
- Page 229 Probleemoplossing De motor start niet Te inspecteren onderdeel Mogelijke oorzaak Actie Starterpallen De starterpallen zijn geblokkeerd. Verstel of vervang de starterpallen. Reinig rondom de pallen. Neem contact op met een erkende servicewerkplaats. Brandstoftank Verkeerd type brandstof. Tap de brandstoftank af en vul hem met de juiste brandstof.
- Page 230 5. Voer een volledige onderhoudsbeurt uit. • Maak de bougiekap los en activeer de kettingrem. • Bevestig het product stevig tijdens vervoer. Technische gegevens Technische gegevens Husqvarna 543 XP Husqvarna 543 XPG Motor Cilinderinhoud, cm 43,1 43,1 Stationair toerental, tpm...
- Page 231 Accessoires Aanbevolen snijuitrusting Terugslag en neusradius zaagblad Kettingzaagmodellen Husqvarna 543 XP, 543 XPG zijn Voor zaagbladen met een neustandwiel wordt de op veiligheid getest conform EN ISO 11681-1:2011 neusradius gespecificeerd door het aantal tanden (bijv. (Bosbouwmachines - Draagbare kettingzagen - 10T).
- Page 232 Gebruik een Husqvarna-vijlmal om de zaagketting Pixel te slijpen. Een Husqvarna-vijlmal zorgt ervoor dat u de tanden in de juiste hoek kunt vijlen. De Pixel is een combinatie van zaagblad en zaagketting onderdeelnummers vindt u in onderstaande tabel.
- Page 233 3 / 16 inch / 4,8 0,025 inch / 0,65 505 69 81-08 30° 85° 3 / 16 inch / 4,8 0,025 inch / 0,65 505 69 81-09 30° 85° 3 / 16 inch / 4,8 0,025 inch / 0,65 S35G 587 80 91-01 30°...
- Page 234 Maskinprovning AB Box 7035, SE-750 07 Uppsala, Sweden heeft een EG-typeonderzoek uitgevoerd volgens de machinerichtlijn (2006/42/EG), artikel 12, punt 3b, bijlage IX namens Husqvarna AB. 0404, RISE SMP Svensk Maskinprovning AB, is gecertificeerd conform Richtlijn 2000/14/EG van de Raad, beoordelingsprocedure voor conformiteit: Bijlage...
- Page 235 Introdução Finalidade Descrição do produto Esta motosserra para silvicultura foi concebida para As Husqvarna 543 XP, 543 XPG são modelos de trabalhos florestais como, por exemplo, abate de motosserras com motor de combustão. árvores, desrama e corte. Decorre um trabalho constante para aumentar a sua segurança e eficiência durante o funcionamento.
- Page 236 9. Acelerador of the Environment Operations (Noise Control) Regulation 2017" (regulamento 10. Interruptor de arranque/paragem de proteção de operações no meio 11. Controlo do estrangulador ambiente [controlo do ruído] de 2017) 12. Depósito de combustível da Nova Gales do Sul. O nível de 13.
- Page 237 Emissões Euro V Ajuste da bomba de óleo. ATENÇÃO: A adulteração do motor anula a aprovação deste produto pela UE. A etiqueta de tipo apre- yyyywwxxxxx senta o número de série. aaaa é o ano de fabrico, ss é a semana de fabrico. Nota: Os restantes símbolos/autocolantes existentes no produto dizem respeito a requisitos de homologação...
- Page 238 de ignição. Perigo de formação de faíscas que num local onde não esteja apoiado numa base firme podem causar incêndio. e segura. • Nunca use o produto quando estiver cansado, tiver bebido álcool ou consumido medicamentos que possam afetar a sua visão, a sua capacidade de discernimento ou o seu controlo físico.
- Page 239 Isso pode causar ferimentos em entrar em contacto com o seu revendedor graves, especialmente nos olhos. ou com a Husqvarna. Teremos todo o prazer • Utilize luvas com proteção contra serra. em apoiá-lo e aconselhá-lo, bem como em ajudá- •...
- Page 240 Se os dispositivos de segurança estiverem Retentor de corrente defeituosos, fale com o seu revendedor com assistência técnica Husqvarna. O retentor de corrente prende a corrente da serra caso esta se parta ou se solte. A tensão da corrente da serra Travão de corrente com protector anti-retrocesso...
- Page 241 Segurança no manuseamento do combustível Interruptor de arranque/paragem Utilize o interruptor de arranque/paragem para parar o motor. ATENÇÃO: Leia as instruções de aviso que se seguem antes de utilizar o produto. • Confirme que existe uma boa ventilação ao reabastecer ou misturar combustível (gasolina e óleo para motores de dois tempos).
- Page 242 Instruções de segurança para manutenção • Mantenha a definição de abertura de corte correta. Siga as instruções e use a definição de abertura ATENÇÃO: de corte recomendada. Uma definição de abertura Leia as instruções de aviso de corte demasiado grande aumenta o risco de que se seguem antes de efetuar tarefas de retrocesso.
- Page 243 2. Retire as porcas da lâmina e a cobertura da ATENÇÃO: Use sempre luvas de embraiagem. Retire a protecção para transporte (A). proteção quando montar a corrente da serra. 5. Certifique-se de que as extremidades das cortadoras estão viradas para a frente na extremidade superior da lâmina-guia.
- Page 244 Óleo para motores a dois tempos recipiente. 5. Agite cuidadosamente a mistura de combustível. • Para obter melhores resultados e desempenho, use o óleo para motor de dois tempos da Husqvarna. • Se o óleo para motores de dois tempos da CUIDADO: Não misture combustível Husqvarna não estiver disponível, use um óleo para...
- Page 245 óleo de corrente. • Utilize óleo de corrente da Husqvarna para obter o tempo de vida útil máximo da corrente e para evitar efeitos negativos no meio ambiente. Se o óleo de corrente da Husqvarna não estiver disponível, recomenda-se a utilização de um óleo de corrente...
- Page 246 muita força, arremessando o produto na direção do sobre como efetuar a verificação do travão da operador. corrente. Recomendamos que execute sempre esta operação antes de utilizar o produto. Em segundo lugar, a força do retrocesso tem de ser intensa para engatar o travão da corrente.
- Page 247 3. Coloque o estrangulador na posição de Arranque estrangulação. ATENÇÃO: É necessário manter os pés numa posição estável quando liga o produto. ATENÇÃO: Se a corrente da serra rodar à velocidade de ralenti, entre em contacto com o seu revendedor com assistência técnica e não utilize o produto.
- Page 248 7. Desengate rapidamente o bloqueio do acelerador • Serrar com a corrente a empurrar significa serrar para colocar o produto na velocidade de ralenti. com a parte superior da lâmina-guia. A corrente da serra empurra o produto na direção do operador. 8.
- Page 249 de retrocesso e pode resultar em 2. Corte o tronco com a corrente a puxar até as duas ferimentos graves ou morte. partes cortadas entrarem em contacto. 2. Remova os pedaços cortados do local de trabalho. ATENÇÃO: Os pedaços cortados na área de corte aumentam o risco de retrocesso e a possibilidade de não conseguir manter o equilíbrio.
- Page 250 b) Corte com a corrente a empurrar. ATENÇÃO: Corte os ramos um a um. Tenha cuidado ao retirar os ramos pequenos e não corte arbustos ou ramos muito pequenos ao mesmo tempo. Os ramos pequenos podem ficar presos na corrente da serra e impedir um funcionamento seguro do produto.
- Page 251 Manter uma distância segura 6. Não deixe que a árvore caia sobre uma árvore que não tenha sido cortada. É perigoso remover 1. Certifique-se de que qualquer pessoa que se uma árvore presa, existindo um risco elevado de encontre nas proximidades mantém uma distância Libertar uma árvore presa na acidentes.
- Page 252 45º-70º Para abater uma árvore A Husqvarna recomenda que efetue cortes direcionais a) Efetue o corte direcional superior. Alinhe a e que utilize, em seguida, o método de recanto de marca de direção de abate (1) do produto com segurança quando abater uma árvore.
- Page 253 d) Corte com a corrente a empurrar até que sobre ⅓ do tronco para completar o recanto de segurança. 1. Se o comprimento de corte efetivo for maior do que o diâmetro da árvore, realize estes passos (a-d). a) Efetue um corte de orifício diretamente no tronco para completar a largura da linha de rutura.
- Page 254 • Montado num trator ATENÇÃO: Não serre de fora a fora uma árvore ou um ramo que se encontre sob tensão. ATENÇÃO: Tenha muito cuidado ao cortar uma árvore que se encontra sob tensão. Existe o risco de a árvore se deslocar rapidamente antes ou depois •...
- Page 255 1. A temperaturas inferiores a 0 °C/32 °F, desloque a CUIDADO: Retire a cobertura de ficha da posição 1 para a posição 2. inverno se a temperatura aumentar acima dos -5 °C/23 °F. Coloque o tampão de inverno na posição 1 se a temperatura aumentar acima de 0 °C/32 °F.
- Page 256 Esquema de manutenção Manutenção diária Manutenção semanal Manutenção mensal Limpe as peças externas do produto Limpe o sistema de arrefecimento. Verifique a faixa do travão. Consulte Limpar o sistema de arrefe- Verificar a faixa do travão na página e certifique-se de que não existe óleo Consulte cimento na página 267 .
- Page 257 Manutenção diária Manutenção semanal Manutenção mensal Certifique-se de que a corrente da serra não roda quando o motor está ao ralenti. Certifique-se de que não existem da- nos na proteção para a mão direita. Certifique-se de que o silenciador es- tá...
- Page 258 Verificar o acelerador e o bloqueio do Verificar a proteção da mão direita acelerador • Certifique-se de que a proteção da mão direita não está danificada e que não apresenta defeitos como, 1. Confirme que o acelerador e o respetivo bloqueio se por exemplo, fissuras.
- Page 259 2. Certifique-se de que o silenciador está devidamente escape nocivos provenientes do seu produto. Só pode instalado no produto. rodar os parafusos de ajuste no máximo ½ volta. Ajustes básicos e rodagem 3. Se o seu produto incluir uma rede retentora Os ajustes básicos do carburador são efetuados na de faíscas especial, limpe a respetiva rede fábrica.
- Page 260 3. Puxe o cabo de arranque cerca de 30 cm/12 pol. e ATENÇÃO: Se a corrente da serra não coloque-o no entalhe do carretel. parar quando roda o parafuso da velocidade de ralenti, contacte o seu revendedor de assistência. Não utilize o produto até que esteja devidamente ajustado.
- Page 261 Montar a caixa do dispositivo de 10. Dê um nó forte na extremidade do cabo de arranque. arranque no produto 1. Puxe o cabo de arranque e coloque o dispositivo de arranque na devida posição, contra o cárter. 2. Lentamente, solte o cabo de arranque até o carretel engatar com os prendedores.
- Page 262 Substitua uma lâmina-guia ou corrente da serra gasta ou danificada pelas combinações de lâmina-guia e corrente da serra recomendadas pela Husqvarna. Isto é necessário para manter as funções de segurança do Acessórios na página 270 para obter produto. Consulte uma lista das combinações de lâmina e corrente de...
- Page 263 Utilize o calibrador para empurrar a lâmina-guia através da madeira. Se a de lima Husqvarna. Tal ajudará a manter o máximo corrente da serra estiver demasiado romba, não existirá desempenho de corte e um risco de retrocesso mínimo.
- Page 264 Utilize apenas a ferramenta de abertura de corte da Husqvarna para obter a definição e o 4. Remova o material de um dos lados de todos os ângulo corretos para a abertura de corte.
- Page 265 3. Se a lubrificação da corrente da serra não Nota: Alguns modelos têm apenas uma porca da funcionar corretamente, verifique a lâmina-guia. lâmina. Verificar a lâmina-guia na página 266 para Consulte obter instruções. Entre em contacto com o seu 2. Aperte as porcas da lâmina o máximo possível à revendedor com assistência técnica se os passos de mão.
- Page 266 Para examinar o equipamento de corte 4. Verifique se a ranhura na lâmina-guia apresenta sinais de desgaste. Se necessário, substitua a 1. Certifique-se de que não existem fissuras nos lâmina-guia. rebites e nas ligações e que os rebites não estão soltos.
- Page 267 Ajustar o fluxo de óleo de corrente Limpar o sistema de arrefecimento O sistema de arrefecimento mantém a temperatura ATENÇÃO: Desligue o motor antes de do motor baixa. O sistema de arrefecimento inclui a fazer ajustes na bomba de óleo. admissão de ar no dispositivo de arranque e na placa- guia do ar, os prendedores no volante, as aletas de •...
- Page 268 Resolução de problemas O motor não arranca Peça do produto a examinar Causa possível Ação Prendedores de arranque Os prendedores do dispositivo de ar- Ajuste ou substitua os prendedores ranque estão obstruídos. do dispositivo de arranque. Limpe a área em redor dos prende- dores.
- Page 269 • Remova a cobertura da vela de ignição e engate o 5. Efetue uma manutenção completa do produto. travão da corrente. Especificações técnicas Especificações técnicas Husqvarna 543 XP Husqvarna 543 XPG Motor Cilindrada, cm 43,1 43,1 Velocidade ao ralenti, rpm...
- Page 270 Equipamento de corte recomendado Corrente da serra com baixa tendência de retrocesso Os modelos de motosserra Husqvarna 543 XP, 543 XPG foram avaliados em termos de segurança de Uma corrente da serra que seja de baixo retrocesso acordo com a norma EN ISO 11681-1:2011 (Máquinas satisfaz os requisitos de baixo retrocesso especificados para silvicultura ‐...
- Page 271 O comprimento de corte efetivo é geralmente 1 pol. Equipamento e ângulos de afiação inferior ao comprimento nominal da lâmina-guia. Utilize um calibrador de lima da Husqvarna para afiar a Pixel corrente da serra. Um calibrador de lima da Husqvarna garante que obtém os ângulos de afiação corretos.
- Page 272 0,025 pol./ SP33G 3/16 pol./4,8 mm 586 93 84-01 30° 80° 0,65 mm 0,025 pol./ 3/16 pol./4,8 mm 505 69 81-08 30° 85° 0,65 mm 0,025 pol./ 3/16 pol./4,8 mm 505 69 81-09 30° 85° 0,65 mm 0,025 pol./ S35G 3/16 pol./4,8 mm 587 80 91-01 30°...
- Page 273 Maskinprovning AB, Box 7035, SE-750 07 Uppsala, Sweden, executou um exame de tipo CE em conformidade com a diretiva de máquinas (2006/42/CE), artigo 12.º, ponto 3b, anexo IX em nome da Husqvarna 0404, RISE SMP Svensk Maskinprovning AB atribuiu a certificação de conformidade com a Diretiva 2000/14/CE do Conselho, procedimento de avaliação de...
- Page 274 Uvod Namen uporabe Opis izdelka Ta verižna žaga za gozdna opravila je izdelana za Husqvarna in 543 XP, 543 XPG so motorne žage z opravljanje del v gozdu, kot so podiranje, kleščenje in motorjem z notranjim zgorevanjem. žaganje. Stalno delamo na tem, da bi povečali varnost in učinkovitost med delovanjem.
- Page 275 9. Ročica plina zvočne moči izdelka je navedena na in v Tehnični podatki na strani 306 . 10. Vklopno/izklopno stikalo 11. Ročica čoka 12. Posoda za gorivo 13. Membrana črpalke goriva Med uporabo mora uporabnik motorno 14. Ročica zaganjalne vrvice žago držati z obema rokama.
- Page 276 Stopnja emisij Euro V Na tipski ploščici je na- yyyywwxxxxx vedena serijska številka. OPOZORILO: yyyy je proizvodno leto, Zaradi predelave ww je proizvodni teden. motorja se razveljavi EU-homologacija tega izdelka. Opomba: Ostali simboli in oznake na izdelku se nanašajo na zahteve za certifikate, ki veljajo za določene trge.
- Page 277 nista nameščena na izdelek, se lahko sklopka • Izdelek vedno primite z obema rokama. Z desno zrahlja in povzroči hude telesne poškodbe. roko morate držati zadnji ročaj, z levo pa sprednjega. Vse osebe, tako desničarji kot levičarji, morajo uporabljati tak prijem. S palcema in drugimi prsti čvrsto objemite ročaja.
- Page 278 • Uporabljajte rokavice z zaščito za motorne žage. prodajalca ali družbo Husqvarna. Radi vam bomo • Uporabljajte hlače z zaščito za motorne žage. priskočili na pomoč z nasveti in vam pomagali, •...
- Page 279 Za informacije o tem, kje na izdelku je nameščen sistem za dušenje tresljajev, glejte poglavje Pregled izdelka na strani 274 . Vklopno/izklopno stikalo Z vklopno/izklopnim stikalom izklopite motor. Zaklep ročice plina Zaklep ročice plina preprečuje neželeno uporabo ročice plina. Če z dlanjo objamete ročaj in pritisnete zaklep ročice plina (A), se ročica plina (B) sprosti.
- Page 280 Varnost pri delu z gorivom Varnostna navodila za vzdrževanje OPOZORILO: OPOZORILO: Pred uporabo izdelka Pred vzdrževanjem preberite navodila v povezavi z opozorili v izdelka preberite naslednja opozorilna nadaljevanju. navodila. • Med dolivanjem ali mešanjem goriva (bencin in • Izvajajte le vzdrževalna in servisna dela, ki so olje za dvotaktne motorje) zagotovite zadostno navedena v teh navodilih za uporabo.
- Page 281 verige in pogonskega zobnika verige. Glejte poglavje tveganje za obrabo meča, verige in pogonskega Nastavitev napetosti verige na strani 302 . zobnika verige. • Redno vzdržujte rezalno opremo in jo ustrezno mažite. Če verige ne mažete ustrezno, se poveča Montaža Uvod 4.
- Page 282 Husqvarna. 6. Prepričajte se, da sistem za dušenje tresljajev • Če olje za dvotaktne motorje Husqvarna ni na pravilno deluje in ni poškodovan. voljo, lahko uporabite kakovostno olje za dvotaktne 7. Prepričajte se, da je dušilnik pravilno nameščen in ni motorje z zračnim hlajenjem.
- Page 283 Za dolgo življenjsko dobo verige in preprečitev negativnih vplivov na okolje uporabljajte verižno olje 1. Zaustavite motor in pustite, da se ohladi. Husqvarna. Če verižno olje Husqvarna ni na voljo, 2. Očistite področje okrog pokrova posode za gorivo. priporočamo uporabo standardnega verižnega olja.
- Page 284 držati ročaja izdelka. Pri povratnem udarcu obstaja Opomba: Za mesto posode za verižno olje na možnost, da zavora verige ne zaustavi verige, Pregled izdelka na strani 274 . vašem izdelku glejte preden se vas veriga dotakne. Obstaja tudi nekaj položajev, v katerih se roka ne more dotakniti Informacije o povratnem udarcu sprednjega ščitnika roke za vklop zavore verige.
- Page 285 2. Približno 6-krat pritisnite membrano črpalke za 2. Približno 6-krat pritisnite membrano črpalke za gorivo, dokler se ta ne začne polniti z gorivom. gorivo, dokler se ta ne začne polniti z gorivom. Membrane črpalke za gorivo ni treba povsem Membrane črpalke za gorivo ni treba povsem napolniti.
- Page 286 skozi drevo. V tem položaju imate boljši nadzor nad POZOR: Zaganjalne vrvice nikoli ne izdelkom in položajem območja povratnega udarca. izvlecite do konca in ne izpustite ročice zaganjalne vrvice. Izdelek se lahko tako poškoduje. a) Če zaganjate izdelek s hladnim motorjem, ročico zaganjalne vrvice vlecite do vžiga goriva v motorju.
- Page 287 1. Hlod namestite na stojalo ali vodila. 1. Zažagajte skozi približno ⅓ hloda tako, da motorno žago potiskate. 2. Nato skozi hlod zažagajte še z vlečenjem motorne OPOZORILO: Ne žagajte hlodov, žage k sebi, dokler se zarezi ne srečata. ki so zloženi na kupu. To poveča tveganje povratnega udarca in lahko privede do hude poškodbe ali smrti.
- Page 288 a) Držite izdelek na deblu in se z mečem premikajte OPOZORILO: Pri uporabi tehnike po hlodu. kleščenja obstaja velika nevarnost nesreče. b) Žagajte s potiskanjem motorne žage. Za navodila za preprečitev povratnega Informacije o udarca glejte poglavje povratnem udarcu na strani 284 . OPOZORILO: Veje žagajte eno po eno.
- Page 289 Ohranjanje varne razdalje 6. Drevo ne sme pasti na drugo stoječe drevo. Odstranjevanje ukleščenega drevesa je nevarno, pri 1. Poskrbite, da so osebe v bližini na varni razdalji, in tem pa obstaja velika nevarnost nesreče. Glejte sicer najmanj 2 dolžini drevesa in pol. Sprostitev ukleščenega drevesa na strani poglavje 291 .
- Page 290 45°–70°. 45º-70º Podiranje drevesa a) Zažagajte zgornji smerni rez. Oznako za smer Husqvarna vam pri podiranju drevesa priporoča podiranja (1) izdelka poravnajte s smerjo opravljanje smernih rezov in uporabo metode varnega podiranja drevesa (2). Stojte za izdelkom, drevo kota.
- Page 291 3. Namestite klin v zarezo naravnost od zadaj. 1. Če je uporabna dolžina reza daljša od premera drevesa, sledite naslednjim korakom (a–d). a) Naredite vrtalni rez naravnost v hlod, da dokončate širino ščetine. 4. Odrežite kot, da se drevo podre. Opomba: Če se drevo ne podre, udarjajte na klin, dokler se ne podre.
- Page 292 Žaganje napetih dreves in vej 7. Nadaljujte z globljim žaganjem v drevo, dokler se drevo ali veja ne upogne in se napetost sprosti. 1. Ugotovite, katera stran drevesa ali veje je napeta. 2. Ugotovite, kje je točka največje napetosti. 8. Ko se napetost sprosti, zažagajte z nasprotne strani krivine.
- Page 293 2. Za temperature pod –5 °C/23 °F ali snežne razmere. Če se temperatura dvigne nad razmere je na voljo pokrov za zimske razmere. 0 °C/32 °F, zimski čep premaknite v položaj Pokrov za zimske razmere namestite na ohišje 1. Nevarnost previsoke temperature motorja zaganjalnika.
- Page 294 Dnevno vzdrževanje Tedensko vzdrževanje Mesečno vzdrževanje Očistite in preverite zavoro verige. Z robov meča odstranite vse grobe Očistite zunanje dele uplinjalnika. Preverjanje zavore Preverjanje Glejte razdelek ostanke. Glejte razdelek verige na strani 295 . sprednjega ščitnika roke in aktivacija zavore verige na strani 295 . Preverite lovilnik verige.
- Page 295 Vzdrževanje in preverjanje varnostnih Preverjanje zavore verige naprav izdelka Zagon 1. Zaženite izdelek. Za navodila glejte poglavje izdelka na strani 284 . Preverjanje zavornega traku OPOZORILO: Prepričajte se, da 1. S krtačo odstranite žagovino, smolo in umazanijo se veriga ne dotika tal ali drugih z zavore verige in bobna sklopke.
- Page 296 Preverjanje dušilnika 5. Sprostite ročico plina in se prepričajte, da se veriga ustavi in miruje. OPOZORILO: Nikoli ne uporabljajte OPOZORILO: Če se veriga vrti, ko izdelka s poškodovanim dušilnikom ali je ročica plina v položaju prostega teka, dušilnikom v slabem stanju. se obrnite na servisnega zastopnika.
- Page 297 izdelka. Vijaka za nastavitev lahko zavrtite za največ ½ OPOZORILO: Če se veriga po obrata. obratu vijaka za nastavitev hitrosti v prostem teku ne zaustavi, se obrnite na najbližjega servisnega zastopnika. Izdelka ne uporabljajte, dokler ni pravilno nastavljen. Nastavitev igle za visoko hitrost (H) Motor je tovarniško nastavljen za uporabo pri ničelni nadmorski višini.
- Page 298 3. Izvlecite približno 30 cm/12 palcev zaganjalne vrvice 10. Na koncu zaganjalne vrvice naredite vozel. in vrvico zataknite v zarezo na jermenici. 4. Pustite, da se jermenica počasi zavrti nazaj, da se sprosti povratna vzmet. 5. Odstranite središčni vijak in jermenico. OPOZORILO: Ob menjavi povratne vzmeti ali zaganjalne vrvice...
- Page 299 Obrabljen ali poškodovan meč oziroma verigo zamenjajte s kombinacijo meča in verige, ki jo priporoča Husqvarna. To je potrebno za ohranjanje varnostnih funkcij izdelka. Za seznam nadomestnih kombinacij meča in verige, ki jih priporočamo, glejte poglavje Dodatna oprema na strani 307 .
- Page 300 • Število zob na zobniku konice meča (T). • Širina gonilnega člena v mm/palcih. • Korak verige v palcih. Razmik med gonilnimi členi verige se mora ujemati z razmikom med zobmi na zobniku konice meča in pogonskemu zobniku. Splošne informacije o brušenju rezil Ne uporabljajte tope verige.
- Page 301 šablono za brušenje rezalnih zob. Opomba: Za informacije o tem, katero pilo in šablono priporoča družba Husqvarna za vašo verigo, Dodatna oprema na strani 307 . glejte poglavje 2. Šablono za brušenje pravilno namestite na rezilo.
- Page 302 3. S ploščato pilo spilite del globinskega zoba, ki gleda Opomba: Za položaj vijaka za napenjanje verige na prek šablona za brušenje globinskih zob. Pregled izdelka na strani 274 . izdelku glejte poglavje Preverjanje mazanja verige 1. Zaženite izdelek in pustite, da deluje s ¾ plina. Meč držite približno 20 cm/8 palcev nad podlago svetle barve.
- Page 303 Preverjanje meča 4. Namažite iglični ležaj z mazalko. Uporabljajte kakovostno motorno olje ali mast za ležaje. 1. Prepričajte se, da oljni kanal ni zamašen. Po potrebi ga očistite. 2. Preglejte, ali so na robovih meča grobi ostanki. S pilo odstranite grobe ostanke. 3.
- Page 304 Sistem zračnega čiščenja 7. Meč dnevno obračajte in mu tako podaljšajte življenjsko dobo. ™ AirInjection je centrifugalni sistem zračnega čiščenja, ki odstrani prah in umazanijo, preden se delci ujamejo ™ v zračni filter. AirInjection podaljša življenjsko dobo zračnega filtra in motorja. Vzdrževanje posode za gorivo in posode za verižno olje •...
- Page 305 Odpravljanje težav Motorja ni mogoče zagnati Del izdelka, ki ga je treba preveriti Možen vzrok Ukrep Zaskočke zaganjalnika Zaskočne kljukice zaganjalnika so Prilagodite ali nastavite zaskočne blokirane. kljukice zaganjalnika. Očistite okolico zaskočnih kljukic. Obrnite se na pooblaščeno servisno delavnico. Rezervoar za gorivo Neprava vrsta goriva.
- Page 306 • Odstranite pokrovček s svečke in aktivirajte zavoro verige. • Med prevozom varno pritrdite izdelek. Tehnični podatki Tehnični podatki Husqvarna 543 XP Husqvarna 543 XPG Motor Gibna prostornina valja v cm 43,1 43,1 Število vrtljajev prostega teka, vrt/min 2500-2700 2500-2700 Največja izhodna moč...
- Page 307 Dodatna oprema Priporočena rezalna oprema Povratni udarec in polmer konice meča Varnost modelov motornih žag Husqvarna 543 XP, 543 Za meče z vodilnim zobnikom je polmer konice meča XPG je bila preizkušena v skladu s standardom EN ISO določen s številom zob (npr. 10T). Za toge meče je 11681-1:2011 (Stroji za gozdarstvo –...
- Page 308 Oprema za brušenje in koti brušenja nazivne dolžine meča. Za brušenje verige uporabljajte šablono za brušenje Pixel družbe Husqvarna. Šablona za brušenje družbe Husqvarna zagotavlja brušenje pod ustreznimi koti. Pixel je lažja kombinacija meča in verige, zasnovana Številke delov so navedene v spodnji tabeli.
- Page 309 SP33G 3/16 in /4,8 mm 586 93 84-01 0,025 in/0,65 mm 30° 80° 3/16 in /4,8 mm 505 69 81-08 0,025 in/0,65 mm 30° 85° 3/16 in /4,8 mm 505 69 81-09 0,025 in/0,65 mm 30° 85° S35G 3/16 in /4,8 mm 587 80 91-01 0,025 in/0,65 mm 30°...
- Page 310 Številka potrdila: 0404/12/2360 Priglašeni organ: 0404, RISE SMP Svensk Maskinprovning AB Box 7035, SE-750 07 Uppsala, Sweden je v imenu družbe Husqvarna AB opravil tipski preizkus v skladu z direktivo ES o strojih (2006/42/ES); člen 12, točka 3b, priloga IX.
- Page 311 956 - 007 - 10.05.2022...
- Page 312 Original instructions Istruzioni originali Originalanweisungen Originele instructies Instrucciones originales Instruções originais Instructions d’origine Izvirna navodila 1141998-39 2022-05-13...
Need help?
Do you have a question about the 543 XP and is the answer not in the manual?
Questions and answers