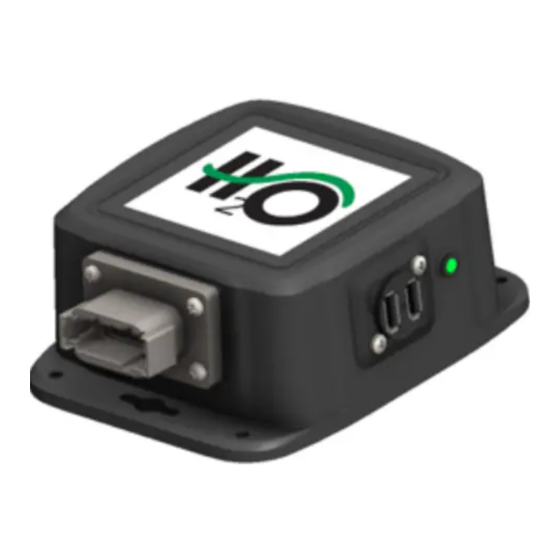
Summary of Contents for HARVEST 500A1
- Page 1 OPERATION MANUAL Model 500A1 Moisture Sensor Kit for Large Square Balers Forage Harvester 010-0500A1 OPR Revised 7/22...
- Page 2 DECLARATION OF APPLICATION OF ESSENTIAL REQUIREMENTS OF THE DIRECTIVE 2006/42/ EC OF THE EUROPEAN PARLIAMENT AND OF THE COUNCIL OF 17, MAY, 2006 AND OTHER RELEVANT EU DIRECTIVES: The Harvest Tec Hay Moisture Sensor Kit conforms with the Directive and other relevant EU directives.
-
Page 3: Table Of Contents
500A1 OPERATIONS MANUAL TABLE OF CONTENTS PAGE SAFETY OPERATION OF THE 500A1 MOISTURE SENSOR KIT INTRODUCTION AND REQUIREMENTS BALER MONITOR SETUP SYSTEM SETUP ADJUST THE MOISTURE ALARM OPTION TO TURN OFF/ON ALL ALARMS OR BEEPS 11-12 PARTS BREAKDOWN CONTROLS AND HARNESSES... -
Page 4: Safety
Safety Carefully read all safety signs in this manual and on the moisture sensor kit before use. Keep signs clean and clear of obstruction to view. Replace missing or damaged safety signs. Replacement signs are available from your local authorized dealer. See your installation manual under the replacement parts section for the correct part numbers. -
Page 5: Operation Of The 500A1 Moisture Sensor Kit
The Square Baler Module (SBM) and the Square Baler Controller (SBC) must run on version 3.0 or higher. Please consult the Baler Operation Manual for more information. For instructions on How to Mount the 500A1 to the Baler please refer to the 500A1 Installation Manual. -
Page 6: Baler Monitor Setup
Baler Monitor Setup System Setup 1. To view moisture from the 500A1 Moisture Sensor begin setup at the main baler screen. Select the WRENCH icon (arrow A) which is the fourth icon down on the right side of the screen-the right selection menu. - Page 7 4. The A B 2 screen will appear. The Harvest Tec On/Off selection icon can now be selected. To turn the Harvest Tec Moisture Sensor On (signified by a green check mark) or Off (signified by a red X) navigate to the box and select by pressing On/Off (arrow D).
- Page 8 5. The main baler work screen will appear. Select the container or option (arrow F) where you have positioned it on this screen to view and adjust moisture. Note: This can be done on the primary or secondary baler work screen. The screen has been or can be customized for viewing containers or options as you would like and as guided in the baler manual.
- Page 9 7. Select the desired moisture and it will appear on the baler work screen as pictured below. The two values indicated in the moisture option are as follows: current moisture / last bale average moisture (arrow I).
-
Page 10: Adjust The Moisture Alarm
To Adjust the Moisture Alarm 1. From the main baler screen, select the third icon down the right selection menu that shows a diamond beside a baler (arrow J). 2. To adjust the moisture alarm set point select the box option to the right of the moisture droplets (arrow K) and adjust to the desired moisture limit. -
Page 11: Option To Turn Off/On All Alarms Or Beeps
Option to turn Off/On all Alarms or Beeps 1. From the main baler work screen select the third icon down the right selection menu that shows a diamond beside a baler (arrow M). 2. Select the fourth icon down on the right selection menu showing a bugle beside an alarm icon (arrow M). - Page 12 3. The alarm screen should now be displayed. All alarms can be silenced before they are ever heard. This can be done by selecting the Peak Moisture icon (arrow O) and turning the alarm On/Off. To return to the baler work screen, press the baler icon located at the top right of the selection menu.
-
Page 13: Parts Breakdown
PARTS BREAKDOWN Controls and Harnesses Description Part no. Description 5/16” nuts Star wheel spacer 001-6707E 5/16” lock washers Star wheels 006-4641 5/16” flat washer Moisture harness 006-4640E2 10/24 x 5/8” PHS PIP cover 001-5650X Precision Information 006-5671LS2 10/24 lock washers Processor (PIP) 5/16”... -
Page 14: Starwheel Sensors
Star Wheels Sensors Description Part# Description Part# Block cover 006-4641B Star wheel block 006-4641A Electronic swivel 006-4642A Star wheel sensor 030-4641C Swivel insert w/ Ref # 10 Twine guard-left 001-4645 Snap ring (per side) 006-4641K Twine guard-right (prox) 001-4644 Washer (per side) w/006-4641K Twine guard-left for Agco 001-4645H... -
Page 15: Common Questions
Anytime the tractor will have voltage going up rapidly the connections should be removed. Can the Harvest Tec 500A1 be updated for preservative or a tagger? Yes. Please ask your Dealer and/or your Harvest Tec representative for more details. Listed below are compatible attachments. -
Page 16: Troubleshooting
TROUBLE SHOOTING CHECKS PROBLEM POSSIBLE CAUSE SOLUTION Moisture reading errors (high or Wire disconnected or bad connection Reconnect wire zero) between star wheels Low power supply to PIP Check voltage at box (min of 12 volts required). See diagnostics section of manual. -
Page 17: Warranty
Harvest Tec, LLC. within 30 days of the failure. Parts must be returned through the selling dealer and distributor, transportation charges prepaid. - Page 18 For questions regarding installation of hardware please contact: HARVEST TEC, LLC. P.O. BOX 63 2821 HARVEY STREET HUDSON, WI 54016 PHONE: 715-386-9100 1-800-635-7468 FAX: 715-381-1792 Email: info@harvesttec.com...

Need help?
Do you have a question about the 500A1 and is the answer not in the manual?
Questions and answers