Table of Contents
Advertisement
Available languages
Available languages
Quick Links
Warranty
The manufacturer provides warranty in accordance with the
legislation of the customer's own country of residence, with a
minimum of 12 months, starting from the date on which the
appliance is sold to the end user.
The warranty only covers defects in material or workmanship, which
will not apply in cases of:
- Normal wear and tear
- Incorrect use, e.g. overloading of the appliance, use of non-approved
accessories
- Use of force, damage caused by external influences
- Damage caused by non-observance of the user manual, e.g.
connectionto an unsuitable mains supply or non-compliance with
the installation instructions
- Partially or completely dismantled appliances.
Declaration of Conformity
This product is in accordance with the
following European directives:
2014/30/EU (EMV)
2014/35/EU (Niederspannung)
2011/65/EG (RoHS)
Disposal Information
If the icon below (crossed-out trashcan on wheels) is found on the product, the
European directuve 2002/96/EG applies. These products may not be disposed of in
the household waste at the end of its useful life. Disposal can take place at
appropriate collection points provided in your country.
21
EISWÜRFELBEREITER
BEDIENUNGSANLEITUNG
Lesen Sie diese Anleitung sorgfältig, bevor Sie das Gerät verwenden
und bewahren Sie sie auf
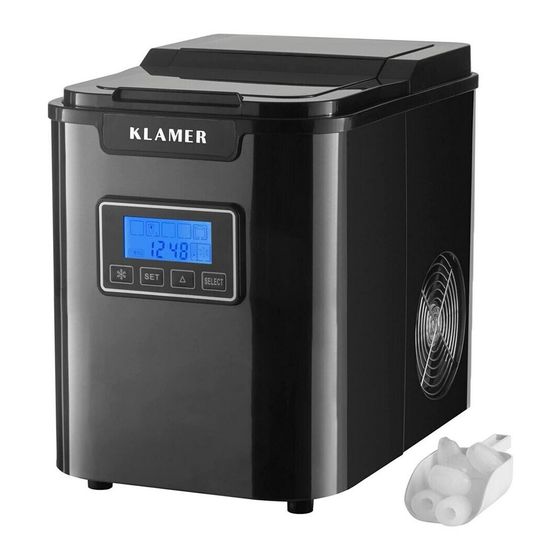
KLAMER Black Series
Ice cube maker
Hilfe und Tipps auf
icem.klamer-kitchen.com
oder QR-Code Scannen
Advertisement
Table of Contents

Related Manuals for Klamer Black Series


Summary of Contents for Klamer Black Series
- Page 1 Sie sie auf The warranty only covers defects in material or workmanship, which will not apply in cases of: - Normal wear and tear KLAMER Black Series - Incorrect use, e.g. overloading of the appliance, use of non-approved accessories Ice cube maker - Use of force, damage caused by external influences...
-
Page 2: Technische Daten
Zum Trennen der Verbindung ziehen Sie den Stecker aus der Steckdose. Hinweis Bitte wenden Sie sich bei Fragen oder Unklarheiten an das KLAMER Customer- 8. Verwenden Sie dieses Gerät nicht für andere Zwecke als den Support Team unter hello@klamer-kitchen.com. Wir helfen Ihnen gerne! vorgesehenen Gebrauch. -
Page 3: Vor Der Ersten Benutzung
Produktdiagramm Displaydiagramm TIMING SELECT Eiswürfelgröße-Anzeige Zeit / Timer Auswahl Fehleranzeige Eisbehälter voll Anzeige Timer-Anzeige Betriebs-Anzeige Wasserstands-Anzeige Eis-Bereitung-Modus Auswahl-Taste Zeitauswahl Zeitanzeige Vor der ersten Benutzung Transparentes Fenster Hauptgehäuse 1. Entfernen Sie alle Verpackungen und alle Aufkleber oder Etiketten, Abdeckung Luftauslass welche sich an der äußenen Seite des Geräts befinden. Kühlstäbe Lufteinlass Rückseite 2. -
Page 4: Einstellen Des Timers
Einstellen des Timers Die Benutzung des Eiswürfelbereiters 1. Der Timer-Modus hat vier verschiedene Einstellungsmodi: 1. Nachdem Sie den Stecker in die Steckdose gesteckt haben schaltet sich das Gerät von selbst ein und das Display leuchtet auf. - Timer nicht aktiv: Es ist TIMING sichtbar 2. -
Page 5: Problembehebung
Problembehebung Reinigung Bitte trennen Sie das Gerät immer von der Stromquelle, bevor Sie es Problem Mögliche Ursache Lösung reinigen oder bewegen. Das Display leuchtet nicht Das Gerät ist nicht mit einer Stecken Sie den Netzstecker Stromquelle verbunden in eine geerdete 1. -
Page 6: Garantie
Die Garantie erstreckt sich nur auf Material- oder Verarbeitungsfehler, was in Fällen von Material- oder Verarbeitungsfehlern nicht gilt: - Normale Abnutzung und Verschleiß KLAMER Black Series - Unsachgemäßer Gebrauch, z.B. Überlastung des Gerätes, Ice cube maker Verwendung von nicht zugelassenem Zubehör - Gewaltanwendung, Schäden durch äußere Einflüsse... -
Page 7: Technical Specification
10. Be careful not to overfill the unit, as this may cause hazards. Never Advice fill the water to above the MAX or below the MIN limit in the water In case of any questions or problems, please contact the KLAMER customer- tank. support team via hello@klamer-kitchen.com. We are happy to help! 11. -
Page 8: Product Diagram
Product diagram Display diagram TIMING SELECT Ice cube size indicator Time / Timer selection Error indicator Ice cube tray full indicator On / Off indicator Timer display Water level indicator Ice Cube On / Off button Time selection Select button Time display Before First Use Transparent window... -
Page 9: Setting The Timer
Using the Ice Cube Maker Setting the Timer 1. Timer mode has four different setting modes: 1. After inserting the plug into the socket, the device will turn on by itself and the display will light up. - Timer not active: TIMING is visible on the display. 2. -
Page 10: Troubleshooting
Troubleshooting Cleaning Please always disconnect the unit from the power source before Problem Possible cause Solution cleaning or moving it. 1. Do not clean the ice cube maker with sharp objects or aggressive The display does not light up The device is not connected Insert the power plug into a to a power source or is not grounded wall outlet...
Need help?
Do you have a question about the Black Series and is the answer not in the manual?
Questions and answers