
Related Manuals for Iron Baltic IB 1200

Summary of Contents for Iron Baltic IB 1200
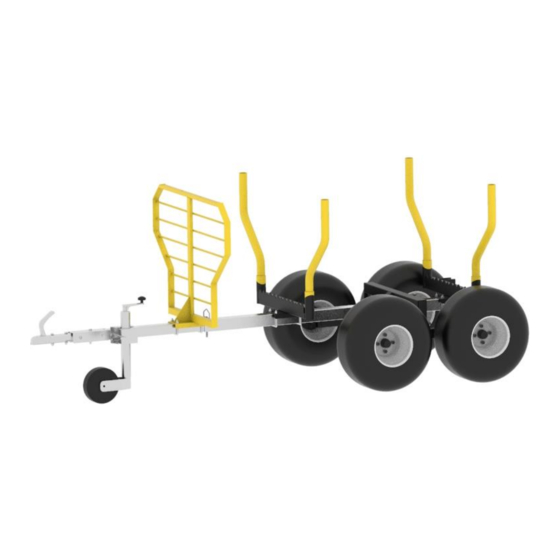
- Page 1 ATV HAAGIS ATV TRAILER IB 1200 Mudel / Model 86.1000 TÄHELEPANU ! LOE JA JÄLGI KÕIKI OHUTUS- JA KASUTUSJUHISEID ! ATTENTION! READ AND FOLLOW ALL SAFETY AND OPERATING INSTRUCTIONS!
-
Page 3: Table Of Contents
Sisukord / Contents EC DECLARATION OF CONFORMITY ..................... 4 EESTI KEEL ............................5 SISSEJUHATUS ......................... 5 OHUTUSJUHISED........................6 OHUTUSKLEEBISED ....................... 7 TOOTE KIRJELDUS ........................8 KASUTUSJUHEND ........................9 HOOLDUS ..........................10 HAAGISE KOOSTAMISE JUHEND .................. 17 VEOKASTI KOOSTAMISE JUHEND ................24 KRAANA KOOSTAMISE JUHEND ................... -
Page 4: Ec Declaration Of Conformity
Iron Baltic OÜ EC DECLARATION OF CONFORMITY Manufactured by: Iron Baltic OÜ Address: Põldmäe tee 1, Vatsla 76915, Estonia Product: Trailer Type: IB 1200 Model: 86.1000 86.1000A – Trailer with cargo box Variations: 86.1000B – Trailer with crane 86.1000C – Trailer with cargo box and crane 86.1000D –... -
Page 5: Eesti Keel
EESTI KEEL 1. SISSEJUHATUS Täname, et olete valinud Iron Baltic toote. Juhendist leiate haagise IB 1200 ja selle külge paigaldatavate kraana ja veokasti tehnilised andmed ning juhised toodete komplekteerimiseks, ohutuks töötamiseks ja hoolduseks. Haagise otstarbevastane kasutamine võib kaasa tuua majanduslikku kahju ja tekitada inimestele kehavigastusi, mistõttu on väga oluline, et toodet kasutav isik loeks juhendi läbi... -
Page 6: Ohutusjuhised
2. OHUTUSJUHISED Enamik õnnetustest juhtuvad hooletuse või ettevaatamatuse tõttu. Vältige õnnetusi ja järgige allpool toodud ohutusjuhiseid. Sõiduk ja selle külge haagitud haagis moodustavad koos pika töömasina millega on keeruline manööverdada, mistõttu väikestel ja kitsastel aladel on töötamine raskendatud. VÄLJAÕPE • Lugege põhjalikult ohutusjuhiseid ja kasutustingimusi. -
Page 7: Ohutuskleebised
3. OHUTUSKLEEBISED Ohutuskleebised peavad asetsema Teie haagise peal. Kui mõni neist kleebistest puudub või on kahjustada saanud, võtke ühendust edasimüüjaga, et asendada puuduvad kleebised enne haagise kasutamist uutega. Ohutuskleebiste tähendused Maksimaalne lubatud sõidukiirus 20 km/h! Maksimaalne lubatud kandevõime 1200 kg! Keelatud on haagisel vedada inimesi! Keelatud on liigelda üle 15°... -
Page 8: Toote Kirjeldus
4. TOOTE KIRJELDUS Iron Baltic IB 1200 on ATV või UTV külge haagitav ja ennast praktikas õigustanud vastupidava konstruktsiooniga haagis, mis on mõeldud kuni 1200 kg koorma vedamiseks. Haagis on mõeldud ATV-dele ja UTV-dele maastikul kasutamiseks, kuid seda saab järgi haakida kõikidele 50 mm veokuuliga sõidukitele. -
Page 9: Kasutusjuhend
5. KASUTUSJUHEND • Enne toote kasutamist lugege läbi ohutusjuhised! • Enne sõitu kontrollige haakepea kinnitust tiisli külge. • Enne sõitu veenduge, et tugiratas on üles tõstetud ja kindlalt kinnitatud. • Enne sõitu veenduge, et kõik liikuvad osad (koormapostid, tiisli toru, veokast) on nõuetekohaselt kinnitatud ja/või lukustatud. -
Page 10: Hooldus
• Koorma laadimisel arvestage haagise kandevõimet, täismassi ja, et veokuulile mõjuv jõud ei ületaks 60 kg või vastava veomasina soovitust (väiksem on määrav). • Jälgige, et koorem ei ulatuks üle haagise külgede. • Suurim lubatud kiirus haagist vedades on 20 km/h, või vastava veomasina soovitus (väiksem on määrav). -
Page 11: English
ENGLISH 7. INTRODUCTION Thank you for choosing Iron Baltic product. This manual contains specifications for the trailer IB 1200, the crane and cargo box mounted on the trailer, as well as instructions for product assembly, safe operation and maintenance. Unnecessary use of the trailer can result economic damage and personal injury, so it is very important that the person who using the product read and use this manual in accordance with the requirements. -
Page 12: Safety Instructions
8. SAFETY INSTRUCTIONS Most accidents occur due to negligence or carelessness. Avoid accidents and follow the safety instructions given below. The ATV together with the trailer hitched to it form a long working machine, which is not easy to manoeuvre; therefore, operating in small and narrow areas can be a complicated task. -
Page 13: Safety Labels
9. SAFETY LABELS The safety labels shall be present on your trailer. If any of those labels is absent or gets damaged, contact your dealer in order to install new labels in place of the absent ones before operating the machine. -
Page 14: Product Description
10. PRODUCT DESCRIPTION The Iron Baltic IB 1200 is a durable timber trailer that can be attached to the ATV or UTV and carry up to 1200 kg load. The trailer is designed for ATVs and UTVs to be used off-road but can be towed with any other vehicle equipped with a 50 mm hitch ball. -
Page 15: User Guide
11. USER GUIDE • Read the safety instructions before driving! • Check tow coupling connection to the tow beam before ride. • Before ride, make sure the trailer stand is up and secured. • Before ride, check all removable accessories are secured and locked. •... -
Page 16: Maintenance
• The highest speed when transporting a load is 20km/h, or what the vehicle manufacturer recommends (the lower speed must be observed). • Apply the ATV parking brake before working with crane. • Make sure that the support legs are on hard, level ground and locked in, before operating with crane. -
Page 17: Haagise Koostamise Juhend
13. HAAGISE KOOSTAMISE JUHEND / TRAILER ASSEMBLING GUIDE Kontrollige spetsifikatsiooni alusel, kas olete kõik komplekti osad kätte saanud! Based on the specification, check whether you have received all the parts for the set. Kood Kogus Pos. Nimetus / Description Code Amount Sild / Axle 86.1001K... - Page 19 Samm 1 Paigaldage sillatala (Pos.1) külge ratta kiiged (Pos.10). Jälgige, et kiige küljes olev määrdenippel (Pos.19) jääks allapoole. Kinnitamiseks kasutage M16x130 polti (Pos.23), Ø16 mm seibi (Pos.26) ja M16 nyloc mutrit (Pos.29). Enne kiige kinnituspoldi pingutamist fikseerige selle asend kiige poldi fiksaatoriga (Pos.8) kinnitades see silla külge M6x16 poldi (Pos.20) ja Ø6 mm seibiga (Pos.24).
- Page 20 Samm 3 Paigaldage raami toru (Pos.2) sillatala külge. Jälgige, et raami torus olev tapiava (tiisli toru kinnitusava) (drawbar mounting hole) oleks maapinna suhtes vertikaalselt ja asuks haagise esiosa (FRONT) pool! Kui kasutate haagist metsaveo haagisena paigutage sillatala võimalikult veetava koorma keskele. Kui kasutate haagist koos veokastiga on sillatala õige asukoht 1085 mm raamitoru esiservast.
- Page 21 Samm 5 Paigaldage esimene kandur (Pos.3) raami toru peale. Kinnitamiseks kasutage 70x70 U-polte (Pos.7), Ø10 mm seibe (Pos.25) ja M10 nyloc mutreid (Pos.28). Step Install front carrier (Pos.3) to frame tube. For fastening use 70x70 U-bolts (Pos.7), Ø10 mm washers (Pos.25) and M10 nyloc nuts (Pos.28). 28 4x Samm 6 Paigaldage tiisli toru (Pos.6).
- Page 22 Samm 7 Paigaldage veopea (Pos.12). Kinnitamiseks kasutage M10x85 polte (Pos.22), Ø10 mm seibe (Pos.25) ja M10 nyloc mutreid (Pos.28). Step Install tow coupling (Pos.12) For fastening use M10x85 bolts (Pos.22), Ø10 mm washers (Pos.25) and M10 nyloc nuts (Pos.28). Samm 8 Paigaldage tugiratta klamber (Pos.14) ja tugiratas (Pos.15).
- Page 23 Samm 10 Paigaldage koormapostid (Pos.5) ja torukorgid (Pos.18) Step 10 Install log bolsters (Pos.5) and pipe caps (Pos.18).
-
Page 24: Veokasti Koostamise Juhend
14. VEOKASTI KOOSTAMISE JUHEND / CARGO BOX ASSEMBLING GUIDE Kontrollige spetsifikatsiooni alusel, kas olete kõik komplekti osad kätte saanud! Based on the specification, check whether you have received all the parts for the set. Kood Kogus Pos. Nimetus / Description Code Amount Külg / Side panel... - Page 26 Samm 1 Paigaldage omavahel kokku kasti küljed (Pos.1). Kinnitamiseks kasutage M6x14 polte (Pos.19), Ø6 mm seibe (Pos.28) ja M6 nyloc mutreid (Pos.31). NB! Ärge pingutage polte täielikult! Step Assemble the sides of the box (Pos.1). For fastening use M6x14 bolts (Pos.19), Ø6 mm washers (Pos.28) and M6 nyloc nuts (Pos.31).
- Page 27 1 2x 20 29 29 3 2 Samm 4 Paigalda luugi lukustid (Pos.6). Kinnitamiseks kasuta M6x16 puidupolte (Pos.23), M6x60 puidupolte (Pos.25), Ø6 mm seibe (Pos.28) ja M6 nyloc mutreid (Pos.31). Step Install hatch locks (Pos.6). For fastening use M6x16 carriage bolts (Pos.23), M6x60 carriage bolts (Pos.25), Ø6 mm washers (Pos.28) and M6 nyloc nuts (Pos.31).
- Page 28 Samm 5 Paigaldage tõsteadapter (Pos.7) kasti esiosale (FRONT). Kinnitamiseks kasutage M6x60 puidupolte (Pos.25), Ø6 mm seibe (Pos.28) ja M6 nyloc mutreid (Pos.31). Step Install lifting adapter (Pos.7) on the front of the cargo box. For fastening use M6x60 carriage bolts (Pos.25), Ø6mm washers (Pos.28) and M6 nyloc nuts (Pos.31). R E A R F R O N T Samm 6...
- Page 29 Samm 8 Paigaldage puuduolevad kasti raami kinnitus poldid/mutrid. Kasutage M6x50 puidupolte (Pos.24), Ø6 mm seibe (Pos.28) ja M6 nyloc mutreid (Pos.31) ning M10x65 puidupolte (Pos.27), Ø10 mm seibe (Pos.30) ja M10 nyloc mutreid (Pos.33). Pingutage kõik eelnevates punktides kirjeldatud poldid/mutrid. Step Install missing box frame bolts/nuts.
- Page 30 Samm 10 Paigaldage kasti tõsteaasad (Pos.15). Kinnitamiseks kasutage M6x14 polte (Pos.19), Ø6 mm seibe (Pos.28) ja M6 nyloc mutreid (Pos.31). Step 10 Install lifting points (Pos.15). For fastening use M6x14 bolts (Pos.19), Ø6 mm washers (Pos.28) and M6 nyloc nuts (Pos.31). 1 9 28 3 1 Samm 11 Paigaldage kasti luugid (Pos.2).
- Page 31 Samm 12 Paigaldage kasti esimese kanduri (Pos.9) külge klambrid (Pos.11). Kinnitamiseks kasutage M6x12 polte (Pos.18) ja Ø6mm seibe (Pos.28). Step Install clamps (Pos.11) to the front carrier (Pos.9). For fastening use M6x12 bolts (Pos.18) and Ø6 mm washers (Pos.28). 1 8 28 Samm 13 Paigaldage kasti esimene kandur (Pos.9) haagise raamitorule.
- Page 32 Samm 14 Paigaldage tagumise kanduri külge kasti kallutusnurga piiramiseks M10x80 poldid (Pos.22), Ø10 mm seibid (Pos.30) ja M10 nyloc mutrid (Pos.33) Step Install M10x80 bolts (Pos.22), Ø10 mm washers (Pos.30) and M10 nyloc nuts (Pos.33) to the rear carrier to limit the tilt angle of the cargo box. Samm 15 Paigaldage tõsterihm (Pos.13) tõsteaasade (Pos.15) külge ja tõstke kast kasutades kraanat (23.3000) või muud tõstevahendit haagisele.
-
Page 34: Kraana Koostamise Juhend
15. KRAANA KOOSTAMISE JUHEND / CRANE ASSEMBLING GUIDE Kontrollige spetsifikatsiooni alusel, kas olete kõik komplekti osad kätte saanud! Based on the specification, check whether you have received all the parts for the set. Kood Kogus Pos Nimetus / Description Code Amount Kraana mast / Crane mast 23.3010... - Page 35 21 27 25 30 30 32 20 27 22 28 28 31...
- Page 36 Samm 1 Paigaldage kraana mast (Pos.1) palgiveohaagisele. Kinnitage masti alumine osa tiisli toru külge kasutades U-polte (Pos.7), Ø10 seibe (Pos.28) ja M10 nyloc mutreid (Pos.31) ning ülemine osa kaitsevõre külge kasutades M10x40 polte (Pos.22), Ø10 seibe (Pos.28) ja M10 nyloc mutreid (Pos.31). Step Install crane mast (Pos.1) to the trailer frame.
- Page 37 Samm 3 Paigaldage kraana nool (Pos.3). Kinnitamiseks kasutage M12x90 polte (Pos.25), Ø12 mm seibe (Pos.30) ja M12 nyloc mutreid (Pos.32). Pingutage poldid selliselt, et kraana noole nurka saaks lihtsasti muuta / nool liiguks vabalt. Step Install crane boom (Pos.3). For fastening use M12x90 bolts (Pos.25), Ø12 mm washers (Pos.30) and M12 nyloc nuts (Pos.32).
- Page 38 Samm 5 Paigaldage rulliku hoidik (Pos.5). Kinnitamiseks kasutage M12x120 polti (Pos.26), Ø12 mm seibe (Pos.29) ja M12 nyloc mutrit (Pos.32). Pingutage polt selliselt, et rulliku hoidik saaks vabalt liikuda. Step Install pulley holder (Pos.5). For fastening use M12x120 bolt (Pos.26), Ø12 mm washers (Pos.29) and M12 nyloc nuts (Pos.32).
- Page 39 Samm 8 Paigaldage vintsi pealmine kate (Pos.15). Kinnitamiseks kasutage M8x12 polte (Pos.20) ja Ø8 mm seibe (Pos.27). Step Install winch top cover (Pos.15). For fastening use M8x12 bolts (Pos.20) and Ø8 mm washers. (Pos.27). Samm 9 Paigaldage tugijalad (Pos.18) koos tugijala klambrite (Pos.17) ja tugijala torudega (Pos.8).
- Page 44 IRON BALTIC OÜ Põldmäe tee 1 Vatsla 76915 Estonia +372 6 533 711 info@ironbaltic.com WWW.IRONBALTIC.COM...
Need help?
Do you have a question about the IB 1200 and is the answer not in the manual?
Questions and answers