
Related Manuals for OETIKER ELK 02


Summary of Contents for OETIKER ELK 02
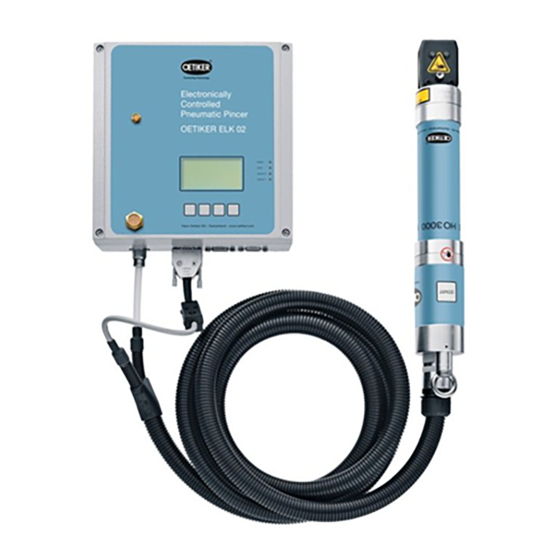
- Page 1 Electronically Controlled Instruction Manual Pneumatic Pincer OETIKER ELK 02 V1.x Original instruction manual Item no. 08902266 Issued June 2012 OETIKER Horgen, Switzerland...
-
Page 2: Table Of Contents
OETIKER ELK 02 V1.x Contents Contents Information about this manual ........................ 1-6 Symbols and means of representation used ................1-6 Scope ............................1-6 New features on the ELK 02 V1.0 ....................1-7 1.3.1 Hardware ..........................1-7 1.3.2 Software ..........................1-7 Abbreviations ..........................1-8 Labels on the ELK 02 ........................ - Page 3 System settings menu......................8-48 8.5.5 Languages ........................... 8-66 8.5.6 Help ............................8-66 Menu navigation in the ELK 02 ......................9-67 Description of the display ......................9-67 9.1.1 Symbols and abbreviations in the display ................9-68 Menu structure .......................... 9-68 Test level ........................... 9-69 9.3.1...
- Page 4 OETIKER ELK 02 V1.x Contents 9.4.2 Force priority ........................9-80 9.4.3 Gap priority .......................... 9-81 9.4.4 Force priority with verification ....................9-82 9.4.5 Gap priority with verification ....................9-84 9.4.6 Force priority for PG 192 / 168T1 ..................9-86 9.4.7 Initiating closure with “START”...
- Page 5 What to do, when...? ......................14-119 14.3 Error messages and error correction measures ..............14-119 Checklists ............................15-122 15.1 Checklist for ELK 02, control unit ..................15-122 15.2 Pincer checklist ........................15-124 Warranty conditions ........................... 16-126 16.1 Warranty period........................16-126 16.2...
-
Page 6: Information About This Manual
Necessary or labor-saving steps for the successful execution of an action Scope This instruction manual applies to all HO-EL pincers with the ELK 02 control unit, item no. 136 00 289 (85 - 265 V / 47 - 63 Hz, V1.0). -
Page 7: New Features On The Elk 02 V1.0
Graphic display unit, 65x35 mm, with 4 control buttons, display-driven for ease of use 1.3.2 Software NOTICE ELK 01 software and data sets cannot be migrated to the ELK 02. • All pincer types are stored in the ELK 02 •... -
Page 8: Abbreviations
1 Information about this manual OETIKER ELK 02 V1.x Abbreviations Active program number (max. 99) OS-SK Closing time between opening gap and closing force Detection gap OS-SS Closing time between opening gap and Detection force closing gap Holding force OS-T... -
Page 9: Labels On The Elk 02
1 Information about this manual OETIKER ELK 02 V1.x Labels on the ELK 02 Fig. 1: Labels on the ELK 02 Warning label “Do not loosen bolts” warning label Risk of crushing Rating plate Issued 03.12 08902266... -
Page 10: Basic Safety Instructions
• Maintenance and repair work should always be carried out by qualified specialists. • The ELK 02 unit may only be used by people who are familiar with its use and have been informed of the risks. • All relevant accident prevention regulations and other generally recognized health and safety rules must be complied with. -
Page 11: Special Safety Instructions
Check hoses for wear as part of the preventive maintenance routine and replace if necessary. Safe working practices Before the start of each production run check the ELK 02 for visible damage and only use it if it is in perfect working order. -
Page 12: Qualified Personnel
2 Basic safety instructions OETIKER ELK 02 V1.x Qualified personnel Only authorized and qualified personnel are permitted to use this machine, subject to compliance with the technical data and the following safety rules and regulations. Qualified personnel are people who are familiar with setting up, assembling, commissioning and operating the product and who have the qualifications appropriate to their job role. -
Page 13: Design Of The Elk 02 System
3 Design of the ELK 02 system OETIKER ELK 02 V1.x Design of the ELK 02 system The ELK 02 electronically controlled pneumatic pincer system comprises the following main components: Fig. 2: Design of the ELK 02 system Status lamp *) -
Page 14: Optional Extras
• Test equipment CAL 01, comprising the calibrator CAL 01 and closing force sensor SKS 01, for measuring the pincer jaw force (closing force) and for calibrating the ELK 02 • Status lamp X2L01 for the visual detection of OK and NO closures and for the audible detection of NO... -
Page 15: Connections On The Elk 02 Control Unit
3 Design of the ELK 02 system OETIKER ELK 02 V1.x Connections on the ELK 02 control unit NOTICE For details of the inputs and outputs on the control unit please refer to section 13.1, page 13-106. Fig. 4: Control unit, connections... - Page 16 3 Design of the ELK 02 system OETIKER ELK 02 V1.x Item Name of Type/use in Fig. 4 interface Optional bus interface Optional bus interface Vent Vent 3-pin IEC connector (male) On/Off switch Compressed air intake (see safety notice below)
-
Page 17: Process Description
Detection identifies a second closure on the same clamp or Low Profile Clamp and reports it as NO. All physical values necessary for the function can be entered via the PC using the ELK 02 software. The PC can then be used if required for recording the close data and for entering the nominal force. -
Page 18: Procedure
START button, for example. A further closure operation can be performed. If special heads are used – e.g. for closing OETIKER Low Profile Clamps – the details will differ from those shown in the diagrams in Fig. 5 to Fig. 7. -
Page 19: Sequence Of Operations
4 Process description OETIKER ELK 02 V1.x Sequence of operations The sequence of operations when working with the ELK 02 is divided into two sections: • Test level • Closure level 4.3.1 Test level Switch on ELK 02 System test... -
Page 20: Closure Level
4 Process description OETIKER ELK 02 V1.x 4.3.2 Closure level Force or gap priority with/without verification with or without hold, detect, contact detection external Pincer button APN pre- Start selection external chaotic single sequential Error messages during closure F1-F24 Data record...
Need help?
Do you have a question about the ELK 02 and is the answer not in the manual?
Questions and answers