
Summary of Contents for DARTY Proline VHP61SS
- Page 1 PROLINE HOTTE VHP61SS MANUEL D'UTILISATION PROLINE REFRIGERATEUR BRF40 Besoin d'aide ? Rendez-vous sur votre communauté https://sav.darty.com...
- Page 2 USER INSTRUCTIONS OVENS NOTICE D'EMPLOI ET D'INSTALLATION DES FOURS ENCASTRABLES USINES DE ROSIÈRES - 30, rue Y. LACELLE - Rosières - 18400 - Lunery - France...
- Page 3 Safety Indications • WARNING: the appliance and accessible parts become hot during use. Be careful not to touch any hot parts. •WARNING: the accessible parts can become hot when the oven is in use. Children must be kept at a safe distance. •WARNING: ensure that the appliance is switched off before replacing the bulb, to avoid the possibility of electric shocks.
- Page 4 socket must be suitable for the load indicated on the tag and must be having the earth contact connected and in operation. The earth conductor is yellow-green in colour. This operation should be carried out by a suitably qualified professional. In case of incompatibility between the socket and the appliance plug, ask a qualified electrician to substitute the socket with another suitable type.
-
Page 5: Table Of Contents
Summary General Instructions 1.1 Safety indications 1.2 Electrical safety 1.3 Recommendations 1.4 Installation 1.5 Waste management 1.6 Conformity declaration 2.1 Overview Product Description 2.2 Accessories 2.3 First use Use of the Oven 3.1 Display description 3.2 Cooking modes Oven Cleaning and Maintenance 4.1 General notes on cleaning 4.2 Maintenance •... -
Page 6: Safety Indications
1. General Instructions We thank you for choosing one of our products. For the best results with your oven, you should read this manual carefully and retain it for future reference. Before installing the oven, take note of the serial number so that you can give it to customer service staff if any repairs are required. -
Page 7: Recommendations
NOTE: as the oven could require maintenance work, it is advisable to keep another wall socket available so that the oven can be connected to this if it is removed from the space in which it is installed. The power cable must only be substituted by technical service staff or by technicians with equivalent qualifications. -
Page 8: Overview
2. Product Description 2.1 Overview 1. Control panel 2. Shelf positions (lateral wire grid if included) 3. Metal grill 4. Drip pan 5. Fan (behind the steel plate) 6. Oven door 2.2 Accessories (According to model) Led vision Metal grill Is an illumination system which replaces the Holds baking trays and plates. -
Page 9: First Use
2.3 First Use PRELIMINARY CLEANING Clean the oven before using for the first time. Wipe over external surfaces with a damp soft cloth. Wash all accessories and wipe inside the oven with a solution of hot water and washing up liquid. Set the empty oven to the maximum temperature and leave on for about 1 hour, this will remove any lingering smells of newness. - Page 10 FUNCTION HOW TO USE HOW TO DEACTIVATE WHAT IT DOES WHY IT IS NEEDED •Child Lock function is •Child Lock function is activated by touching Set deactivated by touching (+) for a minimum of 5 touchpad Set (+) again KEY LOCK s e c o n d s .
-
Page 11: Cooking Modes
3.2 Cooking Modes Function Function (Depends on the oven model) Dial LAMP: Turns on the oven light. DEFROST: When the dial is set to this position. The fan circulates air at room temperature around the frozen food so that it defrosts in a few minutes without the protein content of the food being changed or altered. -
Page 12: General Notes On Cleaning
4. Oven cleaning and maintenance 4.1 General notes on cleaning The lifecycle of the appliance can be extended through regular cleaning. Wait for the oven to cool before carrying out manual cleaning operations. Never use abrasive detergents, steel wool or sharp objects for cleaning, so as to not irreparably damage the enamelled parts. - Page 13 REMOVAL AND CLEANING OF THE GLASS DOOR 1. Open the oven door. 2.3.4. Lock the hinges, remove the screws and remove the upper metal cover by pulling it upwards. 5.6. Remove the glass, carefully extracting it from the oven door (NB: in pyrolytic ovens, also remove the second and third glass (if present)).
- Page 14 CHANGING THE BULB 1. Disconnect the oven from the mains supply. 2. Undo the glass cover, unscrew the bulb and replace it with a new bulb of the same type. 3. Once the defective bulb is replaced, replace the glass cover. 5.
- Page 15 Conseils De Securite • AVERTISSEMENT: L'appareil et les parties accessibles deviennent chauds pendant l'utilisation. Des précautions doivent être prises pour éviter de toucher les éléments chauffants. • ATTENTION : les parties accessibles peuvent devenir très chaudes quand le four est en marche. Les enfants doivent être tenus à une distance de sécurité.
- Page 16 qualifié. En cas d’incompatibilité entre la prise d’alimentation et la fiche du câble de l’appareil, demander à un électricien professionnel de remplacer la prise d’alimentation par un dispositif compatible. La fiche du câble d’alimentation et la prise d’alimentation doivent être conformes aux normes en vigueur dans le pays d’installation.
-
Page 17: Maintenance
SOMMAIRE Instructions Générales 1.1 Indications de sécurité 1.2 Sécurité électrique 1.3 Recommandations 1.4 Installation 1.5 La gestion des déchets et la protection de l'environnement 1.6 Déclaration de conformité Description du produit 2.1 Vue d'ensemble 2.2 Accessoires 2.3 Première utilisation Utilisation du Four 3.1 Description de l'affichage 3.2 Mode de cuisson Nettoyage du four et... -
Page 18: Indications De Sécurité
1. Instructions générales Nous vous remercions d'avoir choisi un de nos produits. Pour obtenir les meilleurs résultats avec votre four, vous devez lire attentivement ce manuel et le conserver pour toute consultation ultérieure. Avant d'installer le four, notez le numéro de série, il vous sera demandé par le support technique si des réparations sont nécessaires. -
Page 19: Recommandations
ATTENTION Faire vérifier la continuité de la terre de l’installation avant de procéder au raccordement. Le fabricant décline toute responsabilité en cas d'accidents ou d'autres problèmes qui pourraient survenir à l'usage d'un appareil non relié à la terre, ou relié à une terre dont la continuité serait défectueuse. REMARQUE: Le four peut nécessiter une opération de S.A.V. -
Page 20: Déclaration De Conformité
ÉCONOMIE ET RESPECT DE L'ENVIRONNEMENT Lorsque cela est possible, éviter le préchauffage du four et éviter de le faire tourner à vide. N'ouvrez la porte du four que lorsque cela est nécessaire, car il y a des déperditions de chaleur à chaque fois qu'il est ouvert. -
Page 21: Première Utilisation
2.2. Accessories Grille métalique Led vision La grille métalique sert de support aux plats. Ce système d'éclairage remplace les « ampoules » traditionnelles. 14 LED (pour les versions non- pyrolyse) ou 10 LED haute puissance (pour les versions pyrolyse) sont intégrées dans la contre Léchefrite porte du four. -
Page 22: Description De L'affichage
3. Utilisation du Four 3.1 Description de l'affichage ATTENTION: la première opération à exécuter 1- Minuteur après l'installation ou après une coupure de 2- Reglage de l'heure courant (de telles situations se reconnaissent parce que le atticheur est sur 12:00 et clignote)est réglage 3- Durèe de cuisson 4- Fin de cuisson de l'heure, comme décrit ci-dessus. - Page 23 FONCTION Á QUOI SERT-IL ? COMMENT L’UTILISER COMMENT L’ARRETER • V o u s a c t i v e z l a • Vous désactivez la sécurité enfants en sécurité enfants en pressant la touche pressant la touche pendant au moins 5 pendant au moins 5 s e c o n d e s , l ' é...
-
Page 24: Mode De Cuisson
3.2 Mode de cuisson Bouton de Fonction (selon modèle) sélection L'ampoule: Allumage de l’éclairage du four Décongélation: fonctionnement de la turbine de cuisson qui brasse l'air dans l'enceinte du four. Idéale pour réaliser une décongélation avant une cuisson. Chaleur brassée: fonction recommandée pour les volailles, les pâtisseries, les poissons, les légumes... - Page 25 4. Nettoyage du four et maintenance 4.1 Remarques générales sur le nettoyage Le cycle de vie de l'appareil peut être étendu grâce à un nettoyage régulier. Attendez le refroidissement du four avant de procéder à des opérations de nettoyage manuel. Ne jamais utiliser de détergents abrasifs, de laine d'acier ou d'objets pointus pour le nettoyage, l'émail serait irrémédiablement abîmé.
- Page 26 RETRAIT ET NETTOYAGE DES VITRES 1. Ouvrez la porte du four. 2.3.4. Bloquer les charnières, enlever les vis et retirez le couvercle métallique supérieur en le tirant vers le haut. 5.6. Retirez le verre, l'extraire soigneusement de la porte du four (NB: dans les fours de pyrolyse, retirez également les deuxième et troisième verre (le cas échéant)).
- Page 27 REMPLACEMENT DE L'AMPOULE 1. Débranchez le four de la prise. 2. Défaire le couvercle en verre, dévisser l'ampoule et la remplacer par une ampoule du même modèle. 3. Une fois l'ampoule remplacée, remettre le couvercle en verre. 5. Dépannage 5.1 FAQ PROBLEMES CAUSE POSSIBLE SOLUTION...
- Page 28 INSTALLATION INSTALLATION Opening/Ouverture 550 mm 460 mm x 15 mm 560 mm 580 mm 595 mm 545 mm 595 mm 22 mm If the furniture is coverage with a bottom at the back part, provide an opening for the power supply cable. Si le fond du meuble est doté...
- Page 29 VHP61SS VHP61WH Hotte décorative Range hood Afzuigkap MANUEL D’UTILISATION OPERATING INSTRUCTIONS HANDLEIDING...
- Page 30 MISES EN GARDE IMPORTANTES Cet appareil est destiné à un usage domestique uniquement. Toute utilisation autre que celle prévue pour cet appareil, ou pour une autre application que celle prévue, par exemple une application commerciale, est interdite Cet appareil peut être utilisé par des enfants âgés d'au moins 8 ans et par des personnes ayant des capacités physiques, sensorielles ou mentales réduites ou dénuées d’expérience ou de connaissance, s'ils (si elles) sont correctement surveillé(e)s ou si des instructions...
- Page 31 L'air ne doit pas être envoyé dans un conduit utilisé pour évacuer les fumées d’appareils utilisant du gaz ou un autre combustible. Les réglementations concernant l'évacuation de l'air doivent être respectées. Lorsque la hotte de cuisine est placée au-dessus d'un appareil à gaz, la distance minimale à...
- Page 32 La présence de flammes libres peut endommager les filtres et donner lieu à des incendies, il faut donc les éviter à tout prix. Ne touchez pas les ampoules après avoir utilisé l’appareil, vous risquez de vous brûler. Avant toute opération de nettoyage ou d’entretien, débranchez la hotte du circuit électrique en retirant la prise ou en coupant l’interrupteur général de l’habitation.
- Page 33 Attention ! Le fait de ne pas suivre les instructions de cette notice peut entraîner des risques électriques. En cas de doute, consultez un centre après-vente agréé ou un technicien agréé. Procédure d’installation détaillée : Cette hotte peut être fixée directement sur le mur au-dessus de votre plan de cuisson, ou bien sous un meuble.
- Page 34 3. Accrochez la hotte sur les vis supérieures que vous avez insérées. Retirez le filtre à graisse afin d’accéder à la vis du bas, et insérez la cheville et la vis. 4. Assurez-vous que la hotte est d’aplomb à l’aide d’un niveau, puis serrez les vis. 5.
- Page 35 Utilisez une gaine de la longueur strictement nécessaire. Les coudes de la gaine doivent être en nombre minime (angle maxi du coude: 90°). Évitez les variations excessives de section de gaine. Utilisez une gaine la plus lisse possible sur sa partie interne. ...
- Page 36 NETTOYAGE ET ENTRETIEN Attention ! Avant toute opération de nettoyage ou d’entretien, débranchez la hotte du circuit électrique en enlevant la prise ou en coupant l’interrupteur général de l’habitation. L’intérieur et l’extérieur de la hotte doivent être nettoyés régulièrement (environ une fois par mois). Pour cela, utilisez un chiffon humidifié...
- Page 37 SPECIFICATIONS Voici la fiche produit de votre hotte, conformément au règlement Européen No 65/2014. Marque Proline Référence VHP61SS, VHP61WH Consommation d’énergie annuelle (AEC 42.3 kWh/an hotte Classe d’efficacité énergétique * Indice d’efficacité énergétique (EEI): 83.8 Efficacité fluidodynamique (FDE 5.5 % hotte Classe d’efficacité...
- Page 38 Hotline Darty France Quels que soient votre panne et Ie lieu d'achat de votre produit en France, avant de vous déplacer en magasin Darty, appelez Ie 0 978 970 970 (prix d'un appel local), 7j/7 et 24h/24. Hotline Vanden Borre à...
- Page 39 WARNINGS This appliance is intended for domestic household use only and should not be used for any other purpose or in any other application, such as for non‐domestic use or in a commercial environment. This appliance can be used by children aged from 8 years and above and persons with reduced physical, sensory or mental capabilities or lack of experience and knowledge if they have been given supervision or instruction concerning use of the appliance in a safe way and...
- Page 40 Regulations concerning the discharge of air have to be fulfilled. When the range hood is located above a gas appliance, the minimum distance between the supporting surface for the cooking vessels on the hob and the lowest part of the range hood shall be at least 65 cm. ...
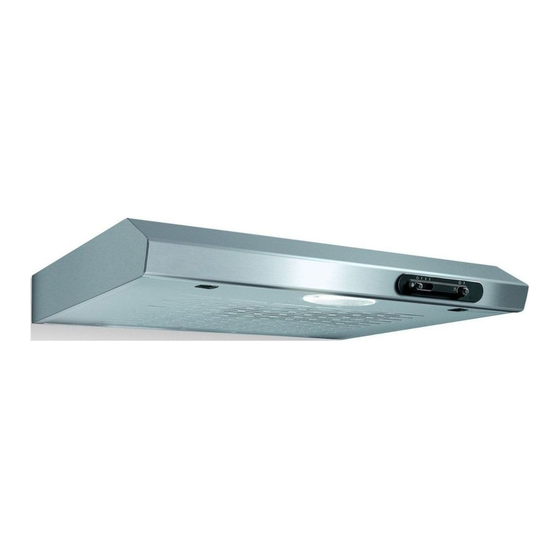
- Page 41 DESCRIPTION Air outlet Control panel The hood is designed to be used either for ducting or filter version. BEFORE INSTALLATION Before proceeding with the installation of your appliance, check that it is not damaged. Otherwise, do not proceed with the installation and contact your dealer. You should also make sure that the dimensions of the appliance and its conduit are compatible with your kitchen and ceiling height.
- Page 42 1. Take the dimensions of your cooker in order to have the range hood centred above it. Stick the installation and drilling template on the wall above your cooker, taking care to comply with the required minimum distance. Note: The minimum distance between the supporting surface for the cooking equipment on the hob and the lowest part of the range hood must be not less than 50cm from electric cookers and 65cm from gas or mixed cookers.
- Page 43 To use the hood in suction mode, remove To use the hood in filtering mode, do not the circular pre‐mounted metal wall and remove the circular pre‐mounted metal wall. install the supplied upper air outlet [A1: Install a charcoal filter (supplied): the fumes and bayonet mount + screws], as well as exhaust steam will be recycled into the kitchen through pipe of the same dimension (not supplied).
- Page 44 Filter version In the case of not being able to discharge the fumes and the steam of cooking outside, the hood can be used in the filter version: the aspirated air will be degreased and deodorised before being fed back into the room.
- Page 45 Cleaning the external surface To protect the external surface of the hood from corrosion over a long period of time, it should be cleaned with hot water plus non corrosive detergent every two months. Keep the motor and other parts free from water, as this will cause damage to the appliance. ...
- Page 46 We apologise for any inconvenience caused by minor inconsistencies in these instructions, which may occur as a result of product improvement and development. Ets Darty & fils SAS © 14, route d'Aulnay 93140 Bondy, France. 10/10/2018...
- Page 47 WAARSCHUWINGEN Dit apparaat is alleen bedoeld voor huishoudelijk gebruik en mag niet voor andere doeleinden of toepassingen worden gebruikt, zoals niet- huishoudelijk gebruik of in een commerciële omgeving. Dit apparaat mag worden gebruikt door kinderen vanaf 8 jaar oud en personen met beperkte fysische, visuele of mentale mogelijkheden, of die gebrek aan ervaring en kennis hebben, indien ze onder toezicht staan of gepaste instructies hebben gekregen zodat ze het apparaat...
- Page 48 De lucht mag niet afgevoerd worden in een rookkanaal dat gebruikt wordt om gassen af te voeren van apparaten die gas of andere brandstoffen branden. Leef de voorschriften betreffende het afvoeren van lucht na. Als de afzuigkap boven een gastoestel wordt geïnstalleerd, moet de minimum afstand tussen het kookoppervlak en het laagste deel van de afzuigkap minstens 65 cm zijn.
- Page 49 BESCHRIJVING Luchtuitlaat Bedieningspaneel De afzuigkap is ontworpen om zowel voor de afvoer- als de filterversie te worden gebruikt. VOORALEER TE INSTALLEREN Controleer of uw apparaat niet beschadigd is voordat u met de installatie begint. Als schade wordt waargenomen, voer de installatie niet uit en neem contact op met uw handelaar. Controleer tevens of de afmetingen van het apparaat en de bijhorende afvoerleiding overeenstemmen met uw keuken en de hoogte van het plafond.
- Page 50 Kleef de installatie- en boorsjabloon op de muur boven uw kookfornuis. Houd hierbij rekening met de minimale vereiste afstanden. Opmerking: De minimale afstand tussen het draagoppervlak voor de kookpotten op de kookplaat en het onderste deel van de afzuigkap mag niet minder dan 50cm voor elektrische fornuizen en niet minder dan 65cm voor gasfornuizen of gemengde fornuizen bedragen.
- Page 51 Om de afzuigkap in de aanzuigmodus te Om de afzuigkap in filtermodus te gebruiken, gebruiken, verwijder ronde, verwijder de ronde, voorgemonteerde metalen voorgemonteerde metalen wandplaat en wandplaat niet. Installeer een koolstoffilter installeer meegeleverde bovenste (meegeleverd): de dampen en stoom worden luchtuitlaat [A1: bayonetsluiting...
- Page 52 Filterversie Als het niet mogelijk is om de dampen en de stoom naar buiten af te voeren, kan de afzuigkap in de filterversie worden gebruikt: de aangezogen lucht wordt ontvet en ontgeurd voordat de lucht opnieuw in de kamer wordt gebracht. Om de afzuigkap in deze versie te kunnen gebruiken, installeer een koolstoffilter (meegeleverd).
- Page 53 De buitenkant schoonmaken • Om de buitenkant van de afzuigkap langdurig tegen corrosie te beschermen, maak deze om de twee maanden schoon met warm water en een niet-corrosief reinigingsmiddel. • Zorg dat de motor en andere onderdelen niet met water in aanraking komen, het apparaat zal worden beschadigd.
- Page 54 9.00 tot 17.00 uur. We verontschuldi gen ons voor enig ongemak veroorzaakt door kleine inconsistenties in deze gebruikershandleiding, die kunnen ontstaan door productverbetering of -ontwikkeling. Ets Darty & fils SAS © 14, route d'Aulnay 93140 Bondy, France. 10/10/2018...
- Page 56 LIB0152077 Ed. 10/18...
Need help?
Do you have a question about the Proline VHP61SS and is the answer not in the manual?
Questions and answers