
Subscribe to Our Youtube Channel
Related Manuals for ORANGEBOX Air 3 pod

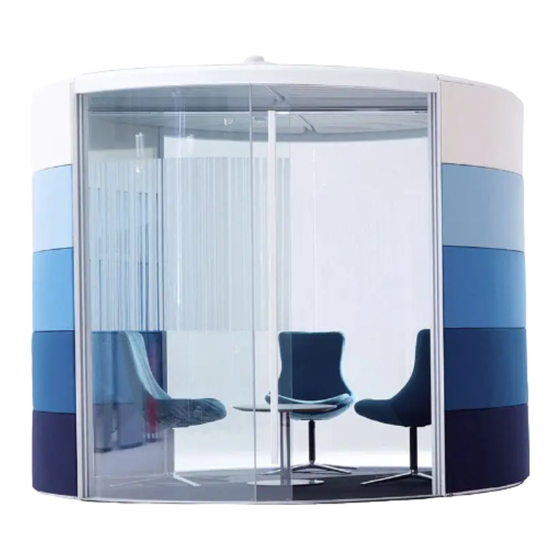
Summary of Contents for ORANGEBOX Air 3 pod
- Page 1 O N L Y MO D E L S A I R - 2 3 , A I R - 2 5 , A I R - 2 7 & A I R - 2 9 A R E E T L L I S T E D R e v i s i o n 1 1 S e p t e mb e r 2 0 1 7...
- Page 2 Contents page 1) Supporting documents……………………………………………………………………………………………………………………………………………………………..1.1 U.S.A. Warning notes……………………………………………………………………………………………………………………1.4 PPE Information……………………………………………………………………………………………………………………………1.5 Pod range overview……………………………………………………………………………………………………………1.6 – 1.14 2) Service hoop assembly……………………………………………………………………………………………………………………………………………………………..2.1 Setting out floor jigs…………………………………………………………………………………………………………2.2 – 2.10 Sign off position of pod Setting out hoop…………………………………………………………………………………………………………………………2.11 Opening hoop covers…………………………………………………………………………………………………………………2.12 UK smoke detector housing………………………………………………………………………………………………………..2.13 Connecting cables in switch side hoop vertical……………………………………………………......2.14 Attaching the actuators……………………………………………………………………………………………………2.15 –...
- Page 3 Profile views of installed roof panels (opening)…………..………………………………………………………………5.10 Attaching crank arm to main actuator body………….…………………………………………………………5.11 – 5.12 Checking that roof blades are completely closed…………………………………….…………………………………5.13 Adjustment of actuators to aid in closing roof blades…………………..…….…………..…………………………5.14 Securing crank arms to main body and replacing cowls………….…..…….…………………………….5.15 – 5.17 Sign off position of pod 6) Front and back glass……………………………………………………………………………………………………...............6.1 Position of glass panels within different pod models……………………………………………………..6.1.1 –...
-
Page 4: Supporting Documents
0 I 1 Supporting documents * NO UNAUTHORISED PERSONNEL PERMITTED TO PARTICIPATE IN ASSEMBLY (ORANGEBOX CERTIFIED PERSONNEL ONLY) *APPROPRIATE PPE MUST BE WORN AT ALL TIMES DURING ASSEMBLY OF ORANGEBOX PRODUCTS *PART ASSEMBLED PODS MAY NOT BE LEFT... - Page 5 Vacuum Suction Cups - 8" or 9" (With Low Vacuum Audio Alarm) Safety Glassesn(1 pair per installer) Safety Gloves (1 Pair per installer) Plastic Gasket Roller (Tool to seal glass) - Provided by Orangebox Pack Isopropanol (IPA) Wipes Tools/Equipment Quantity...
- Page 6 Tools/Equipment 12" Wonder Nar Pry Bar (or similar) NM Gauge Hoop Leaver T-Handle Flat Screw Driver Small Driver Small Crossbar Roller Spirit Level Trigger Clamps 12mm VHB TPE / Electrical Tape Pack Isoproponal (IPA) Wipes No 13 Spanner Amored Corner Protectors Floor Slide Guides 10mm Spanner Steamer...
- Page 7 N O T E : I f a c u s t o me r i s r e q u e s t i n g a n a l t e r n a t e p o w e r c o n n e c t i o n t o t h e l i s t i n g f o r a s p e c i f i i c p r o j e c t , t h e c u s t o me r w i l l h a v e t o w o r k d i r e c t l y w i t h t h e A H J a n d l o c a l c o d e c o n s u l t a n t t o f i n d a s o l u t i o n a s t h i s i s b e y o n d O r a n g e b o x L t d v r e mi t...
- Page 8 1 . 5...
- Page 9 1 . 6...
- Page 11 1 . 8...
- Page 12 1 . 9...
- Page 13 1 . 1 0...
- Page 14 1 . 1 1...
- Page 15 1 . 1 2...
- Page 16 1 . 1 3...
- Page 17 1 . 1 4...
- Page 19 ASSEMBLE THE JIGS AS REQUIRED USING THE LAYOUT SHEETS PROVIDED - LAY OUT JIGS TO SET POSITION OF POD - ENSURE AREA IS FLAT AND FREE OF DEBRIS - ENSURE THAT THERE IS ADEQUATE HEIGHT FOR POD ENSURE FIRM CONNECTION - USE AS SIGN OFF POSITION FROM CLIENT BETWEEN COMPONENTS - USE TO CHECK FLOOR BOX POSITIONS...
- Page 27 2.10...
- Page 28 2 . 1 1...
- Page 29 2 . 1 2...
- Page 30 2 . 1 3...
- Page 31 2 . 1 4...
- Page 32 2 . 1 5...
- Page 33 2 . 1 6...
- Page 34 2 . 1 7...
- Page 35 2 . 1 8...
- Page 36 2 . 1 9...
- Page 37 2 . 2 0...
- Page 38 UK SMOKE DETECTOR MOUNTING 2.21...
- Page 39 2 . 2 1 . 1...
- Page 40 U S A H E A T D E T E C T O R MO U N T I N G 2.21.2...
- Page 41 2 . 2 1 . 3...
- Page 42 F O R C O N N E C T I N G P O WE R I N T O P O D P L E A S E S E E P A G E S 2 . 2 3 - 2 . 2 8 F O R V A R I O U S O P T I O N S A V A I L A B L E...
- Page 43 2.23...
- Page 45 2.25...
- Page 47 POWER CONNECTION REFERENCE OPENING ROOFS OPENING ROOFS UK POWER AND DATA UK POWER ONLY RJ45 CABLE FROM AUTOMATED ROOF BOX TO CONTROL BOX CABLE FROM LIGHTS TO POWER SOCKETS CABLE FROM CONTROL BOX TO SOCKETS RESET BOX TO CONTROL BOX POWER CABLE TO RESET BOX 2.27...
- Page 48 H a r d w i r i n g p o i n t I f r e q u i r e d s t a n d a r d c a b l e c a n b e r e p l a c e d w i t h h a r d w i r e d p e r ma n e n t c o n n e c t i o n .
- Page 49 2 . 2 9...
- Page 50 2 . 3 0...
- Page 52 LIFT AND HOOK SCREENS INTO PLACE BACK OF POD USE NO 3.5 ALLEN KEY TO ADJUST HOOK POSITION IF REQUIRED (M6X20 GRUB SCREWS) FRONT OF POD (DOOR) THESE PLASTIC STRIPS ARE ALWAYS TO THE INSIDE OF THE POD ENSURE HOOK IS LOCATED ON THE BOTTOM INDENTATION.
- Page 54 TORQUE NO 6 ALLEN KEY 14NM (10.32FT-LBF) M8X45 BACK OF POD FRONT OF POD (DOOR) USE HOOP TO SCREEN BRACKETS X4 TO SECURE SCREENS AGAINST HOOP (REMOVE FIXINGS ONE AT A TIME, BRACKET AND REPLACE AND FULLY TIGHTEN FIXINGS) SEE SECTIONS 10.4 - 10.7 USE CLAMPS AND SOFT MALLETS TO ADJUST SCREENS AS REQUIRED BOTH SCREENS MUST BE TIGHT UP...
- Page 65 Ji\' TOP OF G LASS FRAME UPR IGHTS MUST BE I N_LI_ N _ E W_ I _ T H _TO_ P _O _ F _ S _ C _ R _ E _ E N_U_ R _ I G_ H_ T_ S .___ ___, INSERT X4 CORNER...
- Page 68 I N J E C T I O N MO U L D I N G...
- Page 75 4 X I N J E C T I O N MO U L D I N G S S E E P A G E 1 0 . 6...
- Page 79 MI N I P O D...
- Page 80 4 . 2 1...
- Page 81 4 . 2 2...
- Page 82 4 . 2 3...
- Page 83 4 . 2 4...
- Page 84 4 . 2 5...
- Page 85 4 . 2 6...
- Page 86 4 . 2 7...
- Page 87 4 . 2 7...
- Page 88 4 . 2 8...
- Page 89 4 . 2 9...
- Page 90 4 . 3 0...
- Page 91 4 . 3 1...
- Page 100 S E E P A G E 1 0 . 9...
- Page 106 M8 x 1 1 0 N O T E : M8 N U T A L R E A D Y I N S E R T E D I N D R I V E B A R...
- Page 110 Fabric 3 6.1.1...
- Page 111 Fabric 3 Fabric 4 6.1.2...
- Page 112 Fabric 3 Fabric 4 Fabric 5 6.1.3...
- Page 113 Fabric 4 Fabric 5 Fabric 6 6.1.4...
- Page 114 Fabric 2 6.1.5...
- Page 115 6.1.6...
- Page 116 6.1.7...
- Page 117 Fabric 3 6.1.8...
- Page 118 Fabric 2 6.1.9...
- Page 123 S E E P A G E 1 0 . 7...
- Page 124 S E E P A G E 1 0 . 1 3...
- Page 128 S E E P A G E 1 0 . 8 + 1 0 . 1 4...
- Page 129 S E E P A G E 1 0 . 8 + 1 0 . 1 4...
- Page 132 S E E P A G E 1 0 . 7...
- Page 133 S E E P A G E 1 0 . 1 3...
- Page 134 S E E P A G E 1 0 . 8...
- Page 138 S E E P A G E 1 0 . 8 + 1 0 . 1 4...
- Page 139 S E E P A G E 1 0 . 8 + 1 0 . 1 4...
- Page 141 S E E P A G E 1 0 . 1 1 - N 1 0 . 1 2...
- Page 142 P R E S S MA L E A N D F E MA L E C O MP O N E N T S T O G E T H E R X 2 L O C A T I O N S...
- Page 144 S E E P A G E 1 0 . 1 1 - 1 0 . 1 2...
- Page 145 E N S U R E D O O R D O E S N O T S C R A P E O N B O T T O M D O O R T R A C K S E E P A G E 1 0 .
- Page 146 S E E P A G E 1 0 . 1 1 - 1 0 . 1 2...
- Page 147 E N S U R E H A N D L E S A R E L E V E L A N D S T R A I G H T B E F O R E T I G H T E N I N G T O S E E P A G E 1 0 .
- Page 149 S E E P A G E 1 0 . 1 6...
- Page 152 S E E P A G E 1 0 . 1 5 - 1 0 . 1 6...
- Page 155 S E E P A G E 1 0 . 1 5 + 1 0 . 1 7...
- Page 158 S E E P A G E 1 0 . 1 7...
- Page 160 S E E P A G E 1 5 6...
- Page 161 S E E P A G E 1 0 . 1 7...
- Page 172 H O O P MO U N T E D A D J U S T A B L E A R M I S N O T U L C E R T I F I E D...
- Page 181 D I ME N S I O N S T A K E N F R O M B A S E O F T H E H O O P...
- Page 193 L O C A T E T H E P A N E L O N T O T H E S C R E E N O V E R T H E B R A C K E T S I N T O T H E F O A M R E C E S S E S...
- Page 199 Contents page Plastic / Rubber seals………………………………………………………………………………………………………..10.2 Pod Alignment template jigs……………………………………………………………………………………………..10.3 Screen hook positions Upholstery Screen crossbar………………………………………………………………………………………………10.4 Upholstery screen to hoop alignment 1 Upholstery screen to hoop alignment 2…………………………………………………………………………….10.5 Upholstery screen to front/rear glass frame alignment Bottom door track to upright…………………………………………………………………………………………….10.6 Door track to screen block Glass edge cleaner…………………………………………………………………………………………………………….10.7 Sealing the glass panels...
- Page 200 Plastic/Rubber Seals. Check all plastic and rubber seals are assembled correctly prior to any assembly. If a seal is noticed to be pulled out and not engaging correctly late on in the build, the pod will need to be dismantled to put right.
- Page 201 Pod Alignment Template Jigs. To be assembled in position before the build. To guarantee Pods will be built to accurate dimensions and angles, otherwise problems will occur throughout the build. Also to confirm the position with the client prior to building. 2623mm or 103.3 Inches >2623mm or 103.3 Inches 90°...
- Page 202 Screen Hook Positions . Check the hook positions on each screen before hooking them onto the hoop. The height will be misaligned causing gaps throughout and covers will fit poorly. The screw must be located over the detail in extrusion. Upholstery Screen Crossbar.
- Page 203 Upholstery Screen to Hoop Alignment. Ensure the screen height aligns accurately with the hoop casting when hooking into the hoop. Use a soft mallet if necessary. The top covers and upholstery panels will be misaligned and cause gaps throughout. Tap down with a soft mallet if necessary. Upholstery Screen to Hoop Alignment 2.
- Page 204 Upholstery Screen to Front/Rear Glass Frame Alignment. Ensure the screens align accurately with the front/rear frames, when bolting the frame uprights onto the screens. The pod will be misaligned and cause gaps throughout. Bottom Door Track to Upright. When assembling the front/ rear glass frame always sit the upright onto the door track completely parallel.
- Page 205 Door Track to Screen Block. Ensure the block is inserted before the door track is bolted on . Gaps will appear in each corner Place the block into position when the upright is being attached to the screen. Glass Edge Cleaner. The glass edges must be cleaned using the Isopropanol wipes prior to any plastic extrusion being bonded on.
- Page 206 Sealing the Glass Panels. When sealing the glass panels against each other, test the closure by blowing through the gap and checking for a draught or attempting to push a thin piece of material through. If the glass panels are not sealed correctly there will be sound gaps which will affect the acoustic performance.
- Page 207 Roof Panel Alignment. When mounting the roof panels ensure that the roof panel edge sits in the middle of the hoop casting each side. The roof panels will be misaligned causing the opening/ closing movement to be poor. Securing the Opening Roof. After locating all the roof panels, apply an even force around each to secure.
- Page 208 Adjusting the Opening Roof. Once operational, loosen the actuator bracket and push towards the middle of the pod until all roof blades are firmly closed, then re-tighten. Gaps may be visible between the roof blades when fully closed Push into the center of the Pod to reduce the roof blade gaps.
- Page 209 Door Adjustment- Tips Before mounting the door. These are crucial tips on how to mount the door successfully. Without following these tips, the door will be mounted incorrectly or poorly. 1. Set the runner wheels to the neutral positions as shown below. 2.
- Page 210 3. Close the door to inspect the level, ensuring there is an even gap against the door upright. Recommended door force: Min : 30N Max: 50N Ideal: 40N 4. If you are happy with the door movement/ alignment, adjust the inner wheels down to match the outside wheels, but do not over tighten 5.
- Page 211 Door Handle Alignment. When mounting the door handle onto the glass door, ensure the extrusions are parallel and at 90° to the glass. The door handle can easily be mounted at an incorrect angle, putting stress on the glass fixing holes. 90°...
- Page 212 Starting off the Glass Seal. Use the spatula tool/ Hoop opening tool to create enough space in the extrusion for the post fix glass seal to be inserted. The post fix glass seal can be very difficult to push in, especially on the curved glass frames.
- Page 213 Mounting the Front/ Rear Covers. Ensure the covers are located into the clips correctly, to hide/ protect the door runners and glass clamps. The covers will not be fully clipped on otherwise and may come loose/ fall off. 2. Apply force diagonally down to clip the cover on.
- Page 214 Mini-Pod Connection. Ensure the connection wires are linked and secured using the cable ties. The connections will become loose. 1. Connect the wires… 2. Invert cables forming an S 3. Pull both cable ties shape – place cable tie tight and cut off tails around each part of connector and cable.
- Page 215 Mounting the Upholstery Panels Push down firmly in the areas highlighted to properly engage the panel clips into the screens. If any of these clips are not engaged correctly the upholstery panel become loose. Apply force to the 4 areas highlighted to engage the clips into the screen extrusions.
- Page 216 Installation Guide & User Manual Author Date 2017 2018 2018...
Need help?
Do you have a question about the Air 3 pod and is the answer not in the manual?
Questions and answers