panthera Micro 3 Operating Instructions Manual
Hide thumbs
Also See for Micro 3:
- Assembly instruction manual (6 pages) ,
- Assembly instruction (4 pages)

Related Manuals for panthera Micro 3


Summary of Contents for panthera Micro 3
- Page 1 Operating instructions for wheelchair: Micro 3 Panthera AB, Gunnebogatan 26, 163 53 Spånga,Sweden +46-8-761 50 40, www.panthera.se, panthera@panthera.se...
-
Page 2: Table Of Contents
Congratulations on choosing a wheelchair from Panthera AB. We hope you will be satis- fied with your Panthera Micro 3 and wish you many happy years together. All of Panthera AB’s products are designed and assembled in Spånga, outside Stockholm. Our models are constructed to be the very best on the market with regard to quality, manoeuvrability and low weight. -
Page 3: Design/Contact/Symbols
It is available in two versions, Micro 3 and Micro 3 Long. If required, the wheelchair can also be equipped with a range of accessories, such as push handle, side guards or roll stop. -
Page 4: Description/Overview
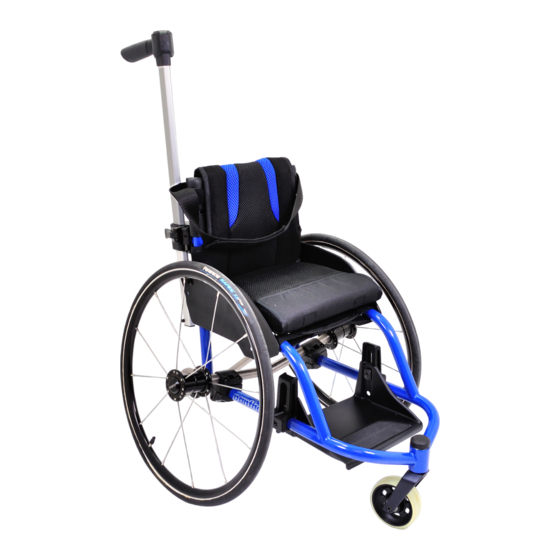
DESCRIPTION (Fig. 1, 2) The Panthera Micro 3 models are dynamic wheelchairs designed to let you live life as actively as possible. Meticulous attention has been paid to their every detail. The low weight, combined with the stable, fixed frame and a single caster make the wheel- chair extremely easy to manoeuvre. -
Page 5: Safety Regulations
The anti-tip device is a safety feature that is intended to prevent falling backwards in the wheelchair. The anti-tip device must always be used on wheelchair model Micro 3 and must be checked daily. - Page 6 If you have any questions on wheelchair technique, contact the person who prescribed the chair or your therapist. You are also welcome to get in touch with the team at Panthera AB. Anti-roll device Note that the anti-roll device is not designed to be used as a brake. It´s designed to keep the wheelchair still while the user makes transfer in or out of the wheelchair or while doing some activity.
-
Page 7: Transfer/Lifting
SAFETY REGULATIONS Lifting while the user is in the wheelchair (Fig. 3) If the wheelchair is to be lifted while the user remains seated, always grip the chair’s chas- sis. See arrows in Fig. Do not lift using the push handles, wheels or other movable sections. Wheelchair technique –... -
Page 8: Settings
SAFETY REGULATIONS Risk of jamming While driving the chair, be aware of the risk of your fingers becoming jammed between the rear wheel and the chassis, and between the rear wheel and side guard. Ensure your fingers or loose items do not become trapped in the rear wheel’s spokes while driving. - Page 9 SETTINGS 1a. The depth of the seat upholstery (Fig. 6) By moving the seat extender forward or backwards you can adjust the seat depth. Loosen the front part of the seat by pulling it backwards (the seat is attached with velcro). Adjust the seat depth and attach it to the velcro.
- Page 10 SETTINGS Raise the footplate 1. Loosen the screws slightly (1) Fig. 11, on both sides, with allen key 4 mm. 2. Adjust the height by sliding the screw in the slot at the footplates attachment Fig. 12 Make sure it is the same height on both sides. To help for this there are markings (4) in the footplates attachments.
- Page 11 SETTINGS The footplate mounted low (”Low position, upper”) Fig. 15 1. Loosen the screw (1) and nut (2), remove the footplate. Fig. 11 2. Loosen the screw (5) Fig. 16, on both sides, with allen key 4 mm and remove the attachment from the chassis.
- Page 12 SETTINGS Footplate mounted extra low (”Low position lower”) Fig. 18 This stage presumes that the attachment is already is mounted in ”low position”, ie the attachment is pointing downwards Fig. 19 1. Loosen the screw (1) Fig. 11 completely from the nut (2), on both sides, with allen key 4 mm.
- Page 13 SETTINGS 3. Backrest and backrest upholstery Height of backrest (Fig. 21) First loosen the velcro ribbon to get to the bolts on both sides, see . Then Fig. 21 lossen the bolts on both sides. Now you can adjust the backrest to suitable height by sliding the backrest rods up or down.
- Page 14 SETTINGS 4. Balance of the wheelchair Fig. 23 You change the wheelchair balancing by moving the drive wheels (rear axle) forward or backwards, see Fig. 23 The further forward you place the drive wheels, the more backward balanced the chair becomes.This makes the seat easier to move forward and gives you more weight over the drive wheels.The chair will be easier to maneuver and will also be easier to lift up on the rear wheels then you have to drive over a threshold However, the chair must not be too back-balanced as it can feel uncomfortable.
-
Page 15: Accessories
ACCESSORIES / SETTINGS 5. Torso-strap Hip belt from third parties that meet requirements according to MDR EU 2017/745 can be used with maintained CE marking. Mounting is done by attching the straps around the chassis Allowed areas for attachments, Fig. 24 6. -
Page 16: Maintenance/Service/Repair
MAINTENANCE Your Panthera is build to be nearly maintenance free. But a few parts you need to regularly check. Storage When storing your wheelchair for 4 months or more you should place it in a dry, warm place. After storage, check the tyre pressure and the condition of the uphol- stery. - Page 17 (Fig. 27 och 28) Wear parts as tyre and castor can be obtained from your local distributor or be ordered from Panthera AB for payment and the work can be done at home for those who have the oppertunity. www.panthera.se...
- Page 18 MAINTENANCE To change castor 1) Order parts in the right dimensions. 2) Disassemble the castor with allen key 4 mm. 3) When mounting the new castor you hold both bushings with your thumb and index finger and slide the castor into the slots on the fork. When reassembling castors after cleaning or servicing, always check that the bolt still has thread lock (blue, red or green) on the thread, which indicates suffi- cient thread lock.
-
Page 19: Guarantee/Conformity
GUARANTEE AND LIFESPAN Lifespan The lifespan of a Panthera product depends on how much wear and tear it is exposed to and how thorough you are with maintenance. When reaching the end of its lifespan, the wheelchair must be handed in to the local distributor or Panthera AB to be recycled. -
Page 20: Technical Facts
TECHNICAL FACTS Micro 3 Model code G515 G515 Seat width (cm) Total width Total length Total height, 20” rearwheels Seat Seat angle 0° 0° Seat height rear, 18” rearwheels 30,5 30,5 Seat height front, 20” rearwheels Seat depth 15-20 15-20... - Page 21 TECHNICAL FACTS Micro 3 Long Model code G515 G515 Seat width (cm) Total width Total length Total height, 20” rearwheels Seat Seat angle 0° 0° Seat height rear, 18” rearwheels 30,5 30,5 Seat height front, 20” rearwheels Seat depth 20-25...
- Page 22 Panthera AB, Gunnebogatan 26, 163 53 Spånga 08-761 50 40, www.panthera.se , panthera@panthera.se...
Need help?
Do you have a question about the Micro 3 and is the answer not in the manual?
Questions and answers