panthera U3 Light Operating Instructions Manual
Hide thumbs
Also See for U3 Light:
- Operating instructions manual (28 pages) ,
- Operating instructions manual (33 pages) ,
- Operating instructions manual (38 pages)

Related Manuals for panthera U3 Light


Summary of Contents for panthera U3 Light
- Page 1 Operating instructions Wheelchair model: U3 Light U3 Light Y-Front U3 Light Y-Front 90° Panthera AB, Gunnebogatan 26, 163 53 Spånga, 08-761 50 40, www.panthera.se, panthera@panthera.se...
-
Page 2: Table Of Contents
Congratulations on choosing a wheelchair from Panthera AB. We hope you will be satis- fied with your Panthera model and wish you many happy years together. All of Panthera AB’s products are designed and assembled in Spånga, outside Stockholm. Our models are constructed to be the very best on the market with regard to quality, manoeuvrability and low weight. -
Page 3: Contact
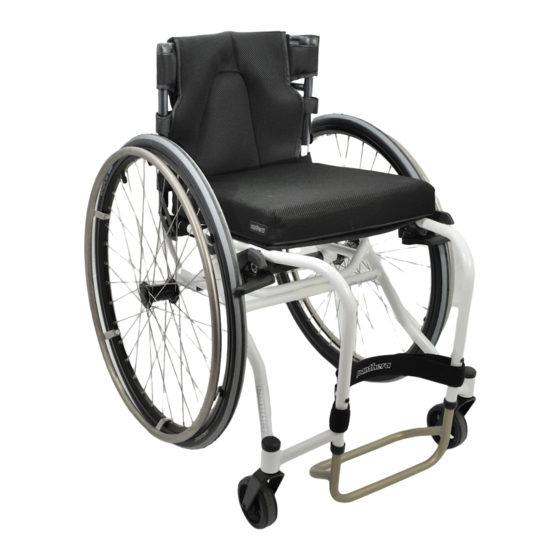
Panthera U3 light, Fig. 1, 2 and U3 Light is a wheelchair designed for the active, advanced user. U3 Light has a ”tippy” ba- lance, easy to lift and transport and also extremely easy to manouver. In standard configu- ration U3 Light has a rigid rear axle of carbon fibre, lightweight rear wheel, aluminium foot rest, easy rolling castor wheels, arm brake, and a seatbag. -
Page 4: Overview
OVERLOOK (Fig. 3) Fig. 3 1. Footrest 2. Chassis 3. Seat - cushion 4. Backrest / upholstery 5. Rear wheel / Tyre 6. Puhrim 7. Brake 8. Quick release 9. Air valve 10. Rear axle 11. Castor 12. Castor fork 13. -
Page 5: Safety Regulations
WARNING Panthera wheelchairs are designed to be as manoeuvrable as possible, which means the wheelchair responds quickly and seamlessly to the actions you perform. If you perform the... - Page 6 If you have a high brake, be careful that your fingers do not make contact with the brake when driving with the rear wheel. When transferring sideways in and out of your Panthera, make sure you can lift yourself over the brake so that you do not sit on or get caught on it.
-
Page 7: Transfer/Lifting
SAFETY REGULATIONS Transfer into the wheelchair Techniques for transfer must be practised extensively together with qualified staff. The methods described below are for advisory purposes only. Transferring into the wheelchair sideways (Fig. 4) 1. Position the wheelchair as close to you as possible. 2. -
Page 8: Settings
SAFETY REGULATIONS Hot surfaces If the wheelchair is exposed to sunshine for long periods, its surfaces may become ex- tremely warm. Risk of jamming While driving the chair, be aware of the risk of your fingers becoming jammed between the rear wheel and the brake, and between the rear wheel and side guard or armrest. - Page 9 The footrest in standard configuration allows adjustment in the 4 lowest holes. To use the lowest position (the footrest in its highest position) you need to shorten the footrest with a saw. For more information, please contact Panthera. 3) The tension of the calf strap/heel strap (Fig.
- Page 10 SETTINGS 4) The angle of the backrest (Fig. 9) Fold the backrest forwards. Loosen the lock screws (1) a few rotations using a 4 mm Allen key. Repeat this process on the other side. Adjust the angle of the backrest using the adjustment screws (2) on both sides. Using the 4 mm Allen key, unscrew the adjustment screws to tilt the backrest forwards.
- Page 11 6) The balance of the wheelchair (Fig. 12) U3 Light has a rigid rear axle and the balance is adjusted by moving the position of the body relative to the rear axle. This is accomplished with moving the backrest into three di- ferent positions.
- Page 12 SETTINGS 7) Adjusting the high brake Please note! The effectiveness of the brakes is affected when the air pressure drops, the tyres become worn or when changing to a different type of tyre. As a result, the brakes’ settings should be checked from time to time. Adjusting high brake (Fig.
-
Page 13: Accessories
ACCESSORIES Armrests (Fig. 14) The armrests can be adjusted both horizontally and vertically. Adjusting the armrest horizontally: 1. Push and hold in the button on the inside of the armrest (1). 2. The armrest can be moved backwards and forwards while the button is pressed in. 3. -
Page 14: Accessories
ACCESSORIES Push handles (Fig. 16) Push handles are used by assistants to drive the user in the wheelchair. The push handles can be adjusted vertically and they can also be folded in. Folding up the push handle: 1. Lift the push handle uppwards (2). 2. -
Page 15: Transportation
TRANSPORTATION when transporting a wheelchair user in a vehicle, We would like to emphasise that, it is always preferable to transfer the user to a regular car seat secured by a seat belt. An exception may be made if the vehicle is fitted with a device designed in accordance with Bus Directive 2001/85/EG, Appendix VII, Item 3.8.3. - Page 16 TRANSPORTATION Assembling and disassembling the wheelchair (Fig. 20 och 21) When transporting the wheelchair, in a car, for example, the backrest can be folded and the rear wheel detached. Lowering the backrest, (Fig. 20) 1) Release the side guards and armrests, if necessary, and pull them up vertically. 2) Remove the seat cushion if necessary.
-
Page 17: Maintenance/Service
MAINTENANCE Your Panthera model was designed for rigorous daily use over a number of years, and as such, some parts must be regularly checked. If using your wheelchair in more demanding environments, such as sand or saltwater, you must examine and clean your wheelchair more often than what is specified below... - Page 18 Replacement of wear parts (Fig. 25 och 26) Wear parts such as tyres, inner tubes and Castors can be ordered from Panthera, with the work carried out at home for those able to do so. Otherwise, contact your wheelchair provider or Panthera.
-
Page 19: Guarantee/Conformity
GUARANTEE AND LIFESPAN Lifespan: The lifespan of a Panthera product depends on how much wear and tear it is exposed to and how thorough you are with maintenance. When reaching the end of its lifespan, the wheelchair must be handed in to your wheel- chair provider or Panthera AB to be recycled. -
Page 20: Technical Facts
TECHNICAL FACTS U3 Light / U3 Light L Seat width (cm) Total width Total length Total height 65-75 65-75 65-75 65-75 65-75 Seat Seat angle 7° 7° 7° 7° 7° Seat height rear Seat height front Seat depth 35-46 35-46... - Page 21 TECHNICAL FACTS U3 Light Y-front / U3 Light L/ Y-front Seat width (cm) Total width Total length Total height 66-76 66-76 66-76 66-76 66-76 Seat Seat angle 7° 7° 7° 7° 7° Seat height rear Seat height front Seat depth...
- Page 22 TECHNICAL FACTS U3 Light Y-front 90° / U3 Light /L Y-front 90° Seat width (cm) Total width Total length Total height 66-76 66-76 66-76 66-76 66-76 Seat Seat angle 7° 7° 7° 7° 7° Seat height rear Seat height front...
- Page 23 NOTES...
- Page 24 Panthera AB, Gunnebogatan 26, 163 53 Spånga, Sweden 08-7www.panthera.se, panthera@panthera.se...
Need help?
Do you have a question about the U3 Light and is the answer not in the manual?
Questions and answers