Table of Contents
Advertisement
WWW.RESPONSEBIO.COM | SPEED. PRECISION. ACCURACY.
24-HOUR TECHNICAL SUPPORT
Tel: 1-866-525-7267 (toll free) Tel: 1-604-219-
6119 (int'l) Email:
techsupport@responsebio.com
RESPONSE CORPORATE OFFICE
Tel: 1-888-591-5577 (toll free) Tel: 1-604-456-
6010 (int'l) Email:
customersupport@responsebio.com
C1100-1.5
OCTOBER 2019
Advertisement
Table of Contents

Related Manuals for Response Biomedical RAMP READER

Summary of Contents for Response Biomedical RAMP READER
- Page 1 WWW.RESPONSEBIO.COM | SPEED. PRECISION. ACCURACY. 24-HOUR TECHNICAL SUPPORT RESPONSE CORPORATE OFFICE C1100-1.5 Tel: 1-866-525-7267 (toll free) Tel: 1-604-219- Tel: 1-888-591-5577 (toll free) Tel: 1-604-456- OCTOBER 2019 6119 (int’l) Email: 6010 (int’l) Email: techsupport@responsebio.com customersupport@responsebio.com...
-
Page 2: Table Of Contents
Table of Contents INTRODUCTION ......................... 1 Overview ..........................1 Intended Use ..........................1 ® RAMP System Description ..................... 1 ® How the RAMP System Works ....................3 ® 1.4.1 RAMP Reader ......................... 3 ® 1.4.2 RAMP Assay/Test Kit Components ................3 1.4.3 Accessories ........................ - Page 3 End User License Agreement ......................50 Software Updates..........................50 Feedback ............................50 Governing Law ..........................50 APPENDIX C ............................51 Contact Information ........................... 51 Response Biomedical Customer Service ..................51 European Authorized Representative ....................51 ® Operator’s Manual, RAMP Reader...
-
Page 4: Introduction
System should only be used by trained personnel. 1.2 Intended Use ® The RAMP Reader is a general use fluorometer that analyzes results produced by immunoassays manufactured by Response Biomedical Corp. ® 1.3 RAMP System Description Each disposable, single-use Test Cartridge houses an analyte-specific, immunochromatographic strip ®... - Page 5 Introduction ® Instructions for Uses for more details. The use of the RAMP Ratio significantly reduces variation due to sample, operator and membrane differences. The assay result is displayed on the Reader’s LCD (liquid crystal display) following test development. The result is stored and can be printed, uploaded to a PC, or deleted. Lot specific information for each Kit lot is entered using a pre-programmed Lot Card, included with each Kit.
-
Page 6: How The Ramp System Works
There are a number of optional accessories that can be purchased for use with the RAMP System. All items are available from Response Biomedical. Please contact your local distributor or Response Biomedical Customer Service (Appendix C) if you require any of the following accessories 1.4.3.1... -
Page 7: Warnings And Precautions
Introduction 1.5 Warnings and Precautions Warnings and Precautions 1.5.1 Symbols and Definitions Symbols and Definitions Read all contents of this manual prior to use. Read all contents of this manual prior to use. ® The following symbols are used on the RAMP The following symbols are used on the RAMP Reader, related components a nd accessories, or in nd accessories, or in... -
Page 8: Summary Of Warnings And Precautions
Store Lot Cards in the anti -static pouches provided. Use only Response Biomedical Use only Response Biomedical - supplied or recommended accessories with the Reader. supplied or recommended accessories with the Reader. DO NOT connect the barcode wand to Reader DO NOT connect the barcode wand to Reader while the Reader is turned ON. -
Page 9: Unpacking And Installation
Remove the AC Adapter and Power Cord and check the label to confirm country-specific voltage requirements. Remove remaining contents and compare with the packing slip or list below. If any of the contents are missing, contact your distributor or Response Biomedical Corporation Customer Service (Appendix C). -
Page 10: Initial Start-Up
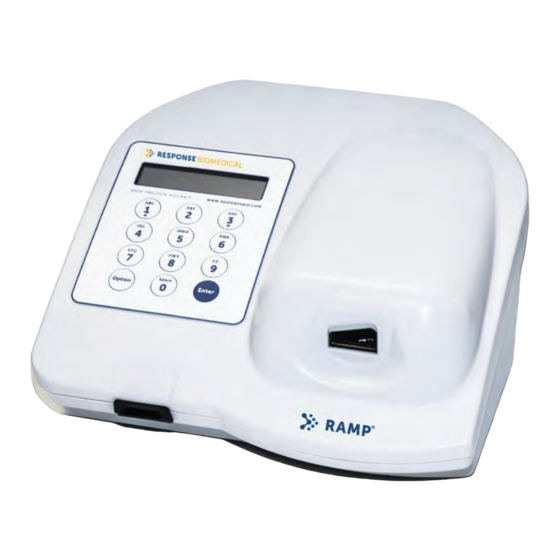
Introduction 1.6.5 Initial Start-up The power button is located on the back panel of the Reader (Figure The power button is located on the back panel of the Reader (Figure 1-2 ). When the power is turn ). When the power is turn ed on, the Reader performs a Power on, the Reader performs a Power -On Self- Test (“POST”) to ensure the system is operating within Test (“POST”) to ensure the system is operating within... - Page 11 Introduction ® Figure 1-1: RAMP Reader ® Operator’s Manual, RAMP Reader Reader...
- Page 12 Introduction ® Figure Figure 1-2: RAMP Reader Rear Panel View ® Operator’s Manual, RAMP Reader Reader...
-
Page 13: Ramp System Operation
® System Operation RAMP ® 2.0 RAMP SYSTEM OPERATION Keypad Function and Use ® To interface with the RAMP System, use the keypad (Figure 2-1) when prompted by the Reader display. The keypad consists of ten alphanumeric character keys and two function keys, [Options] and [Enter]. To input a specific letter or number, press the key to scroll through the choices until the desired character is displayed. - Page 14 ® System Operation ® System Operation RAMP ® Figure 2-1: RAMP Reader Keypad ® Operator’s Manual, RAMP Reader Reader...
-
Page 15: Run/Options Menu
® System Operation RAMP RUN/OPTIONS Menu When the Reader is turned on, it initially performs a Power-On Self-Test and displays the following animation on the display for one second while emitting two short beeps: ■■■■■■■■■■■■■■■■■■■■ ■■■■■■■■■■■■■■■■■■■■ The following message scrolls across the screen from right to left and remains displayed for a few seconds (X.XX corresponds to the software version): *** RAMP READER ***... - Page 16 ® System Operation ® System Operation RAMP To load the lot information, hold the Lot Card by the label with the arrow / text facing up, then insert To load the lot information, hold the Lot Card by the label with the arrow / text facing up, then insert To load the lot information, hold the Lot Card by the label with the arrow / text facing up, then insert the L ot Card with the arrow pointing toward the Reader, contact end first ot Card with the arrow pointing toward the Reader, contact end first , into the slot located under...
-
Page 17: Running An Assay
® System Operation RAMP Running an Assay 2.4.1 Entering User ID If the User ID option is enabled, the following screen is displayed after pressing [Enter] at the RUN/OPTIONS prompt: > SELECT USER ID ENTER USER ID If the User ID option is disabled, this screen does not appear and the test proceeds to Sample ID entry after pressing [Enter] (Section 2.4.2). -
Page 18: Entering User P.i.n. - "User Lock-Out" Mode (P.i.n. Enabled)
® System Operation RAMP 2.4.2 Entering User P.I.N. – “User Lock-out” Mode (P.I.N. Enabled) If the User ID and P.I.N. options are enabled, the following screen is displayed after pressing [Enter] to select the appropriate User ID: ENTER USER P.I.N.: *************** If the User P.I.N. -
Page 19: Inserting A Cartridge
® System Operation RAMP A Sample ID of up to 20 alphanumeric characters can be input using the letter, number and space keys (Section 2.1). ENTER SAMPLE ID: When all characters have been entered, press [Enter] to store the displayed Sample ID into memory. If a letter or number has been inadvertently entered, press [Options] to clear the entry. - Page 20 ® System Operation ® System Operation RAMP Figure Figure 2-2: Inserting a Test Cartridge 2-2A 2-2B CAUTION! To prevent damage to internal components of the Reader, it is important to To prevent damage to internal components of the Reader, it is important to To prevent damage to internal components of the Reader, it is important to prevent excess sample from getting onto the prevent excess sample from getting onto the Cartridge or spilling out of the sample well.
- Page 21 ® System Operation RAMP NOTE: If sample flow is not detected within the time specified by the Lot Card, the following message is displayed, with the bottom line alternating display with “REMOVE CARTRIDGE…” (Section 4.4). SAMPLING ERROR #2 SEE INSTRUCTIONS When the sample flow is detected within the proper time interval, a double-beep is emitted, SAMPLE FLOW DETECTED is displayed, followed by: TEST: TnI...
-
Page 22: Using The Options Menu
® System Operation RAMP When [Enter] is pressed, the Reader will check that the used Cartridge has been removed from the instrument. If the Reader detects a Cartridge, a REMOVE CARTRIDGE... prompt is displayed. To print results after each test is completed, see Section 2.6.6. The Reader memory can store results for up to 500 tests. - Page 23 ® System Operation RAMP Press [Enter] to select 1. OUTPUT RESULTS. The screen displays the following prompt: SELECT RESULT TYPE: 1. SAMPLE RESULTS The three result types available to select are: 1. Sample Results 2. LQC Results 3. IQC Results Press [▲] or [▼] until the desired option is displayed.
- Page 24 ® System Operation RAMP Figure 2-3: Sample Results Printout Example RAMP Reader S/N XXXXXXX Version X.XX Patient USER: USER1 RESULT: TnI 0.40 ng/mL DATE: 25 Jun 2015 TIME: 19:19 LOT: M0xxxx EXP. 30 Jun 2016 END OF DATA When all results have completed printing, the report indicates completion by printing the message: END OF DATA at the bottom of the printout.
-
Page 25: View Results
® System Operation RAMP If there are no results stored in the Reader’s memory, the following is displayed with a long beep: NO TEST RESULTS IN MEMORY! PUSH A KEY Press any key to return to the SELECT RESULT TYPE Menu. 2.5.2 View Results To review results from previous samples on screen without outputting to a computer or printer,... - Page 26 ® System Operation RAMP Press [Enter] again to display the sample result with date and time of the test. 0.40 ng/mL 25 Jun 2015 – 19:19 Press [Enter] once more to display the Kit lot number with the expiry (Use by) date. LOT: M0xxxx EXP.
-
Page 27: Run Internal Quality Control (Iqc)
® System Operation RAMP Use [▲] or [▼] and [Enter] to select the desired option. If YES is selected, the following screen will be displayed: RESULT HAS BEEN DELETED! Upon completion, the screen returns to the most recent sample result. After the last result is deleted from the VIEW menu, the following screen is displayed: LAST RESULT DELETED! -
Page 28: Run Liquid Quality Control (Lqc)
® System Operation RAMP 2.5.4 Run Liquid Quality Control (LQC) ® External liquid quality control reagents are available for clinical RAMP Assays. To conduct an LQC test, perform the following steps. From the RUN/OPTIONS Menu, select Options and press [▲] or [▼] until 4. RUN LIQUID QC is displayed. -
Page 29: Using The System Settings Menu
® System Operation RAMP Using the SYSTEM SETTINGS Menu The SYSTEM SETTINGS Menu allows controlled access to the following system settings: SET MASTER P.I.N. – to edit the Master PIN. – SET CLOCK to adjust the date and time. – DISABLE ID &... -
Page 30: Set Master P.i.n
® System Operation RAMP NOTE: Please contact Technical Support (Appendix ). Be sure the Reader is accessible and the screen with the permit # (above) is visible. An override code will be provided by Technical Support. Press [Enter] to enter the override code. ENTER OVERRIDE CODE: ************* NOTE: Entering the override code does not reset the Master P.I.N. -
Page 31: Enable User Id/P.i.n
® System Operation RAMP 2.6.4 Enable User ID/P.I.N. The Enable User ID option allows the Reader to store a User ID with each test result, such that the User ID is included with the output of the sample or LQC result when sent to a computer or printer, or when the result is viewed on the display screen. -
Page 32: Print Settings
® System Operation RAMP Enter the User ID using the keypad or optional barcode wand. A maximum of 20 alphanumeric characters can be input for the User ID. When finished editing, press [Enter] to store the displayed User ID. To accept the ID without editing, press [Options] or [Enter] with nothing typed. The screen advances to the EDIT P.I.N. - Page 33 ® System Operation RAMP Press [▲] or [▼] then [Enter] to select one of the three printing options: 1. DO NOT PRINT - (default) the user is not prompted to print after an assay is run. Results may be printed when viewing results at a later date. 2.
-
Page 34: Transfer Users
(receiving Reader). Connect source Reader to receiving Reader using a Reader-to-Reader cable (available from Response Biomedical, see Appendix C). Ensure the receiving Reader is powered on and the RUN/OPTIONS prompt is displayed. From the source Reader SYSTEM SETTINGS Menu, press [▲] or [▼] until 6. TRANSFER USERS is displayed. -
Page 35: Erase Memory
® System Operation RAMP During transfer, the receiving Reader displays the following screen: RECEIVING USERS... After completion, the following screen is displayed: USER ID + PIN DATA RECEIVED & STORED Upon completion of download, source Reader returns to TRANSFER USERS option screen. If the receiving Reader is not properly connected, the source Reader briefly displays an error screen: RECEIVING READER IS NOT RESPONDING! -
Page 36: Set Iqc Timer
® System Operation RAMP If [Enter] is pressed to select a specific memory that has no results stored, the following display is shown. MEMORY PREVIOUSLY ERASED. PUSH A KEY. The display returns to the SELECT RESULT TYPE Menu. 2.6.9 Set IQC Timer The Set IQC TIMER option allows the setting of the interval at which the Reader will automatically run IQC testing. -
Page 37: Reset Lqc Timer
® System Operation RAMP From the SYSTEM Menu, press [▲] or [▼] until 9. SET LQC TIMER is displayed. Press [Enter]. The following prompt is displayed, which is the system default: SET LQC TIMER (LQC TIMER IS OFF) To initiate the LQC TIMER/INTERVAL, press [▲] or [▼] until the desired LQC interval is displayed. The range of the LQC Timer/Interval is 1-31 days. -
Page 38: Test Counters
® System Operation RAMP NOTE: The RESET LQC TIMER option does not allow the operator to disable the LQC Timer. In order to turn the LQC Timer off, the steps outlined in Section 2.6.10 should be followed. 2.6.12 Test Counters The TEST COUNTERS option maintains a record of the number of Sample, IQC and LQC tests that the instrument has performed. -
Page 39: Exit Menu
® System Operation RAMP SET SOUND: 2. ENABLE SET SOUND: 1. DISABLE 2.6.15 Exit Menu Selecting this option from the SYSTEM Menu returns the Reader to the RUN/OPTIONS prompt. From SYSTEM SETTINGS Menu, press [▲] or [▼] and [Enter] to select 14. EXIT SYSTEM MENU and return to the RUN/OPTIONS screen. -
Page 40: Maintenance
WEEE (Waste Electrical and Electronic Equipment) WEEE (Waste Electrical and Electronic Equipment) Do not dispose of this product in municipal waste. Please contact Response Biomedical not dispose of this product in municipal waste. Please contact Response Biomedical not dispose of this product in municipal waste. Please contact Response Biomedical Technical Support to arrange disposal and recycling. -
Page 41: Troubleshooting Guide
4.0 TROUBLESHOOTING GUIDE When the Reader is unable to continue a specific task it will emit an audio alarm (long beep, unless otherwise stated) and display a message. Refer to the following list of messages when troubleshooting. Power-On Self-Test Messages / IQC Messages If any Error persists, call Technical Support (Appendix C). - Page 42 Guide Troubleshooting LCD Message Cause Action RUN TEST: <Enter> During Power-On Self-Test, Plug in AC Adapter/Charger. NOTE: 24 hours of continuous *** LOW BATTERY! *** IQC, RUN/OPTIONS or RUN LQC/EXIT prompt, Reader charging is required to (Message accompanied by detects low battery voltage. 1 completely charge battery.
-
Page 43: Lot Card / Barcode Messages
Guide Troubleshooting Lot Card / Barcode Messages ‡Repeat Test: Using the same sample, follow the testing procedure in the Test Kit Instructions for Use, beginning at the SAMPLE PREPARATION section. A new Sample Buffer Vial, Assay Tip and Test Cartridge must be used. LCD Message Cause Action... -
Page 44: Transport Messages
Guide Troubleshooting LCD Message Cause Action LOT CARD READ-ERROR! Lot Card data is corrupted due Remove Lot Card, then re- REMOVE LOT CARD to electrical fault or poor contact insert. between Lot Card and Reader slot. INVALID LOT CARD! Test is not compatible with this Contact Technical Support. -
Page 45: Test Run Messages
Guide Troubleshooting Test Run Messages LCD Message Data Print Out Cause Action Message CARTRIDGE ERROR! CTG ERROR May be due to: Cartridge is automatically CONSULT MANUAL ejected. Cartridge not pushed completely to The lower line of the the back of the insertion port of the Remove Cartridge. - Page 46 Guide Troubleshooting LCD Message Data Print Out Cause Action Message SAMPLING ERROR #1 SAMP ERROR 1 Sample flow occurred before the Cartridge is automatically SEE INSTRUCTIONS Cartridge was inserted into the ejected. Reader. The lower line of the Remove Cartridge. message alternates This may be due to: between “SEE...
-
Page 47: General Messages
OUTPUT RESULTS. The warning indicates that the sample was run after the LQC Timer had expired. If at any time further assistance is required, contact your distributor or Response Biomedical (see Appendix C). ® Operator’s Manual, RAMP Reader... -
Page 48: Reader Specifications
5.0 READER SPECIFICATIONS Dimensions 27 cm wide x 25 cm deep x 15 cm high (10 ½ in wide x 10 in deep x 6 in high) Weight 2.1 kg (4.6 lbs) Reader Power Requirements 15 – 18 Vdc, 1A Max Power Supply Output 18 Vdc, 0.84A Power Supply Input... - Page 49 Appendix A NOTE 2: This equipment has been tested and found to comply with the limits for a Class A digital device, pursuant to Part 15 of the FCC Rules. These limits are designed to provide reasonable protection against harmful interference when the equipment is operated in a commercial environment.
-
Page 50: Connecting The Ramp ® Reader To Accessories
Reader to another Reader when transferring User IDs and P.I.N.s. This cable can be purchased as an accessory from Response Biomedical. User IDs and P.I.N.s. This cable can be purchased as an accessory from Response Biomedical. -
Page 51: User Agreement And Warranty
APPENDIX B User Agreement and Warranty This User Agreement and Warranty (this “Agreement”) is an agreement between you and Response Biomedical Corp. ® ® (“Response”) and governs the purchase and use of your RAMP Reader System. The RAMP Reader System comprises the ®... -
Page 52: Warranty
Appendix B Warranty ® Response warrants to the original purchaser that RAMP will be free from defects in material and workmanship on the date of purchase and substantially conform to the material functional specifications contained in this Owner’s Manual (“Limited Warranty”) for a period of one (1) year from the date of the original purchase from Response or an authorized distributor (“Warranty Period”). -
Page 53: End User License Agreement
Appendix B Upon return of the Recalled Product to the distributor (or Response if purchased directly), the purchaser’s sole and exclusive remedy, and Response’s sole obligation will be to, at Response’s option repair the Recalled Product or replace the Recalled Product with a an equivalent Response product (if available) of equal or lesser value. -
Page 54: Contact Information
Response Biomedical Corporation 1781 75th Avenue West Vancouver, British Columbia Canada V6P 6P2 www.responsebio.com ® RAMP is a Registered Trademark of Response Biomedical Corporation European Authorized Representative Emergo Europe Prinsessegracht 20 2514 AP The Hague The Netherlands Tel: +31 (0)70 345 8570 Fax: +31 (0)70 346 7299 C1100-1.5...
Need help?
Do you have a question about the RAMP READER and is the answer not in the manual?
Questions and answers