
Related Manuals for Response Biomedical RAMP 200

Summary of Contents for Response Biomedical RAMP 200
- Page 1 Tel: 1-866-525-7267 (toll free) Tel: 1-604-219- Tel: 1-888-591-5577 (toll free) Tel: 1-604-456- 6119 (int’l) Email: 6010 (int’l) Email: techsupport@responsebio.com customersupport@responsebio.com...
- Page 2 Every effort is made to ensure that all the information contained in this manual is correct at the time of printing. However, Response Biomedical Corp. reserves the right to make any changes necessary without notice as part of ongoing product development.
- Page 3 ® RAMP 200 USER MANUAL ....................... i EDITION NOTICE ........................i TRADEMARKS ..........................i CORPORATE INFORMATION ....................i TECHNICAL ASSISTANCE ......................i EUROPEAN REPRESENTATIVE INFORMATION ..............i INTRODUCTION ....................5 Scope and Audience ........................6 How to Use This Manual ......................6 Customer Information .........................
- Page 4 Starting an Assay ........................25 QUALITY CONTROL ..................29 Running LQC ..........................30 LQC Icons ..........................33 Running IQC ..........................34 WORKING WITH RESULTS ................35 Data Management Guidelines ....................36 Viewing Saved Assay Results ....................36 Viewing Event Logs ........................37 Searching for Assay Results .....................
- Page 5 Lot Card ............................ 66 Settings Messages ........................67 LQC Related Messages ......................68 Warnings and Confirmation Requests ..................68 Printer Errors ..........................69 Communications Errors ......................69 USB Device Errors ........................70 SPECIFICATIONS ....................71 Specifications ..........................72 TM Specifications ........................72 CM Specifications ........................
- Page 6 IP Tab ............................82 Tab Procedure ........................82 IP Mode ..........................82 USER AGREEMENT & WARRANTY ..............83 User Agreement and Warranty ................. 84 Return Policy ..........................84 Receipt of Delivery ........................84 Exchange Policy........................84 Warranty ............................ 84 Exclusions ..........................85 Liability Limitations ........................
- Page 8 Contact your local sales representative for further information regarding the RAMP® 200 warranty. Replacement parts and consumable materials should be ordered from Response Biomedical Corp. When ordering, please use the Response Biomedical catalog number and reference name for each item. For more information, contact Response Customer Service at: 1.866.525.7267.
-
Page 9: Temperature Limitation
Visual cues are used to help locate and interpret information in this manual quickly. This section explains formatting conventions used in this manual. ► Procedural step Use-by/Expiry date Caution, consult accompanying ● documents. List item Indicates a situation which, if not avoided, could damage device. - Page 10 Abbreviation Description Code of Federal Regulations Control Module Canadian Standards Association DHCP Dynamic Host Configuration Protocol Federal Communications Commission File Transfer Protocol FTPS File Transfer Protocol Over Secure Socket Layer Human Interface Device High Running Background HTTP Hypertext Transfer Protocol HTTPS Hypertext Transfer Protocol Over Secure Socket Layer International Electrical Commission...
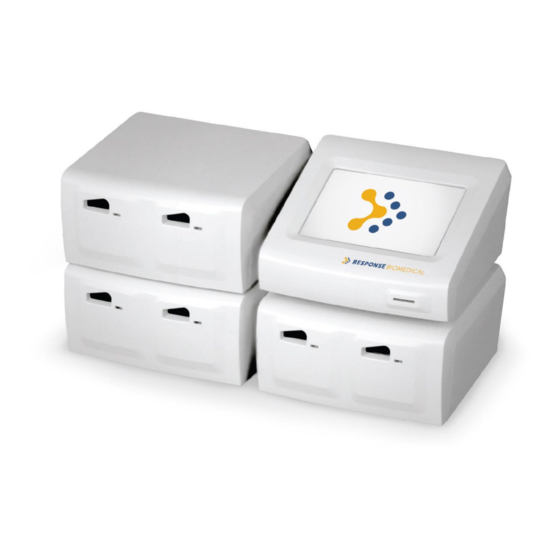
- Page 11 The RAMP® 200 is a system comprised of two primary components: A Test Module (TM) that analyzes sample tests. A Control Module (CM) that manages the sample test results that it receives from the TM. Calibration and expiration information for Test Cartridges are uploaded to the CM through Lot Cards that are included with the Test Kits.
- Page 12 Refer to the individual RAMP® Test Instructions for Use (IFU) for a detailed description of result interpretation. Depending on the test used, the result interpretation may vary due to specific Assay properties. Full operation of the RAMP® System requires the use of RAMP® Test Kits and components. Optional accessories include a printer and barcode scanner.
- Page 14 Operation should be conducted by personnel who have undergone training. Prior to operating the Platform, operators are required to have knowledge of relevant guidelines and norms as well as the information and procedures contained in the User Manual and supplied USB. Carefully follow the procedures specified in the User Manual for the operation and maintenance of the RAMP®...
- Page 16 Inspect all components carefully. If any damage is visible, notify the carrier and your distributor or notify Response Biomedical Corp. to arrange for repair or replacement. Item Description RAMP® 200 Control Module (CM) RAMP® 200 Control Module RAMP® 200 User Manual...
- Page 17 Item Description Printer Barcode printer for self-adhesive roll labels, 2 - 2.5-inches ® wide. Connects to the CM via USB. Zebra Technologies TLP 2824™ or TLP 2824 Plus *NOTE: TLP 2824 Plus is compatible with CM V1.3 or later software only. Consumables: ®...
- Page 18 ® Place RAMP 200 components on a stable work surface within reach of an electrical outlet (and network connection, if available). Access to the back of each module is required to connect components. Refer to Figure 2 for connector locations. Remove the dust protection stickers from TM ports.
- Page 19 Figure 2: RAMP® 200 - rear view ® RAMP 200 Control Module USB connectors for optional printer, barcode scanner and flash drive Power on/off Power cord connector ® RAMP 200 Control Module ® to RAMP 200 Test Module connectors Ethernet connector ®...
- Page 20 Figure 4: RAMP® 200 Test Module - rear panel label...
- Page 22 The RAMP® 200 is pre-programmed with default settings so you can use the instrument immediately. Some settings can be edited manually through the Settings menu on the CM touchscreen. However, you will find that you can edit most settings using the Reader Configuration Utility (RCU) found on the USB flash drive supplied with the CM.
- Page 23 The Control Module is controlled using the interactive touchscreen. Once the Home screen is displayed, selections can be made by touching the appropriate prompt on the display (i.e., Run Assay to initiate a RAMP® Test, or Menu to go to the Main Menu) (Figure 6). The display is pressure/touch sensitive and can accept input from a bare/gloved finger or a blunt stylus.
- Page 24 The lower left corner of the display screen, below the port icons, displays LQC, printer and communication warning icons. The description of the displayed icons are as follows: Icon Description Port Idle Port Busy Assay Timer Sample Processing and Cartridge Movement Error Message (HRB is shown for example only) For other error messages, refer to Test Run Messages in the Troubleshooting section...
- Page 26 NOTE For U.S. customers, the RAMP® 200 must be operated in a laboratory setting when used with the RAMP® Cardiovascular Tests. CAUTION When entering data via the CM touchscreen (e.g., Sample/Patient/User ID), enter characters one at a time. Failure to do so may result in erroneous data entry.
- Page 27 Hold the card so that the arrow is on the top side and pointing away from the user. Insert the Lot Card – contact end first – into the slot located on the front of the CM. The display provides the following status messages: Reading Lot Card Complete Lot ID: M0XXXX...
- Page 28 Figure 7 Operator Entry Screen NOTE The Operator ID and Password entries are case sensitive. The CM supports Pinyin character entries only. If the CM is set to Chinese language, ensure that the Operator ID and Password are set up using the English alphabet (primary keyboard) and the English character set (select Shift).
- Page 29 NOTE For detailed instructions on how to handle samples, refer to the RAMP® Test Kit IFU. When the display prompt to Add Sample & Insert appears, the LED on a free port of the TM will flash blue and the corresponding icon on the display will illuminate blue.
- Page 30 NOTE Before removing the Test Cartridge fully from the TM, a predefined note can be added to the result from the drop-down menu in the creen (Figure 9). Once the Test Cartridge has been Result Details s removed, a note can no longer be added or changed. You can add up to 10 predefined notes using the RCU.
- Page 32 Two types of quality control Tests can be run and stored by the RAMP® 200: LQC (liquid quality control): external surrogate samples used for routine QC testing. IQC (internal quality control): self-diagnostic test that include a check of the power supply voltage, system memory, cartridge transport system, cartridge barcode sensor, optical function, and incubator function for heated Assays.
- Page 33 Refer to the RCU Help Manual for more information. Select the Assay for which LQC will be performed. Touch Run LQC, located at the bottom of the screen. If prompted, enter the Operator ID and Password (Figure 7), if required, using either the touchscreen keyboard or the barcode scanner.
- Page 34 Do not use excessive force when inserting the Test Cartridge. Once inserted, the TM will automatically guide the cartridge into position for analysis. NOTE The Test Cartridge must be inserted into the TM within approximately 30 seconds of sample application; otherwise FAIL will be displayed in the port icon and the system will abort the Assay.
- Page 35 Icon Description Indicates that LQC is due shortly. Appears when the LQC timer for an Assay has less than the user defined % of time remaining until Assay lockout. Indicates that the LQC has expired for one or more Assays. If icon is displayed, the Assay Status Warnings screen (Figure 12) will display upon touching Run Assay.
- Page 36 NOTE If there is more than 1 level of LQC defined for an Assay, and LQC has expired for this Assay, the LQC timer is reset to the time at which the earliest LQC level passes in the set (e.g., if 2 levels of LQC are required and Level 2 passes LQC but Level 1 fails, Level 1 must be repeated and pass).
- Page 38 The RAMP® 200 can store up to 900 results: 300 patient results, maximum 300 LQC results, maximum 300 IQC results, maximum When the CM database is full, the oldest result is overwritten. Dual analyte Assay results are stored as two separate records.
- Page 39 NOTE For each Assay result, the Patient ID or Sample ID, Assay name, result value and date/time is displayed. To view a list of LQC or IQC results, touch the circle next to the words LQC Results or IQC Results (in the display header) to specify the type of results to be viewed. The list of results will be displayed.
-
Page 40: Result Type
Figure 17 All Events Log To view a list of failed Assays or LQCs, touch the circle next to the words Failed Assays or Failed LQCs (in the display header) to specify the type of results/events to be viewed. The list of events will then be displayed. - Page 41 Figure 18 Search Assay Results Screen To change the search parameter, use the drop-down arrow on the Operator Name: and select the new parameter. Use the touchscreen keyboard or barcode scanner to enter/scan the desired value to search. Touch Alt. Keys or Shift to display an extended character set. NOTE Enter the first few characters of the name or ID you are searching for.
- Page 42 Analysis results can be viewed on the RAMP® 200 display screen, exported/transferred to a USB flash drive, computer or network server, or printed out from the CM. Event logs other than failed Assay and LQC cannot be printed from the CM, however they can exported to a USB flash drive, computer or network server.
- Page 43 NOTE If the CM is set to Chinese, the 888-TT printer must be used for printing results in order to print the Chinese characters correctly. Figure 19 Results Transfer Screen Figure 20 Results Transfer Confirmation Screen Once results have been exported, the File Converter Utility on the supplied USB Flash Drive may be used to convert the data files to Excel format.
- Page 45 Many features of the RAMP® 200 are not available until a user with Supervisor privileges has configured them on the CM, or until a Full Access user has configured them with the RCU. See Edit Settings See Editing Settings Using the RCU Customizable features include operator IDs and passwords, data transfer options, print options, display language (only on the CM), network settings, LQC timers and ranges.
- Page 46 From the Main Menu (Figure 6) touch Settings to display the Settings menu (Figure 21). The Settings menu requires an Operator ID with Supervisor access privileges. The default login for access to the Settings menu is: Operator ID: SUPERVISOR Password: PASSWORD Both entries are case-sensitive.
- Page 47 To edit the configured settings for the RAMP® 200, touch Edit Settings from the Settings menu (Figure 21), login as described in Accessing Settings Menu section and the Settings: Edit screen (Figure 23) will open. The Settings: Edit screen features a series of tabs that include editable instrument setting fields. Use the tabs to select those settings to be changed.
- Page 48 Restoring device settings to factory defaults erases all stored settings, Assay results and operator information. NOTE: Back up all device databases before you restore the system settings to the default values. To restore the system defaults: Select Menu > Settings > Restore Defaults. The Settings: Restore Defaults screen appears. Select Restore Defaults and then select Confirm.
- Page 49 A complete list of all operators authorized to use the device with Display Name and Operator Type appears. Operator and supervisor access privileges can be defined using the RCU only. Defaults: Operators = Run Assays, Supervisors = Run Assays and change settings (see Managing operators on page 46).
- Page 50 Adding or modifying an operator To add or modify an operator: If you are adding a new operator, complete all desired fields in the Settings: Operators: Add screen (select Menu > Settings > Edit Operators). NOTE: The RAMP® 200 can store a maximum of 600 operators. If modifying an existing operator, the screen title is Settings: Operators: Modify and the fields are populated.
- Page 51 To search for a specific operator: Define who you want to search for: In the Operator Name drop-down select the desired name or ID you want to search. To disable expiry date fields for searching, select All Operators. To search for operators whose permission to use the system expires in a given date range, select Expiry Date and then enter the date range.
- Page 52 Exporting files allows back-up of critical RAMP® 200 information including configuration files, operator lists and result files. Whenever you relocate the system, use the export feature to back up your data. To export files: Click Menu > Settings > Export Configuration. The Settings: Export Configuration screen appears.
- Page 53 NOTE: Prior to deleting results, transfer and store all data in accordance with applicable local, state and/or federal guidelines or accreditation requirements and each facility’s protocol. To delete Assay results: Click Menu > Settings > Delete Results. The Settings: Delete Results screen appears. Select Delete All Results or Delete Results Prior to Date.
- Page 56 The RCU is a Windows (2000/XP/Vista) application you can use to manage a range of RAMP® 200 features. You must have the necessary login privileges to install software on your computer. To install the RCU: Insert the RCU USB key into an available USB slot. Open the USB drive.
- Page 57 To run an RCU session: Open the RCU from the START menu: Click START > All Programs > Reader Configuration > Reader Configuration Program. Login to the system. When the RCU is initially installed, the case sensitive default login is: User ID: Supervisor Password: password To ensure that only authorized users access the RCU, you can and should change at least the password as...
- Page 58 If you forget your password, you can temporarily reset it to allow access to the encoded password list. To reset the password in an emergency: In the User ID field of the RCU Login screen type override and then click Login. A message box appears and prompts you to contact Technical Support with a five-digit number (Permit #).
- Page 59 A group is defined as a common configuration shared by multiple Readers. As many groups as necessary can be defined. Each group must have its own directory. A directory contains a set of configuration files that define how the Readers in that group operate. For example, one group may be defined for Readers in an emergency department environment with files saved in a directory ED, while a separate set of configuration files, for use in an intensive care setting, would be defined in the group ICU and saved in a directory ICU.
-
Page 60: Files Tab
To set up communications between RCU and Readers, open the default Group Settings file in the RCU. Files Tab This page sets the file locations where the Reader(s) looks for specific configuration information. The Reader supports the following file transfer protocols: HTTP, HTTPS, FTP, FTPS and CIFS. Directories are specified in URL notation. - Page 61 The RCU uses Reader information files to identify the Readers installed within an institution. Once a Reader has been identified, you can use the RCU to change Reader-specific settings. A USB flash drive is used to transfer Reader settings between the Reader and the RCU. To change Reader-specific settings in a non-networked environment: Insert a USB flash drive into an available USB port on the CM.
- Page 63 WARNING! Do not disassemble the RAMP® 200 or any of its related components and accessories. The instrument contains no operator-serviceable components. Possible electrical shock Unplug RAMP® 200 devices before you clean the system. The RAMP® 200 does not contain any operator-serviceable components. Beyond gentle exterior cleaning, the RAMP®...
- Page 64 RAMP® 200 using devices such as autoclaves, ultrasonic cleaners, or pasteurizers. Use of such methods to disinfect/sterilize the RAMP® 200 causes permanent device damage and voids the warranty. Do not dispose of this product in municipal waste. Contact Response Biomedical Technical Support to arrange disposal and recycling.
- Page 66 This section explains problems and provides solutions for general operating issues and for error messages that appear on the CM screen. If you need additional assistance, use the following information to contact Response Biomedical. 24-Hour Response Biomedical Technical Support Toll free: 1 (866) 525-7267 (North America only)
- Page 67 Test run messages are indicated by a red port icon: Do not remove the cartridge. Select the icon to display detailed information about the failure. If the cartridge is removed, you can access this information by viewing the error log from the main menu. Port display Message Cause(s)
- Page 68 Message / problem Cause(s) Solution Insertion Error Remove & Reinsert The Test Cartridge was not inserted Cancel the Assay or reinsert the Test Cartridge. Fully insert Test Cartridge until ® properly into the RAMP 200 or the you feel firm resistance. Do not use operator did not wait until prompted.
- Page 69 Message Cause(s) Solution Access denied. Try again. The user does not have the login Confirm correct login details and try permissions necessary to access again. selected function. Assay List Size Exceeded. The list of Assays permitted is full. No Delete existing Assays from the Assay further additions can be made.
- Page 70 Message Cause(s) Solution LQC Lockout. Ejecting. LQC is overdue for this Assay and no LQC must be run and passed, or a full overrides are available. access user can reset the LQC timer and/or override for this Assay in Reader Settings on the RCU. Invalid Assay or Control, Aborting LQC.
- Page 71 Message / problem Cause(s) Solution Printer Error. Reconnect the printer, switch it on and ® The RAMP 200 is not able to try again. communicate with the printer. If the printer is not being used, turn off The printer may be offline. Auto Print via the RCU.
- Page 72 Message Cause(s) Solution Multiple Printers Attached, Remove Two USB printers are connected. Only Remove the additional printer. Device one printer is permitted. Multiple USB Drives attached, Remove More than one USB device of the same Remove the additional USB device. Device type is connected.
- Page 74 CAUTION. Possible device damage and warranty invalidation. Changes or modifications to this equipment, not expressly approved by the manufacturer, could void the warranty. Specification Description Model Name ® RAMP 200 TM Dimensions 185mm D x 195mm W x 96mm H Weight 1.5kg External connections...
- Page 75 Specification Description Operating Temperature 15 - 30º C (59 - 86º F) Storage Temperature -10 - 50º C (14 - 122º F) Operating Humidity 20 – 90% relative humidity, non-condensing. Operating/Storage Elevation 0 – 2000m Pollution Degree Installation Category Complies with the following EMC FCC 47 CFR Part 15 Specifications: IEC 61326-1 –...
- Page 76 This section describes the individual tabs in the Settings: View screen. For overview information on viewing system settings, see Viewing system settings on page 44. To access these tabs, select Menu > Settings > View Settings. The Settings: View screen appears. You can only edit the Assay tab settings through the RCU.
- Page 77 You must use the RCU to edit the LQC tab settings. They cannot be edited in the CM. Default: Timer Reset (hours) = 0, LQC will not time-out. To Hide Numeric LQC Results and report only PASS/FAIL. Set as Yes or No. Yes: Pass/Fail appears in place of results.
- Page 78 NOTE: The ability to edit the settings of the Timer tab varies by item. Menu Idle Timeout – Edit on the CM. Cannot edit through the RCU. Amount of idle time before the RAMP® 200 returns to the home screen. To disable, enter 0. Range: 0 - 10 minutes.
- Page 79 Customized print header information that is visible on every printout. You must use the RCU to edit the Login tab settings. They cannot be edited in the CM. Name that has been assigned to the device. Default: Blank. Disable Reader Device Locked: Assays cannot be run.
- Page 80 RCU. Consult your local IT administrator or the RCU help manual for information and help on how to use these settings. This tab displays the details of the serial number, software and hardware versions of the system. This information is important during discussions with Response Biomedical Technical Support.
- Page 81 This section describes the individual tabs in the Settings: Edit screen. For overview instructions on editing settings, see Editing system settings on page 45. To access these tabs, select Menu > Settings > Edit Settings. The Settings: Edit screen appears. Use this field to specify the interval between completing automatic IQC self-diagnostics.
- Page 82 Use this tab to specify the locations for the device, group and time server settings. You can edit these values either on the CM or in the RCU. Consult your local IT administrator and the RCU help manual for guidance on how to configure these settings.
- Page 83 Switch the CM off and then on again to reset the values. NOTE: When you adjust for changes in daylight savings time, remember to set the accurate Time Zone offset and not just the accurate current time. Use this tab to set the display language for the RAMP® 200. You can only edit these values on the CM.
- Page 84 You can only edit these values on the CM. You cannot edit them in the RCU. NOTE: There is no volume adjustment feature. Test: Select to hear indicator. On: The audio indicator is ON and sounds at the completion of an Assay and when a USB device is connected or disconnected.
- Page 86 This User Agreement and Warranty (this “Agreement”) is an agreement between you and Response Biomedical Corporation (“Response”) and ® ® governs the purchase and use of your RAMP 200 System. The RAMP 200 System comprises the Control Module (“CM”), Control Module software (“CM Software”) one or more Test Module(s) (“TM(s)”), the Reader Configuration Utility Software (“RCU Software”), the power supply...
- Page 87 ® If RAMP becomes defective during the Warranty Period, and the Exchange Period has expired, the purchaser’s sole and exclusive remedy, and ® Response’s sole obligation, will be to repair or replace RAMP . Repaired or replaced products or parts may be new or reconditioned, and are subject to this limited warranty through the end of the original Warranty Period.
- Page 88 Response may, in its sole discretion, provide replacements, updates, modifications, or bug fixes for the Software to the purchaser or a transferee (“Software Updates”). Each Software Update is provided “as is” with no warranty of any kind. Software Updates will be deemed part of the Software solely for purposes of the sections of this Agreement entitled LIABILITY LIMITATIONS and END USER LICENSE AGREEMENT.
- Page 89 assay list 24 hour technical support ...... 64 RCU ............30 Abbreviations ..........8 barcode .......... 9, 10, 15 abort assay ..........33 error messages ........66 access printer ............ 15 access denied message ......67 scanner ......15, 16, 17, 25, 72 access privilege requirements ....
- Page 90 connectors file transfer protocols ......58 barcode scanner ......16, 17 files Control Module to Test Module ..16, 17 exporting ..........50 ethernet .......... 16, 17 importing ..........49 flash drive ........16, 17 flash drive ......10, 14, 16, 17 power cord ........
- Page 91 Liability Limitations ........ 85 warnings and confirmation requests ..68 Liquid Quality Control ....See LQC network settings ..........78 local mode deleting results ........51 network mode date and time synchronized with NTP IP & MAC address ........ 78 Server..........
- Page 92 ..........78 privilege requirements ......77 restoring defaults ........46 quality control ....29, See LQC/IQC timers ............. 79 RAMP 200 troubleshooting ........67 overview and product description .... 6 settings menu RCU ..........20, 21, 30 accessing ........44, 56 access privileges ........
- Page 93 Login ............77 USB device errors ......... 70 LQC ............75 TUV ............17 Misc............81 unpacking and setup ......14 Timer............79 update interval technical support editing timer settings ......76 contact information ........ 64 upload results interval test editing timer settings ......
Need help?
Do you have a question about the RAMP 200 and is the answer not in the manual?
Questions and answers