Advertisement
Quick Links
R 410A W IN D O W /W A LL TY P E
R 410A W IN D O W /W A LL TY P E
R 410A W IN D O W /W A LL TY P E
R 410A W IN D O W /W A LL TY P E
R 410A W IN D O W /W A LL TY P E
R 410A W IN D O W /W A LL TY P E
R 410A W IN D O W /W A LL TY P E
R 410A W IN D O W /W A LL TY P E
R 410A W IN D O W /W A LL TY P E
R 410A W IN D O W /W A LL TY P E
R 410A W IN D O W /W A LL TY P E
R 410A W IN D O W /W A LL TY P E
R O O M A IR CO N D ITIO N E R
R O O M A IR CO N D ITIO N E R
R O O M A IR CO N D ITIO N E R
R O O M A IR CO N D ITIO N E R
R O O M A IR CO N D ITIO N E R
R O O M A IR CO N D ITIO N E R
R O O M A IR CO N D ITIO N E R
R O O M A IR CO N D ITIO N E R
R O O M A IR CO N D ITIO N E R
R O O M A IR CO N D ITIO N E R
R O O M A IR CO N D ITIO N E R
R O O M A IR CO N D ITIO N E R
R410A WINDOW TYPE
AIR CONDITIONER
Model:RC-X7U
RC-X9U
Before using your air conditioner, please read this manual carefully and keep it for future reference.
窗口式冷氣機
-
-
-
-
-
-
-
-
-
-
-
-
Advertisement

Related Manuals for Rasonic RC-X9U


Summary of Contents for Rasonic RC-X9U
- Page 1 R O O M A IR CO N D ITIO N E R R O O M A IR CO N D ITIO N E R R410A WINDOW TYPE AIR CONDITIONER 窗口式冷氣機 Model:RC-X7U RC-X9U Before using your air conditioner, please read this manual carefully and keep it for future reference.
-
Page 2: Table Of Contents
CONTENTS 1. SAFETY PRECAUTIONS..............2 2. UNIT PARTS IDENTIFICATION............5 3. OPERATING INSTRUCTIONS ............6 4. INSTALLA TION INSTRUCTIONS............11 5. TROUBLES HOOTING ..............14 6. SPECIFICATIONS ................15 Read This Manual Inside you will find many helpful hints on how to use and maintain your air conditioner properly. -
Page 3: Safety Precautions
SAFETY PRECAUTIONS To prevent injury to the user or other people and property damage, the following instructions must be followed. Incorrect operation due to ignoring of instructions may cause harm or damage. The seriousness is classified by the following indications. WARNING This symbol indicates the possibility of death or serious injury. - Page 4 ! CAUTION Do not clean the air Ventilate the room well when When the air filter is to be removed, do not touch the conditioner with water. used together with a stove, metal parts of the unit. etc. It may cause an injury. Water may enter the unit and An oxygen shortage may occur.
- Page 5 1. Contact an installation specialist for installation. 2. Plug in the power plug properly. 3. Do not use a damaged or non-standard power cord. 4. Do not share the same outlet with other appliances. 5. Do not use an extension cord. 6.
-
Page 6: Unit Parts Identification
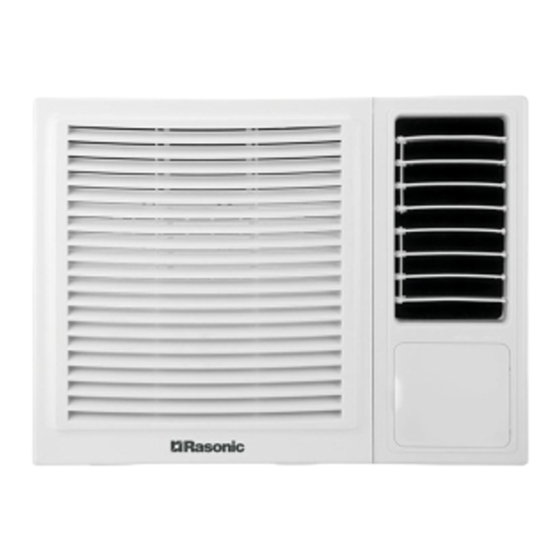
UNIT PARTS IDENTIFICATION NOTE: The front panel and cabinet may be slightly different according to the models, but the functions are the same. The following illustration is for explanation purpose only , the actual shape of the machine you purchased may be slightly different. 1. -
Page 7: Operating Instructions
OPERATING INSTRUCTIONS Control The electronic control keypad will look like one of the following: NOTE: The outline of the operation panel is based on typical model, the function is the same with your air conditioner while some difference may exist in appearance. LED shows the intake temperature. Vent Control The vent control is located above the control knobs. - Page 8 Press the POWER keypad to turn the unit on/off. (The TIMER keypad controls the auto start/stop feature of the unit.) Press the "MODE" keypad to select the appropriate operating mode. The mode selection will alternate between AUTO, HEAT, COOL, FAN and DRY. The green indicator light beside the "MODE"...
- Page 9 In the Dry mode, the air conditioner will generally operate in the form of a dehumidifier. Since the conditioned space is a closed or sealed area, some degree of cooling will continue. The temperature setting are adjustable between 17 C to 30 C . The temperature setting are adjustable between 17 C to 30 C .
- Page 10 Failur e Indic ato r Disp lay : Indicates a malfunction of the indoor room temperature sensor Indicates a malfunction of the evaporator temperature sensor Indicates a malfunction of the outdoor condenser temperature sensor Indicates frosting protection (Turn off the unit and restart it to return to normal operation) Note: When one of the above malfunctions occurs, turn off the unit, and check for any obstructions.
- Page 11 Vertical air flow adjustment (manually) Up horizontal louver To adjust vertical air flow direction of the up or low horizontal louvers, adjust any one of the up or low horizontal louver blades. Low horizontal louver To meet different requirement of different type of air conditioner, there are three kinds of methods for your choice to treat the condensed water.
-
Page 12: Installation Instructions
INSTALLATION INSTRUCTIONS Select the best location AWNING AWNING FENCE FENCE About 10mm About 10mm Over 50cm Over 50cm 1. To avoid vibration and noise, make sure the unit is installed securely and firmly. 2. Install the unit where the sunlight does not shine directly on the unit. If the unit receives direct sunlight, build an awning to shade the cabinet. - Page 13 Installation of the Housing Step 1 NOTE: UNIT MAY BE SUPPORTED BY A SOLID FRAME FROM BELOW OR Remove the air conditioner from it's packaging, remove fixing BY A HANGER FROM A SOLID screws and slide the air conditioner out of it's housing (Refer OVERHEAD SUPPORT.
- Page 14 Installation Steps Step 1. Remove the front panel and the air filter 1. Hold the tabs under the front panel, then uplift it outwards, and remove the front panel (See Fig.1). 2. Pinch the handle under the air filter and make the air filter arched, remove it from the slot from underside to upside (See Fig.2).
-
Page 15: Troubleshooting
TROUBLESHOOTING Troubleshooting Tips Save time and money! Review the chart below first and you may not need to call for service. Normal Operation You may hear a pinging noise caused by water being picked up and thrown against the condenser on rainy days or when the humidity is high. This design feature helps remove moisture and improve efficiency. -
Page 16: Specifications
SPECIFICATIONS Cooling Capacity Unit Dimension(mm) Model Wirning Size (m m ) (W x H x D ) (Btu/h) RC-X7U 450x346x585 > 7000 3*1.5 > RC-X9U 9000 450x346x585 3*1.5... - Page 17 本裝置可於有適當人員監督下或給予如何安全使用本裝置的指示並讓其了解涉及的風險後由八歲 以上的小孩,或運動,感官與感知能力受限,或缺乏相關知識或使用經驗的人來使用。孩童不得 胡亂使用本裝置。本裝置的清潔與維護也不得由孩童在無人監督下進行。(EN標準) 除非有適當人員監督下或給予如何安全使用本機的指示並讓其了解涉及的風險,本機並非設計給 運動,感官與感知能力受限,或缺乏相關知識或使用經驗的人(包括孩童)來使用的。(IEC標準) 本機旁有孩童時應有成人監督,確保他們不會胡亂使用本裝置。 若電源線受損時,必須由製造商,其維護代理商或合資格的技術人員來更換,以免發生危險。 本裝置的安裝應根據國家電線安裝的相關法例進行。 有電氣加熱器的家電必須與易燃物件相隔至少一公尺的距離。 本機需要修理或維護時須聯絡合資格的技術人員。...
- Page 20 18-43 C (T 17-32 C (T 注:...
- Page 21 ¿ Õ µ ÷ » ú Á ã ¼ þ Ã û ³ Æ 附件 密封圈 排水接頭 排水接盤 (用於排水接頭) 螺絲 數量: 注:本說明書中的所有插圖僅供說明用途。您的空調可能略有不同,以實際形狀為準。...
- Page 22 LED屏顯示回風溫度。...
- Page 23 某些型號沒有中風速 “自動 模式”風速固定為“高”。...
- Page 24 (只限冷暖型號): 自動( AUTO ) 注意:如果在本機處於AUTO模式時激活SLEEP模式,風扇馬達將立即變為LOW速度模式。...
- Page 25 注:當出現上述其中一類故障時,請關掉空調機,檢查有誤堵塞。重啟空調機,如果故 障依舊,請再次關掉空調機并拔下電源線。聯繫信興電器服務中心有限公司熱線查詢: 2406 5666。 警告 切勿 在沒有空氣開關的情況下操作空調, 因為灰塵/污垢顆粒有可能會導致設備故障。 控制面板蓋 合上控制面板蓋板並再次按下 抓住控制面板蓋的左側, 蓋板左側,直至其卡入鎖定位置。 並向上拉以將其打開。 空氣過濾網 進氣格柵後面的空氣過濾網應至少每2週(或根據需要) 進行一次檢查和清潔,以保持空調的最佳性能。 如何拆卸空氣過濾網 1.抓住前面板下方的卡舌,然後向外抬起,然後卸下前面板。 2.捏住空氣過濾器下方的手柄,使空氣過濾器成拱形,將其 從下側向上移出。 3.用溫肥皂水清潔過濾網。 水應低於40℃以防止過濾網變形。 4.沖洗乾淨,輕輕抖掉過濾網中的多餘水分。 安裝前請讓 過濾網充分乾燥。 為防止過濾網變形,請勿在陽光直射下 晾乾。...
- Page 26 1.將密封件安裝到排水接頭上 (與空調附件一起提供)。 2.從設備背面取下橡膠塞(如果適用),然後將橡膠塞 (隨空調附件提供)插入設備的底部排水孔。 3.將排水接頭連接到機櫃後部,在此處卸下插頭並旋轉 90°以牢固地組裝。 4.連接排水接頭和延長排水管(請自己購買)。 注意:如果您選擇不排水,則裝置的底部和後部排水孔應插入橡膠塞。 建議:為確保冷凝水順利排出,安裝排水盤時, 請務必將排水盤的排水口向下放置。...
- Page 30 異常操作...
- Page 31 機身尺寸(mm) 冷卻效能 型號 (mm ) Btu/h RC-X7U 7000 450x346x585 > 3*1.5 > 3*1.5 RC-X9U 9000 450x346x585 特別聲明 此說明書所有內容經過認真核對,如有任何印刷或內容上的誤解,本公司將 保留解釋權。 本產品若有技術改進,會編進新版說明書中,恕不另行通知;產品外觀及規格 以廠方生產資料為準。 售後服務 由購買日期起之一年保修期內,經信興電器服務中心有限公司之服務人員證實產 品故障屬於正常使用之情況下發生者,本公司將提供免費維修或更換零件服務。 經更換之任何損壞零件,將歸屬本公司所有。用戶請於維修時出示購買收據/換 購收據及蓋有銷售點/換購中心印章的保修證,如有任何疑問,請致電信興電器 服務中心有限公司熱線查詢: 2406 5666。...
- Page 32 辦公室: 香港九龍尖沙咀東部麼地道67 號半 島中心9樓909-912室 OFFICE: ROOM 909-912, 9/F, PENINSULA CENTRE, 67 MODY ROAD, TSIMSHATSUI EAST, KOWLOON, HONG KONG 電話 Tel: (852) 2861 2767 傳真 Fax : (852)2865 6706 網址 Website: www.rasonic.com 電郵 Email: shew@shunhinggroup.com 保養及維修 Maintenance and Repair Servi 信興電器服務中心有限公司...