Table of Contents
Advertisement
Available languages
Available languages
Quick Links
Advertisement
Chapters
Table of Contents

Subscribe to Our Youtube Channel
Related Manuals for BONFIGLIOLI TQ

Summary of Contents for BONFIGLIOLI TQ
- Page 1 PRECISION PLANETARY GEARBOXES Performance line TQ - TQK - TQF - TR - MP Effective line TQFE - TQFEK - SL - LC - MPE - MPEK - KR MANUALE INSTALLAZIONE USO E MANUTENZIONE INSTALLATION, USE AND SERVICE MANUAL...
-
Page 3: Table Of Contents
Servizio dopo la manutenzione ....................8 GUASTI E RIMEDI 9 SMALTIMENTO Revisioni L’indice di revisione del Manuale è riportato a pag. 28. Al sito www.bonfiglioli.com sono disponibili i manuali nelle loro revisioni più aggiornate. IOM_TIR_STD_ita - istruzioni originali - Rev 1_1 - 05/05/2022... -
Page 4: Informazioni Generali
In caso di smarrimento o deterioramento, la documentazione sostitutiva potrà essere richiesta direttamente al Costruttore o scaricata direttamente dal sito web www.bonfiglioli.com. Questo manuale rispecchia lo stato dell’arte al momento dell’immissione sul mercato del riduttore. - Page 5 RICHIESTA DI ASSISTENZA Per qualsiasi richiesta di assistenza rivolgersi direttamente alla rete di vendita del Costruttore, consultabile sul sito www.bonfiglioli.com. Prima di contattare la rete di vendita è necessario procurarsi i seguenti dati: • Tutti i dati della targhetta di identificazione del riduttore.
-
Page 6: Ichiesta Di Assistenza
RICHIESTA DI ASSISTENZA Per qualsiasi richiesta di assistenza rivolgersi direttamente alla rete di vendita del Costruttore, consultabile sul sito www.bonfiglioli.com. Prima di contattare la rete di vendita è necessario procurarsi i seguenti dati: • Tutti i dati della targhetta di identificazione del riduttore. -
Page 7: Informazioni Sulla Sicurezza
2 INFORMAZIONI SULLA SICUREZZA La funzionalità e la sicurezza del riduttore dipendono dalla scrupolosa osservanza delle prescrizioni contenute in questo manuale. In particolare occorre: • Rispettare le indicazioni relative al trasporto e all’immagazzinamento. • Operare il riduttore esclusivamente in modo conforme all’uso previsto. •... - Page 8 Il riduttore deve essere impiegato all’interno dei limiti di impiego previsti dal Costruttore ed installato in maniera conforme a quanto prescritto in questo manuale. La messa in servizio del riduttore è consentita esclusivamente dopo che la macchina su cui questo andrà...
- Page 9 AVVERTENZA Se movimentato o immagazzinato in maniera inadeguata, la caduta del riduttore può provocare lesioni gravi, anche mortali. • Non sostare mai al di sotto di carichi sospesi. • Prima di effettuare lavori sul riduttore, indossare adeguati indumenti protettivi (e.g. scarpe antinfortunistiche, guanti, occhiali protettivi).
-
Page 10: Informazioni Tecniche
3 INFORMAZIONI TECNICHE IDENTIFICAZIONE DEL RIDUTTORE AVVISO Un riduttore senza targhetta identificativa non può essere operato correttamente e risulta non coperto da garanzia. • Non rimuovere la targhetta identificativa dal riduttore. • Assicurarsi che la targhetta sia saldamente installata sul riduttore. •... -
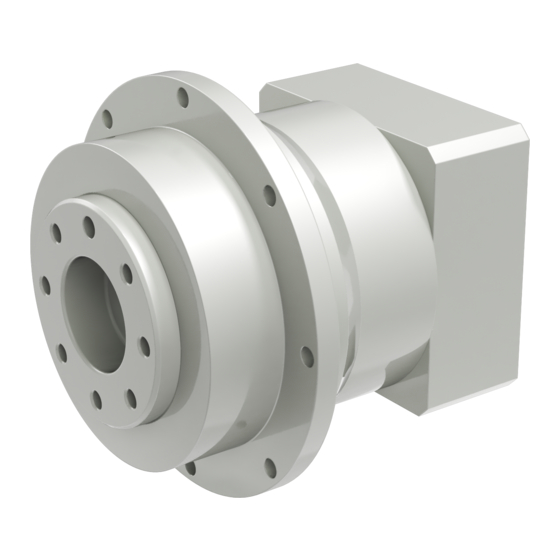
Page 11: Componentistica Principale
Dati riguardanti gli ingombri e le prestazioni massime consentite possono essere reperiti consultando: A – Il catalogo di vendita. B – Il sito www.bonfiglioli.com. BM R_IOM _PPG_ITA_DRAFT_3_nuovagraf ica.docx 9 / 26 IOM_TIR_STD_ita - istruzioni originali - Rev 1_1 - 05/05/2022... - Page 12 X_MP, X_LC). 3.4.1 LUBRIFICAZIONE Tutti i riduttori epicicloidali di precisione Bonfiglioli vengono forniti lubrificati a vita con olio sintetico specifico oppure con grasso ad alte prestazioni. Per informazioni specifiche sulla tipologia di lubrificante impiegato, consultare la targhetta identificativa (figura 1 campo B).
-
Page 13: Movimentazione E Stoccaggio
4 MOVIMENTAZIONE E STOCCAGGIO AVVERTENZA Se movimentato o immagazzinato in maniera inadeguata, la caduta del riduttore può provocare lesioni gravi, anche mortali. • Assicurarsi di aver letto e compreso le informazioni sulla sicurezza contenute al capitolo 2 di questo manuale. •... -
Page 14: Movimentazione
• Imballaggio costituito da materiale riciclabile. • Impilare solo in verticale. Vietato impilare a piramide o su più di tre livelli. MOVIMENTAZIONE AVVISO Variare l’assetto del carico rispetto a quanto indicato sull’imballo può comprometterne la stabilità e causare danni materiali. •... - Page 15 Se è previsto un periodo di stoccaggio superiore a sei mesi, ricoprire tutte le superfici lavorate con un prodotto antiossidante (e.g. Klüber Contrakor Fluid H 1 o similare). Seguendo le raccomandazioni sopra indicate, la durata consentita per lo stoccaggio è di due anni. Per condizioni di immagazzinamento diverse da quelle indicate si invita a contattare la rete di vendita del Costruttore.
-
Page 16: Installazione
5 INSTALLAZIONE AVVERTENZA L’installazione non corretta del riduttore può causare lesioni anche gravi ed ingenti danni materiali. • Assicurarsi di aver letto e compreso le informazioni sulla sicurezza contenute al capitolo 2 di questo manuale. • Assegnare le operazioni di installazione unicamente a personale autorizzato nella specifica mansione (cfr. - Page 17 Figura 5 – Tappo di chiusura e morsetto Rimuovere il tappo di chiusura dal foro periferico sulla flangia di accoppiamento e ruotare il morsetto calettatore fino ad allineare la vite di fissaggio (cfr. figura 5). Allentare la vite di bloccaggio del morsetto calettatore. Controllare se l’albero del motore è...
- Page 18 • Se il motore dovesse offrire eccessiva resistenza durante l’avvicinamento al riduttore, estrarre il motore dall’albero del riduttore, svitare ulteriormente la vite di bloccaggio e ripetere l’operazione. Figura 7 – Serraggio viti motore Applicare dell’adesivo frenafiletti medio (e.g. Loctite® 243) sul gambo delle viti (cfr. figura 7 – A) e serrare con sequenza a croce aumentando progressivamente la coppia fino al valore indicato in tabella 3.
- Page 19 Vite Coppia di serraggio per morsetti [N·m] Diametro Vite eccentrica (figura 6 – B) Vite centrale (figura 6 – C) Tabella 4 – Coppia di serraggio per morsetti 5.2.1 VERSIONE “IS” Per i riduttori con albero sporgente in ingresso, aventi designazione “IS”, non è previsto l’accoppiamento diretto con il motore.
-
Page 20: Accoppiamento Fra Riduttore E Macchina
Serrare le viti con sequenza a croce, aumentando progressivamente la coppia fino al valore indicato in tabella 3, a pagina 16. Procedere con l’accoppiamento del motore al riduttore secondo quanto indicato al punto 5.2. AVVISO il mancato assemblaggio dell’anello di compensazione, ove previsto, può pregiudicare il funzionamento sicuro del riduttore. - Page 21 Nel caso di organi di trasmissione dotati di mozzo asimmetrico, allo scopo di minimizzare le forze agenti sui supporti dell’albero di uscita è consigliabile adottare la disposizione illustrata in figura Figura 10 – Verso preferenziale per pulegge asimmetriche 5.4.1 VERSIONE CON GIUNTO CALETTATORE Figura 11 –...
- Page 22 NOTA Le superfici di attrito fra albero di uscita del riduttore e albero della macchina non devono essere lubrificate. Se queste superfici dovessero accidentalmente venire a contatto con del lubrificante, ripetere tutte le operazioni di pulizia e sgrassaggio. Installare il riduttore, accoppiando l’albero di uscita con quello della macchina e riposizionare il giunto calettatore.
- Page 23 Identificare la vite calibrata A, distinguendola dalle restanti viti di fissaggio B. Rimuovere le viti di fissaggio B e la vite calibrata A ed estrarre la puleggia C dall’albero di uscita del riduttore. Contrassegnare il foro corrispondente alla vite calibrata sia sulla puleggia C che sull’albero di uscita del riduttore, per facilitare il successivo riassemblaggio.
-
Page 24: Messa In Servizio
6 MESSA IN SERVIZIO AVVERTENZA L’esecuzione non corretta della messa in servizio del riduttore può causare lesioni anche gravi ed ingenti danni materiali. • Assicurarsi di aver letto e compreso le informazioni sulla sicurezza contenute al capitolo 2 di questo manuale. •... -
Page 25: Manutenzione
7 MANUTENZIONE AVVERTENZA Lavori di manutenzione non eseguiti in maniera corretta possono causare lesioni anche gravi ed ingenti danni materiali. • Assicurarsi di aver letto e compreso le informazioni sulla sicurezza contenute al capitolo 2 di questo manuale. • Assegnare le operazioni di manutenzione unicamente a personale autorizzato nella specifica mansione (cfr. -
Page 26: Operazioni Di Manutenzione
OPERAZIONI DI MANUTENZIONE 7.3.1 CONTROLLO DELLE GUARNIZIONI Esaminare le superfici esterne del riduttore ed accertarsi che siano prive di danneggiamenti. Verificare che non vi siano perdite di lubrificante dalle guarnizioni e che queste non presentino segni di usura eccessiva o screpolature. Assicurarsi che non vi siano accumuli di sporcizia in prossimità... -
Page 27: Guasti E Rimedi
8 GUASTI E RIMEDI Le informazioni seguenti hanno lo scopo di facilitare l’identificazione di eventuali anomalie o disfunzioni e di consigliare nella pianificazione delle corrispondenti azioni correttive. Qualora l’anomalia dipenda dalla macchina in cui il riduttore è incorporato, si invita a consultare la sezione corrispondente nel manuale di uso e manutenzione della macchina. -
Page 28: Smaltimento
9 SMALTIMENTO AVVISO Smaltire il riduttore o le sue parti in maniera inadeguata può comportare un elevato rischio ambientale. • Assicurarsi di aver letto e compreso le informazioni sulla sicurezza contenute al capitolo 2 di questo manuale. • Rispettare le direttive vigenti a livello nazionale. •... - Page 29 IOM_TIR_STD_ita - istruzioni originali - Rev 1_1 - 05/05/2022...
- Page 30 INDICE DELLE REVISIONI (R) TI_IOM_TIR_STD_ITA_ENG_R01_1 Ci riserviamo il diritto di apportare modifiche senza preavviso. È vietata la riproduzione anche parziale senza autorizzazione. Questa pubblicazione annulla e sostituisce ogni precedente edizione o revisione. IOM_TIR_STD_ita - istruzioni originali - Rev 1_1 - 05/05/2022...
- Page 31 8 TROUBLESHOOTING 9 DISPOSAL Revisioni The revision list for this manual is given on page 54. The most recent version of this manual is available from www.bonfiglioli.com. IOM_TIR_STD_gb - Translation of original instructions in Italian - Rev 1_1 - 05/05/2022...
-
Page 32: General Information
If lost or damaged, replacement documentation may be requested directly from the Manufacturer or downloaded directly from the website www.bonfiglioli.com. This manual reflects the state of the art when the gearbox is placed on the market. The manufacturer reserves the right to make changes, additions or improvements to the manual itself, without this constituting a reason to consider this publication invalid. - Page 33 1.2.1 SYMBOLS To report situations of potential danger, important safety information or technical characteristics relevant to the compliant use of the gearbox, this manual adopts the symbols described below: DANGER This warns of a direct hazard which may cause serious or even fatal injuries. WARNING This warns of a potential impending hazard, which if suitable action is not taken may also cause serious injuries and significant material damage.
-
Page 34: Request For Assistance
REQUEST FOR ASSISTANCE For any request for assistance, contact the Manufacturer's sales network directly, available at www.bonfiglioli.com. Before contacting the sales network, the following data must be gathered: • All the gearbox nameplate data. • Type and severity of the malfunction. -
Page 35: Safety Information
2 SAFETY INFORMATION The functionality and safety of the gearbox depend on strict compliance with the requirements contained in this manual. In particular: • Comply with the indications regarding transport and storage. • Operate the gearbox only in accordance with its intended use. •... - Page 36 The gearbox must be used within the limits of use provided by the Manufacturer and installed in accordance with the requirements of this manual. Commissioning of the gearbox is only allowed after the machine on which it will be installed has been declared compliant in accordance with the current directives.
- Page 37 • Before carrying out work on the gearbox, wear suitable protective clothing (e.g. safety shoes, gloves, goggles). • Make sure the workplace is clean and tidy. • If necessary, use lifting equipment suitable for the type of load to be handled. WARNING Adhesives, cleaners and lubricants can cause allergic skin reactions and severe eye irritation.
-
Page 38: Technical Informations
3 TECHNICAL INFORMATIONS GEARBOX IDENTIFICATION ATTENTION A gearbox without the nameplate cannot be operated correctly and is not covered by the warranty. • Do not remove the nameplate from the gearbox. • Ensure that the nameplate is firmly installed on the gearbox. •... -
Page 39: Main Components
Data regarding dimensions and maximum permitted performance can be found by consulting: A – The sales catalog. B – The website www.bonfiglioli.com. C – The customer drawing, in case of special configurations with designation prefix “X_” (e.g. X_TQ, X_MP, X_LC). - Page 40 3.4.1 LUBRICATION All Bonfiglioli precision planetary gearboxes come with lifelong lubrication by synthetic oil or by high-performance grease. For specific information on the type of lubricant used, refer to the nameplate (figure 1 field B). 3.4.2 PERMITTED TEMPERATURE LIMITS Description / Condition...
-
Page 41: Handling And Storage
4 HANDLING AND STORAGE WARNING If handled or stored improperly, the fall of a gearbox can cause serious, even fatal, injury. • Make sure that you have read and understood the safety information contained in chapter 2 of this manual. •... -
Page 42: Handling
• Packaging made of recyclable material. • Stack vertically only. Do not pyramid stack or stack on more than three layers HANDLING ATTENTION Modifying the load setup from what is prescribed on the packaging can compromise its stability and cause material damage. •... -
Page 43: Installation
5 INSTALLATION WARNING Incorrect installation of the gearbox may cause serious injuries and significant material damage. • Make sure that you have read and understood the safety information contained in chapter 2 of this manual. • Assign installation operations only to personnel authorized for the specific task (see section 2.2). In case of doubt concerning the assembly procedures listed below, please contact the Manufacturer's sales network. -
Page 44: Coupling Between Motor And Gearbox
COUPLING BETWEEN MOTOR AND GEARBOX Position the gearbox vertically, with the coupling flange facing upwards. Figure 5 – Sealing plug and shaft collar Remove the sealing plug from the radial hole on the motor flange and rotate the shaft collar until the locking screw is aligned (see figure 5). - Page 45 • If the motor offers excessive resistance while fitting the gearbox, remove the motor from the gearbox shaft, loosen the locking screw further and repeat the operation. Figure 7 - Tightening the motor screws Apply some medium strength threadlocker (e.g. Loctite® 243) on the screw thread (see figure 7 – A) and progressively tighten in a criss-cross sequence increasing the torque up to the value listed in table 3.
- Page 46 Screw Tightening torque for collars [N·m] Diameter Eccentric screw (figure– B) Central screw (figure- C) Table 4 – Collar screws tightening torque 5.2.1 VERSION "IS” Gearboxes configured with a solid input shaft, which go by the designation “IS”, do not support a direct coupling with the motor.
-
Page 47: Coupling Between Gearbox And Machine
Proceed with the coupling of the motor to the gearbox as explained in section 5.2. ATTENTION failure to assemble the compensation ring, where required, may prevent the gearbox from being safely operated. COUPLING BETWEEN GEARBOX AND MACHINE NOTE Whenever possible, it is desirable to couple the gearbox to the machine with the motor already pre-assembled. - Page 48 Figure 10 - Preferred mounting position for asymmetrical hubs 5.4.1 VERSION WITH SHRINK DISC Figure 11 – Output shaft with shrink disc joint Remove the protection cover A, the screws B and the spacers C. Loosen the locking screws D gradually and sequentially, without removing them completely. Then remove the entire shrink disc.
- Page 49 Install the gearbox by coupling its output shaft with the machine shaft and reposition the shrink disc. Gently tighten all the locking screws D of the shrink disc, then tighten in a circular sequence, progressively increasing the torque up to the value listed in table 5. Replace the protection cover A, the screws B and the spacers C.
-
Page 50: Commissioning
When reassembling, reposition the pulley C on the gearbox output shaft, aligning the previously marked pin bolt bores. Apply some medium strength threadlocker (e.g. Loctite® 243) on the screw threads A and B. Reposition the pin bolt A in its seat and the screws B in the remaining bores. Tighten in a criss-cross sequence, progressively increasing the torque up to the value listed in table 6. -
Page 51: Maintenance
7 MAINTENANCE WARNING Incorrect maintenance may cause serious injuries and significant material damage. • Make sure that you have read and understood the safety information contained in chapter 2 of this manual. • Assign maintenance operations only to personnel authorized for the specific task (see section 2.2). The Manufacturer declines any liability for damage to property or injury to persons resulting from the use of non-original spare parts or unapproved extraordinary maintenance interventions, which may compromise the functionality and safety of the gearbox. -
Page 52: Maintenance Operations
MAINTENANCE OPERATIONS 7.3.1 CHECKING THE SEALS Examine the outer surfaces of the gearbox and make sure they are not damaged. Check that the lubricant is not leaking from the seals and that the seals show no signs of excessive wear or surface cracks. Make sure that there is no dirt buildup near the moving parts of the gearbox. -
Page 53: Troubleshooting
8 TROUBLESHOOTING The following information is intended to help the identification of any anomalies or malfunctions and to help planning the subsequent corrective actions. If the failure depends on the machine in which the gearbox is incorporated, consult the appropriate section in the use and maintenance manual of the machine. In case any component is permanently damaged or worn-out enough to compromise the correct operation of the gearbox, contact the Manufacturer's sales network. -
Page 54: Disposal
9 DISPOSAL ATTENTION Improper disposal of the gearbox or its parts can cause a high environmental risk. • Make sure that you have read and understood the safety information contained in chapter 2 of this manual. • Comply with national laws in force. •... - Page 55 IOM_TIR_STD_gb - Translation of original instructions in Italian - Rev 1_1 - 05/05/2022...
- Page 56 INDEX OF REVISIONS (R) TI_IOM_TIR_STD_ITA_ENG_R01_1 We reserve the right to modify the information given herein without prior notification. This manual may not be reproduced, even partially, without express authorisation. This edition cancels and replaces all previous editions and revisions. IOM_TIR_STD_gb - Translation of original instructions in Italian - Rev 1_1 - 05/05/2022...
- Page 58 Abbiamo un infl essibile dedizione per l’eccellenza, l’innovazione e la sostenibilità. Il nostro Team crea, distribuisce e supporta soluzioni di trasmissione e controllo di potenza per mantenere il mondo in movimento. We have a relentless commitment to excellence, innovation & sustainability. Our team creates, distributes and services world-class power transmission &...
Need help?
Do you have a question about the TQ and is the answer not in the manual?
Questions and answers