Table of Contents
Advertisement
Quick Links
Advertisement
Chapters
Table of Contents

Related Manuals for Groupe Atlantic CONDENSINOX 40


Summary of Contents for Groupe Atlantic CONDENSINOX 40
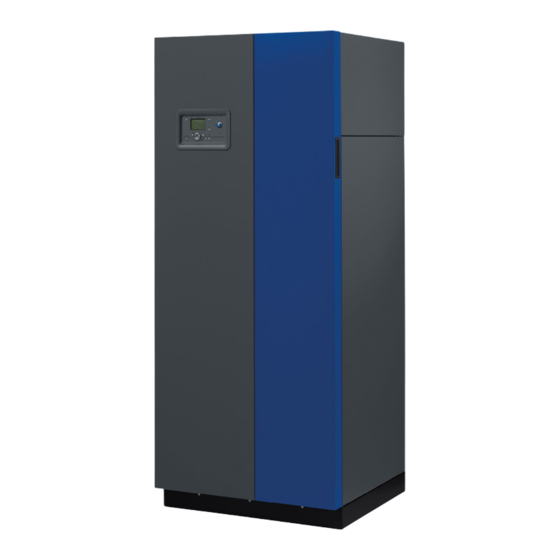
- Page 1 INSTALLATION, USE AND MAINTENANCE INSTRUCTIONS CONDENSINOX Gas condensing boiler 40, 50, 60, 80 or 100 kW with modulating burner for natural gas and propane gas U0627512 / 00CNO0192-E For professional. To be retained by the user for future reference 08.04.2021...
- Page 2 CONDENSINOX - Installation, Use and Maintenance 00CNO0192-E (U0627512) 2 / 116...
-
Page 3: Table Of Contents
CONDENSINOX - Installation, Use and Maintenance CONTENTS 1. WARNINGS AND RECOMMENDATIONS ................5 1.1. Transport and storage ........................... 5 1.2. Symbols used in this document ........................5 1.3. Staff qualification for installation, adjustment, use and maintenance ............5 1.4. Safety instructions ............................5 1.5. Water characteristics ............................. 6 2. CERTIFICATION .........................10 2.1. - Page 4 CONDENSINOX - Installation, Use and Maintenance 9. HYDRAULIC DIAGRAMS AND CONFIGURATIONS ............42 9.1. Selection diagrams ............................42 9.2. Symbols used in the diagrams ........................44 9.3. List of diagrams ............................44 9.4. Specific configurations when connecting to 0-10V outputs (Ux) ..............88 10. SPARE PARTS LIST ......................92 11. CUSTOMER PARAMETERS TABLE ................100 12.
-
Page 5: Warnings And Recommendations
CONDENSINOX - Installation, Use and Maintenance 1. WARNINGS AND RECOMMENDATIONS PLEASE READ THIS MANUAL CAREFULLY BEFORE INSTALLING, MAINTAINING OR USING THE BOILER. IT CONTAINS IMPORTANT INFORMATION ABOUT SAFETY. 1.1. Transport and storage The boiler: - must be stored vertically in a place where the temperature is between -20°C and +60°C and the relative humidity is between 5% and 95%. -
Page 6: Water Characteristics
CONDENSINOX - Installation, Use and Maintenance If you smell gas: • Do not use naked flames, do not smoke and do not activate electrical contacts or switches. DANGER: • Cut the gas supply. • Ventilate the room. • Trace the leak and repair it. If smoke is released: •... - Page 7 CONDENSINOX - Installation, Use and Maintenance 1.5.2. Protecting the unit against scaling Water naturally contains dissolved calcium ions and carbonates that cause scaling (calcium carbonate) to form. To prevent excessive deposits, take precautions with regard to the water used to fill the unit: hardness < 100 ppm Water must be added during the life of the boiler. The new water adds scaling to the water system. The amount of fill water plus the amount of make-up water added during the life of the unit should not be more than three times the water capacity of the heating system.
- Page 8 CONDENSINOX - Installation, Use and Maintenance 1.5.3. Protecting steel and stainless steel boilers against corrosion Corrosion can affect the iron components used in boilers and heating systems, which is directly related to the presence of oxygen in the water heater's water. Dissolved oxygen that enters the unit when it is being filled for the first time reacts with the equipment materials and quickly disappears. If the oxygen is not renewed through significant contributions of water, the unit might not experience any damage whatsoever.
- Page 9 CONDENSINOX - Installation, Use and Maintenance 1.5.5. Setting up a plate exchanger If the recommendations listed above cannot be met, you can set up a plate exchanger to separate the primary system from the secondary system, which protects the boiler from undesirable effects. 1.5.6. Setting up a filtration system A filtration system on the boiler return circuit is recommended in order to remove suspended particles from the unit (filter, dirt separator etc.).
-
Page 10: Certification
CONDENSINOX - Installation, Use and Maintenance 2. CERTIFICATION 2.1. Compliance with European Directives - Low voltage (2014/35/UE) This appliance is not intended for use by persons (including children) whose physical, sensory or mental abilities are reduced, or persons without experience or knowledge, unless they have been able to benefit, through someone responsible for their safety, from supervision or prior instruction concerning the use of the appliance. -
Page 11: Gas Supply Pressures
CONDENSINOX - Installation, Use and Maintenance Categories CZ-HU-SK-LT-NO-AT-LV-DK-EE-FI-GR- CH-ES-GB-EI-PT-IT-AT RO-SE-SI B23 - B23 P 2H3P CONDENSINOX C13 - C33 - C53 40-60 kW C43 - C83 CONDENSINOX B23 - B23 P 50 kW B23 - B23 P 2H3P CONDENSINOX C13 - C33 - C53 80-100 kW C43 - C83 2.4. -
Page 12: Technical Specifications
CONDENSINOX - Installation, Use and Maintenance 3. TECHNICAL SPECIFICATIONS 3.1. Dimensions Ø N (cylindrical male) Flow Ø K (conical male) Ø K Hot return Ø K Cold return Condensate Ø 25 discharge U0627216-C figure 1 - Dimensional characteristics Ø K Ø... -
Page 13: Combustion At 15°C And 1013 Mbar
CONDENSINOX - Installation, Use and Maintenance 3.2. Combustion at 15°C and 1013 mbar MODEL 40.0 49.9 60.0 80.0 97.0 Nominal power Pn (80/60°C) G25 set up for G20 ** 33.2 49.8 65.6 80.5 Nominal power when 43.8 54.1 65.5 87.5 105.5 condensing Pn (50/30°C) G25 set up for G20 **... -
Page 14: Conditions Of Use
CONDENSINOX - Installation, Use and Maintenance 3.3. Conditions of use MODEL Maximum starting temperature setpoint °C Max starting temperature °C Safe temperature °C 4000 Max service pressure hPa (bar) 1000 Minimum cold pressure hPa (bar) Hydraulic pressure loss at ∆T 20 daPa Nominal water flow rate (P/20) 2.15... -
Page 15: Installation
CONDENSINOX - Installation, Use and Maintenance 4. INSTALLATION 4.1. Boiler location CONDENSINOX boilers must not be installed on an inflammable surface (wooden floor, plastic floor covering etc.). Recommended clearance from walls and ceiling: Sufficient clearances must be provided to permit easy maintenance operations on the boilers. The minimum values (in mm) are indicated in figure 2 and the table below. -
Page 16: Removing / Refitting The Front Panel
CONDENSINOX - Installation, Use and Maintenance These values cannot be substituted for the specific regulatory requirements. The boiler must be positioned horizontally using a spirit level to ATTENTION: promote effective ventilation of the heat exchanger body (use the plinth as a reference surface). To adjust the level, screw or unscrew the 4 adjustable feet as required using a 13 mm wrench. -
Page 17: Exhaust Connection
ø For the CONDENSINOX 40-50-60, the use of the 125 Chimney Adaptor accessory (code 040940) is mandatory to connect a CONDENSINOX boiler to a B23 chimney duct. This kit is suitable for Ø 125 exterior ducts. - Page 18 CONDENSINOX - Installation, Use and Maintenance The dimension A indicates the upper position of the completely inserted chimney adapter Filter sheet figure 5 - Connection to a chimney 4.4.2. Connection to a B23P chimney B23P type connection: Air from the installation room, gas evacuation through the roof via a pressurised duct.
- Page 19 CONDENSINOX - Installation, Use and Maintenance CONDENSINOX Ø duct Code 040945 Ø 80 (contains part Code 041096 Code 041052 Ø 110 (contains part (contains part Code 040940 Code 041051 Ø 125 (contains part (contains part Code 041050 Ø...
- Page 20 CONDENSINOX - Installation, Use and Maintenance 4.4.2.2. Cascade installation case The combustion product extraction duct must be dimensioned by using the parameters set out in the table in chapter 3.2. Depending on the actual configuration of the duct, a calculation is ATTENTION: required to check that the pressures at the boiler outlet do not exceed the maximum allowable values in this table.
- Page 21 CONDENSINOX - Installation, Use and Maintenance figure 6 - C13 type connection The dimension A indicates the upper position of the boiler exhaust outlet figure 7 - C13 type connection The table below presents the accessories available for each boiler type, the duct diameters and the maximum straight lengths.
- Page 22 CONDENSINOX - Installation, Use and Maintenance The Lmax lengths indicated exclude the terminal and 90° bend for the C13 type and the terminal for the C33 type. In addition, in calculating the duct lengths, take the following equivalences into account: - 90° bend = 1 m of straight duct - 45° bend = 0.5 m of straight duct The terminal location must respect the rules in section 4.2.3.
- Page 23 L air duct (m) L air duct (m) L conduit air (m ) figure 9 - Max length of C53 type ducts figure 10 - Max length of C53 type ducts - CONDENSINOX 40-60 - CONDENSINOX 80-100 08.04.2021 23 / 116...
- Page 24 CONDENSINOX - Installation, Use and Maintenance When calculating the duct length, take the following rules into account: - 90° bend = 1 m of straight duct - 45° bend = 0.5 m of straight duct For the exhaust duct, respect a minimum slope of 3% towards the boiler in horizontal sections.
-
Page 25: Hydraulic Connection
CONDENSINOX - Installation, Use and Maintenance 4.5. Hydraulic connection The presence of a water pump built into the boiler with intelligent regulation allows optimum operation at up to Pinst/35 (Pinst = instantaneous power expressed in Th/h – 1 Th/h = 1.163 kW). Below this rate of Pinst/35, the boiler will continue to operate but with a gradual reduction in power (the boiler will stop below Pinst/51). - Page 26 CONDENSINOX - Installation, Use and Maintenance The boilers are equipped with the following elements: • a safety valve calibrated to 4 bar, • an automatic drain tap, • a drain valve. It is imperative to fit the boiler and its installation with the following components: • isolation valves on the flow and return tappings, • an expansion vessel, • an effective drain system, • a check valve (or a motorised isolating valve) if the boiler is installed in a cascade.
-
Page 27: Connecting The Gas Supply
CONDENSINOX - Installation, Use and Maintenance 4.5.3. Condensate removal Removal to the drains, via a drain hopper, using a PVC tube (minimum diameter 32 mm) is mandatory because the condensates are acidic and thus aggressive (pH between 3 and 5). Use a sufficient slope of the order of 3% to ensure correct flow of the condensates. - Page 28 CONDENSINOX - Installation, Use and Maintenance All work involving a change in the type of gas must be carried out by ATTENTION: a qualified professional. The valve must be adjusted on the boiler in operation at both maximum and minimum power. Use the 'Manual power program' operating mode (see section 3.3.4 of the manual for the NAVISTEM B3000 boiler controller), which allows you to change directly to the minimum or maximum setpoint (0% or 100%).
- Page 29 CONDENSINOX - Installation, Use and Maintenance To avoid any deterioration of the boiler, the CO values measured ATTENTION: must be in conformity with the below table: Models Gas valve Pre-setting/G20 Pmax CO Pmin 8.9 - 9.1 8.4 - 8.6 G25 set up for 6.9 - 7.1 6.4 - 6.6 G20 *...
- Page 30 CONDENSINOX - Installation, Use and Maintenance 4.7.2. Changing from G20 to G31 ATTENTION: ONLY for boilers connected with B23 and B23P. 4.7.2.1. Phase 1: Procedure for changing the ignition power Set the boiler to standby mode (see section 3.3.1 of the NAVISTEM B3000 boiler controller manual). If necessary, press the ESC button to return to the standard screen. Access the Settings menu (see section 3.6 of the NAVISTEM B3000 boiler controller manual), "OEM"...
-
Page 31: Electrical Connection
CONDENSINOX - Installation, Use and Maintenance 4.8. Electrical connection Before carrying out any work, ensure that the general electrical power DANGER: supply is switched off. It is essential that the phase-neutral polarity is respected for the DANGER: electrical connection. It is essential to connect this boiler correctly to earth and to comply with the national standards in force in the country for low-voltage electrical installations. - Page 32 CONDENSINOX - Installation, Use and Maintenance 4.8.2. Cable bushing Use the cable trays located on the top left of the rear jacket (see ) to introduce the connection cables: • The upper tray must be reserved for the power connections (boiler power supply, alarm feedback or circulating pump control).
- Page 33 CONDENSINOX - Installation, Use and Maintenance 4.8.3. Connection to the boiler controller terminal blocks To connect the boiler controller, refer to its installation and use manual. 4.8.4. Connecting the AVS75 extension module(s) (optional accessory) To install the AVS75 module(s) (up to 3), refer to the manual supplied with the accessory (reference 059751). 4.8.5. Connecting the OCI345 communication module (optional accessory) To install the OCI345 module, refer to the manual supplied with the accessory (reference 059752).
- Page 34 CONDENSINOX - Installation, Use and Maintenance 4.8.7. Electrical diagram N1A N1B 230 V NAVISTEM B3000 QAD 36 QAD 36 QAZ 36 QAC 34 AVS75 G+ CL- CL+ OCI345 QAA 75 x 3 OCI 345 AVS75 x3 U0570440-B / 00CET0072-B U0570440-A / 00CET0072-A figure 19 - Electrical diagram 00CNO0192-E (U0627512) 34 / 116...
- Page 35 CONDENSINOX - Installation, Use and Maintenance Refer to the paragraph 2.3 of the NAVISTEM B3000 manual should you require further information on the characteristics of borniers. Cascade flow sensor Room sensor Cascade return sensor Boiler flow sensor DHW sensor Boiler return sensor External sensor Flue-gas sensor Input prog. client: 0...10V Alarm relay Output prog. client: 0...10V Modulating pump Input prog.
-
Page 36: Commissioning
CONDENSINOX - Installation, Use and Maintenance 5. COMMISSIONING 5.1. Checks before commissioning For a cascade installation, check the hydraulic balancing of the boilers. Check the water pressure on the manometer. This must be a minimum of 1 bar when cold. Check that the gas pressure and type are suited to the products. -
Page 37: Checks After Commissioning
CONDENSINOX - Installation, Use and Maintenance 6. CHECKS AFTER COMMISSIONING 6.1. Condensate removal Check that the removal of condensates is not obstructed on either the boiler side or the pipe side. 6.2. Gas supply Check that the gas pipe diameter is correctly sized: It is necessary to stop all the boilers together abruptly using the boiler room main circuit breaker to check that the gas pressure regulator safety device is not triggered. -
Page 38: Maintenance Operations
CONDENSINOX - Installation, Use and Maintenance 7. MAINTENANCE OPERATIONS Maintenance operations must be done annually or every 3000 hours of operation by a qualified professional. The actions to take for each type of maintenance are given in the table below. In all cases, these operations must be performed by a qualified professional. -
Page 39: Checks On The Boiler Environment
CONDENSINOX - Installation, Use and Maintenance 7.2. Checks on the boiler environment Before any maintenance operation, a number of common checks should be carried out on the installation. • Water pressure: check that the water pressure is greater than 1 bar when cold. -
Page 40: Checking The Ignition And Ionisation Electrodes
CONDENSINOX - Installation, Use and Maintenance • Check the gas tightness of the gas circuit, • Switch the electrical power supply back on, • Switch on the CONDENSINOX, check that the combustion chamber door is sealed and check the combustion health: CO level compliant with the values in the table in section 4.5 and CO <... -
Page 41: End-Of-Life Cycle Of The Apparatus
CONDENSINOX - Installation, Use and Maintenance 8. END-OF-LIFE CYCLE OF THE APPARATUS Regulatory disposal and managed recycling of this product can prevent damage to the environment and health risks. a) For the disposal of the product and the component parts, the services of an accredited waste disposal company should be used. -
Page 42: Hydraulic Diagrams And Configurations
CONDENSINOX - Installation, Use and Maintenance 9. HYDRAULIC DIAGRAMS AND CONFIGURATIONS 9.1. Selection diagrams Secondary networks via communicating via 0…10 V signal existing communicating regulation CX3.1 No management of secondary networks Secondary networks via communicating via LPB bus existing communicating regulation CX3.1 1 direct heating network... - Page 43 CONDENSINOX - Installation, Use and Maintenance communicating Secondary networks via 0…10 V regulated via external signal communicating regulation CX11.1 Secondary network Cascade management by management external regulation by ATLANTIC Secondary networks communicating via regulated via external LPB bus communicating regulation CX11.1 1, 2 or 3 2 or 3 networks regulated...
-
Page 44: Symbols Used In The Diagrams
CONDENSINOX - Installation, Use and Maintenance 9.2. Symbols used in the diagrams Symbol Function Symbol Function Isolation valve open Balancing valve 2-way powered valve 3-way powered valve Filter Non-return valve Safety device Pump Dirt separator Bleed valve Outdoor sensor Temperature sensor 9.3. -
Page 45: Single Boiler
CONDENSINOX - Installation, Use and Maintenance Diagram Single boiler 1 regulated heating circuit page 1 / 4 A. HYDRAULIC DIAGRAM Bypass required in case of underfloor heating network figure 22 - Diagram CX1 B. REGULATION ACCESSORY NECESSARY Appliance Quantity Order no. reference External sensor kit QAC 34 059260 08.04.2021 45 / 116... - Page 46 CONDENSINOX - Installation, Use and Maintenance Diagram: CX1 page 2 / 4 C. CUSTOMER ELECTRICAL CONNECTION Direct circuit Alarm relay circulating pump Q2 N L3 L3 L1 230 VAC 50 Hz power supply External sensor B9 If an external management system (e.g.
- Page 47 CONDENSINOX - Installation, Use and Maintenance Diagram: CX1 page 3 / 4 • Set the heating program to permanent comfort E. ELECTRICAL AND HYDRAULIC VALIDATION • Menu Input/output test Check the outputs Relay test (7700) Relay QX1 output Alarm relay Relay test (7700) Relay QX2 output Heating circuit 1 Q2 pump...
- Page 48 CONDENSINOX - Installation, Use and Maintenance Diagram: CX1 page 4 / 4 Maintenance optimisation: It is possible to generate a maintenance message that does not cause a boiler fault. This maintenance message can occur after the 3 following counters reach set values: •...
-
Page 49: Single Boiler
CONDENSINOX - Installation, Use and Maintenance Single boiler Diagram Regulated networks and existing DHW production, external regulation communicating via LPB bus or 0-10V signal page 1 / 3 A. HYDRAULIC DIAGRAM EXTERNAL COMMUNICATING REGULATOR figure 23 - Diagram CX3 B. REGULATION ACCESSORY NECESSARY Appliance Quantity Order no. - Page 50 CONDENSINOX - Installation, Use and Maintenance Diagram: CX3 page 2 / 3 C. CUSTOMER ELECTRICAL CONNECTION Alarm relay N L3 L3 L1 230 VAC 50 Hz power supply 0 to 10V analogue input LPB Bus If an external management system (e.g.
- Page 51 CONDENSINOX - Installation, Use and Maintenance Diagram: CX3 page 3 / 3 Line No. Value H1 function value 2 (5956) 1000 (for equivalence 10 V = 100°C) Warning the boiler considers a heat demand for a voltage H1> 0.2 V and a resulting setpoint> 6 ° C * The boiler no longer considers a heat demand for a voltage H1 <0.2V or a resulting setpoint <4 °...
-
Page 52: Or More) Regulated Networks With Or Without Dhw Production
CONDENSINOX - Installation, Use and Maintenance Single boiler Diagram 3 (or more) regulated networks with or without DHW production page 1 / 6 A. HYDRAULIC DIAGRAMS MAIN AND VARIANT Y1/Y2 Y5/Y6 Y11/Y12 figure 24 - Diagram CX4 B. REGULATION ACCESSORIES NECESSARY Appliance Quantity Order no. - Page 53 CONDENSINOX - Installation, Use and Maintenance Diagram: CX4 page 2 / 6 C. CUSTOMER ELECTRICAL CONNECTION Alarm pump Q3 relay N L3 L3 L1 230 VAC 50 Hz power supply DHW sensor B3 External sensor B9 G+ CL- CL+ G+ CL- CL+ ...
- Page 54 CONDENSINOX - Installation, Use and Maintenance Diagram: CX4 page 3 / 6 Module 1 QX21 Heating circuit 1 mixing valve Y1/Y2 BX21 QX22 Regulated circuit flow sensor B1 AVS75 BX22 Heating circuit 1 circulating pump Q2 QX23 Module 2 QX21 Heating circuit 2 mixing valve Y5/Y6 BX21...
- Page 55 CONDENSINOX - Installation, Use and Maintenance Diagram: CX4 page 4 / 6 Line No. Value Heating circuit 3 (5721) Start heating circuit 3 Relay QX2 output (5891) DHW pump/valve Configure the DHW pump output Extension module 1 function (6020) Heating circuit 1 Configure the extension modules Extension module 2 function (6021) Heating circuit 2 Extension module 3 function (6022) Heating circuit 3...
- Page 56 CONDENSINOX - Installation, Use and Maintenance Diagram: CX4 page 5 / 6 F. OPTIMISING THE SETTINGS Heating circuit optimisation: Line No. Value • Menu Heating circuit 1/2/3 Low setpoint temperature (712/1012/1312) - - - Adjust the low setpoint • Menu HC1/HC2/HC3 timer program Preselection (500/520/540) - - - Preselection...
- Page 57 CONDENSINOX - Installation, Use and Maintenance Diagram: CX4 page 6 / 6 Line No. Value • Menu Domestic Hot Water Anti-legionella function (1640) - - - Configure an anti-legionella function Periodic legionella function (1641) - - - Weekday Legionella function (1642) - - - Anti-legionella temperature setpoint (1645) - - - Anti-legionella function duration (1646)
-
Page 58: Regulated Networks And Dhw Regulated By External Regulator Communicating Via Lpb Bus Or 0-10V Signal
CONDENSINOX - Installation, Use and Maintenance Boiler cascade Diagram CX10 Regulated networks and DHW regulated by external regulator communicating via LPB bus or 0-10V signal page 1 / 6 A. HYDRAULIC DIAGRAM EXTERNAL COMMUNICATING REGULATOR figure 25 - Diagram CX10 B. - Page 59 CONDENSINOX - Installation, Use and Maintenance Diagram: CX10 page 2 / 6 C. CUSTOMER ELECTRICAL CONNECTION Boiler no. 1: If the isolation valve is not equipped with an automatic reset, connect the INFORMATION: isolation valve Q1.1 close contact to L3. Isolation valve Q1.1 Alarm relay N L3 L3 L1 230 VAC 50 Hz Cascade flow power supply sensor B10...
- Page 60 CONDENSINOX - Installation, Use and Maintenance Diagram: CX10 page 3 / 6 Isolation Alarm relay valve Q1.2 N L3 L3 L1 230 VAC 50 Hz power supply LPB Bus MB DB D. SPECIFIC START-UP PROCEDURE " Fit and connect the accessories. "...
- Page 61 CONDENSINOX - Installation, Use and Maintenance Diagram: CX10 page 4 / 6 Line No. Value H1 function value (5954) H1 voltage value 2 (5955) 10.0 H1 function value 2 (5956) 1000 (for equivalence 10 V = 100°C) For a request via LPB Check that the secondary regulator is defined for an LPB segment other than 0 (reserved for generators) Warning the boiler considers a heat demand for a voltage H1>...
- Page 62 CONDENSINOX - Installation, Use and Maintenance Diagram: CX10 page 5 / 6 E. ELECTRICAL AND HYDRAULIC VALIDATION On boiler no. 1: master Line No. Value • Menu Cascade troubleshooting Confirm that all the boilers are present in the cascade General status 1 (8100) Released/not released General status 2 (8101) Released/not released .......
- Page 63 CONDENSINOX - Installation, Use and Maintenance Diagram: CX10 page 6 / 6 On boiler no. 2: slave Line No. Value • Menu Input/output test Check the outputs Relay test (7700) Relay QX1 output Alarm relay Relay test (7700) Relay QX3 output Isolation valve Q1.2 Relay test (7700) No test...
-
Page 64: Networks Regulated By 3-Way Valves, 1 Direct Circuit, With Dhw Production
CONDENSINOX - Installation, Use and Maintenance Boiler cascade Diagram CX11 3 networks regulated by 3-way valves, 1 direct circuit, with DHW production page 1 / 10 A. HYDRAULIC DIAGRAM figure 26 - Diagram CX11 B. REGULATION ACCESSORIES NECESSARY Appliance Quantity Order no. - Page 65 CONDENSINOX - Installation, Use and Maintenance Diagram: CX11 page 2 / 10 C. CUSTOMER ELECTRICAL CONNECTION Boiler no. 1: If the isolation valve is not equipped with an automatic reset, connect the INFORMATION: isolation valve Q1.1 close contact to L3. Isolation valve Alarm Q1.1 pump Q3 relay N L3 L3 L1 230 VAC 50 Hz Cascade flow power supply sensor B10...
- Page 66 CONDENSINOX - Installation, Use and Maintenance Diagram: CX11 page 3 / 10 Module 3 QX21 Heating circuit 3 mixing valve Y11/Y12 Regulated circuit flow BX21 QX22 AVS75 sensor B14 BX22 Heating circuit 3 circulating pump Q20 QX23 Boiler no. 2: If the isolation valve is not equipped with an automatic reset, connect the INFORMATION: isolation valve Q1.2 close contact to L3.
- Page 67 CONDENSINOX - Installation, Use and Maintenance Diagram: CX11 page 4 / 10 Boiler no. 3: If the isolation valve is not equipped with an automatic reset, connect the INFORMATION: isolation valve Q1.3 close contact to L3. Alarm Isolation relay valve Q1.3 N L3 L3 L1 230 VAC 50 Hz power supply LPB Bus MB DB Module 1 QX21...
- Page 68 CONDENSINOX - Installation, Use and Maintenance Diagram: CX11 page 5 / 10 D. SPECIFIC START-UP PROCEDURE " Fit and connect the accessories. ATTENTION: Configure the switches correctly for the AVS75 extension modules. " Start up the boiler alone. " Make the following adjustments. On boiler no.
- Page 69 CONDENSINOX - Installation, Use and Maintenance Diagram: CX11 page 6 / 10 Line No. Value • Menu Heating circuit 2 Comfort temperature setpoint (710) - - - Adjust the comfort setpoint Heating curve slope (720) - - - Set the curve slope • Menu Heating circuit 3 Comfort temperature setpoint (710) - - - Adjust the comfort setpoint...
- Page 70 CONDENSINOX - Installation, Use and Maintenance Diagram: CX11 page 7 / 10 On boiler no. 3: slave Line No. Value • Configure as slave in the cascade: Menu LPB network Appliance address (6600) Device number Segment address (6601) Segment number Bus supply function (6604) Automatic Configure the bus supply...
- Page 71 CONDENSINOX - Installation, Use and Maintenance Diagram: CX11 page 8 / 10 Line No. Value Check the sensor values B9 exterior T° (7730) in °C Outdoor sensor B9 DHW temperature B3/B38 (7750) in °C DHW sensor B3 Sensor BX2 T° (7821) in °C Cascade flow sensor B10 Sensor temperature BX21 module 1 (7830)
- Page 72 CONDENSINOX - Installation, Use and Maintenance Diagram: CX11 page 9 / 10 F. OPTIMISING THE SETTINGS On master and slave boilers Heating circuit optimisation: • Menu Heating circuit 1/2/3 Low setpoint temperature (712/1012/1312) - - - Adjust the low setpoint • Menu HC1/HC2/HC3 timer program Preselection Preselection (500/520/540) - - -...
- Page 73 CONDENSINOX - Installation, Use and Maintenance Diagram: CX11 page 10 / 10 • Menu DHW tank Temperature rise from initial setpoint (5020) 16 °C Adjust the rise • Menu Domestic Hot Water Anti-legionella function (1640) - - - Configure an anti-legionella function Periodic legionella function (1641) - - - Anti-legionella temperature setpoint (1642) - - -...
-
Page 74: Heating Circuits Managed By Non-Communicating Controller And Dhw Production With Plate Exchanger
CONDENSINOX - Installation, Use and Maintenance Boiler cascade Diagram CX12 Heating circuits managed by non-communicating controller and DHW production with plate exchanger page 1 / 6 A. HYDRAULIC DIAGRAM NON-COMMUNICATING EXTERNAL REGULATOR Q1.1 Q1.2 circulation figure 27 - Diagram CX12 B. - Page 75 CONDENSINOX - Installation, Use and Maintenance Diagram: CX12 page 2 / 6 C. CUSTOMER ELECTRICAL CONNECTION Boiler no. 1: If the isolation valve is not equipped with an automatic reset, connect the INFORMATION: isolation valve Q1.1 close contact to L3. Do not connect Isolation valve Alarm anything! Q1.1 relay fictional HC pump N L3 L3 L1 230 VAC 50 Hz...
- Page 76 CONDENSINOX - Installation, Use and Maintenance Diagram: CX12 page 3 / 6 Boiler no. 2: If the isolation valve is not equipped with an automatic reset, connect the INFORMATION: isolation valve Q1.2 close contact to L3. Do not connect Isolation valve Alarm anything! Q1.2 relay fictional HC pump N L3 L3 L1 230 VAC 50 Hz power supply LPB Bus...
- Page 77 CONDENSINOX - Installation, Use and Maintenance Diagram: CX12 page 4 / 6 Line No. Value • Menu Configuration Heating circuit 1 (5710) Start heating circuit 1 For heating circuit 1 to be effective, an actuator must be defined even if it is not connected: Configure pump Q2 Relay QX2 output (5891) Pump HC1 Q2 Relay QX3 output (5892) Boiler pump Q1 Configure the isolation valve Q1.1 Sensor input BX2 (5931)
- Page 78 CONDENSINOX - Installation, Use and Maintenance Diagram: CX12 page 5 / 6 On boiler(s) no. 2 (and above): slave Line No. Value • Menu Configuration For DHW to be effective, an actuator must be defined even if it is not connected: Relay QX2 output (5891) DHW pump/valve...
- Page 79 CONDENSINOX - Installation, Use and Maintenance Diagram: CX12 page 6 / 6 Line No. Value • Menu Input/output test Check the outputs Relay test (7700) Relay QX1 output Alarm relay Relay test (7700) Relay QX3 output Isolation valve Q1.1 Relay test (7700) No test Reset the outputs Check the sensor values...
-
Page 80: Boiler Equipped With Lmu + Rvs 63 And 1 Boiler Equipped With The Navistem B3000 Controller
CONDENSINOX - Installation, Use and Maintenance Boiler cascade Diagram CX13 1 boiler equipped with LMU + RVS 63 and 1 boiler equipped with the NAVISTEM B3000 controller page 1 / 8 A. HYDRAULIC DIAGRAM figure 28 - Diagram CX13 B. REGULATION ACCESSORIES NECESSARY Appliance Quantity Order no. - Page 81 CONDENSINOX - Installation, Use and Maintenance Diagram: CX13 page 2 / 8 C. CUSTOMER ELECTRICAL CONNECTION Boiler no. 1: Mains supply Isolation valve Y1.1 (terminals Y1-Y2-N) RVS 63 08.04.2021 81 / 116...
- Page 82 CONDENSINOX - Installation, Use and Maintenance Diagram: CX13 page 3 / 8 Boiler no. 2: If the isolation valve is not equipped with an automatic reset, connect the INFORMATION: isolation valve Q1.1 close contact to L3. Isolation valve Alarm Q1.1 relay N L3 L3 L1 230 VAC 50 Hz Cascade flow power supply sensor B10 LPB Bus ...
- Page 83 CONDENSINOX - Installation, Use and Maintenance Diagram: CX13 page 4 / 8 On the RVS 63 Line No. Value • Menu Time and date Hour / minute (1) HH.MM Set the time Day / month (2) DD.MM Set the date Set the year Year (3) YYYY...
- Page 84 CONDENSINOX - Installation, Use and Maintenance Diagram: CX13 page 5 / 8 On boiler no. 2: master Line No. Value • Menu LPB network Appliance address (6600) Configure the boiler as master of the cascade Segment address (6601) Bus supply function (6604) Automatic Clock operation (6640) Slave without...
- Page 85 CONDENSINOX - Installation, Use and Maintenance Diagram: CX13 page 6 / 8 Line No. Value Check the sensor values Outdoor sensor B9 Ext. temp. B9 (7730) in °C Flow temp. B1 (7732) in °C Circuit 1 network flow sensor (B1) Flow temp. B12 (7734) in °C Circuit 2 network flow sensor (B12) DHW temp.
- Page 86 CONDENSINOX - Installation, Use and Maintenance Diagram: CX13 page 7 / 8 F. OPTIMISING THE CONFIGURATION OF BOILER NO. 1 (SLAVE) Adjusting the heating circuits (connected to the RVS 63): Line No. Value • Menu Heating circuit 1 Comfort setpoint (710) - - - Adjust the comfort setpoint Low setpoint (712)
- Page 87 CONDENSINOX - Installation, Use and Maintenance Diagram: CX13 page 8 / 8 Line No. Value Anti-legionella setpoint (1645) - - - Adjust the anti-legionella cycle temperature setpoint Anti-legionella function duration - - - Adjust the duration of the anti-legionella cycle (1646) • Menu DHW tank Rise in initial setpoint (5020) - - - Adjust the primary rise/DHW G.
-
Page 88: Specific Configurations When Connecting To 0-10V Outputs (Ux)
CONDENSINOX - Installation, Use and Maintenance 9.4. Specific configurations when connecting to 0-10V outputs (Ux) 9.4.1. Transfer of the "burner power" image to PLC You cannot use this function if you are controlling a Q1 boiler pump with IMPORTANT: one of the NAVISTEM B3000 0-10V outlets. Load rate image burner boiler... - Page 89 CONDENSINOX - Installation, Use and Maintenance 9.4.2. Controlling a Q1 boiler pump D. SPECIFIC START-UP PROCEDURE Line No. Value • Configuration menu Function output Ux (6078/6089) Boiler pump Q1 Declare the boiler pump Q1 on the output chosen. Signal direction. Signal logil output UX (6079/6090) Standard Progress of the 0-10V signal in the signal...
- Page 90 CONDENSINOX - Installation, Use and Maintenance E. ELECTRICAL AND HYDRAULIC VALIDATION Line No. Value • Input/output test menu Check the outputs Output test Ux (7716/7724) in % (1% = 0,1 V) Pump with 0-10 V control 9.4.4. Controlling a DHW pump Q3 D. SPECIFIC START-UP PROCEDURE Line No.
- Page 91 CONDENSINOX - Installation, Use and Maintenance 08.04.2021 91 / 116...
-
Page 92: Spare Parts List
CONDENSINOX - Installation, Use and Maintenance 10. SPARE PARTS LIST 014 015 U0627332_2 figure 29 - Casing/insulation 00CNO0192-E (U0627512) 92 / 116... - Page 93 CONDENSINOX - Installation, Use and Maintenance REF. FOR MODELS ITEM DESCRIPTION 40 kW 50 kW 60 kW 80 kW 100kW Casing/insulation Top cover 78802 78803 Air filter 73417 Concentric adaptor 71918 72575 Rear jacket 71929 72583 Exhaust sensor with seal 71908 Side jacket 78804 78805 Exhaust duct with seal...
- Page 94 CONDENSINOX - Installation, Use and Maintenance U0505841-A U0505839-# / U0505841-# figure 30 - Control panel 00CNO0192-E (U0627512) 94 / 116...
- Page 95 CONDENSINOX - Installation, Use and Maintenance REF. FOR MODELS ITEM DESCRIPTION 40 kW 50 kW 60 kW 80 kW 100kW Control panel Platform with configured NAVISTEM B3000 78814 79346 78816 78818 78819 Platform without NAVISTEM B3000 and with 76127 wiring Round fuse holder 76130 Fuse (T 6.3 H - 5x20) 71898 Square fuse holder (with fuse)
- Page 96 CONDENSINOX - Installation, Use and Maintenance U0627337-# figure 31 - Body 00CNO0192-E (U0627512) 96 / 116...
- Page 97 CONDENSINOX - Installation, Use and Maintenance REF. FOR MODELS ITEM DESCRIPTION 40 kW 50 kW 60 kW 80 kW 100kW AVS75 supply wiring 76146 Ground wiring 78656 Prepared control panel bottom 78658 Body Turbulators (complete set) 72356 71920 72578 72579 Bleed valve 71924 Valve 72165...
- Page 98 CONDENSINOX - Installation, Use and Maintenance 00U07052750-A figure 32 - Burner 00CNO0192-E (U0627512) 98 / 116...
- Page 99 CONDENSINOX - Installation, Use and Maintenance REF. FOR MODELS ITEM DESCRIPTION 40 kW 50 kW 60 kW 80 kW 100kW Pressure sensor with stay 73946 Flow/return sensor 71899 Complete body 78649 78650 78651 78652 Burner Burner + door 72375 76377 76378 Air hose 71913...
-
Page 100: Customer Parameters Table
CONDENSINOX - Installation, Use and Maintenance 11. CUSTOMER PARAMETERS TABLE Boiler: ..........site: ........serial no.: ..................Please transfer all parameter modifications into this document! Note: The "access" column indicates the degree of accessibility for information or programming (E for the end user, C for commissioning and S for specialist). - Page 101 CONDENSINOX - Installation, Use and Maintenance Line Programming Access Default value Customer setting Time prog heating circuit 3 Preselection Mo-Su First period start time 06:00 First period stop time 22:00 Second period start time 24:00 Second period stop time 24:00 Second period start time 24:00 Second period stop time...
- Page 102 CONDENSINOX - Installation, Use and Maintenance Line Programming Access Default value Customer setting Heating curve displacement 0 °C Heating curve adaptation Summer/winter heating limit --- °C 24-hour heating limit --- °C Flow temp setpoint min 8 °C Flow temp setpoint max 80 °C Flow temp setpoint room stat 65 °C...
- Page 103 CONDENSINOX - Installation, Use and Maintenance Line Programming Access Default value Customer setting 1032 24-hour heating limit --- °C 1040 Flow temp setpoint min 8 °C 1041 Flow temp setpoint max 80 °C 1042 Flow temp setpoint room stat 65 °C 1046 Delay heat request 1050...
- Page 104 CONDENSINOX - Installation, Use and Maintenance Line Programming Access Default value Customer setting 1342 Flow temp setpoint room stat 65 °C 1346 Delay heat request 1350 Room influence --- % 1360 Room temp limitation 1 °C 1361 Heating limit room controller --- °C 1370 Boost heating...
- Page 105 CONDENSINOX - Installation, Use and Maintenance Line Programming Access Default value Customer setting 1663 Circulation setpoint 45 °C 1680 Optg mode changeover Consumer circuit 1 1859 Flow temp setp cons request 60 °C 1875 Excess heat draw 1878 With buffer 1880 With prim contr/system pump Consumer circuit 2...
- Page 106 CONDENSINOX - Installation, Use and Maintenance Line Programming Access Default value Customer setting 2442 Fan speed full charging max 40 kW : 6700 50 kW : 6910 60 kW : 7800 80 kW : 6400 100 kW : 7550 2444 Fan speed DHW max 40 kW : 6700...
- Page 107 CONDENSINOX - Installation, Use and Maintenance Line Programming Access Default value Customer setting 5085 Excess heat draw 5090 With buffer 5092 With prim contr/system pump 5093 With solar integration 5101 Pump speed min 100 % 5102 Pump speed max 100 % 5108 Starting speed charg pump 100 %...
- Page 108 CONDENSINOX - Installation, Use and Maintenance Line Programming Access Default value Customer setting 5956 Function value 2 H1 (F2) 1000 5977 Function input H5 None 5978 Contact type H5 6020 Function extension module 1 None 6021 Function extension module 2 None 6022 Function extension module 3...
- Page 109 CONDENSINOX - Installation, Use and Maintenance Line Programming Access Default value Customer setting 6110 Time constant building 15 h 6116 Const tmps compens consig. 1 min 6117 Compens centr T° consigne 3 °C 6120 Frost protection plant 6127 Pump/valve kick duration 30 s 6200 Save sensors...
- Page 110 CONDENSINOX - Installation, Use and Maintenance Line Programming Access Default value Customer setting 6890 History 10 00:00 6895 SW diagnostic code 10 6900 History 11 00:00 6905 SW diagnostic code 11 6910 History 12 00:00 6915 SW diagnostic code 12 6920 History 13 00:00...
- Page 111 CONDENSINOX - Installation, Use and Maintenance Line Programming Access Default value Customer setting 7823 Sensor temp BX4 0 °C 7830 Sensor temp BX21 module 1 0 °C 7831 Sensor temp BX22 module 1 0 °C 7832 Sensor temp BX21 module 2 0 °C 7833 Sensor temp BX22 module 2...
- Page 112 CONDENSINOX - Installation, Use and Maintenance Line Programming Access Default value Customer setting 8124 / 25 Priority / State source 13 0 / Missing 8126 / 27 Priority / State source 14 0 / Missing 8128 / 29 Priority / State source 15 0 / Missing 8130 / 31 Priority / State source 16 0 / Missing...
- Page 113 CONDENSINOX - Installation, Use and Maintenance Line Programming Access Default value Customer setting 8530 Hours run solar yield 00:00:00 h 8531 Hours run collect overtemp 00:00:00 h 8532 Hours run collector pump 00:00:00 h 8560 Solid fuel boiler temp 0 °C 8570 Hours run solid fuel boiler 00:00:00 h...
- Page 114 CONDENSINOX - Installation, Use and Maintenance Line Programming Access Default value Customer setting 8962 Common output setpoint 8980 Buffer temp 1 0 °C 8981 Buffer setpoint 0 °C 8982 Buffer temp 2 0 °C 8983 Buffer temp 3 0 °C 9005 Water pressure H1 0 bar...
-
Page 115: Annex A
CONDENSINOX - Installation, Use and Maintenance 12. ANNEX A Data on products ≤ 70 kW Product reference Trade mark YGNIS Models Code 041620 041812 041621 Nominal power Prated Seasonal energy efficiency class Class Seasonal energy efficiency η (PCS) Useful heat production 40,3 51,3 60,5... - Page 116 Tél. : 02/357 28 28 Tel.: 0332 895240 r.a. Fax : 02/351 49 72 Fax : 0332 893063 www.ygnis.it www.ygnis.be YGNIS AG GROUPE ATLANTIC ESPAÑA, S.C.T., S.A. Wolhuserstrasse 31/33 Calle Antonio Machado 65, 6017 RUSWIL CH Edificio Sócrates 08840 Viladecans (Barcelona) Tel.: +41 (0) 41 496 91 20 Tel.: +34 988 144 522...
Need help?
Do you have a question about the CONDENSINOX 40 and is the answer not in the manual?
Questions and answers