Table of Contents

Related Manuals for May Way E-4


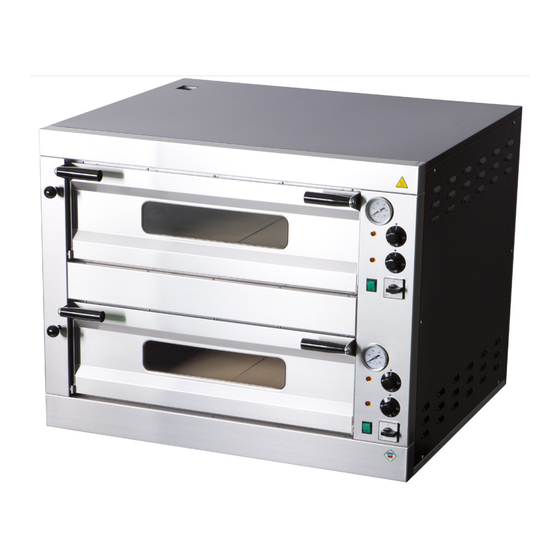
Summary of Contents for May Way E-4
- Page 1 INSTRUCTIONS FOR INSTALLATION AND USE DIE GEBRAUCHS-, UND INSTALLATIONSANWEISUNG NOTICE D’INSTALLATION ET D’EMPLOI PIZZA OVENS E - 4 / 6 / 6 L / 8 / 9 / 12 / 12 L / 18 / 4/50 / 8/50 Date: 2016...
-
Page 3: Technical Data
2x 105 x 70 x 15 v E - 18 400 V, 3N, 50 HZ 131 x 127 x 75 v 2x 105 x 105 x 15 v E-4/50 400 V, 3N, 50 HZ 83 x 66 x 41 v 55 x 55 x 15 E-8/50... - Page 4 PLACEMENT The device must be instalated in well ventilated room what is necessary for regulation of the function of the device (technician must go by valid standard (EN..). If the device is situated close to the wall or if it is in contact with the furniture walls, these walls must resist the temperatures ranging to 90°C.
- Page 5 CONNECTION OF THE ELECTRIC CABLE TO THE ELECTRICITY Instalation of electric feeder - This feeder must be separetely protected by a safety fuse according to the specifi c electric stream which depends on the wattage of the instaled device. Check the wattage on the label at the back of the device.
- Page 6 INSTRUCTION FOR USE Warning! Before you begin using this oven you must remove the protective fi lm from its whole surface, wash it well with water containing washing up liquid and then wipe it with a damp rag. Before starting baking switch the oven on for approx.
-
Page 7: Cleaning And Maintenance
Connecting the supply cable, equipotential symbol (pic. 2) Oven chamber (pic. 3) - The terminal panel is located on the rear of the oven. FIRE-CLAY SLABS INTERIOR CHAMBER LIGHTING HEATING ELEMENT SUPPORT HEATING ELEMENTS CLEANING AND MAINTENANCE It is recommended to have the device checked by the professional service min. once a year. All interventions must be done by qualifi... -
Page 8: Die Technischen Daten
2x 107 x 72 x 15 v E - 18 400 V, 3N, 50 HZ 131 x 127 x 75 v 2x 107 x 107 x 15 v E-4/50 400 V, 3N, 50 HZ 83 x 66 x 41 v 55 x 55 x 15 E-8/50... - Page 9 DIE PLATZIERUNG Es ist unbedingt notwendig, zu der Regulation der Gerätetätigkeit, daß das Milieu - der Küche -, wo das Gerät installiert wird, sehr gut belüftbar ist (im Hinblick darauf: sei der Techniker sich mit geltenden Normen (EN) richtet). Wenn die Einrichtung so plaziert wird, daß sie im Mobiliarwandkontakt stehen wird, so müssen diese einer Temperatur von 90°C wiederstehen.
- Page 10 DIE SICHERHEITSVORRICHTUNGEN AUS DER SICHT DES FEUERSCHUTZES LAUT EN. 061008 ČL. 21 Die Einrichtungsbedienung dürfen nur Erwachsene ausführen • Das Gerät darf sicher in gewöhnlicher Umgebung laut EN 332000-4-482; EN 332000-4-42 verwendet werden. • Es ist notwendig das Gerät so platzieren, daß es auf einer unbrennbaren Grundlage steht oder hängt. •...
- Page 11 GEBRAUCHSANWEISUNG Vorsicht! Vor dem Gebrauch des Gerätes ist von der gesamten Oberfl äche die Schutzfolie abzunehmen, weiter ist die gesamte Oberfl äche mit einem Geschirrreinigungsmittel zu waschen und mit weichem Putztuch abzuwischen. Vor dem Backen lassen Sie den Ofen auf 300 °C ca. 4 stunden lang laufen, um die Reste der Konservierungsmittel auszubrennen.
- Page 12 BETRIEBSEMPFEHLUNG • Im Verlauf des Backens ist der Zustand der Pizzen zu kontrollieren; ggf. sind sie teilweise umzudrehen, damit sie regelmäßig durchgebraten werden. • Anfangs ist die Kammer mit den auf Maximum eingestellten Thermostaten einzuschalten. Nach dem Erhitzen sind die Thermostaten auf die Betriebstemperatur einzustellen. •...
-
Page 13: Déclaration De Conformité
2x 107 x 72 x 15 v E - 18 400 V, 3N, 50 HZ 131 x 127 x 75 v 2x 107 x 107 x 15 v E-4/50 400 V, 3N, 50 HZ 83 x 66 x 41 v 55 x 55 x 15 E-8/50... - Page 14 LA LOCATION Le local dans lequel l‘appareil est installé doit être bien ventilé. Si l’appareil doit toucher le parois , celui-ci doit résister à la chaleur de 90°C au minimum. L’installation, le réglage et la mise en marche doivent être eff...
-
Page 15: Branchement Électrique
MÉSURES DE SÉCURITÉ POUR LA PROTECTION CONTRE INCENDIE SELON EN 06 1008 ARTICLE 21: - l’apparel ne peut être utilisé que par des personnes majeures - l’appareil peut être utilisé dans un espace ordinaire selon EN 332000-4-482; 332000-4-42 - l’appareil doit être placé ou suspendu d’une manière stable sur une surface ininfl ammable Il est interdit de placer sur l’appareil ou dans la distance inférieure à... - Page 16 MODE D’EMPLOI Attention! Avant d’utiliser l’appareil, retirez les fi lms de protection de toute la surface, lavez minutieusement avec de l’eau mélangée à un détergent, puis essuyez à l’aide d’un torchon humide. Avant de commencer la cuisson, laissez fonctionner le four pendant environ 4 heures afi n de brûler les résidus des produits de conservation. Avant la première utilisation, il est indispensable de régler la température à...
-
Page 17: Nettoyage Et Entretien
RECOMMANDATIONS • Pendant la cuisson, contrôlez l’état des pizzas et éventuellement déplacez-les afi n d’obtenir une cuisson générale. • Au début, allumez la chambre avec les thermostats réglés au maximum. Après le réchauff ement, réglez les thermostats à la température de régime. •... - Page 20 EL. CONNECTION DIAGRAM / SCHALTPLAN / SCHÉMA DU ELECTRIQUE E - 4 ENGLISH DEUTSCH FRANÇAIS TERMINAL BOARD KLEMMSBRETT TABLETTE A BORNES SAFETY THERMOSTAT SICHERHEITSTHERMOSTAT THERMOSTAT DE SECURITÉS BACKLIT SWITCH LEUCHTSCHALTER INTERUPTEUR PRINCIPAL THERMOSTAT TERMOSTAT THERMOSTAT ORANGE CONTROL LIGHT ORANGEKONTROLLEUCHT VOYANTE ORANGE GREEN CONTROL LIGHT GRÜNES KONTROLLEUCHT VOYANTE VERT...
- Page 21 EL. CONNECTION DIAGRAM / SCHALTPLAN / SCHÉMA DU ELECTRIQUE E - 6/9...
- Page 22 EL. CONNECTION DIAGRAM / SCHALTPLAN / SCHÉMA DU ELECTRIQUE E - 6L...
- Page 23 EL. CONNECTION DIAGRAM / SCHALTPLAN / SCHÉMA DU ELECTRIQUE E - 8...
- Page 24 EL. CONNECTION DIAGRAM / SCHALTPLAN / SCHÉMA DU ELECTRIQUE E - 12/18...
- Page 25 EL. CONNECTION DIAGRAM / SCHALTPLAN / SCHÉMA DU ELECTRIQUE E - 12L...
- Page 26 EL. CONNECTION DIAGRAM / SCHALTPLAN / SCHÉMA DU ELECTRIQUE E - 4 digital...
- Page 27 EL. CONNECTION DIAGRAM / SCHALTPLAN / SCHÉMA DU ELECTRIQUE E - 8 digital...
- Page 28 EL. CONNECTION DIAGRAM / SCHALTPLAN / SCHÉMA DU ELECTRIQUE E - 8 (3F-THERMOSTAT)
- Page 29 EL. CONNECTION DIAGRAM / SCHALTPLAN / SCHÉMA DU ELECTRIQUE E - 4/50...
- Page 30 EL. CONNECTION DIAGRAM / SCHALTPLAN / SCHÉMA DU ELECTRIQUE E - 8/50...
Need help?
Do you have a question about the E-4 and is the answer not in the manual?
Questions and answers