Table of Contents
Advertisement
Quick Links
Advertisement
Table of Contents

Related Manuals for Makita RS001GM


Summary of Contents for Makita RS001GM
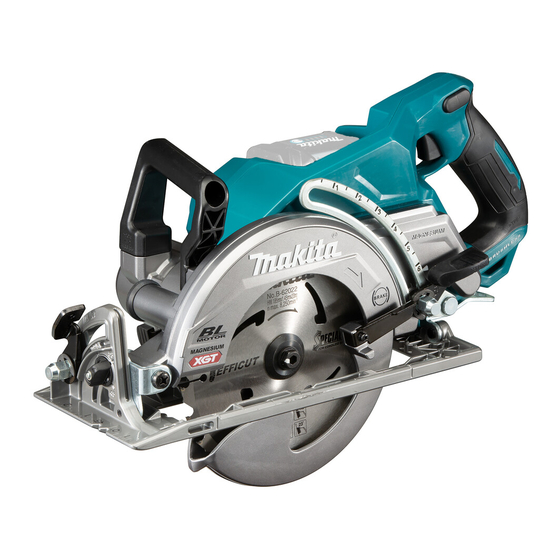
- Page 1 INSTRUCTION MANUAL Cordless Rear Handle Saw RS001G Read before use.
-
Page 2: Specifications
SPECIFICATIONS Model: RS001G Blade diameter 185 mm Max. Cutting depth at 0° 65 mm at 45° bevel 45 mm at 53° bevel 38 mm No load speed 6,400 min Overall length 446 mm Rated voltage D.C. 36 V - 40 V max Net weight 5.0 - 5.6 kg •... -
Page 3: Ec Declaration Of Conformity
Electrical safety Vibration Power tool plugs must match the outlet. Never modify the plug in any way. Do not use any The vibration total value (tri-axial vector sum) deter- adapter plugs with earthed (grounded) power mined according to EN62841-2-5: tools. Unmodified plugs and matching outlets will Work mode: cutting wood reduce risk of electric shock. Vibration emission (a ) : 2.5 m/s or less... - Page 4 Do not let familiarity gained from frequent use Keep handles and grasping surfaces dry, clean of tools allow you to become complacent and and free from oil and grease. Slippery handles ignore tool safety principles. A careless action can and grasping surfaces do not allow for safe handling cause severe injury within a fraction of a second.
- Page 5 Adjust the cutting depth to the thickness of When blade is binding, or when interrupting a the workpiece. Less than a full tooth of the blade cut for any reason, release the trigger and hold the saw motionless in the material until the teeth should be visible below the workpiece.
- Page 6 Place the wider portion of the saw base on that part of the workpiece which is solidly supported, not on the section that will fall off when the cut is made. If the workpiece is short or small, clamp it down. DO NOT TRY TO HOLD SHORT PIECES BY HAND! Never force the saw.
- Page 7 CAUTION: Only use genuine Makita batteries. tion right away. It may result in loss of your Use of non-genuine Makita batteries, or batteries that eyesight. have been altered, may result in the battery bursting Do not short the battery cartridge: causing fires, personal injury and damage. It will...
-
Page 8: Functional Description
Overload protection FUNCTIONAL DESCRIPTION When the tool/battery is operated in a manner that causes it to draw an abnormally high current, the tool automatically stops. In CAUTION: Always be sure that the tool is this situation, turn the tool off and stop the application that caused switched off and the battery cartridge is removed the tool to become overloaded. Then turn the tool on to restart. before adjusting or checking function on the tool. Overheat protection Installing or removing battery When the tool/battery is overheated, the tool stops... -
Page 9: Adjusting Depth Of Cut
Positive stopper Automatic speed change function The positive stopper is useful for setting the designated This tool has "high speed mode" and "high torque angle quickly. Turn the positive stopper so that the mode". arrow on it points your desired bevel angle (around The tool automatically changes the operation mode 22.5°/45°/53°). Loosen the lever and then tilt the tool depending on the work load. When the work load is low, base until it stops. -
Page 10: Switch Action
Electric brake This tool is equipped with an electric blade brake. If the tool con- sistently fails to quickly stop the circular saw blade after switch lever release, have tool serviced at a Makita service center. CAUTION: The blade brake system is not a substitute for blade guard. NEVER USE TOOL WITHOUT A FUNCTIONING BLADE GUARD. - Page 11 For tool with the inner flange for other For tool without the ring than 15.88 mm hole-diameter saw blade The inner flange has a certain diameter protrusion on one side of it and a different diameter protrusion on the other side. Choose a correct side on which protrusion fits into the circular saw blade hole perfectly. Mount the inner flange onto the mounting shaft so that the correct side of protrusion on the inner flange faces outward and then place the circular saw blade and outer flange. ► 1 . Hex bolt 2. Outer flange 3. Circular saw blade 4.
-
Page 12: Operation
► 1 . Upper guard 2. Lower guard 3. Base 4. Stopper 5. Open 6. Close If the lower guard is not functioning properly, check if saw dust is accumulated inside of the upper and lower guards. If the lower guard is not functioning properly even after removing dust, have your tool serviced at a Makita service center. ► 1 . Rubber cap 12 ENGLISH... - Page 13 The hook is convenient for hanging the tool temporarily. CAUTION: Wear dust mask when performing To use the hook, simply lift up hook until it snaps into cutting operation. the open position. When not in use, always lower hook until it snaps into CAUTION: Be sure to move the tool forward the closed position. in a straight line gently. Forcing or twisting the tool will result in overheating the motor and dangerous kickback, possibly causing severe injury.
-
Page 14: Maintenance
16. In the event the tool is dropped, it must be tagged and removed from service, and should be inspected by a Makita Factory or Authorized Service Center. ► 1 . Triangular rule 2. Adjusting screw Tighten the lever and then make a test cut to check the verticalness. -
Page 15: Optional Accessories
OPTIONAL ACCESSORIES CAUTION: These accessories or attachments are recommended for use with your Makita tool specified in this manual. The use of any other accessories or attachments might present a risk of injury to persons. Only use accessory or attachment for its stated purpose. If you need any assistance for more details regard- ing these accessories, ask your local Makita Service Center. • Circular saw blade •... - Page 16 Makita Europe N.V. Jan-Baptist Vinkstraat 2, 3070 Kortenberg, Belgium Makita Corporation 3-11-8, Sumiyoshi-cho, Anjo, Aichi 446-8502 Japan 885863-229 www.makita.com 20201014...
Need help?
Do you have a question about the RS001GM and is the answer not in the manual?
Questions and answers