Table of Contents
Advertisement
Quick Links
Advertisement
Table of Contents

Related Manuals for Varta pulse neo


Summary of Contents for Varta pulse neo
- Page 1 PERATING MANUAL VARTA pulse neo VARTA S TORAGE...
- Page 2 Tel.: +49 9081 240 866 060 info@varta-storage.com If you need help troubleshooting or installing your machine, we will be happy to assist you. To do so, please contact your local technical support. You can find the contact details at www.varta-ag.com. DE - Technical service: technical.service@varta-storage.com Tel.: +49 9081 24086 6044...
-
Page 3: Table Of Contents
Function, scope of delivery and technical parameters ................14 Derating ....................................14 Scope of delivery ................................15 Optional components ..............................15 Front view VARTA pulse neo ............................ 15 System overview ................................16 Identification ..................................16 Type plate and ID label ............................... 16 Cryptocode label ................................ - Page 4 Preparation of the electrical connection ......................30 Connections at distribution ............................31 Preparation of AC connection house network ....................31 VARTA Split Core current sensor .......................... 32 PV current sensor (optional) ........................... 33 Remote switch-off (Country-specific) ....................... 33 Assembly preparation ..............................34 Suspending and connecting the energy store ....................
- Page 5 Variant 1 ....................................44 Variant 2 ..................................... 44 Login on the web interface ............................45 Login as installer ................................45 Login as end customer ............................... 45 Change password ................................45 Reset password ................................45 Performing the software configuration ......................46 Homepage of the installation assistant ......................
- Page 6 Communication faults ..............................58 Dismount and disposal .............................. 59 Planning dismount ............................... 59 Carry out dismount ..............................59 Disposal ..................................... 59 Move ..................................... 60 Planning a move ................................60 Carrying out a move ..............................60 Reuse of the battery module ........................... 61 Commissioning after move ............................
-
Page 7: Foreword
End customers, „ Electrical specialist responsible for installation, commissioning and maintenance. Scope of application This manual is part of the system. It applies to the product VARTA pulse neo in the expansion stages: „ VARTA pulse neo 3, „ VARTA pulse neo 6. -
Page 8: General
General Information about this manual Symbols The following types of safety directions and tips are used in this operating manual: Indicates tips regarding use of the device. Safety instructions In this manual, the safety directions are structured as follows: Signal word Type and source of danger! Possible consequence(s) in the event of non-compliance. -
Page 9: Warning Sign
Warning sign The following warning signs are used in the operating manual and on the device. General warning sign Warning of hand injuries Warning of electric shock Warning of cut injuries Warning of dangers due to Warning of oxidising substances batteries warning of non-compliance with the discharge time. -
Page 10: Residual Dangers
Intended use VARTA pulse neo with its components is built according to the state of the art and the product- specific standards and is to be used for the storage of electricity from photovoltaic systems. Other uses must be coordinated with the manufacturer and the local energy supplier. -
Page 11: Electrical Specialist Requirements
Electrical specialist requirements Activities on the VARTA pulse neo system (e.g. installation and maintenance work) may be performed by qualified electrical specialists certified by VARTA Storage only! Here, specialists refers to persons who, among other things, possess the knowledge of relevant terms and skills. -
Page 12: Danger Due To Water
Danger due to water WARNING Entry of water into electrical installations. Possible danger to life and material damage. Do not use water to clean the energy store. Do not deposit containers with liquids (such as drinks cups) on electri- cal installations. The relative humidity in the room must not exceed 80%. -
Page 13: Misconduct
VARTA Storage. The VARTA pulse neo energy storage system has several pieces of safety equipment. These include grid and system protection e.g. according to VDE-AR-N 4105, closed electrical operating area, over- temperature switch-off and a mechanical switch-off mechanism. -
Page 14: Function, Scope Of Delivery And Technical Parameters
Function, scope of delivery and technical parameters The energy storage system VARTA pulse neo is intended for operation on the 230 V house network and offers the option of connecting a separate grid-connected photovoltaic system. The latter must be a generation system that feeds in not at full infeed, but after excess. -
Page 15: Scope Of Delivery
Scope of delivery The VARTA energy storage system includes: 1 x battery module, 1 x battery converter, 1 x support plate, 1 x hood, 1 x pre-assembled cable set, 1 x operating manual. Accessories kit 1 x current sensor (50 A),... -
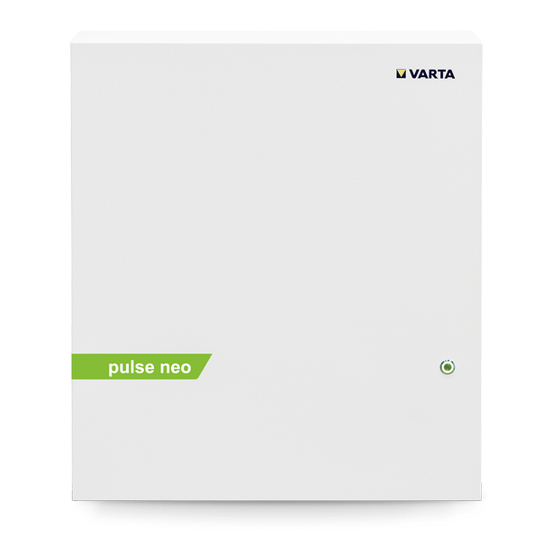
Page 16: System Overview
System overview Identification Type plate and ID label Cryptocode label ID label of the battery module... -
Page 17: Unlock Code Label
Unlock code label Technical parameters VARTA pulse neo expansion stage Nominal capacity 3.3 kWh 6.5 kWh AC charging power 1.8 kW 2.5 kW AC discharging power 1.6 kW 2.3 kW Batter converter layout without isolating transformer Dimensions in mm (W x H x D) 600 x 690 x 190 Weight (incl. -
Page 18: Battery Modules
Battery modules VKB number 56461704099 56462704099 Electrochemistry cell Li-ions 6.5 kWh Nominal module capacity 3.3 kWh Discharge depth 5.9 kWh Useful module capacity 3.0 kWh Connection contact-safe Cell monitoring integrated 445 x 110 x 587 Dimensions in mm (W x H x D) 445 x 110 x 339 Weight 25 kg 45 kg... -
Page 19: Guarantee
Guarantee For the guarantee to become effective, the following data must be held by VARTA Storage: „ Serial number (SN number) of the VARTA system, „ Serial number of the battery module, „ Name and email address of the end customer. -
Page 20: Operation
Operation Switching on and off DANGER Contact with electrical voltage Danger to life due to electric shock. Always keep the energy store closed. Look out for damage to the electrical equipment. Have defects eliminated immediately. Only the electrical specialist is allowed to open the energy store. The energy store may be opened only while switched off. -
Page 21: Display Of The Led Ring
In the event that an online guarantee is concluded, a permanent internet connection must be ensured. Access to the portal is activated as soon as you agree to the VARTA online services as part of the guarantee registration. -
Page 22: Maintenance And Cleaning
Maintenance and cleaning WARNING Improper performance of maintenance and cleaning works. Possible danger to life. Ensure that an electrical specialist certified by VARTA Storage performs the maintenance and cleaning works. Only original parts are to be used for maintenance works. Maintenance works The maintenance of the energy storage system includes: „... -
Page 23: Fault / Case Of Damage
Fault / case of damage WARNING Improper elimination of faults. Possible danger to life. Ensure that an electrical specialist performs the works on the energy store. In the event of a fault, contact the electrical specialist. Fault displays on the device on/off button The LED ring of the on the front of the housing displays faults. -
Page 24: Installation
Installation The section Installation is directed towards the electrical specialist. Transport and storage Transport Lithium-ion batteries are dangerous goods. The battery modules are designed and tested in such a way that they may be transported up to a total weight of 333 kg under compliance with the condi- tions of ADR 1.1.3.6 (not transport requiring labelling provided there are no other dangerous goods on or in the vehicle). -
Page 25: Transport Control
Danger to life. Do not accept clearly damaged packaging. Contact VARTA Storage. The housing and the battery module (individually packed) are delivered in separate and tested pack- aging units on pallets. The installer assumes the disposal of the packaging. Please check the deliver- ies for completeness and damage: „... -
Page 26: Storage
Material damage due to superimposition. Deep discharge of the battery module. Adhere to the storage conditions. The battery module • Have it commissioned with 20 weeks of delivery by the manufacturer or by a qualified electrical specialist certified by VARTA Storage. -
Page 27: Assembly And Installation
WARNING Installation of damaged components Possible danger to life. Check all components for visible damage. Do not install damaged components. Contact VARTA Storage. Setup site requirements Danger Blocked escape routes Possible danger to life and material damage. Keep escape routes clear. -
Page 28: Suitable Assembly Sites
Pay attention to the minimum dimensions in Fig. 2 “Dimensions on the support plate” on page 35. To ensure that escape is possible, the swivel range of doors must not extend into this space. • A smoke detector must be installed in the setup room of the VARTA pulse neo. -
Page 29: Environmental Conditions
Environmental conditions The setup site must correspond to a soiling grade of 2. It must be ensured that a continuous exchange of air takes place, perhaps by means of external ven- tilation e.g. windows, air-conditioning system, ventilation or similar. The distance to the ventilation must be at least 100 cm. The room temperature must always be between +5 and +30 °C (optimally +18 °C), the relative humidi- ty <... -
Page 30: Preparation Of The Electrical Connection
Preparation of the electrical connection The section Installation is directed towards the electrical specialist. WARNING Improper installation. Personal and material damage. Configure the fuse in front of the energy storage system as three-pole. The fuse must meet the requirements of a separator Secure the device connection on the energy store with a 16 A fuse type B. -
Page 31: Connections At Distribution
Connections at distribution The following connections are to be prepared: Device connection: „ Recommendation: 3 x 2.5 mm², „ Sensor cable: RJ12 (in scope of delivery), „ LAN connection. Do not expose the sensor cable to a mechanical load. To keep the losses low, the line distance between the store and the connection should be no more than 20 metres. -
Page 32: Varta Split Core Current Sensor
For this reason, it is located right behind the consumption and feed- in meter. The VARTA Split Core Strom-sensor consists of a terminal box and three folding transduc- ers. Their nominal current is 50 A (maximum current 100 A) per phase. -
Page 33: Pv Current Sensor (Optional)
2 Connection socket “current measurement” 3 Folding transducers (L1, L2, L3) Fig. 1: VARTA Split Core Stromsensor PV current sensor (optional) VARTA pulse neo has the option of connecting an additional VARTA Split Core current sensor to visu- alise the generator performance. Here, „... -
Page 34: Assembly Preparation
Assembly preparation The section Installation is directed towards the electrical specialist. Read the operating manual. WARNING Components are heavy. This can lead to overburdened intervertebral discs, contusions and strains. Carry out the works described in this chapter with 2 persons or suitable aids. - Page 35 All dimensions in millimetres. Fig. 2: Dimensions on the support plate...
- Page 36 To reduce EMC faults, both folding ferrite cores included in the delivery must be mounted on the AC cable. Now create the connection between the current sensor (Fig. 1, page 33) and the store (see page 36). Insert the AC plug connection into the AC grid socket. Insert the sensor cable and the network cable into the corresponding sockets.
-
Page 37: Battery Module Assembly
Battery module assembly The section Installation is directed towards the electrical specialist. DANGER Touching live parts Danger to life Comply with a waiting time of at least 3 minutes. Ensure that the battery modules are switched off and that no LED display is lit up. -
Page 38: Behaviour In The Event Of Damage
Do not attempt a repair! Avoid contact with any escaping liquid! Avoid contact with any escaping vapours! Damaged or soiled battery module Contact VARTA Storage. First aid in the event of contact with escaping liquid If inhaled: • Leave the room. -
Page 39: Fitting The Battery Module
ATTENTION Superimposition of battery module. Deep discharge of the battery module. As soon as you have begun the commissioning, it must be carried out to the end. ATTENTION Inverted wires of error and warning messages. Wrong error message to the control. Pay attention to the specified colour coding. -
Page 40: Connect The Battery Module
The battery module is positioned as shown in the following figure. „ Lift the battery module onto the two tracks of the support plate. „ The handle is suitable for moving the battery module only. „ The long holes on the battery module serve to centre the battery module with the two pre-fitted screws. -
Page 41: Closing The Energy Store
Communication 1: „ Insert the four communication cables into the openings of the clamping connector „ The connections are self-clamping. Communication 2: „ Insert the communication cable (red, CAN). Check functionality: „ Press the activation button on the battery module. „... -
Page 42: Check
Check Before you close the energy store, please check: ü Check Have you removed all the tools? Is the interior clean? Are there no loose parts in the interior? Have you created all the cable connections correctly? Is the edge protection located at the intended sites? „... -
Page 43: Initial Start-Up And Initialisation
Initial start-up and initialisation The section Installation is directed towards the electrical specialist. Switch-on conditions The housing is closed and screwed. The network cable is inserted. The fuse on the house network is switched on. Initialisation on/off button „ Switch on the store with the The button is locked in the lower position. -
Page 44: Initial Start-Up Via The Web Interface
Update the website view (key F5). „ Enter the following address into the browser line and open it: http://169.254.0.5 Subsequently, the login interface of the VARTA web interface appears. Variant 2 Should you be granted access to the customer’s home network: „... -
Page 45: Login On The Web Interface
Login on the web interface If the connection to the device was successful, the login interface of the web interface appears. Here, optional secure login you can choose between the normal login window and the Note: In the secure login, the data are transferred on an encrypted basis; however, for this you must first accept a certificate in your browser. -
Page 46: Performing The Software Configuration
“Forgotten password” If you have forgotten your password, click on the button on the login interface. Subsequently, a window appears in which a PUK (personal unlocking key) is to be entered. the 36 characters Code #1 Cryptocode label The PUK consists of of the printed on the . -
Page 47: Completing The Configuration
The connected store is displayed in the overview “Coupled stores”. Once a store is coupled and the VARTA pulse neo can access the data from the store, the “cascade monitor” is displayed. Here you receive an overview of the complete cascade: „... -
Page 48: Connect Pv Converters Via Sunspec
To ensure a permanent connection to the PV converter, we recommend assigning a perma- nent IP address to the PV converter. Note: Please take note of the compatibility list of PV converters with the VARTA pulse neo on our website at: https://www.varta-ag.com/de/konsument/service/downloads-energiespeicher. -
Page 49: Maintenance
Only original parts are to be used for maintenance works. After all the works, the connections are to be created cleanly again and screwed. All works on the VARTA pulse neo system are to be documented by the electrical specialist in the service book. -
Page 50: Service And Repair Works
Secure against switching on again. Ensure de-energised state. Before connecting to energy, ensure that there are no persons in the danger zone. The maintenance of the VARTA pulse neo energy storage system includes: „ Service means inspection and maintenance. „... -
Page 51: Checking The System Parameters
„ Check whether the wall fastening is stable. If necessary, tighten the screw or replace it. Checking the system parameters The system parameters are checked via the web interface. For this, see chapter 13. Air filter change: Reset time The air filter must be replaced at every second service. See chapter 14.4.9. „... -
Page 52: Converter Dc Side
1 LAN (network) 2 PV sensor (optional) 3 Grid sensor (house network) 4 AC grid (house connection) 5 Main earthing (PE) (2x) Converter DC side 1 Air outlet 2 Batt (battery module) 3 Ventilator 4 CAN 5 DRY... -
Page 53: Network Connector Dismount
Network connector dismount Attention Improper dismount of the network connector Damage to the network connector and the network connection socket. Release the block using a suitable tool. Dismounting the battery converter Ensure that no small parts get into the interior of the battery converter. „... -
Page 54: Dismounting And Installing The Battery Module
Dismounting and installing the battery module WARNING Improper handling of battery module. Personal and material damage. Ensure that the battery module is switched off and that no LED display is lit up. Do not damage the battery module when dismounting and installing it. Do not attempt a repair. -
Page 55: Installing The Battery Module
Check the ventilator for soiling and clean it if necessary. „ Check the bearing clearance and the free movement of the ventilator by hand. If the ventilator needs to be replaced, please contact VARTA Storage. Completing service and repair works DANGER Touching live parts. - Page 56 Attention On/off switch becomes damaged. System cannot be started up. Do not apply any force when closing the hood. The switch must insert into the opening of the battery converter. „ Before you close the energy store, please check: ü Check Have you removed all the tools? Is the interior clean?
-
Page 57: Check Operating Status
Check operating status „ Check whether the fuses are switched on again. „ Switch on the energy storage system with the on/off button. „ Check whether the LED ring displays the following successively after switch-on: LED ring colour LED action Operating condition Flashes once per second Green... -
Page 58: Faults
(VARTA link / energy store into the internet) external (VARTA link / energy store into the internet) 4998 Internal (VARTA link / energy store to other energy stores and back) 21338 Internal (VARTA link / energy store to other energy stores and back) -
Page 59: Dismount And Disposal
The packed battery modules are collected by VARTA Storage or by a company mandated by it. To this end, please contact VARTA Storage (entsorgung@varta-storage.com). Request the dangerous goods packaging from there as well. VARTA Storage shall assume the costs for pack- aging and collection. „... -
Page 60: Move
The opening of the storage cabinet and the dismount of the components are described in chapter 14.4 “Service and repair: Housing interior”, page 51. The battery module must be recommissioned by a qualified electrical specialist certi- fied by VARTA Storage within 11 weeks after the dismount. -
Page 61: Reuse Of The Battery Module
Reuse of the battery module Danger Improper further use of battery module Possible danger to life and material damage. Continue to use the battery module exclusively in the energy store from which is was dismounted. Commissioning after move Perform the commissioning after a move as described as of chapter 11 “Assembly and installation”... -
Page 62: Documentation
With the documentation of the service and maintenance works, you prove that the specified mainte- nance intervals have been complied with, exclusively original parts have been used and the works on your VARTA pulse neo energy storage system have been performed exclusively by qualified electrical specialists certified by VARTA Storage GmbH. -
Page 63: Proof Of Service Works
Proof of service works 1st service before expiry of the 2nd year after the installation Service company: Name Address Post code and town/city Telephone number Service: Date Certified service employee Signature/seal Next service by: Date Service works* Comments Check from outside: Vents on the right-hand housing edge cleaned. - Page 64 2nd service before expiry of the 5th year after the installation Service company: Name Address Post code and town/city Telephone number Service: Date Certified service employee Signature/seal Next service by: Date Service works* Comments Check from outside: Vents on the right-hand housing edge cleaned.
- Page 65 3rd service before expiry of the 8th year after the installation Service company: Name Address Post code and town/city Telephone number Service: Date Certified service employee Signature/seal Next service by: Date Service works* Comments Check from outside: Vents on the right-hand housing edge cleaned.
- Page 66 4th service before expiry of the 11th year after the installation Service company: Name Address Post code and town/city Telephone number Service: Date Certified service employee Signature/seal Next service by: Date Service works* Comments Check from outside: Vents on the right-hand housing edge cleaned.
- Page 67 5th service before expiry of the 14th year after the installation Service company: Name Address Post code and town/city Telephone number Service: Date Certified service employee Signature/seal Next service by: Date Service works* Comments Check from outside: Vents on the right-hand housing edge cleaned.
- Page 68 6th service before expiry of the 17th year after the installation Service company: Name Address Post code and town/city Telephone number Service: Date Certified service employee Signature/seal Next service by: Date Service works* Comments Check from outside: Vents on the right-hand housing edge cleaned.
- Page 69 7th service before expiry of the 20th year after the installation Service company: Name Address Post code and town/city Telephone number Service: Date Certified service employee Signature/seal Next service by: Date Service works* Comments Check from outside: Vents on the right-hand housing edge cleaned.
-
Page 70: Proof Of Repairs And Other Works
Proof of repairs and other works Repair / other works (1) Service company: Name Address Post code and town/city Telephone number Certified service employee: Date Name Signature/seal Repair / other works Date: Software status: Works performed: Original parts: Serial numbers: Conspicuous system parame- Values: ters:... - Page 71 Repair / other works (2) Service company: Name Address Post code and town/city Telephone number Certified service employee: Date Name Signature/seal Repair / other works Date: Software status: Works performed: Original parts: Serial numbers: Conspicuous system parame- Values: ters: Comments:...
- Page 72 Repair / other works (3) Service company: Name Address Post code and town/city Telephone number Certified service employee: Date Name Signature/seal Repair / other works Date: Software status: Works performed: Original parts: Serial numbers: Conspicuous system parame- Values: ters: Comments:...
- Page 73 Repair / other works (4) Service company: Name Address Post code and town/city Telephone number Certified service employee: Date Name Signature/seal Repair / other works Date: Software status: Works performed: Original parts: Serial numbers: Conspicuous system parame- Values: ters: Comments:...
- Page 74 Repair / other works (5) Service company: Name Address Post code and town/city Telephone number Certified service employee: Date Name Signature/seal Repair / other works (1) Date: Software status: Works performed: Original parts: Serial numbers: Conspicuous system parame- Values: ters: Comments:...
- Page 75 Repair / other works (6) Service company: Name Address Post code and town/city Telephone number Certified service employee: Date Name Signature/seal Repair / other works (1) Date: Software status: Works performed: Original parts: Serial numbers: Conspicuous system parame- Values: ters: Comments:...
-
Page 76: Spare Parts
Battery module 6.5 kWh 727707 Filter mat pulse 716710 Sensor cable 710499 Length: 20 m VARTA Split Core current sensor 3-phase 719341 Converter 726643 USB retrofit set Belgium 802388 Appendix Conformity with the EU directives relevant to the device is confirmed by the CE sign. -
Page 77: Connection Diagram Tn-C Network
Appendix a. Connection diagram TN-C network As at: 07/2021... -
Page 78: Connection Diagram Tt Network
Appendix b. Connection diagram TT network As at: 07/2021... -
Page 79: Connection Diagram Tn-C Network With Data Logger
Appendix c. Connection diagram TN-C network with data logger As at: 07/2021... -
Page 80: Connection Diagram Tt Network With Data Logger
Appendix d. Connection diagram TT network with data logger As at: 07/2021...
Need help?
Do you have a question about the pulse neo and is the answer not in the manual?
Questions and answers