Table of Contents
Advertisement
Quick Links
Advertisement
Table of Contents

Subscribe to Our Youtube Channel
Related Manuals for Varta Pulse neo Series


Summary of Contents for Varta Pulse neo Series
- Page 1 PERATING MANUAL VARTA pulse neo VARTA S TORAGE...
- Page 2 Leerseite - Pagina vuota - Page blanche - Blank page...
- Page 3 Legal notice Original operating manual VARTA pulse neo VARTA Storage GmbH Nürnberger Straße 65 86720 Nördlingen Germany Phone: +49 9081 240 86 60 info@varta-storage.com www.varta-storage.com Technical service: technical.service@varta-storage.com Phone: +49 9081 240 86 44 Document number: 727 606 - 01...
- Page 4 Leerseite - Pagina vuota - Page blanche - Blank page...
-
Page 5: Table Of Contents
Misuse ................... 23 Safety equipment ..............24 Function, scope of delivery and technical data ....25 Scope of delivery ..............28 VARTA pulse neo front view ..........29 System overview ..............30 Identification ................. 31 2.4.1. Nameplate and ID label ............31 2.4.2. - Page 6 Table of contents 2.4.3. Unlock code label ..............32 Technical data ............... 33 Battery modules ..............34 Environmental rating data ............ 35 Guarantee ..............36 Guarantee registration ............37 Control functions ..............39 Activation and deactivation ......... 39 Indicators at the LED circle ............ 40 Portal (optional) ..............
- Page 7 Preparation of electric connection ........57 Connections at the distribution ..........58 Preparation of AC connection to building network ....58 VARTA Split Core current sensor ........... 60 PV current sensor (optional) ..........65 Preparation of installation ............. 65 Suspension and connection of the energy storage system ... 66 Battery module installation ...........
- Page 8 Table of contents Initialisation ................81 Fault during initialisation ............82 Initial commissioning via the web-interface ....83 General information on using the web-interface ....83 Fault messages ..............83 Connection to the device ............84 10.3.1. Option 1 ................. 84 10.3.2.
- Page 9 Table of contents Checking the energy storage system ........96 Checking the system parameters .......... 97 11.3.1. Air filter replacement: Time reset ......... 98 11.3.2. Checking current sensor values ..........98 11.3.3. Checking the battery inverter ..........99 11.3.4. Checking the battery module ..........99 Service and repair: Enclosure interior ........
- Page 10 Table of contents Planning relocation ............. 115 Relocation process .............. 116 Commissioning after relocation .......... 116 Documentation ..............117 User data ..............117 Verification of servicing ............118 Verification of repairs and other work ........ 132 Spare parts ..............144...
-
Page 11: Preface
Preface Preface Thank you for choosing an energy storage system of VARTA Storage GmbH! We are pleased that you have selected one of our long-lasting and high-quality systems. For use and handling of the storage system, please carefully read this manual. - Page 12 VARTA Storage GmbH. Keeping the manual The operating manual should be kept near the VARTA pulse neo and must be always accessible to everybody working at the energy storage system. Of the end user of the system changes, the operating manual must be handed over.
- Page 13 Please skip these sections of the manual if your energy storage system is not equipped with the respective parts General note on VARTA Storage GmbH is aware of the equal treatment importance of language regarding the equality of women and men. For better readability of this manual, no gender- specific distinction has been made.
-
Page 14: General Information
General information General information Information on this manual Indications In this manual, the following types of safety instructions and hints are applied: Indicates hints for handling the device. 1.1.1. Safety instructions In this manual, safety instructions are structured as follows: Signal word Type and source of danger. - Page 15 General information Meaning Signal word DANGER symbol, red Indicates immediate dangerous situations that can result in death DANGER or severe injury and/or fire. WARNING symbol, orange Indicates potentially dangerous situations that can result in death WARNING or severe injury and/or fire. CAUTION symbol, yellow Indicates potentially dangerous situations that can result in minor...
-
Page 16: Warning Signs
General information 1.1.3. Warning signs In the operating manual and at the device, the following warning signs are used. General warning sign. Warning! Electricity. Warning! Oxidising substances. Warning! Hand injury. Warning! Cutting hazard. Warning! Battery hazard. Warning! Observe discharge time: 3 Minutes. -
Page 17: For Your Safety
General information For your safety Everybody commissioned with working at the system must have read and understood this manual and particularly the chapter on safety. Risks are reduced by compliance with the safety instructions and taking required measures to ensure safety at work. WARNING Non-compliance with safety instructions. -
Page 18: Intended Use
All safety instructions must always be observed for safety. The device must not be changed or modified in any way. Intended use VARTA pulse neo with its components has been manufactured according to the state-of-the-art and product-specific standards and is dedicated for storage of electricity from renewable energy sources like photovoltaic systems or CHP plants. -
Page 19: Incorrect Use
1.3.2. Prohibited use Do not sue the VARTA pulse neo: „ for mobile applications on land, on the water or in the air. „... -
Page 20: Requirements For Electricians
General information Requirements for electricians Any work at the VARTA pulse neo system (e.g. installation and servicing) may only be carried out by qualified electricians certified by VARTA Storage GmbH! The term "qualified" refers to personnel with relevant knowledge and skills in the area. -
Page 21: General Hazard Sources
General information General hazard sources VARTA Storage GmbH will not assume any liability if the following instructions for handling the devices are not observed and personal injury and property damage at the device occur. DANGER Contact with electric voltage. Risk of death due to electric shock. - Page 22 Do not take wet devices or components into operation. Do not take devices or components that have gotten wet into operation. Please contact VARTA Storage. WARNING Storage and use of oxidising and/or corrosive substances. Increased fire-risk and risk of electric shock.
-
Page 23: Misuse
General information Misuse ATTENTION Energy storage system deactivated. Possible damage at the battery module due to deep discharge. The energy storage system may only be deactivated temporarily for maintenance purposes. ATTENTION Objects on the system! Risk of injury and damage to the system due to falling objects. -
Page 24: Safety Equipment
This ensures that the device is deactivated if the enclosure is opened without deenergising the energy storage system. Smoke detector At the installation location of the VARTA pulse neo, a smoke detector must be installed. -
Page 25: Function, Scope Of Delivery And Technical Data
General information Function, scope of delivery and technical data The VARTA pulse neo energy storage system is dedicated for operation at building supply networks with 230 V and enables connection of a separate mains- coupled photovoltaic system. This generation system may only feed excessive energy into the system. - Page 26 System registration Before installation of the VARTA energy storage system, it must be clarified with the responsible energy supplier/network operator whether registration of the...
- Page 27 VARTA energy storage system are designed in such a way that the admissible operating temperature is not exceeded and derating is not required as long as the operating and ambient conditions are complied with.
-
Page 28: Scope Of Delivery
General information Scope of delivery The VARTA energy storage system includes: Storage system 1 x Battery module, 1 x Battery inverter, 1 x Mounting plate, 1 x Hood, 1 x Preassembled cable set, 1 x Operating manual. Accessories 1 x Current sensor (50 A),... -
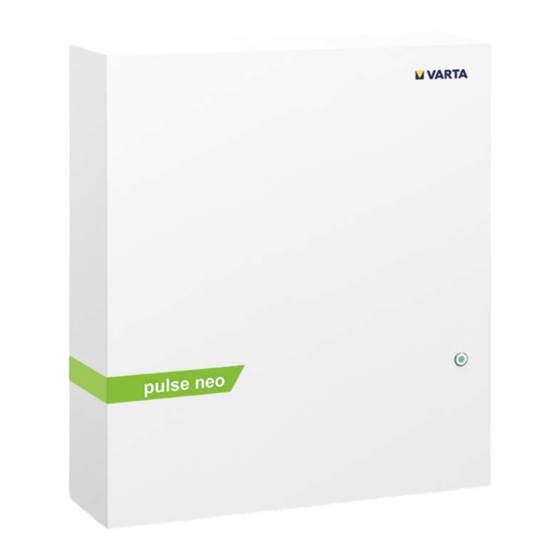
Page 29: Varta Pulse Neo Front View
General information VARTA pulse neo front view Nameplate ON/OFF button Screw positions... -
Page 30: System Overview
General information System overview Inverter for photovoltaic Current sensor system CHP / wind power VARTA pulse neo Consumer in building Photovoltaic system... -
Page 31: Identification
+5 °C to +30 °C operating temperatur range: date of manufacture: JJJJ/MM expansion stage: DE: Selbsttätige Schaltstelle gemäß VDE V 0126-1-1 VARTA pulse battery storage system made by VARTA Storage GmbH VKB-Number: 2707 852 201 Crypto Code Code #1 Code #2 q82r z8vN... -
Page 32: Id Label Of Battery Module
General information 2.4.2. ID label of battery module 2.4.3. Unlock code label... -
Page 33: Technical Data
General information Technical data VARTA pulse neo version 6.5 kWh 3.3 kWh Nominal capacity 2.5 kW 1.8 kW AC charging power 2.3 kW 1.6 kW AC discharging power without isolating Battery inverter structure transformer 600 x 690 x 190 Dimensions in mm (W x H x D) -
Page 34: Battery Modules
General information Battery modules VKB number 56461701100 56462701100 Li-ion Electrochemical cell Nominal module 6.5 kWh 3.3 kWh capacity Discharge depth Effective module 5.9 kWh 3.0 kWh capacity insulated Connection integrated Cell monitoring Dimensions in 445 x 110 x 587 445 x 110 x 339 (W x H x D) 45 kg 25 kg... -
Page 35: Environmental Rating Data
General information Environmental rating data Environmental category Climate-conditioned* indoors** Classification of wet Wet areas not admissible areas Degree of contamination IP33 Ingress protection +5°C to +30°C Ambient temperature < 80% Relative humidity 2000 m above sea level Max. height Overvoltage category Protection class * Refer to chapter 8.3 "Ambient conditions", page 55. -
Page 36: Guarantee
General information Guarantee For valid claims under guarantee (outside of Germany, Austria and Switzerland to claim potential warranty), the following data must be provided to VARTA Storage: Required documents „ Commissioning protocol (with duration of commissioning). Serial number (SN number) of the „... -
Page 37: Guarantee Registration
Guarantee registration Online guarantee registration has two steps: Installer Step 1: Registration of the energy storage system by the installer incl. commissioning protocol. „ Open: www.varta-storage.com „ Select: â Energy storage systems â â Login with password. „ Provide all required information. - Page 38 „ Provide all required information. Alternatively, the completed and signed guarantee documents (commissioning protocol and guarantee card including attached ID labels of the VARTA system and the battery module) can be send to VARTA Storage within 4 weeks after installation.
-
Page 39: Control Functions
Control functions Control functions Activation and deactivation DANGER Contact with electric voltage Risk of death due to electric shock! Always keep the energy storage system closed. Observe any damage at the electric equipment. Any defects must be corrected immediately. The energy storage system may only be opened by qualified electricians in deactivated condition. -
Page 40: Indicators At The Led Circle
Control functions installer on initial commissioning and servicing. In case of damage (see chapter 6.2), the system can be taken out of operation with the ON/OFF button. Indicators at the LED circle The LED circle at the ON/OFF button provides information on the conditions and events during operation of the energy storage system LED circle... -
Page 41: Portal (Optional)
(see chapter 3.1 "Guarantee registration"). Alternatively, the respective option (for use of the online portal of VARTA Storage) can also be selected on the signed guarantee card and returned to VARTA Storage. Use of the portal is free. Any costs for the internet connection must be borne by the user. -
Page 42: Servicing And Cleaning
WARNING Incorrect servicing and cleaning! Potential risk of death. Make sure that servicing and cleaning is only performed by qualified electricians certified by VARTA Storage. For servicing, only original parts may be used. Servicing Servicing of the energy storage system... -
Page 43: Cleaning
Control functions Cleaning WARNING Ingress of water in electrical systems. Potential risk of death. Do not use any water for cleaning the energy storage system. Do not place any containers with liquids (beverage cups or similar) on electrical systems. Cleaning agents Do not use any acidic, alkaline or solvent- based cleaning agents. -
Page 44: Fault / Damage
In case of fault, please contact a qualified electrician. Make sure that any work at the energy storage system is only performed by qualified electricians certified by VARTA Storage. Indication of faults at the device The LED circle of the ON/OFF button at the front of the enclosure indicates a fault. -
Page 45: In Case Of Damage
Control functions In case of damage WARNING Incorrect handling in case of fire and flood! Potential risk of death! If possible, deactivate the system and interrupt the circuit breakers. Leave the hazard area. In case of fire, call the fire services immediately. - Page 46 Control functions WARNING Damaged battery module due to technical defect. Acrid smell. Avoid contact with any leaking fluids. Avoid contact with any escaping vapours. If possible: Deactivate the system and interrupt the circuit breakers. Avoid sparks and open fire. Ventilate the installation location. In case of fault, please contact a qualified electrician.
-
Page 47: Installation
Installation Installation The section Installation is addressed to qualified electricians. Transport and storage Transport Lithium ion batteries are classified as Hazardous material hazardous material. The battery modules are designed and tested in such a way that they may be transported up to a total weight of 333 kg in compliance with ADR 1.1.3.6 (transport without labelling provided no other hazardous materials are transported with the... -
Page 48: Transport Regulations
Installation Transport regulations WARNING Incorrect transport due to insufficient expertise. Potential risk of death and property damage. The energy storage system and its components may only be transported by the manufacturer and qualified and certified electricians. Be careful during transport. Always observe all transport regulations. -
Page 49: Transport Checks
2 persons or with suitable equipment. Use personal protective equipment. This reduces the risk of injury. Transport checks DANGER Installation of damaged components. Risk of death. Do not accept any packaging with obvious damage. Please contact VARTA Storage. -
Page 50: Storage
Installation The enclosure and battery module (packaged individually) are delivered on pallets and in separate and tested packaging units. Packaging will be disposed of by the installer. Please check the delivery for completeness and damage: „ In case of visible damage at the packaging, make a note on the shipping documents and have it confirmed by the driver by signature. -
Page 51: Prohibited Storage
Damage due to excessive storage. Deep discharge of the battery module. Always observe all storage conditions. 7.4.4. Maximum storage time Battery module „ Must be commissioned within eleven weeks after delivery by the manufacturer or a qualified electrician certified by VARTA Storage. -
Page 52: Assembly And Installation
Short circuit and corrosion due to condensation. Do not start assembly before the components are at room temperature. WARNING Installation of damaged components. Potential risk of death. Check all components for visible damage. Do not install damaged components. Please contact VARTA Storage. -
Page 53: Installation Location Requirements
Installation Installation location requirements WARNING Ingress of water in electrical systems. Risk of death due to electric shock. The system cabinet must be installed indoors. Observe all installation location requirements. CAUTION Risk of injury and damage due to incorrect installation and confined spaces. - Page 54 Installation of the energy storage system, refer to chapter 2.5 "Technical data", page 32. „ As necessary, have the statics checked. The surface, connected walls and ceilings must not be made of temperature- sensitive material. Installation dimensions To enable unobstructed outlet of cooling air at the device, a minimum side clearance of 15 cm must be observed.
-
Page 55: Ambient Conditions
Installation Ambient conditions The installation location must have a degree of contamination of 2. Continuous exchange of air must always be ensured, for example by additional ventilation through windows, AC units, ventilation or similar. Ensure sufficient protection against rodents and do not smoke at the installation location. -
Page 56: Inadmissible Locations And Ambient Conditions
Installation Inadmissible locations and ambient conditions Heights over 2000 m, garages, carports or other locations with deviating ambient conditions. Locations: „ with potentially explosive atmospheres, „ with storage of flammable or oxidising substances, „ wet areas, „ subject to high fluctuations in ambient temperature, „... -
Page 57: Preparation Of Electric Connection
Installation Preparation of electric connection WARNING Incorrect installation. Personal injury and property damage. The safeguard upstream of the energy storage system must comply with the requirements of a circuit breaker. Secure the device connection at the energy storage system with a 16A fuse type B. -
Page 58: Connections At The Distribution
Installation Connections at the distribution The following connections must be prepared: Device connection: „ Recommendation: 3 x 2.5 mm², „ Sensor cable: RJ12 (in scope of delivery), „ LAN connection. Do not expose the sensor cable to mechanical loads. To keep losses as low as possible, the line between the storage system and the connection should have a maximum length of 20 m. - Page 59 Installation „ The length of the PE conductor must exceed the length of the other conductors by 8 mm. Shorten the conductors respectively. „ Strip the insulation of the wires of the line at the ends by 9 mm. AC connector „...
-
Page 60: Varta Split Core Current Sensor
Installation AC connector Tension relief fitting (bottom) Tension relief fitting (top) VARTA Split Core current sensor If the energy storage system to be Cascading option installed is to be cascaded as Master with other energy storage system, proceed as follows. - Page 61 For this reason, it is directly positioned downstream of the consumption/feed meter. The VARTA Split Core current sensor includes a connection box and three foldable transformers. Their nominal current is 50 A (100 A maximum) per phase.
- Page 62 Installation connection box. For the position of the "current measuring" socket at the energy storage system, refer to page 69. For correct recording of the VARTA Split Core current sensor consumption and feed, the following must be observed: „ The phase assignment L1, L2, L3 must have a clockwise phase sequence.
- Page 63 Installation For installation of the foldable transformer at the VARTA Split Core current sensor, the conductor must be laid by opening the blue foldable transformer. Open the lock at the rear, place the foldable transformer around the conductor and close it. The lock must click into place.
- Page 64 Installation Three Phase ü Single Phase ü Not permitted û û...
-
Page 65: Pv Current Sensor (Optional)
Installation PV current sensor (optional) VARTA pulse neo enables connection of an additional VARTA Split Core current sensor for visualisation of the generated power. The following conditions must be met: „ The phases of the building current sensor must correspond to the phases of the PV current sensor. -
Page 66: Suspension And Connection Of The Energy Storage System
Installation Suspension and connection of the energy storage system Mark the positions of the top right Dimensions in mm and left dill holes according to: Fig. 2, page 67 (position 1 in the drawing) No drilling dust may enter Remove the mounting plate with the device. - Page 67 Installation All Dimensions in mm. Fig. 2: Dimensions at the mounting plate...
- Page 68 Installation To reduce EMC interruptions, the two included foldable ferrite cores must be attached to the AC cable. Afterwards, establish the connection between the current sensor (Fig. 1, page 63) and the storage system (see page 69). Plug the AC connector into the AC grid socket.
- Page 69 Installation AC-side inverter LAN (network) PV sensor (optional) Grid sensor (building network) AC grid (building connection) Protective earth (PE) (2x)
-
Page 70: Battery Module Installation
Installation Battery module installation DANGER Contact with live components. Risk of death. Observe the waiting time. Make sure that the battery module is deactivated and that no LED indicators are flashing. The energy storage system must not be transported if a battery module has already been installed. -
Page 71: Checking The Battery Module
Do not install damaged or dirty battery modules. Do not take damaged or dirty battery modules into operation. Carefully transport the battery module. Do not place any objects on the battery module. Keep unauthorised person away. Damaged or dirty battery module Please contact VARTA Storage. -
Page 72: In Case Of Damage
Do not try to repair it. Avoid contact with any leaking fluids. Avoid contact with any escaping vapours. Damaged or dirty battery module Please contact VARTA Storage. First aid in case of contact with leaking fluids If inhaled: Leave room. „... -
Page 73: Installation And Connection Of The Battery Module
Installation Installation and connection of the battery module WARNING Incorrect handling of the battery module. Personal injury and property damage. Any work described in this chapter must be carried out by 2 persons or with suitable equipment. Do not lift the battery module at the handle. -
Page 74: Installation Of The Battery Module
Installation 8.15.1. Installation of the battery module Before installation, you must ensure that the mounting bracket is in the correct position. If necessary, mount the bracket with 4 screws at the specified position. „ The torque of the screws is 5 Nm. a. - Page 75 Installation Position the battery module as illustrated in the following figure. „ Lift the battery module on the two attachment rails of the mounting plate. „ The handle is only suitable for guiding the battery module. „ The elongated holes at the battery module enable centring of the battery module at the preinstalled screws.
-
Page 76: Connecting The Battery Module
Installation 8.15.2. Connecting the battery module Establish the connections at the battery module. Battery power connection: „ Connect the two connectors with correct polarity. The connectors must click into „ place. - Page 77 Installation Communication 1: „ Insert the four communication cables into the openings of the clamping connector. „ The connections are self-locking. Communication 2: „ Insert the communication cable (red, CAN). Checking readiness: „ Press the activation button at the battery module. Readiness is indicated by the LED „...
-
Page 78: Closing The Energy Storage System
Installation Closing the energy storage system WARNING Cable damage due to incorrect installation. Risk of electric shock. Before closing the energy storage system, make sure that all steps of installation are correct. Do not use force to close the hood. ATTENTION Damaged ON/OFF switch. -
Page 79: Check
Installation 8.16.1. Check Before closing the energy storage system, check as follows: ü Check Have all tools been removed? Is the interior clean? Are there loose parts in the interior? Have all cables been connected correctly? Has edge protection been installed at the dedicated positions? „... - Page 80 Installation „ Connect the PE conductor between the hood and battery inverter. „ Check the electrical connection between hood and central earthing point by continuity testing. Swivel the hood to the device, „ Observe the position of the ON/OFF switch, Make sure that no lines are jammed.
-
Page 81: Initial Commissioning And Initialisation
Installation Initial commissioning and initialisation Switch-on conditions The housing is closed and secured with screws. The network cable is connected. The fuse at the building network is switched-on. Initialisation „ Switch on the storage system at the ON/OFF button. The bottom stays in the lower position. -
Page 82: Fault During Initialisation
Installation Fault during initialisation LED circle Possible cause Solution Colour Press the ON/OFF ON/OFF button is button not pressed. Open hood and install Hood incorrectly according to instructions. installed Fuse not switched- White Switch on the fuse. Check AC grid No AC grid connection and establish connection... -
Page 83: Initial Commissioning Via The Web-Interface
Installation Initial commissioning via the web-interface General information on using the web-interface The web-interface serves for visualisation of current measuring values and configuration of settings and functions. Below, the required steps for initial commissioning via the software are described. Precondition is that the energy storage system has been installed according to the operating manual and initialised. -
Page 84: Connection To The Device
Firefox) „ Enter the following address in your browser line and open it: http://169.254.0.5 The login interface of the VARTA web- interface is displayed. 10.3.2. Option 2 If you have access to the local network of the user: Connect the storage system to the „... -
Page 85: Login At The Web-Interface
Example: http://varta130100000 The login interface of the VARTA web- interface is displayed. Login at the web-interface If the connection to the device was successfully established, the login interface of the web-interface is displayed. - Page 86 Installation connection isn’t secure". Depending on the browser, the connection must then be confirmed and allowed. User password The delivery includes an individual access password for the user. It consists of the first six digits of the "Code #1" printed on the Nameplate.
-
Page 87: Login As Installer
Installation Login as installer The access password of the installer consists of a combination of the password of the end user (see page 86) and the password of the installer. (The code was handed over during certification training). It is added to the user password without any spaces. -
Page 88: Change Password
Installation Change password After login, the password of the currently logged-in user can be changed in the settings in the "User" tab. To open the settings menu, select the tool symbol. Password reset If you have forgotten your password, select "Forgot password?" in the login interface. -
Page 89: Software Configuration
Installation Software configuration Initial commissioning is supported by the internal installation wizard. It is started automatically when the installer logs in for the first time. 10.9.1. Start page of the installation wizard First, the current sensor configuration needs to be selected. Depending on your selection, the energy storage system is set to the respective mode (normal operation or cascade). -
Page 90: Battery Module Registration
Installation 10.9.3. Battery module registration In the second step, the serial number of the battery module must be entered. It can be found on the ID label of battery module. „ Afterwards, select "Continue". 10.9.4. Grid parameter configuration For configuration of grid parameters, select the respective standard in the "Country code"... -
Page 91: Finishing Configuration
Installation „ Repeat the steps. If the described measures remain without success, please contact the VARTA service. 10.9.6. Finishing configuration After configuration, finish the installation by clicking on "Finish". Please note: To save the installation report on the computer, select "Save report". - Page 92 Installation Please note: If the VARTA Link is used as current sensor, enter the IP address of the VARTA Link. „ Press "Connect". The coupled storage system is displayed in the respective overview. After coupling of a storage system and retrieval of the storage system data by the VARTA pulse neo, the "Cascade monitor"...
-
Page 93: Pv Inverter Connection Via Sunspec
Please note: The settings can only be made by the installer. To ensure a permanent connection to the PV inverter, we recommend assigning a fixed IP address. Please note: Please observe the compatibility list of PV inverters with the pulse neo on our website: https://www.varta- storage.com/service/downloads/... -
Page 94: Servicing
Servicing Servicing The section Servicing is directed to qualified electricians. DANGER Contact with live components. Risk of death. Switch off the energy storage system. Observe the waiting time. Make sure that the battery modules are deactivated and that no LED indicators are flashing. - Page 95 Potential risk of death. For servicing, only original parts may be used. After all work, all connections must be properly re-established and secured. All work at the VARTA pulse neo system must be documented by the qualified electrician in the service booklet. WARNING Components are heavy.
-
Page 96: Servicing And Repairs
Servicing Servicing of the VARTA pulse neo neo energy storage system includes: „ Inspection and maintenance. „ Repair, technical improvements and extensions as necessary. For documentation of servicing, see chapter 5 "Servicing and cleaning", page Servicing and repairs Verification of servicing First servicing must be performed within two years after installation. -
Page 97: Checking The System Parameters
Servicing In case of deviations: Discuss with the user different possibilities of keeping the temperature at the installation location. As necessary, an active fan may need to be installed. Ask the user if any new heat sources have been installed at the installation location since the last maintenance. -
Page 98: Air Filter Replacement: Time Reset
Servicing 11.3.1. Air filter replacement: Time reset The air filter must be replaced on every other servicing. Refer to chapter 11.4.7. Select „ â Settings âService. „ Press the button. 11.3.2. Checking current sensor values „ Check the sensor values (I phase L1, I phase L2 and I phage L3) for realistic values. -
Page 99: Checking The Battery Inverter
Servicing 11.3.3. Checking the battery inverter „ Check the status of the battery inverter for plausibility 11.3.4. Checking the battery module Check whether any warnings or faults „ of the battery module are displayed. Service and repair: Enclosure interior 11.4.1. Opening the energy storage system Make sure that the energy storage „... - Page 100 Servicing AC-side inverter LAN (network) PV sensor (optional) Grid sensor (building network) AC grid (building connection) Protective earth (PE) (2x)
-
Page 101: Dc-Side Inverter
Servicing 11.4.2. DC-side inverter 1 Air outlet 2 Batt (battery module) 3 Fan 4 CAN 5 DRY 11.4.3. Removing the battery inverter Make sure that no small parts get into the battery inverter. Disconnect the electrical connections. „ Make sure that no LED indicators are „... -
Page 102: Installing The Battery Inverter
Servicing „ Untighten screws 1-3. „ Lift the battery inverter (4) to the top and out of the bracket. 11.4.4. Installing the battery inverter For reinstallation, perform the steps in reverse order. The battery inverter clicks into place in its final position. -
Page 103: Installing And Removing The Battery Module
Servicing 11.4.5. Installing and removing the battery module „ Make sure that the battery module is deactivated and that no LED indicators are flashing. WARNING Improper handling of the battery module. Personal injury and property damage. Make sure that the battery module is not damaged during removal or installation. - Page 104 Servicing ATTENTION Incorrect removal of cables. Damage at connectors. Press the lock at the connector and carefully pull it off to the top. If the battery module is not automatically deactivated, proceed as follows: Deactivate the battery module with „ the activation button (keep pressed until LED stops flashing).
-
Page 105: Installing The Battery Module
Servicing „ Lift the battery module from the mounting rails. 11.4.6. Installing the battery module For installation of the battery module, proceed in reverse order. (See chapter: 8.15 "Installation and connection of the battery module", page 73.) 11.4.7. Cleaning the fan and air filter The air filter must be replaced on every other servicing. -
Page 106: Completion Of Servicing And Repairs
Servicing „ Check the bearing clearance and smooth operation of the fan by hand. If the fan has to be replaced, please contact VARTA Storage. Completion of servicing and repairs DANGER Contact with live components. Risk of death. Remove all tools and/or small parts from the interior. - Page 107 Servicing ATTENTION Damaged ON/OFF switch. The system cannot be taken into operation. Do not use force to close the hood. The switch must engage in the opening of the battery inverter. „ Before closing the energy storage system, check as follows: ü...
- Page 108 Servicing If all points are complied with: „ Lift the hood over the mounting plate at an angle of 45°. „ Carefully lower the hood until the rear is engaged at the mounting plate. „ Connect the PE conductor between the hood and battery inverter.
-
Page 109: Checking The Operating State
Servicing 11.5.1. Checking the operating state „ Make sure that the fuses are switched-on. „ Switch on the energy storage system at the ON/OFF button. „ Check the following sequence at the LED circle after activation: Operating LED action circle state Colour Blinking every second... -
Page 110: Cleaning
Servicing Check if any fault messages are displayed at the web-interface and correct the fault if possible. For further information, refer to chapter 10. After replacing the battery module, enter the serial number of the module. Please note: Without the correct serial number of the battery module, commissioning of the storage system is not possible. -
Page 111: Faults
Servicing Faults WARNING Incorrect troubleshooting due to insufficient expertise. Personal injury and property damage. Troubleshooting may only be performed by qualified electricians. Indicated faults at the LED circle The LED circle at the ON/OFF button indicates faults. For further information, refer to chapter 4.1 "Indicators at the LED circle", page 40. -
Page 112: Communication Faults
Servicing Communication faults In case of any problems with the network connections, please observe the following information: „ Sharing of ports For communication, the ports listed in the following table should be shared. „ Static address assignment For assignment of static IP addresses, knowledge on the existing network is required. - Page 113 Servicing Protocol Transmission direction Port no. to external (VARTA link / energy storage system to internet) to external (VARTA link / 37, 123 energy storage system to internet) IPSec to external (VARTA link / 500, 4500 energy storage system to internet)
-
Page 114: Disassembly And Disposal
Servicing Disassembly and disposal Planning disassembly WARNING Incorrect disassembly due to insufficient expertise. Personal injury and environmental damage. The energy storage system may only be disassembled by qualified electricians. „ If the original packaging is no longer available, please request suitable packaging for hazardous goods. -
Page 115: Disposal
Servicing Disposal The VARTA pulse neo system must not be disposed of in household waste. The packaged battery modules are picked up by VARTA Storage or an authorised company. Please contact VARTA Storage (entsorgung@varta-storage.com). There, you can also request packaging for hazardous goods. -
Page 116: Relocation Process
Enclosure interior", page 99. The battery module must be recommissioned within 11 weeks after disassembly by a qualified electrician certified by VARTA Storage. Commissioning after relocation For commissioning after relocation, refer to chapter 8 “Assembly and installation” as of... -
Page 117: Documentation
VARTA pulse neo energy storage system exclusively by qualified electricians certified by VARTA Storage GmbH verified. First servicing must be performed within two years after Afterwards, the maintenance interval is installation. -
Page 118: Verification Of Servicing
Documentation Signature/stamp Verification of servicing 1. Service within 2 years after installation Service contractor: Name Street Postcode and city Phone number Service: Date Certified service technician Signature/stamp Next service by: Date... - Page 119 Documentation Comments Servicing* Outside check: Air vents at right side of enclosure cleaned. Openings are not covered or clogged. Room temperature of 5 - 30°C, all- year LED indicator at ON/OFF switch green ON/OFF switch: Function checked Via web-interface: Online status "connected" Ver.: Software version Air filter counter reset...
- Page 120 Documentation 2. Service within 5 years after installation Service contractor: Name Street Postcode and city Phone number Service: Date Certified service technician Signature/stamp Next service by: Date...
- Page 121 Documentation Comments Servicing* Outside check: Air vents at right side of enclosure cleaned. Openings are not covered or clogged. Room temperature of 5 - 30°C, all- year LED indicator at ON/OFF switch green ON/OFF switch: Function checked Via web-interface: Online status "connected" Ver.: Software version Air filter counter reset...
- Page 122 Documentation 3. Service within 8 years after installation Service contractor: Name Street Postcode and city Phone number Service: Date Certified service technician Signature/stamp Next service by: Date...
- Page 123 Documentation Comments Servicing* Outside check: Air vents at right side of enclosure cleaned. Openings are not covered or clogged. Room temperature of 5 - 30°C, all- year LED indicator at ON/OFF switch green ON/OFF switch: Function checked Via web-interface: Online status "connected" Ver.: Software version Air filter counter reset...
- Page 124 Documentation 4. Service within 11 years after installation Service contractor: Name Street Postcode and city Phone number Service: Date Certified service technician Signature/stamp Next service by: Date...
- Page 125 Documentation Comments Servicing* Outside check: Air vents at right side of enclosure cleaned. Openings are not covered or clogged. Room temperature of 5 - 30°C, all- year LED indicator at ON/OFF switch green ON/OFF switch: Function checked Via web-interface: Online status "connected" Ver.: Software version Air filter counter reset...
- Page 126 Documentation 5. Service within 14 years after installation Service contractor: Name Street Postcode and city Phone number Service: Date Certified service technician Signature/stamp Next service by: Date...
- Page 127 Documentation Comments Servicing* Outside check: Air vents at right side of enclosure cleaned. Openings are not covered or clogged. Room temperature of 5 - 30°C, all- year LED indicator at ON/OFF switch green ON/OFF switch: Function checked Via web-interface: Online status "connected" Ver.: Software version Air filter counter reset...
- Page 128 Documentation 6. Service within 17 years after installation Service contractor: Name Street Postcode and city Phone number Service: Date Certified service technician Signature/stamp Next service by: Date...
- Page 129 Documentation Comments Servicing* Outside check: Air vents at right side of enclosure cleaned. Openings are not covered or clogged. Room temperature of 5 - 30°C, all- year LED indicator at ON/OFF switch green ON/OFF switch: Function checked Via web-interface: Online status "connected" Ver.: Software version Air filter counter reset...
- Page 130 Documentation 7. Service within 20 years after installation Service contractor: Name Street Postcode and city Phone number Service: Date Certified service technician Signature/stamp Next service by: Date...
- Page 131 Documentation Comments Servicing* Outside check: Air vents at right side of enclosure cleaned. Openings are not covered or clogged. Room temperature of 5 - 30°C, all- year LED indicator at ON/OFF switch green ON/OFF switch: Function checked Via web-interface: Online status "connected" Ver.: Software version Air filter counter reset...
-
Page 132: Verification Of Repairs And Other Work
Documentation Verification of repairs and other work Repairs / other work (1) Service contractor: Name Street Postcode and city Phone number Certified service technician: Date Name Signature/stamp... - Page 133 Documentation Repairs / other work (1) Date: Software version: Work performed: Serial number: Original parts: Values: Irregular system parameters: Comments:...
- Page 134 Documentation Repairs / other work (2) Service contractor: Name Street Postcode and city Phone number Certified service technician: Date Name Signature/stamp...
- Page 135 Documentation Repairs / other work (2) Date: Software version: Work performed: Serial number: Original parts: Values: Irregular system parameters: Comments:...
- Page 136 Documentation Repairs / other work (3) Service contractor: Name Street Postcode and city Phone number Certified service technician: Date Name Signature/stamp...
- Page 137 Documentation Repairs / other work (3) Date: Software version: Work performed: Serial number: Original parts: Values: Irregular system parameters: Comments:...
- Page 138 Documentation Repairs / other work (4) Service contractor: Name Street Postcode and city Phone number Certified service technician: Date Name Signature/stamp...
- Page 139 Documentation Repairs / other work (4) Date: Software version: Work performed: Serial number: Original parts: Values: Irregular system parameters: Comments:...
- Page 140 Documentation Repairs / other work (5) Service contractor: Name Street Postcode and city Phone number Certified service technician: Date Name Signature/stamp...
- Page 141 Documentation Repairs / other work (5) Date: Software version: Work performed: Serial number: Original parts: Values: Irregular system parameters: Comments:...
- Page 142 Documentation Repairs / other work (6) Service contractor: Name Street Postcode and city Phone number Certified service technician: Date Name Signature/stamp...
- Page 143 Documentation Repairs / other work (6) Date: Software version: Work performed: Serial number: Original parts: Values: Irregular system parameters: Comments:...
-
Page 144: Spare Parts
Battery module 3.3 kWh 719153 Battery module 6.5 kWh 716710 Filter mat pulse Length: 20 m 710499 Sensor cable VARTA Split Core current 719341 sensor, 3-phase 726643 Inverter System Conformity with relevant EU Directions for the device is confirmed by the CE mark. - Page 145 Appendix Appendix 1: Connection diagram of TT system Subject to modification!
- Page 146 Appendix 2: Connection diagram of TT system with data logger Subject to modification!
- Page 147 Appendix 3: Connection diagram of TN-C system Subject to modification!
- Page 148 Appendix 4: Connection diagram of TN-C system with data logger Subject to modification!
Need help?
Do you have a question about the Pulse neo Series and is the answer not in the manual?
Questions and answers