
Related Manuals for SNEED Coding Solutions SNEED-JET Titan

Summary of Contents for SNEED Coding Solutions SNEED-JET Titan
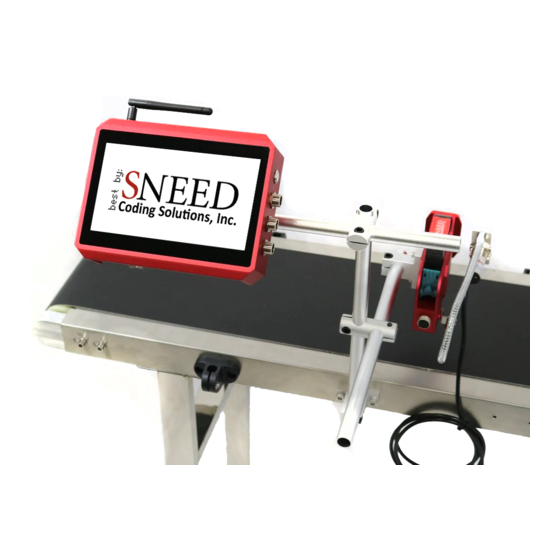
- Page 1 User Guide SNEED-JET Titan Sneed Coding Solutions, Inc. 22315 Gosling Rd. Spring, TX 77389 833-926-3464 www.sneedcoding.com...
- Page 2 To schedule a call: Click to schedule a call Help desk and support videos: Click to visit our support desk...
- Page 3 OUR MISSION: Sneed Coding Solutions was founded with the belief that coding and marking should be simple. Our team of experts is focused on making the complex coding and marking process easy so that you can focus on the things important to you. We are here and available to speak with you whenever the need arises.
-
Page 4: Table Of Contents
Contents Section 1: Printer Specifications ........................4 Section 2: Main Menu ........................... 5 Section 3: Getting Started ..........................7 Section 4: Programming a message ......................8 Programming Text ............................. 8 Time & Date .............................. 9 Counter ..............................10 Uploading Images & logos ........................11 Barcodes, QR codes, and data matrix ..................... -
Page 5: Section 1: Printer Specifications
Section 1: Printer Specifications Order Description Specification Number model SNEED-JET Titan Series System Language English, Spanish, French, Arabic, Chinese External Connection External Sensors, External Encoder, Alarm Lights Power Adapter 12V/4A Maximum Resolution 600DPI 200DPI:95m/min;300DPI:70m/min;600DPI: Print Speed 35m/min Ink Cartridge HP Original 42mL Ink Cartridge... -
Page 6: Section 2: Main Menu
Section 2: Main Menu Create File - Allows for the creation and full customization of printed messages. Load File - Select previously programmed messages for printing Print (Set)tings - Global print settings (ex. “Print speed” and “Print delay”) System settings - (ex. Time & date, network settings,) Counter settings - program product counters Password entry - User level password entry Note:... - Page 7 Number Name Description Speed The indicator light is white under normal conditions. If it turns red during printing, it Indicator means that the production line speed is too fast and the current printing parameters Light cannot meet the requirements. System Time Displays the current date and time. Tap to set User Level Displays the current user level.
-
Page 8: Section 3: Getting Started
Start 1. Activate Print mode 2. Stop printing Stop Section 3: Getting Started A. Upon starting your printer for the first time you will want to ensure that the print voltage and pulse width are set to correspond with your ink cartridge. Select the gear Icon B. -
Page 9: Section 4: Programming A Message
Section 4: Programming a message To begin programming your message select “Create File” from the main menu The objects in the red box represent the different programmable items for your message. Text Time & Date Counter Image Barcode Shift code Programming Text 1. -
Page 10: Time & Date
The General tab will allow you to set the font style, size, spacing, and set the X, Y position coordinates. (….) Time & Date 4. This feature will allow you to set manufacture and expiration dates 5. Select the time and date Icon 6. -
Page 11: Counter
Date number without leading zero (1 to 31) Full month name (e.g. ""January" to "December") MMMM Two-digit year (00-99) Four-digit year yyyy Hour without leading zero (0 to 23, displayed as 1 to 12 with AM/PM) Hour with leading zero (00 to 23, displayed as 01 to 12 with AM/PM) Hour without leading zero (0 to 23, that is to use AM/PM to display) Hour with leading zero (00 to 23, that is to use AM/PM to display) Minute without leading zero (0 to 59) -
Page 12: Uploading Images & Logos
(….) 12. To program each of the four counters you will need to navigate back to the main menu and select the calculator Icon form the top of the screen. (You will need to have loaded the message containing the counter you want to print first). -
Page 13: Barcodes, Qr Codes, And Data Matrix
18. Begin by selecting the Icon depicting a mountain 19. In the advanced tab, press “Select Image” 20. On the next screen you will be able to see files stored on your USB drive on the right and those stored on your local drive on the left. Select the File that you wish you upload and then select “copy to local”... -
Page 14: Shift Codes
identify which type will suite your needs beforehand. For example, there isn’t much limitation to what you can program into a QR code, but a UPC- A code can only take an 11-digit numeric code. 4. Now that you have programmed your barcode you need only to adjust the size and position it into your message. -
Page 15: Section 5: Loading A Message
Section 5: Loading a message Click the button on the main menu, select the file from the "File List", or enter the desired file name in the search box. After selecting the desired file from the list, a preview of the file content will be displayed on the right side of the screen. -
Page 16: Parameter" Settings
“Parameter” Settings 1. DPI (dot per inch) value. The higher the DPI the darker and crisper your prints will be. While the darkest most crisp code is normally the most appealing sometimes an application requires a lower DPI value to achieve the best results. -
Page 17: Print Mode
4. Delay - To set your delay select the print head you would like to delay and use the + and – keys to increase or decrease the delay. The global delay button Is used to change all print head delays at once. 5. - Page 18 TIP: The beep slider sets a tone to indicate that the printer has completed a print, this can be useful when you are setting your delay value. A beep before the box has passed the print head indicates your device is printing early and a beep after the box has passed the print head indicates late printing. 7.
Need help?
Do you have a question about the SNEED-JET Titan and is the answer not in the manual?
Questions and answers