Table of Contents
Advertisement
Available languages
Available languages
Quick Links
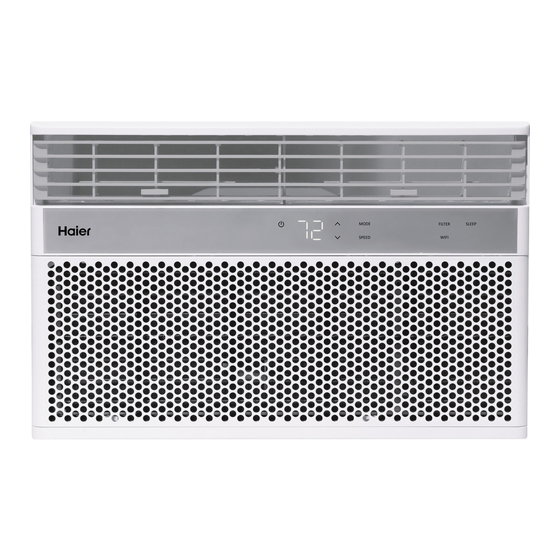
Room Air Condit ioner
Accondicionadores de Aire Para Sala
Design may vary by model number.
Some models may have an addit ional
letter after t he model number.
Inst allat ion and User Manual
Inst rucciones de inst alación y
Manual del usuario
El diseño puede variar según el número
de modelo
Algunos modelos pueden tener una
let ra adicional después del número de
modelo.
49- 5000537 Rev. 2 09- 21 GEA
QHNG08AA
QHNG10AA
Advertisement
Chapters
Table of Contents

Related Manuals for Haier QHNG08AA


Summary of Contents for Haier QHNG08AA
- Page 1 Inst allat ion and User Manual Inst rucciones de inst alación y Manual del usuario QHNG08AA QHNG10AA Room Air Condit ioner Accondicionadores de Aire Para Sala Design may vary by model number. El diseño puede variar según el número de modelo...
- Page 2 49- 5000537 Rev. 2...
-
Page 3: Table Of Contents
Limit ed Warrant y ........................16 Record Keeping Thank you for purchasing t his Haier product . This user manual will _______________________________________ help you get t he best performance from your new air condit ioner. -
Page 4: Safety Information
SAFETY INFORMATION WARNING For your safety, t he informat ion in t his manual must be followed to minimize t he risk of fire, elect ric shock or personal injury. • Use t his appliance only for it s int ended purpose as •... -
Page 5: Controls
Delay pad on the remote control. Use the Increase / WiFi. Decrease pads on the remote control to set a new time if Download t he Haier Home App desired. For det ails go t o Haierappliances.com. To cancel the timer, press Decrease pad on the remote control until the set time is zero. -
Page 6: Remote Control
USING THE AIR CONDITIONER Do Not Operate in Freezing Outdoor Conditions This cool-only air conditioner was not designed for freezing It must not be used when the outdoor temperature is below outdoor conditions. freezing (32°F). Control Panel Lights On/ Off Feature This air condit ioner has a cont rol panel light s on/ off feat ure To t urn t his feat ure off, press and hold t he SLEEP pad, on t he where it s light s will t urn off when t here is no act ivit y wit h t he... -
Page 7: Air Direction
USING THE AIR CONDITIONER Air Direction Use t he levers t o adjust t he air direct ion left or right . Tilt t he louver bank t o adjust up and down. CARE AND CLEANING Grille and Case Turn t he air condit ioner off and remove t he plug from t he wall To clean, use wat er and a mild det ergent . -
Page 8: Installation Instructions
INSTALLATION INSTRUCTIONS BEFORE YOU BEGIN ELECTRICAL REQUIREMENTS (cont ) Read t hese inst ruct ions complet ely and carefully. IMPORTANT – • Save t hese inst ruct ions Power cord includes a current int errupt er device. A t est for local inspect or’s use. -
Page 9: Part S Included
INSTALLATION INSTRUCTIONS Side Curt ain Foam t op window (Appearance may vary) Frame gasket Left Right Top mount ing rail Side Curt ain condit ioner ON/OFF MODE SPEED DELAY TEMP/TIME TEMP/TIME Bot t om Seal and Side Seals (3) Side Curt ain Foam (2) Window locking Type A (4) -
Page 10: Window Requirement S
INSTALLATION INSTRUCTIONS • These inst ruct ions are for a st andard double- hung A. Inst all t he t op mount ing rail wit h Type A screws, 4 window. You will need t o modify t hem for ot her for AHH10 and 3 for AHH08, from t he out side of t he t ypes of windows. -
Page 11: 4. Install The Air Conditioner
INSTALLATION INSTRUCTIONS 4. INSTALL THE AIR CONDITIONER IN THE WINDOW A. Loosen t he screw on t he right hand side of t he air condit ioner near t he bot t om. A. Mark t he cent er of t he window. Set t he air condit ioner in t he window so t hat is it cent ered. -
Page 12: Inst All Support Bracket S
INSTALLATION INSTRUCTIONS 6. INSTALL WINDOW LOCK BRACKET AND FOAM TOP WINDOW GASKET Use Type B Screw t o inst all t he window lock bracket on t op of t he bot t om window. CAUTION To prevent broken glass or damage t o windows, on vinyl or ot her similarly const ruct ed windows, at t ach t he window... -
Page 13: Troubleshooting Tips
TROUBLESHOOTING Save t ime and money! Review t he chart s on t he following pages first and you may not need t o call for service. Problem Possible Cause What To Do Make sure t he air condit ioner plug is pushed complet ely int o Air condit ioner does not The unit is unplugged. -
Page 14: Normal Operating Sounds
If your Air Condit ioner (AC) has a Connected Appliance Informat ion label located on t he out side as shown below, your AC is Haier Appliances Smart HQ Enabled . A WiFi communicat ion card is built into t he product allowing it to communicate wit h your smart phone for remote monitoring, cont rol and not ificat ions. - Page 15 Gett ing St arted All connected appliace dat a is held in st rict accordance wit h t he Haier Appliances Connected Dat a Privacy Policy. Visit To connect your room air condit ioner, you’ll need t he geappliances.com/ privacy/ privacy_policy_connected to Smart Hq App.
-
Page 16: Limited Warranty
To know what your legal right s are, consult your local or st ate consumer affairs office or your st ate’s At torney General. Warrantor US: GE Appliances, a Haier company Louisville, KY 40225 49- 5000537 Rev. 2... - Page 17 Garant ía LImit ada....................... . . 15 INFORMACIÓN A TENER EN CUENTA Le agradecemos la compra de este producto de marca Haier. Este _______________________________________ manual para el usuario le ayudará...
- Page 18 SEGURIDAD DEL ACONDICIONADOR DE AIRE Para su seguridad, siga las inst rucciones de este manual a fin de minimizar riesgos de incendio, descargas ADVERTENCIA eléct ricas o heridas personales. • Use este elect rodomést ico sólo para su propósito original, como •...
-
Page 19: Controles
1–24hr (Retraso entre 1 y 24 hrs), presione la tecla Delay 1–24hr Descargue la Aplicación Hogareña de Haier - -. (Retraso entre 1 y 24 hrs.) de la unidad o del control remoto. Use las teclas Increase (Incrementar) / Decrease (Reducir) de la Para más det alles, visit e Haierappliances.com. - Page 20 USO DEL ACONDICIONADOR DE AIRE No Utilizar con Condiciones Climáticas Exteriores de Congelación Este acondicionador de aire sólo frío no fue diseñado para uso con ser usado con condiciones climát icas exteriores de temperat ura condiciones climát icas exteriores de temperat ura helada. No deberá helada.
-
Page 21: Dirección Del Aire
USO DEL ACONDICIONADOR DE AIRE Dirección del Aire Use la palanca para ajust ar la dirección del aire hacia la izquierda o derecha. Incline la rejilla para hacer ajustes hacia arriba o abajo. CUIDADO Y LIMPIEZA Parrilla y Caja Para limpiar, use agua y un detergente suave. No use Apague el acondicionador de aire y ret ire el enchufe del tomacorriente antes de limpiar. -
Page 22: Instrucciones De Instalación
INSTRUCCIONES DE INSTALACIÓN ANTES DE INICIAR REQUISITOS ELÉCTRICOS (CONT) El cable de aliment ación incluye un disposit ivo para Lea est as inst rucciones complet a y cuidadosament e. int errupción de corrient e. Se incluye un bot ón de prueba IMPORTANTE –... -
Page 23: Partes Incluidas
INSTRUCCIONES DE INSTALACIÓN PARTES INCLUIDAS Marcos de la Junt a de gomaespuma Cort ina Lateral (La apariencia puede variar) de la parte superior de Derecho Izquierda la vent ana Riel de mont aje superior Cort inas Laterales (2) Acondicionador de aire ON/OFF MODE SPEED... - Page 24 INSTRUCCIONES DE INSTALACIÓN 1. REQUISITOS PARA LA VENTANA 3. PREPARE EL ACONDICIONADOR DE AIRE • Est as inst rucciones son para una vent ana est ándar de dos pliegues. Ust ed necesit ará modificar el proceso A. Inst ale el riel de mont aje superior con t ornillos Tipo A, 3 para ot ros t ipos de vent anas.
- Page 25 INSTRUCCIONES DE INSTALACIÓN 4. I NSTALE EL ACONDICIONADOR DE 5. ASEGURE EL ACONDICIONADOR DE AIRE EN LA VENTANA AIRE A. Marque el cent ro de la vent ana. Coloque el acondicionador A. Afloje el t ornillo del lado derecho del acondicionador de de aire en la vent ana de modo que se encuent re cent rado.
- Page 26 INSTRUCCIONES DE INSTALACIÓN 6. INSTALE EL SOPORTE DE LA TRABA DE LA VENTANA Y LA JUNTA SUPERIOR DE GOMAESPUMA DE LA VENTANA Use un t ornillo t ipo B para inst alar el soport e de bloqueo arriba de la part e inferior de la vent ana.
- Page 27 SOLUCIÓN DE PROBLEMAS ¡Ahorre t iempo y dinero! Primero revise los cuadros que aparecen en las siguientes páginas y es posible que no necesite solicit ar reparaciones. Problema Causas posibles Qué hacer El acondicionador de aire no El acondicionador de aire est á Cerciórese de que el acondicionador de aire est á...
- Page 28 (Para clientes en Est ados Unidos) Smart HQ de Haier Autorizado* . Si su Acondicionador de Aire (AA) cuent a con una et iquet a informat iva del Elect rodomést ico Conect ado, ubicada en la parte externa como se muest ra a cont inuación, su AA cuent a con la aplicación Smart HQ Autorizada de Haier Appliances.
-
Page 29: Configuración Smarthq
A fin de conect ar su acondicionador de aire para sala, Privacidad de Datos de Conexión de Haier Appliances. Para necesit ará la Aplicación Hogareña de Haier . La aplicación acceder a est a polít ica, visite geappliances.com/ privacy/ lo guiará a t ravés del proceso de conexión. Descargue la privacy_policy_connected. - Page 30 NOTAS 49- 5000537 Rev. 2...
-
Page 31: Garantía Limitada
Para conocer cuáles son sus derechos legales, consulte a la oficina de asuntos del consumidor local o est at al o al Fiscal de su est ado. Garante en EE.UU: GE Appliances, a Haier company Louisville, KY 40225 49- 5000537 Rev. 2... - Page 32 IMPORTANT Do Not Return This Product To The Store If you have a problem wit h t his product , please call 1- 877- 337- 3639 for t he name and telephone number of t he nearest aut horized service center. DATED PROOF OF PURCHASE REQUIRED FOR WARRANTY SERVICE IMPORTANTE No regrese este producto a la t ienda...
Need help?
Do you have a question about the QHNG08AA and is the answer not in the manual?
Questions and answers