
Related Manuals for Siemens WMH4W640IL


Summary of Contents for Siemens WMH4W640IL
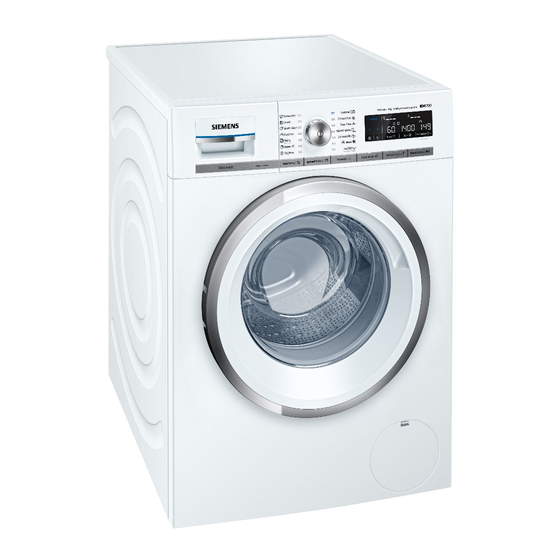
- Page 1 Washing machine WMH4W640IL siemens-home.com/welcome Register your product online ens-home.com/welcome...
- Page 2 Your new washing machine Display rules : Warning! You have chosen a Siemens washing machine. This combination of symbol and signal word indicates a possibly dangerous Please take a few minutes to read and situation. Not heeding the warning can become familiar with the advantages of cause death or injuries.
-
Page 3: Table Of Contents
Contents e n I n s t r u c t i o n M a n u a l a n d I n s t a l l a t i o n I n s t r u c t i o n s Intended use. - Page 4 Intelligent dosing system..44 Faults and what to do about them..... . 59 Intelligent dosing system in the detergent drawer .
-
Page 5: Intended Use
Intended use Intended use This appliance is intended for private ■ I n t e n d e d u s e domestic use only. Do not install or operate this ■ appliance anywhere that is liable to experience frost and/or outdoor conditions. -
Page 6: Safety Instructions
Safety instructions Do not allow children to Safety instructions ■ clean or maintain this appliance unsupervised. The following safety information Keep children under 3 years S a f e t y i n s t r u c t i o n s and warnings are provided to ■... -
Page 7: Installation
Safety instructions Warning Installation Risk of suffocation! Warning If allowed to play with the Risk of electric shock/fire/ packaging/plastic film or material damage/damage to packing components, children the appliance! may become caught in these or If the appliance is not installed pull them over their heads and properly, this may lead to a suffocate. - Page 8 Safety instructions If you take hold of any of the Warning ■ appliance's protruding parts Risk of electric shock/fire/ (e.g. the appliance door) in material damage/damage to order to lift or move it, these the appliance! parts may break off and If the appliance's mains cable is cause injury.
- Page 9 Safety instructions The appliance is secured for Caution! ■ transportation by transport Material damage/damage to locking devices. If the the appliance transport locking devices are If the water pressure is too ■ not removed before the high or too low, the appliance is operated, this appliance may not be able to may result in damage to the...
-
Page 10: Operation
Safety instructions If you reach into the drum Operation ■ while it is still rotating, you Warning risk injuring your hands. Risk of explosions/fire! Wait until the drum has Laundry that has been stopped rotating. pretreated with cleaning agents Warning that contain solvents, e.g. -
Page 11: Cleaning/Maintenance
Safety instructions Never take hold of the mains Caution! ■ plug with wet hands. Material damage/damage to When removing the mains the appliance ■ plug from the socket, always If the amount of laundry in ■ take hold of the plug itself the appliance exceeds its and never the mains cable, maximum load capacity, it... - Page 12 Safety instructions Warning Risk of injury/material damage/damage to the appliance! The use of spare parts and accessories supplied by other brands is dangerous and may result in injury, material damage or damage to the appliance. For safety reasons, use genuine spare parts and accessories only.
-
Page 13: Environmental Protection
Environmental protection Information on energy and water ■ Environmental consumption: ~ Page 27 The displays provide information protection about the relative level of energy and water consumption in the selected Packaging/used appliance programmes. E n v i r o n m e n t a l p r o t e c t i o n The more indicator lights light up, Dispose of packaging in an the higher the programme's... -
Page 14: Positioning And Connecting
Positioning and connecting ( Mains cable Positioning and 0 Bag: connecting Installation and operating ■ instructions Included with the appliance Customer services location ■ P o s i t i o n i n g a n d c o n n e c t i n g directory* Check the machine for transport Note:... -
Page 15: Safety Instructions
Positioning and connecting Safety instructions Installation surface The washing machine be stable Warning Note: so that it does not move around. Risk of injury! The installation surface must be firm The washing machine is very heavy. ■ ■ and level. Be careful when lifting/transporting Soft floors/floor coverings are not the washing machine. -
Page 16: Installing The Appliance In A Kitchenette
Positioning and connecting Installing the appliance in a Take the hoses out of the holders. kitchenette Warning Danger of death! There is a risk of electric shock if you touch live components. Do not remove the appliance covering plate. Unscrew and remove all four transportation securing bolts with a Notes wrench (WAF 13). -
Page 17: Hose And Cable Lengths
Positioning and connecting Hose and cable lengths Left-hand connection ■ Right-hand connection ■ The following are available from Tip: specialist dealers/customer services: Extension for Aqua-Stop and cold ■ water supply hose (approx. 2.50 m); order no. WM Z2380, WZ 10130, CZ 11350, Z 7070X0 A longer supply hose ■... -
Page 18: Water Inlet
Positioning and connecting Water inlet When the tap is open, the water flow rate is at least 8 l/min. Warning If the water pressure is higher than this, Danger of death! a pressure-reducing valve must be There is a risk of electric shock if you installed. -
Page 19: Water Outlet
Positioning and connecting Water outlet Connection Drainage into a washbasin Warning ■ Risk of scalding! When you are washing at high temperatures, there is a risk of scalding if you come into contact with hot water (e.g. when draining hot water into a washbasin). -
Page 20: Levelling
Positioning and connecting Levelling Notes The mains voltage and voltage ■ Align the appliance using a spirit level. indicated on the washing machine (rating plate) are the same. Incorrect alignment may result in loud The connected load and fuse noises, vibrations and machine required are specified on the rating "movement". -
Page 21: Before Washing For The First Time
Positioning and connecting Before washing for the first time The washing machine was thoroughly tested before leaving the factory. To remove any water that may be left over from the test, run the first wash cycle without any laundry. Notes The washing machine must be ■... -
Page 22: Transportation
Positioning and connecting Transportation Insert all four sleeves. Clip the mains cable securely in the E.g. when moving house holders. Insert the transportation securing bolts and tighten them with Caution! a wrench (WAF 13). Risk of damage to the appliance caused by detergent/fabric softener leaking from the dispensers. -
Page 23: Main Points In Brief
Main points in brief Main points in brief M a i n p o i n t s i n b r i e f Connect the mains Open the door. To switch on, press Select a plug. Turn on the the # button. -
Page 24: Getting To Know The Appliance
Getting to know the appliance Getting to know the appliance Washing machine G e t t i n g t o k n o w t h e a p p l i a n c e Detergent drawer ~ Page 41 Operating/display panel Door with door handle 9S Open the door... -
Page 25: Control Panel
Getting to know the appliance Control panel All the buttons are sensitive P Child lock (w 3 sec. ) Note: (except for the main switch) and only Activate/deactivate to prevent the need to be pressed lightly. set functions from being changed accidentally: To do this, press the Finish in 5 + ( Main switch... - Page 26 Getting to know the appliance h The Remote Start } button enables the programme to be started remotely on the appliance via the Home Connect app. Remote start remains enabled for 24 hours after it has been activated. It is automatically deactivated if you do not start the programme via the Home Connect app during this...
-
Page 27: Display Panel
Getting to know the appliance Display panel @ Finish in 5 time e.g. 2:30; Programme duration depends on the programme selection in h:min (hours:minutes) End time preselection ■ 1 - 24 h; Programme ends after ... h (h = hours) Basic dosage ■... -
Page 28: Programme Selector
Getting to know the appliance Further information Further information Childproof lock: ~ Page 42 Programme progress: Childproof lock activated Prewash is continuously Wash ¼ Rinse ¬ Childproof lock activated, is flashing programme selector adjusted Spin Foam detection function: - 0 - Programme end ~ Page 41 Programme end with Rinse Stop... -
Page 29: Laundry
Laundry Some examples of soiling levels can Laundry be found on ~ Page 30 – Light: Do not prewash, select the P repare the laundry speedPerfect G setting if L a u n d r y necessary Caution! – Normal Damage to the appliance/fabrics –... -
Page 30: Detergent
Detergent Saving energy and detergent Detergent For light and normal soiling, you can C orrect selection of detergent save energy (lower washing D e t e r g e n t temperature) and detergent. The care label is crucial for selecting the correct detergent, temperature and Saving Soiling/note... -
Page 31: Overview Of Programmes
Overview of programmes Overview of programmes Programmes on the programme selector O v e r v i e w o f p r o g r a m m e s Programme/Type of laundry/Instructions Settings Programme name Max. load Brief explanation of the programme and the fabrics for which it Temperature that can be selected is suitable. - Page 32 Overview of programmes Programme/Type of laundry/Instructions Settings Easy-Care Ó Max. 4 kg Synthetic or blended fabrics Ž ... 60 °C $, 0 - 1200 rpm ecoPerfect ¦, speedPerfect G, Prewash !, Extra Rinse l Detergent è, fabric softener è Mixed Fabrics Ñ Max.
- Page 33 Overview of programmes Programme/Type of laundry/Instructions Settings Rinse q / Spin 0 / Empty p Combined extra programme for rinsing and spinning the laundry, and draining the rinsing water $, 0 - 1600** rpm The Extra Rinse l button is activated at the factory for Note: .
- Page 34 Overview of programmes Programme/Type of laundry/Instructions Settings *** ® Hygiene Max. 6,5 kg Hard-wearing fabrics made of cotton or linen Ž - 60 °C Note: . Particularly suitable for strict hygiene requirements or $, 0 - 1600** rpm particularly sensitive skin thanks to the extended wash cycle at a ecoPerfect ¦, speedPerfect G, defined temperature, higher water level and extended rinse cycle.
- Page 35 Overview of programmes Programme/Type of laundry/Instructions Settings *** Sportswear Max. 2 kg Sportswear and leisurewear made from microfibre fabrics Ž - 40 °C Notes $, 0 - 800 rpm Laundry must not be treated with fabric softener. ■ ecoPerfect ¦, speedPerfect G, Before washing, clean the detergent drawer thoroughly (all ■...
-
Page 36: Starching
Overview of programmes Programme/Type of laundry/Instructions Settings *** Automatic / auto 60° Max. 6 kg More intensive treatment of the laundry; 60 °C the degree of soiling and the type of fabric are automatically $, 1400 rpm detected, and the washing sequence and intelligent dosing are adjusted accordingly. -
Page 37: Programme Default Settings
Programme default settings The maximum speed that can be set Programme default depends on the model and programme that has been selected. settings Finish in 5 The default programme settings are P r o g r a m m e d e f a u l t s e t t i n g s displayed in the display panel after Before starting the programme, you selecting the programme. -
Page 38: I-Dos Settings
Programme default settings i-Dos settings Your washing machine has an intelligent dosing system for liquid detergent and fabric softener. The washing machine doses your detergent and fabric softener automatically in most programmes. ~ Page 31 The following have been preset at the factory: i-Dos ô... -
Page 39: Additional Programme Settings
Additional programme settings Extra Rinse l Additional programme Additional rinse cycle for particularly settings sensitive skin and/or for areas with very soft water. An overview of all additional settings, A d d i t i o n a l p r o g r a m m e s e t t i n g s which can be selected depending on the programme, can be found from ~ Page 31. -
Page 40: Operating The Appliance
Operating the appliance The indicator light for the i-Dos ■ Operating the settings, if intelligent dosage has been selected appliance Information on water and energy ■ consumption Preparing the washing In appliances with a drum light: O p e r a t i n g t h e a p p l i a n c e machine The drum is lit after switching on the appliance, after opening and closing the... -
Page 41: Measure And Add Detergent And Care Products
Operating the appliance Measure and add detergent Select additional programme and care products settings The washing machine doses your By selecting additional settings, you can detergent and fabric softener better adapt the washing process to automatically in most programmes. your items of laundry. The intelligent dosage has been preset The settings can be selected or at the factory for all programmes in... -
Page 42: Child Lock
Operating the appliance Child lock Notes Do not leave the door open for too ■ (w 3 sec. ) long when adding laundry as water from the laundry may leak out. You can lock the washing machine to For safety reasons, the door remains prevent the functions you have set from ■... -
Page 43: Programme End
Operating the appliance Programme end - 0 - and Ï appear in the display panel. The Ü button indicator lamp is off. Removing laundry/switching off the appliance Open the door and remove the laundry. Press the # button. The appliance is switched off. -
Page 44: Intelligent Dosing System
Intelligent dosing system Notes Intelligent dosing Only use easy-pour liquid products ■ system that the manufacturer recommends adding to the detergent drawer. Do not mix different liquid Intelligent dosing system in ■ detergents. If changing your liquid I n t e l l i g e n t d o s i n g s y s t e m the detergent drawer detergent (type, manufacturer, etc.), empty the dispenser completely and... -
Page 45: Everyday Use
Intelligent dosing system When the appliance is switched on, the The selection (on/off) and the Note: fact that the detergent drawer is closed selected dosage strength for i-Dos i completely is indicated by the following: and i-Dos ô are saved for each programme until they are changed If intelligent dosagei-Dos ô... -
Page 46: Manual Dosage
Intelligent dosing system My water hardness: Changing the basic dosages: Press the corresponding i-Dos button (ô or i) for approx. 3 seconds. The preset basic dosage will appear in the display panel. Set the required basic dosage using the Finish in 5 - or + buttons. The setting is activated without needing to be confirmed. -
Page 47: Home Connect
Home Connect Caution! Home Connect Damage to the appliance Cleaning agents and agents for T his appliance is Wi-Fi enabled and can pretreating laundry (e.g. stain removers, H o m e C o n n e c t be controlled remotely via a smartphone prewash sprays, etc.) may cause or tablet PC. -
Page 48: Connecting To Your Home Network Automatically
Home Connect Connecting to your home Connecting to your home network automatically network manually If your router has a WPS function, you If you have already automatically can connect the appliance to your home connected your appliance to your home network automatically. -
Page 49: Connecting To The Home Connect App
Home Connect Connect your smartphone or tablet PC to the HomeConnect Wi-Fi network and enter the password (key) “HomeConnect”. The connection process may Note: take up to 60 seconds. Once you have connected successfully, open the Home Connect app on your Turn the programme selector to smartphone or tablet PC. -
Page 50: Switching Wi-Fi On And Off
Home Connect If a connection could not be If ©Ÿ (switched on) appears on Note: Note: established, “§§ (fault) will appear on the display but you actually wanted to the display panel. Check whether your select ©”” (switched off), you will need smartphone or tablet PC is in range of to repeat all of these steps again. -
Page 51: Updating The Software
Home Connect Press the Start button to confirm. Turn the programme selector to “Ÿš (end) will appear on the display position 6. —˜š (update) will appear panel. The network settings have now on the display panel. been reset. Your appliance is no longer connected to your home network or the Home Connect app. -
Page 52: About Data Protection
(initial registration): A detailed R&TTE Declaration of Conformity can be found online at Unique appliance identification ■ www.siemens-home.com among the (consisting of appliance codes as additional documents on the product well as the MAC address of the page for your appliance. -
Page 53: Appliance Settings
Appliance settings Changing the signal volume Appliance settings Use the Finish in 5 + or - button to You can change the following settings: change the following settings at the A p p l i a n c e s e t t i n g s corresponding programme selector The volume of the buttons and the ■... -
Page 54: Sensors
Sensors Sensors A utomatic load sensing S e n s o r s Depending on the type of fabric and load, the automatic load sensing function optimally adjusts the water consumption and programme duration in each programme. Unbalanced load detection system The automatic unbalanced load detection system detects imbalances... -
Page 55: Cleaning And Maintenance
Cleaning and maintenance Machine housing/control Cleaning and panel maintenance Wipe the housing and the control ■ Warning panel with a soft, damp cloth. C l e a n i n g a n d m a i n t e n a n c e Remove the detergent residue Danger of death! ■... -
Page 56: I-Dos Detergent Draw And Its Housing
Cleaning and maintenance i-Dos detergent draw and its The detergent drawer can be removed completely to allow you to housing clean to dispensers after you have emptied them. Emptying the dispensers: a) Empty the dispensers before The dispensers have emptying removing the drawer. -
Page 57: The Drain Pump Is Blocked, Emergency Draining
Cleaning and maintenance – Protect the rear drawer connector Turn off the water tap so that no against water, detergent or fabric- more water can flow in and has to be softener residue; if necessary, drained via the drain pump. clean the outer surfaces with a Switch off the appliance. -
Page 58: The Drain Hose At The Siphon Is Blocked
Cleaning and maintenance Put the service flap back on, lock it Filter in the water supply into place and close it. blocked First, reduce the water pressure in the supply hose: Turn off the tap. Select any programme (except Rinse/Spin/Empty). Press the Ü... -
Page 59: Faults And What To Do About Them
Faults and what to do about them. Faults and what to do about them. Emergency release F a u l t s a n d w h a t t o d o a b o u t t h e m . E.g. -
Page 60: Information On The Display Panel
Faults and what to do about them. Information on the display panel Indicator Cause/remedy - P - and Ï The door is unlocked. It is possible to add laundry. - P - The temperature is too high. Wait until the temperature drops. ■... -
Page 61: Faults And What To Do About Them
Faults and what to do about them. Faults and what to do about them. Faults Cause/remedy Water is leaking from the Attach the drain hose correctly or replace it. ■ machine. Tighten the threaded joint on the supply hose. ■ The appliance is not filling Have you pressed the Ü... - Page 62 Faults and what to do about them. Faults Cause/remedy The programme is taking Not a fault – the unbalanced load detection system is adjusting an ■ longer than usual. imbalance by repeatedly redistributing the laundry. Not a fault – the foam detection system is active – a rinse cycle has been ■...
- Page 63 Faults and what to do about them. Faults Cause/remedy There is detergent Some phosphate-free detergents contain water-insoluble residue. ■ residue on the laundry. Select Rinse q or brush the laundry after washing. ■ - P - appears on the The water level is too high. It is not possible to add laundry. Close the door ■...
-
Page 64: After-Sales Service
After-sales service After-sales service If you cannot rectify a fault yourself, A f t e r - s a l e s s e r v i c e contact customer services. ~ Cover page We will always find an appropriate solution in order to avoid unnecessary visits by engineers. -
Page 65: Consumption Rates
Consumption rates Consumption rates Energy and water consumption, programme duration and C o n s u m p t i o n r a t e s residual moisture for the main washing programmes (approximate values) Programme Load Energy Water Programme consumption** consumption**... -
Page 66: Technical Data
Technical data Technical data Dimensions: T e c h n i c a l d a t a 850 x 600 x 590 mm (height x width x depth) Weight: 70-85 kg (depending on the model) Mains connection: Mains voltage 220-240 V/50 Hz Nominal current 10 A Nominal power 1900-2300 W Water pressure:... -
Page 67: Aqua-Stop Warranty
Aqua-Stop warranty Aqua-Stop warranty Only for appliances with Aqua-Stop A q u a - S t o p w a r r a n t y In addition to warranty claims against the vendor based on the purchase agreement and to our appliance warranty, we will provide compensation under the following conditions: If water damage is caused due to a... - Page 68 You can find the contact information for all countries in the attached after-sales service directory. BSH Hausgeräte GmbH Carl-Wery-Straße 34 81739 München GERMANY siemens-home.com *9001186641* 9001186641 (9603)
Need help?
Do you have a question about the WMH4W640IL and is the answer not in the manual?
Questions and answers