
Related Manuals for Husqvarna RZ 016


Summary of Contents for Husqvarna RZ 016
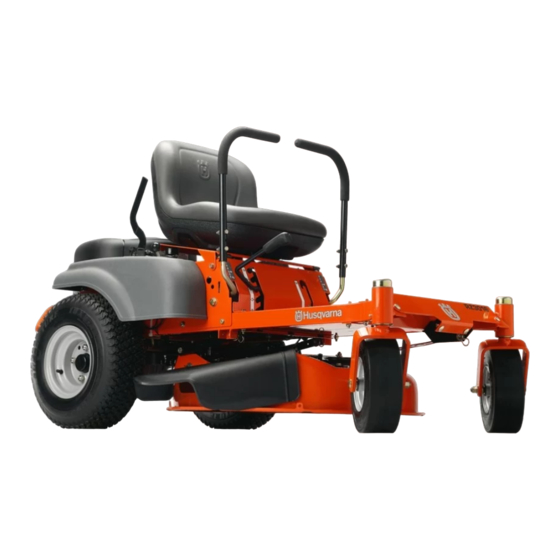
- Page 1 RZ 3016 Operator Manual 966042901 Please read the operator’s manual carefully and make sure you understand the instructions before using the machine.
- Page 2 Use only original parts for repairs. The use of other parts voids the warranty. Do not modify or install non-standard equipment to the unit without consent from the manufacturer. Modifications to the unit may cause unsafe operations or damage the unit. ©2009 Husqvarna. All rights reserved. Beatrice, NE. Printed in U.S.A.
-
Page 3: Table Of Contents
CONtENtS INtRODUCtION ............... 5 MAINtENANCE .............. 33 General ............... 5 Maintenance Schedule ..........33 Driving and transport on Public Roads ...... 5 Battery ..............35 towing................. 5 Ignition System ............36 Operating ..............5 Safety System............36 Good Service .............. 6 Engine Cooling Air Intake ......... - Page 4 WARNING! Failure to follow cautious operating practices can result in serious injury to the operator or other persons. The owner must understand these instructions, and must allow only trained persons who understand these instructions to operate the mower. Each person operating the mower must be of sound mind and body and must not be under the influence of any mind altering substance.
-
Page 5: Introduction
INtRODUCtION Congratulations Towing thank you for purchasing a Husqvarna ride-on If machine is equipped with a tow hitch, use extreme mower. This machine is built for superior efficiency caution when towing. Never allow children or others in to rapidly mow primarily large areas. A control panel or on towed equipment.. -
Page 6: Good Service
INtRODUCtION Good Service Husqvarna’s products are sold all over the world and only in specialized retail stores with complete service.. this ensures that you as a customer receive only the best support and service. Before the product is delivered, the machine has, for example, been inspected and adjusted by your retailer. -
Page 7: Symbols And Decals
Do not stand here Noise emissions to the surroundings in accordance with the European Union’s directive. the machine’s emission is stated in the chapter tECHNICAL DAtA and on the decals. Only machines for European market Use protective glasses Use protective gloves HUSQVARNA-7... - Page 8 Severing of fingers Do not open or Careful backing up, Careful going exposure to and toes remove safety watch for other forward, watch for thrown objects shields while people other people engine is running Moving sharp blades under cover 8 - HUSQVARNA...
-
Page 9: Safety
Clear the area of objects before mowing engine and wait for all parts to come to a complete stop before cleaning the machine, removing the grass catcher, or unclogging the discharge guard. • Operate machine only in daylight or good artificial light. HUSQVARNA-9... - Page 10 The engine exhaust contains • Allow machine to cool before storage. carbon monoxide, which is a odorless, colorless, poisonous gas. Do not use the machine in enclosed spaces. 10 - HUSQVARNA...
-
Page 11: Personal Safety Equipment
10 degrees. And do direction, which could cause machine to roll over. not drive across any slopes. • Use extra care while operating machine with grass catchers or other attachments; they can affect the stability of the machine. HUSQVARNA-11... - Page 12 • Never allow children to operate the machine. • Use extra care when approaching blind corners, shrubs, trees, or other objects that may block your view of a child. 8011-517 Never allow children to operate the machine 12 - HUSQVARNA...
-
Page 13: Safe Handling Of Gasoline
• Check the fuel level before each use and leave space for the fuel to expand, as the heat from the engine and the sun may otherwise cause the fuel to expand and overflow. HUSQVARNA-13... -
Page 14: General Maintenance
• the battery can explode and cause serious injury/ damage. • Ensure that nuts and bolts, especially the fastening bolts for the blade attachments, are properly tightened, torqued and that the equipment is in good condition. 14 - HUSQVARNA... - Page 15 • Reduce the risk of fire by removing grass, leaves, and other debris that may have accumulated on the machine. Allow the machine to cool before putting it in storage. HUSQVARNA-15...
-
Page 16: Transport
• Load the unit onto truck or trailer by driving up ramps of suitable strength using a slow speed. Do not lift! the machine is not intended to be lifted by hand. 16 - HUSQVARNA... -
Page 17: Controls
CONtROLS this operator’s manual describes the Husqvarna Zero transmission from the engine is made via belt-driven Turn Rider. The rider is fitted with a Briggs & Stratton hydraulic pumps. Using the left and right steering four-stroke overhead valve engine. controls, the flow is regulated and thereby the direction and speed. -
Page 18: Steering Control Levers
If the steering controls are in uneven positions when standing still or do not fit in the slots for moving the controls outward, they can be adjusted. 8050-004 1. Forward 2. Neutral 3. Neutral slot, Neutral lock 4. Reverse Motion control lever, right side 18 - HUSQVARNA... -
Page 19: Parking Brake
IMPORTANT INFORMATION Do not run the starter for more than five seconds each time. If the engine does not start, wait about 10 seconds before retrying. 8050-006 Ignition switch HUSQVARNA-19... -
Page 20: Choke Control
WARNING! Fill to bottom of filler neck. Do not overfill. Wipe off any spilled oil or fuel. Do not store, spill or use gasoline near an open flame. 20 - HUSQVARNA... -
Page 21: Fuel Shut Off Valve
Recommended air pressure is 15 psi. (1 bar) Tracking must be checked on a flat and level concrete or blacktop surface. If the unit still does not track straight contact your Husqvarna workshop for adjustments. HUSQVARNA-21... -
Page 22: Blade Control Lever
Pull the EZt bypass linkages out and into the slots. Release linkages to hold in the bypass position. • Release park brake. • to reengage the EZt’s to drive, reverse the above procedure. 8050-018 Set bypass linkages into slots on both sides 22 - HUSQVARNA... -
Page 23: Operation
To zero turn While moving in a forward direction, first pull both control levers back until the mower stops or slows dramatically. then by alternating one lever slightly to the forward position and the other in the reverse position. HUSQVARNA-23... -
Page 24: Before Starting
Activate the parking brake. 8050-014 Raise the mower deck Disengage the mower blades by lowering the blade control lever out of the lock notch and into the down position. 8050-014 Set the blade control lever to the down position 24 - HUSQVARNA... - Page 25 Move the steering controls outward to the locked (outer) neutral position. 8050-008 Place controls in neutral position Move the throttle to the middle position. 8050-008 Set the throttle If the engine is cold, the choke control should be pushed forward to its extent. 8050-007 Choke control HUSQVARNA-25...
- Page 26 IMPORTANT INFORMATION STOP Do not run the starter for more than 5 seconds each time. If the engine does not start, wait approximately 10 seconds before retrying. 8050-136 Release ignition to the RUN position 26 - HUSQVARNA...
-
Page 27: Weak Battery
To remove cables, reverse order • Remove BLACK cable first from chassis and then from the fully charged battery. • Remove RED cable last from both batteries. 8011-642 Jumper cable connection HUSQVARNA-27... -
Page 28: Running
(zero turn) can be achieved by moving one control backward (behind the neutral position) and carefully moving the other steering control forward from its neutral position. 8050-022 The mower blade control lever locked blade engagement 28 - HUSQVARNA... -
Page 29: Operating On Hills
Pull the control levers back to the center of the mower and press forward to regain forward motion. • Make all turns slowly. IMPORTANT INFORMATION When in reverse, control levers return to neutral when released. This may cause the mower to suddenly stop. HUSQVARNA-29... -
Page 30: Mowing Tips
• Use compressed air to clean top surface of the deck. Avoid flooding water on top surface, engine and electrical components. • When the mulching kit is used, it is important that the mowing interval is frequent. 30 - HUSQVARNA... -
Page 31: Stopping The Engine
Remove key. Always remove key when leaving the mower to prevent unauthorized use. IMPORTANT INFORMATION Leaving the ignition switch in any other 8050-014 Raise the mower deck with the lifting lever position than "OFF" will cause the battery to be discharged. HUSQVARNA-31... -
Page 32: Manual Transport
Pull the EZt bypass linkages out and into the slots. Release linkages to hold in the bypass position. • Release park brake. • to reengage the EZt’s to drive, reverse the above procedure. 8050-018 Set bypass linkages into slots on both sides 32 - HUSQVARNA... -
Page 33: Maintenance
50 hours. In dusty conditions, cleaning and replacement are required more often. For daily use, the machine should be lubricated twice weekly. Performed by authorized service workshop. Described in this manual ♦ Not described in this manual HUSQVARNA-33... - Page 34 • Turn the ignition switch to “OFF” position and remove the key. • Make sure the blades and all moving parts have completely stopped. • Disconnect the spark plug wire from all spark plugs and place the wire where it cannot come in contact with the plug. 34 - HUSQVARNA...
-
Page 35: Battery
8. First connect RED battery cable to positive (+) battery terminal with hex bolt and hex nut. 9. Connect BLACK grounding cable to negative (-) battery terminal with remaining hex bolt and hex 8050-109 Battery cleaning and installation nut. 10. Fit the terminal guard. 11. Lower seat. HUSQVARNA-35... -
Page 36: Ignition System
Check that the engine stops if the mower blades are sit in the seat and release the parking brake engaged and the driver temporarily moves off the before the steering controls can be moved into drivers seat. the neutral position, otherwise the engine will stop. 36 - HUSQVARNA... -
Page 37: Engine Cooling Air Intake
Risk for burns if touched. Allow engine and exhaust system to cool at least two (2) minutes. Tire Pressures All tires should be at 15 psi / 103 kPa / 1 bar. 8011-564 Tire pressures HUSQVARNA-37... -
Page 38: Parking Brake
Visually check that no damage is found on the lever, links, or switch belonging to the parking brake. Perform a standstill test and check that there is sufficient braking action. to adjust the parking brake, contact the Husqvarna service workshop. WARNING! Faulty adjustment can result in reduced braking ability and can cause an accident. -
Page 39: Ezt Belt
45-55 ft/lbs (60-75 Nm). IMPORTANT INFORMATION Special blade bolt is heat treated. 8052-007 Replace with a Husqvarna bolt if required. 1. Blade Do not use lower grade hardware than 2. Cutter housing 3. Blade bolt (special) specified. -
Page 40: Adjusting The Mower Deck
8050-015 Side to side adjuster nut IMPORTANT INFORMATION This procedure will place the mower in a base measurement position. Additional adjustment may be required to achieve desired cut for the type of grass or conditions involved. 40 - HUSQVARNA... -
Page 41: Caster Wheels
Do not rinse hot surfaces with cold water. Let unit cool before washing. 8050-011 Use protective glasses when Clean regularly cleaning and washing. Hardware Check daily. Inspect the entire machine for loose or missing hardware. HUSQVARNA-41... -
Page 42: Lubrication
Gasoline or other petroleum products must not be used to clean belts. For daily use, the machine should be lubricated twice weekly. 42 - HUSQVARNA... -
Page 43: Front Wheel Mount
Use only good quality bearing grease. IMPORTANT INFORMATION Use minimal lubrication and remove excess lubricant so that is does not come into contact with belts or belt pulley drive surfaces. 8050-027 Lubricating the deck spindle after removing the foot plate HUSQVARNA-43... -
Page 44: Engine Oil
“ADD” mark or over the or appropriate disposal location. “FULL” mark on the dipstick. Avoid skin contact; wash with soap and water in case of spills. 44 - HUSQVARNA... -
Page 45: Changing Oil Filter
Mount the filter by hand with clockwise ¾ turn. Run the engine warm, then check that there are no leaks around oil filter seal. Check oil level in engine, fill if necessary. The oil filter holds 0.1 qt (0.1 liters) of oil. 8011-734 Changing the oil filter HUSQVARNA-45... -
Page 46: Steering Control Shafts
Lubricate with a grease gun, one zerk for each steering control shaft, until the grease is forced out. Use only good quality molybdenum disulphide grease. Grease from well-known brand names (petrochemical companies, etc.) usually maintains a good quality. 8050-021 Lubricating the steering control shafts 46 - HUSQVARNA... -
Page 47: Troubleshooting
Clogged ventilation valve on fuel cap. Fuel tank nearly empty. Fouled spark plug. Spark plug is loose. Defective ignition cable. Defective spark plug electrode. Defective spark plug connection. Rich fuel mixture or fuel-air mixture. Wrong fuel type. Water in fuel. Clogged air filter. HUSQVARNA-47... - Page 48 Suspension for the mower deck is uneven. Blades are dull. Driving speed too high. Grass is too long. Grass collected under the mower deck. the machine vibrates. Blades are loose. Blades are incorrectly balanced. Engine is loose. 48 - HUSQVARNA...
-
Page 49: Storage
Drain the fuel into purchase year, model, type, and serial number. an approved container outdoors and Always use genuine Husqvarna spare parts. far away from open flame. Never use An annual checkup at an authorized service workshop gasoline for cleaning. Use a degreaser is a good way to ensure that the machine performs its and warm water instead. -
Page 50: Schematics
WIRING DIAGRAM 8050-050 - Husqvarna... -
Page 51: Technical Data
½ ¾ 1060 1410 1912 ** Grade 5 - Minimum commercial quality (lower quality not recommended) Metric Standard Hardware Grade Grade 8.8 Grade 10.9 Grade 12.9 ft./lbs ft./lbs ft./lbs ft./lbs 13.5 18.8 21.8 35.2 43.5 43.5 62.2 70.5 1205 HUSQVARNA-51... - Page 52 Brakes Mechanical parking brake Front caster tires, smooth tread 11 x 4-5, 4 ply Rear tires, turf pneumatic 18 x 6.5-8 tire pressure 15 PSI / 103 kPa / 1 bar *As rated by the engine manufacturer. 52 - HUSQVARNA...
- Page 53 395 lbs / 179 kg Base Machine Length 66½" / 169 cm Base Machine Height 39¼" / 99.6 cm Base Machine Width 33½" / 85.3 cm Overall Width, Chute Up 35½" / 90 cm Overall Width, Chute Down 37" / 94 cm HUSQVARNA-53...
-
Page 54: Conformity Certificates
(California emission literature packet. rules etc.). Do not remove any of these labels. Certificates can also be supplied with the machine at delivery or written in the Engine manual. take care of them as they are valuable documents. 54 - HUSQVARNA... -
Page 55: Warranty
No remaining notes. the need and advantages of leaving the machine Certified: for service every 300 hours. the effects of service and maintaining a service journal on the machine’s resale value. Application areas for Mulching. 15. Fill in the sales papers HUSQVARNA-55... -
Page 56: Service Journal
SERVICE JOURNAL Action Date, mtr reading, stamp, sign After the First 5-8 Hours 1. Change engine oil. 56 - HUSQVARNA... - Page 57 2. Check the hydraulic system’s oil level. 3. Check the tire pressures. 4. Lubricate the belt adjuster, mower deck. 5. Lubricate the belt adjuster, hydraulic pumps. 6. Check/clean the engine’s cooling air intake. 7. Clean air filter dust cap. Husqvarna...
- Page 58 Date, mtr reading, stamp, sign 50-Hour Service 1. Perform the 25-hour service. 2. Clean/replace the air cleaner’s filter cartridge (paper filter) (shorter intervals for dusty operating conditions). 3. Change engine oil. 4. Lubricate according to lubrication chart. 5. Check/adjust the parking brake. - Husqvarna...
- Page 59 4. Clean/replace the spark plugs. 5. Replace the fuel filter. 6. Clean the cooling fins on the engine and transmission. 7. Check V-belts. 8. Check tighten caster wheel axle bolts (every 200 hours). 9. Change the air filter’s paper cartridge. Husqvarna...
- Page 60 2. Perform the 50-hour service. 3. Perform the 100-hour service. 4. Check/adjust the mower deck. 5. Clean the combustion chamber and grind the valve seats. 6. Check the engine valve clearance. 7. Replace the air cleaner’s prefilter (foam). - Husqvarna...
- Page 61 6. Check/adjust the cutting height. 7. Check/adjust the parking brake (50 hours). 8. Clean/Change the spark plugs (100 hours). 9. Change the fuel filter (100 hours). 10. Clean the cooling fins (100 hours). 11. Check the engine valve clearance. Husqvarna...
- Page 62 SERVICE JOURNAL Action Date, mtr reading, stamp, sign - Husqvarna...
- Page 64 P/N 115 161426 IR 04/02/09...